
Mizuumi Wiki:Sandbox
Jump to navigation
Jump to search
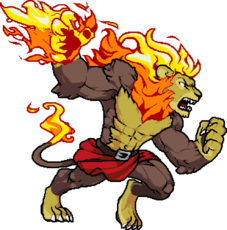
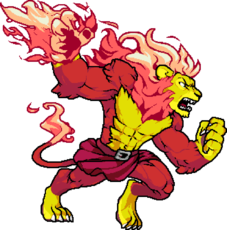
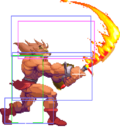 Fire
Fire
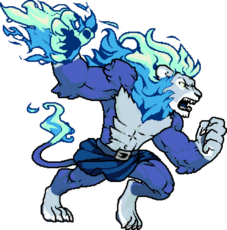
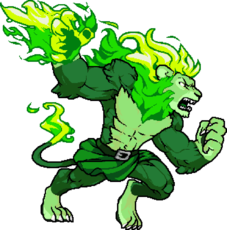
 Ice
Ice
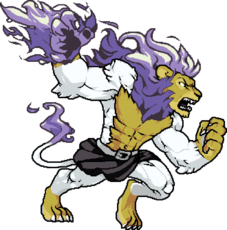
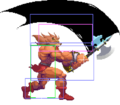 Axe
Axe

This is a sandbox page for general testing, everyone is able to edit here. Feel free to practice wiki editing or play around with existing templates to familiarize yourself with them.
test content 1
| Impostor | |
|---|---|
 | |
| Health | 3000 |

select screen
we out here glove on fightin
|
| ||||||||||||||||||||||||||||||
| Special Moves | |
|---|---|
| j.2B | How do you use air moves in a jumpless game??? |
| 236X | This move goes places... |
| 22X | DP? Sure |
| Supers | |
|---|---|
| 4AB | DP? Sure |
| 6AB | Desperation Super. |
| 2AB | Futaba Date slows down the state of time. This is the ultimate move, and makes her top 1 in every game, even if she isn't playable or does not appear in a game. |
beware, noob testing

testing stuff again
Wild Throw
5S |
|---|
Wild Throw (Air)
j.S |
|---|
Something Else
3C
Jab
AAA
Lua error: Wikimedia\Rdbms\Platform\SQLPlatform::makeList: empty input for field main_table.
Lua error: Wikimedia\Rdbms\Platform\SQLPlatform::makeList: empty input for field main_table.
Hitboxes Off
Hitboxes On
Jab 1
No results
Jab 2
No results
Jab 3
No results
| Character | Move |
|---|---|
| A.B.A | Kihi (Purple Fireball; Normal Mode) |
| Anji | (FB) Shitsu (Butterfly projectile)
Shin: Ichishiki (Aerial fan projectiles) |
| Axl | None |
| Baiken | None |
| Bridget | None |
| Chipp | None |
| Dizzy | None |
| Eddie | Normal Shadow's ]D[ (Ball) |
| Faust | None |
| I-no | (Air/FB) Antidepressant Scale (Flat Note)
(Horizontal/Vertical) Chemical Love (Big Laser) |
| Jam | None |
| Johnny | None |
| Justice | None |
| Kliff | None |
| Ky | Stun Edge / Air Stun Edge (Lighting Shot)
(Air/FB)Charged Stun Edge (Big Lightning Shot, 1st part only) Sacred Edge (Glowing Blue Blade)<SUPER> |
| May | None |
| Millia | (FB) Tandem Top (Discs) |
| Order-Sol | None |
| Potemkin | None |
| Robo-Ky | 2H (Knee Missile)
Want some Ky? (Bazooka) Aerial Want some Ky? (Aerial Missiles) |
| Slayer | None (lol) |
| Sol | (DI) Gunflame (Ground Hugging Flames) |
| Testament | None |
| Venom | (FB) (Charged) Stinger Aim (Horizontal Ball Shot)
(FB) (Charged) Carcass Raid (Vertical Ball Shot) Ball Seisei / Ball Set (Cue Ball, Only when the ball is in motion) Dubious Curve (Ball Skull Bash, Only when the ball is in motion) Red Hail (Multi Shot Raid) <SUPER> Tactic Arch (Cue Ball Setup, Only when balls are in motion) <SUPER> |
| Zappa | None |
}} }}

SOMEONE GIVE ME SOME FUCKING BAKED BEANS
InuYasha: A Feudal Fairy Tale (犬夜叉 戦国お伽合戦, Inuyasha: Sengoku Otogi Kassen) is a 2D fighting game based on the manga and anime series Inuyasha. It consists of battles and minigames in an effort to retrieve shards of the sacred Jewel of Four Souls, essentially following the overall plot of the series.
Throw Img test
Kaeru Spring
カエルスプリング Behind 4P+K |
|---|
Kaeru Package Hold
カエルパッケージホールド 2P+K |
|---|
Reverse Power Bomb
リバースパワーボム P+K (Reversal 1) |
|---|
Red Earth
Normal Moves
Fire Ice Axe1  |
|---|
2  Can be ducked. Can be ducked.
|
|---|
3  Staggers Kenji. Staggers Kenji.  3 followup. 3 followup.
|
|---|
4  |
|---|
5  "The Father" "The Father"
|
|---|
6  Can be ducked. Staggers Kenji. Can be ducked. Staggers Kenji.
|
|---|
cr.1  |
|---|
cr.2   Two hits. First hit can be ducked. Two hits. First hit can be ducked.
|
|---|
cr.3    |
|---|
cr.4  |
|---|
cr.5  "The Son" "The Son"
|
|---|
cr.6   6 followup. 6 followup.
|
|---|
j.1  |
|---|
j.2  |
|---|
j.3  Staggers Kenji. Staggers Kenji.
|
|---|
j.4   |
|---|
j.5  "The Holy Spirit" "The Holy Spirit"
|
|---|
j.6   Staggers Kenji (+27). Staggers Kenji (+27).
|
|---|
gaming in progress
Default Colors
Default

Alt Blue

Alt Red

Alt Green

Alt Gray

Alt Purple

Custom Color 1

Custom color 2

Abyss

Ranked
Seasonal Colors
CEO Dreamland 2017

Frostbite 2017

Valentines

Summer

Halloween

Christmas

Premium Skins
Champion

Excaliburn

Early Access Promo

Shine 2017

Golden Zetterburn Promo

Lovers of Aether

Ranked
Steampunk

Testing image size
Jab 5A  Jab1 Jab1
|
|---|
Jab2 5AA Jab2 Jab2
|
|---|
Jab3 5AAA |
|---|


Source
{{Navbox| title=Nitroplus Blasterz: Heroines Infinite Duel | link=Nitroplus Blasterz: Heroines Infinite Duel
| rows=
 {{Navbox/Row| text=General | textwidth=56 | maxlines=1
 | data=
  {{Navbox/Icon| image=icon controls.png | text=Controls}}
  {{Navbox/Icon| image=icon glossary.png | text=Notation}}
  {{Navbox/Icon| image=icon hud.png      | text=HUD}}
  {{Navbox/Icon| image=icon system.png   | text=System}}
  {{Navbox/Icon| image=icon faq.png      | text=FAQ}}
 }}
 {{Navbox/Separator}}
 {{Navbox/Row| text=Characters | iconwidth=68 | maxlines=1
 | data=
  {{Navbox/Icon| image=NPB Ein Icon.png      | text=Ein}}
  {{Navbox/Icon| image=NPB Al Icon.png       | text=Al Azif}}
  {{Navbox/Icon| image=NPB Mora Icon.png     | text=Mora}}
  {{Navbox/Icon| image=NPB Ruili Icon.png    | text=Ruili}}
  {{Navbox/Icon| image=NPB Anna Icon.png     | text=Anna}}
  {{Navbox/Icon| image=NPB Saya Icon.png     | text=Saya}}
  {{Navbox/Icon| image=NPB Ignis Icon.png    | text=Ignis}}
  {{Navbox/Icon| image=NPB Muramasa Icon.png | text=Muramasa}}
  {{Navbox/Icon| image=NPB Ethica Icon.png   | text=Ethica}}
  {{Navbox/Icon| image=NPB Saber Icon.png    | text=Saber}}
  {{Navbox/Icon| image=NPB Ouka Icon.png     | text=Ouka}}
  {{Navbox/Icon| image=NPB Sonico Icon.png   | text=Sonico}}
  {{Navbox/Icon| image=NPB Heart Icon.png    | text=Heart}}
  {{Navbox/Icon| image=NPB Homura Icon.png   | text=Homura}}
}}
Health Values
| Health | Character(s) | Notes |
|---|---|---|
| 1050 | Part 6: |
|
| 1000 | Part 1: Part 2: Part 3: Part 4: Part 5: Part 8: |
|
| 950 | Part 1: Part 2: Part 3: Part 4: Part 5: Part 6: Part 7: |
|
| 930 | Part 3: |
|
| 920 | Part 7: |
|
| 900 | Part 2: Part 3: Part 4: Part 5: Part 6: Part 7: |
|
| 850 | Part 2: Part 4: Part 5: Part 8: Other: |
|
| 840 | Part 3: |
|
| 800 | Part 1: Part 2: Part 3: |
|
| Load Ran/Dark Ran | |
|---|---|
  | |
| Speed | ☆☆ |
| Shot | ☆☆ |