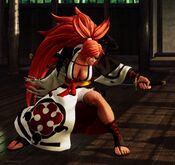
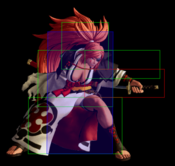
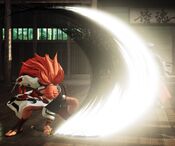
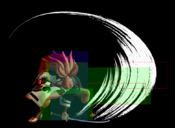
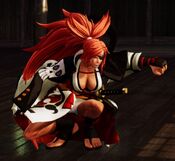
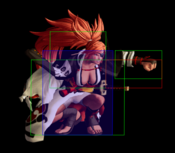
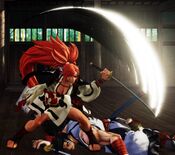
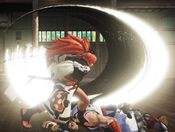
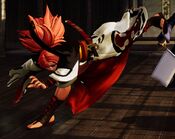
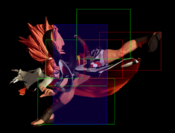
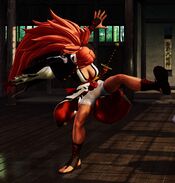
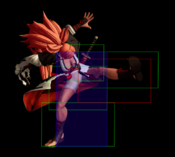
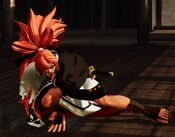
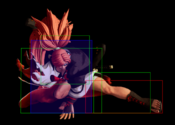
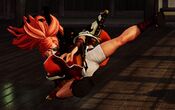
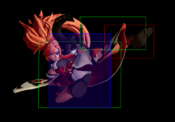
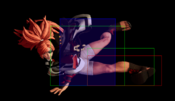
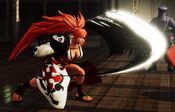
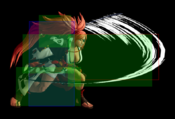
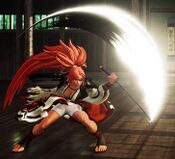
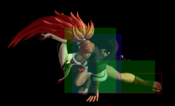
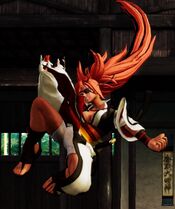
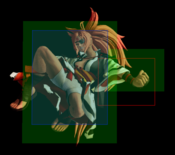
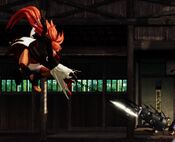
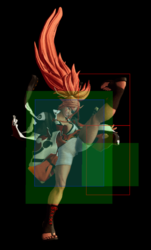
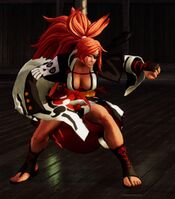
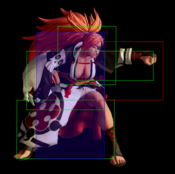
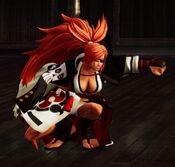
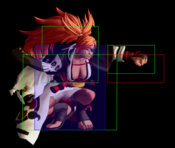
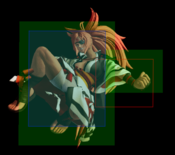
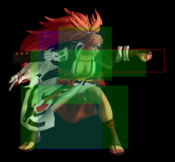
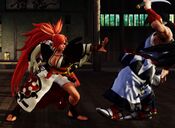
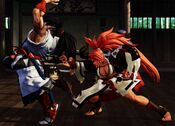
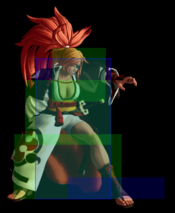
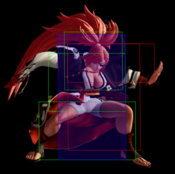
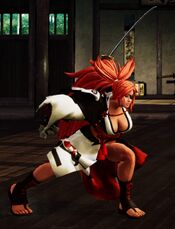
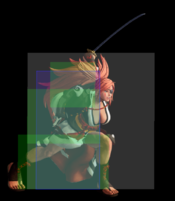
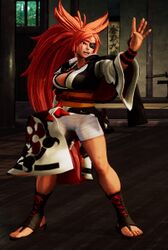
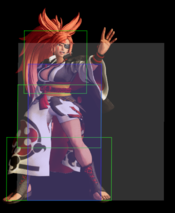
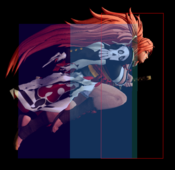
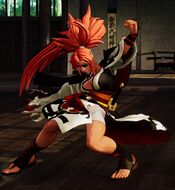
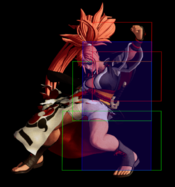
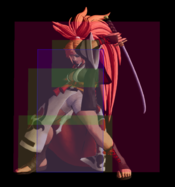
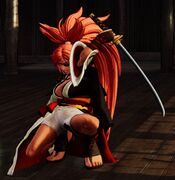
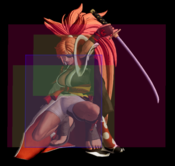
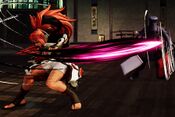
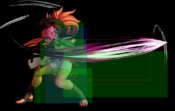
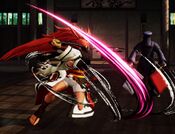
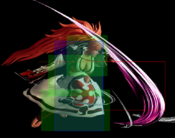
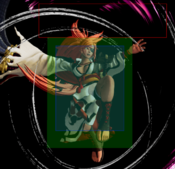
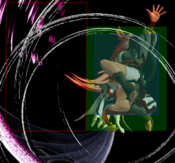
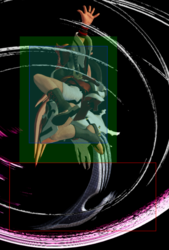
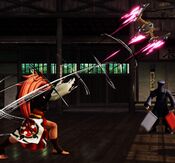
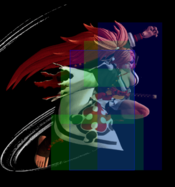
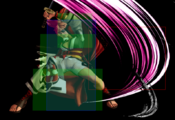
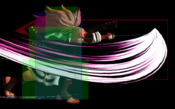
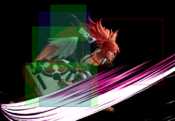
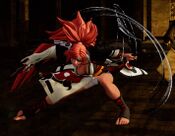
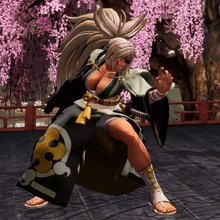
Baiken
梅喧, Baiken
|
- Damage Taken: 105%
- Rage Factor: 0.30
- Rage Duration: 7 seconds
- Jump: 46 frames (Average)
- Forward Walk Speed: 0.3 (Average)
- Back Walk Speed: 0.23 (Average)
- Dash Speed: 1.25 (Average)
- Back Dash: 27 frames
- Weapon Pickup / Drop: 40 / 68 frames
|
Introduction
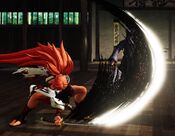
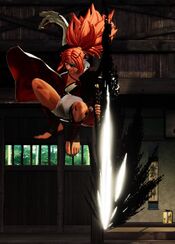
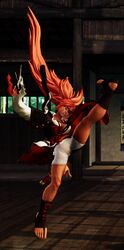
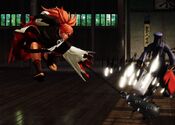
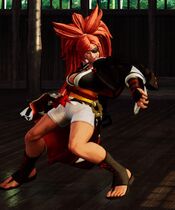
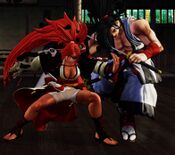
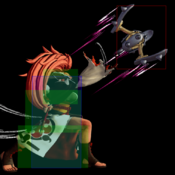
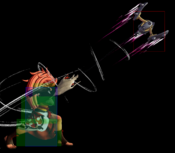
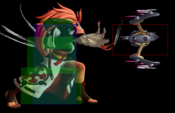
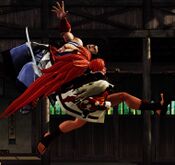
Baiken is an aggressive midrange character whose game revolves around strong mid-screen space control and great pressure options. She is enormously flexible and has a higher skill ceiling than most characters, but the investment is more than worth it as Baiken has an answer for every matchup scenario.
Baiken's 2B, f.5B, 66A and j.B give her a commanding midscreen presence. These normals let her put up a defensive wall that is difficult for shorter-ranged characters to get around. She has many great grounded anti-air options as well for when opponents try to jump over her normals. This forces opponents to give up space or commit to blocking, allowing her to apply her pressure
In proper Guilty Gear fashion, Baiken is a versatile swiss army knife of mix-up options. Baiken has the best B+C in the game: it has enormous range, is block-safe against most characters and crushes low-profile normals to boot. She can offset this with her terrifying 2C sweep and excellent slide to make blocking a scary prospect. From closer range her Yozansen (j.623S) overhead special punishes low blocks and forces opponents to respect Baiken's throw pressure and guard crush game. A notable aspect of Baiken's pressure is the air reset potential given from the juggle properties of her Tatami Gaeshi (236D) and Kabari (41236B/C) specials. These specials put opponents into an airborne state on hit and can followed up with certain normals to cause an air reset state instead of a knockdown. This allows Baiken to keep pressure going without guessing against wakeup rolling and force opponents into the corner
Baiken lacks significant weaknesses that are not covered by her (ahem) ample assets, but it is worth noting that her air-to-air game is somewhat situational compared to other characters. Baiken relies on j.D to hit above her head and j.C as her deep-hitbox options, and both of these normals are very narrow, putting her at risk of trip guard cross-under AA.
Playstyle
 Baiken is a mixup character with great control over the mid-range who can keep up the pressure once she gets an opening. Baiken is a mixup character with great control over the mid-range who can keep up the pressure once she gets an opening.
|
| Strengths |
Weaknesses
|
- Long reach: Baiken controls space well from afar with her lengthy 2B, j.B and 66A normals.
- Great 50/50: Baiken has one of the longest and safest B+Cs in the game. She can mix this with her superb 2C sweep in order to scare opponents out of blocking.
- Air resets: Baiken can air reset off her 236D and 41236A/B specials, allowing 50/50 pressure from midscreen while stopping the opponent from rolling as well as strong corner loops off her j.C follow-up. Her grounded AA normals and cross-unders also give good air reset advantage.
- Good anti-air: With too many ground AAs to even list, Baiken has an anti-air for every situation and gives airborne characters a hard time.
- Hard to deflect: Baiken's best normal (2B) cannot be deflected and she has multiple strong lows, making deflect a less worthwhile answer against her ground game.
- Good recoil game: Baiken has numerous fast, semi-safe and high-reward cancel options off of recoil states, making punishes against her pressure ambiguous.
- Low-profile options: 2C, 2D and 3D are lows that shrink Baiken's hurtbox and allow her to squeak under many high-profiling neutral options such as standing high normals and certain fireballs.
- Mid-screen zoning: Baiken is an unorthodox but surprisingly effective zoner from mid-screen thanks to the projectile specials Kibari and Tatami Gaeshi. Although ineffective from full screen, these options all grant a lot of advantage on hit. The anti-air version of Kibari can make her zoning difficult to circumvent.
|
- Terrible SSM: Baiken has the worst SSM in the game; it's so short that she cannot SSM punish off of far 5B deflects against many characters.
- Slow WFT: WFT has slow startup and is hard to raw punish with.
|
Gameplan
Neutral
The following is an overview of Baiken's best neutral options:
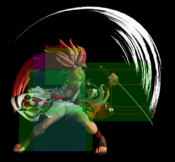
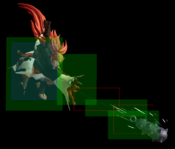
2B: The most essential go-to poke. Hits from very far at mid-screen and is difficult to challenge for a variety of reasons, the biggest of which being that 2B is not deflectable, as the animation uses her trick arm and not her sword. It also has no hurtbox extension on the arm, making it difficult to whiff punish with standing pokes and forcing the opponent to resort to more unsafe long-ranged options such as trying to react with running normals. Although it is vulnerable to crouching state deep jump punishes, it has surprisingly low recovery and it's hard to hit with a jump punish without a hard read.
5B: Another essential ingredient. Inferior in range to 2B but is distinct in that it has no low hurtbox, allowing Baiken to high-profile lows such as defensive 2Ds. It is also cancellable which makes recoil OS cancelling into Rokkon Sogi an excellent option for whiff punishment. At 12 frames, it is your best long-range punish option when 66B will not reach and 66C or 2C are too slow. Can combo into WFT and 236D if it hits from closer range.
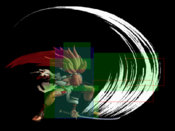
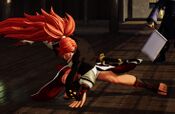
2C: Baiken's infamous mid-screen low. Low-profiles from start to finish and will go under many common standing high pokes such as Jubei and Haohmaru's 5Bs. Although it is not safe on block, it has a short blockstun period that makes reactionary punishment difficult. Experienced opponents will respect 2C by default due to the threat of the damage and the opportunity of the punish, which allows you to threaten with other options such as 66A, B+C, j.B or throw attempts. Hits slightly off the ground, making it useful as a situational anti-air against early-arc or shallow jump attacks.
B+C: Easily the best UOH in the game and perhaps Baiken's most infamous tool. With enormous range on the level of many character's 5Bs, this is a fantastic mid-range normal in its own right even without the mix-up potential of the overhead. The hopping property allows it to completely blow through any low-to-ground pokes, neutralizing many standard options (including Baiken's own 2B, interestingly enough). It's also completely disjointed, with no hurtbox anywhere on the mallet. This makes it very hard to stuff for shorter-ranged characters and even allows it to work as a situational anti-air.
Using this button in tandem with 2C from the tip of its range allows you constantly threaten a 50/50 mix-up from mid-screen. This makes downbacking uniquely dangerous against Baiken and makes her throw game very powerful. The threat of the 50/50 encourages opponents to try to counter it with pre-emptive options such as counterpokes and neutral jump punishes, allowing Baiken to play a reactive game that is nearly always in her favor. Although 2C and 66D are quite unsafe from the range the overhead hits at, B+C is only -11 when spaced to hit meaty at max distance, making block punishes situational or impossible for the majority of options. This means you can safely poke with B+C as a default options and throw in 2C from time to time to catch them off guard.
66A: Another cornerstone of your gameplan. Potentially the best 66A in the game, with huge range and a massive disjoint that makes it basically impossible to stuff. This is your best option for countering 5Bs that outrange your 2B in neutral from characters such as Jubei and Yashamaru. You can deflect cancel OS into Rokkon Sogi in order to get a knockdown that connects from max range. Combos into Kuchinasi if it hits from closer range for a bit more damage. 66A is hugely important to your offensive gameplan as it the primary device that you use to condition your opponent to take a throw in neutral. Throw it out in neutral to stuff pokes and then close the distance to start your throw game when your opponent is convinced to block. Also an excellent whiff punish option against A and D normals. Has significant recovery on whiff, so beware of attempts to punish with neutral jump.
Okizeme
Definition of a frame kill.
jB air reset:
- Off of any mid-screen 236D launch, juggle into jB and do not cancel into j.B+C. This will forego some damage but give you an air reset instead of a knockdown, granting a variety of useful advantages, the biggest being that it robs the opponent of the opportunity to wakeup roll and forces them closer to the corner. You can meaty into 2B [xx Rokkon Sogi recoil OS], 66A or 2C after the reset. This forces them to sit still, allowing you to threaten with a run up throw attempt. Be sure to slightly delay the run up throw, as their throw invuln from air recovery will swallow your "meaty" throw. You can also immediately B+C after the reset to force a 50/50 mix-up with 2C. The B+C is not a true meaty and will lose to jumps and backdashes, but these options are vulnerable to the aforementioned meaties. If you read the backdash you can also hold a forward run for lots of forward screen space advantage.
Forward roll setups:
- j.B+C knockdown:
- This is your most common BNB ender and also works as an anti-air or air-to-air option from the j.B -> j.B+C target combo.
- Mid-screen (not corner):
- Frame kill 2A -> jump forward 236D. Safe jump that lets you land meaty air tatami. Tatami is trivial to stance break but this allows you to throw in an empty jump mix-up between yozansen, 2D or throw. You will be at frame disadvantage if you commit to tatami and they do not forward roll.
- Frame kill 5D -> jump forward C. An excellent safe jump that disincentivizes forward rolling. Wakeup stance break will not work and you will have the opportunity for deep jump frame advantage or empty jump mix-up. If you read a neutral getup, you can hold run forward after the frame kill and gain a lot of space while putting yourself in throw range.
- Be sure to backdash or jump to bait wakeup throw, as you will not be able to back walk out of range.
- Frame kill Suzuran. Frame killing with command dash allows timing for meaty throw against forward roll and gives you lots of time to pressure against neutral wakeup.
Normal Moves
Far Slashes
5A
5A
|
| Damage
|
Guard
|
Startup
|
Active
|
Recovery
|
Total
|
Hit Adv
|
Block Adv
|
Guard Dmg
|
Cancel
|
Recoil
|
Deflectable
|
Unarmed
|
| 50
|
Mid
|
5
|
5
|
10
|
19
|
-2
|
-5
|
5
|
Yes
|
Yes
|
Yes
|
No
|
Baiken jabs with the hilt of her sword.
- Good defensive high poke with a strong active hitbox.
- Decent reach for a light normal, but at the cost of being deflectable.
|
|
Toggle Hitboxes Toggle Hitboxes
|
5B
5B
|
| Damage
|
Guard
|
Startup
|
Active
|
Recovery
|
Total
|
Hit Adv
|
Block Adv
|
Guard Dmg
|
Cancel
|
Recoil
|
Deflectable
|
Unarmed
|
| 100
|
Mid
|
12
|
6
|
19
|
36
|
-4
|
-12
|
10
|
Yes
|
Yes
|
Yes
|
No
|
Baiken quickly unsheathes her sword and slashes at an upward angle.
- A special cancellable midrange poke. Combos into 63214D+C from any distance.
- Less range than 2B, but has no hurtbox at her feet, which means it can beat some low options that would stuff or trade with 2B.
- Combos into WFT and 236D at closer range.
- Situationally useful as an anti-air against shallow jump normals.
|
|
Toggle Hitboxes Toggle Hitboxes
|
5C
5C
|
| Damage
|
Guard
|
Startup
|
Active
|
Recovery
|
Total
|
Hit Adv
|
Block Adv
|
Guard Dmg
|
Cancel
|
Recoil
|
Deflectable
|
Unarmed
|
| 240
|
Mid
|
24
|
2
|
41
|
66
|
-3
|
-16
|
25
|
No
|
Yes
|
Disarm
|
No
|
Baiken slams her sword down onto the opponent.
- Mediocre range for a 5C, but made safer than average due to Baiken's excellent recoil game.
|
|
Toggle Hitboxes Toggle Hitboxes
|
2A
2A
|
| Damage
|
Guard
|
Startup
|
Active
|
Recovery
|
Total
|
Hit Adv
|
Block Adv
|
Guard Dmg
|
Cancel
|
Recoil
|
Deflectable
|
Unarmed
|
| 30
|
Mid
|
5
|
4
|
11
|
19
|
-2
|
-5
|
5
|
Yes
|
No
|
No
|
No
|
Baiken does a quick crouching punch.
- Slightly less range than her 5A, but safer to mash since it's an undeflectable unarmed normal.
|
|
Toggle Hitboxes Toggle Hitboxes
|
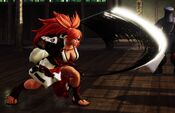
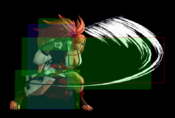
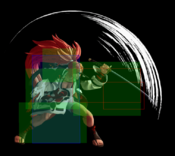
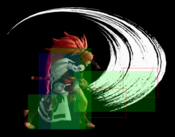
2B
2B frames 12~13 frames 14~17
|
| Damage
|
Guard
|
Startup
|
Active
|
Recovery
|
Total
|
Hit Adv
|
Block Adv
|
Guard Dmg
|
Cancel
|
Recoil
|
Deflectable
|
Unarmed
|
| 80
|
Mid
|
12
|
6
|
20
|
37
|
-5
|
-9
|
10
|
No
|
No
|
No
|
No
|
Baiken strikes at the opponent's legs with the spiked mace from her prosthetic.
- The longest non-deflectable medium slash normal in the game and Baiken's most essential normal.
- Very hard for many characters to challenge while letting her dominate the midrange space, making it one of the best normals in the game and one of the reasons for Baiken's high tier placements.
- Punishes many recoil windows where specials don't hit fast enough due to its fast startup.
- It is still vulnerable to forward jump punishes, however, due to it being a crouching normal.
|
|
Toggle Hitboxes Toggle Hitboxes
|
2C
2C
|
| Damage
|
Guard
|
Startup
|
Active
|
Recovery
|
Total
|
Hit Adv
|
Block Adv
|
Guard Dmg
|
Cancel
|
Recoil
|
Deflectable
|
Unarmed
|
| 150
|
Low
|
16
|
4
|
26
|
45
|
-2
|
-15
|
25
|
No
|
No
|
No
|
No
|
Baiken slides forward while sweeping at the opponent's legs with her sword.
- Long range low 2C with good frame advantage on hit.
- Excellent whiff punish and movement check, and important to her high/low mixups.
- Can low profile certain attacks and is difficult to punish on block when spaced correctly.
|
|
Toggle Hitboxes Toggle Hitboxes
|
Near Slashes
Note: Due to being identical with their far counterparts, most of her close normals were omitted from this segment.
n.5B
n.5B
|
| Damage
|
Guard
|
Startup
|
Active
|
Recovery
|
Total
|
Hit Adv
|
Block Adv
|
Guard Dmg
|
Cancel
|
Recoil
|
Deflectable
|
Unarmed
|
| 80
|
Mid
|
9
|
4
|
19
|
31
|
-2
|
-12
|
10
|
Yes
|
Yes
|
Yes
|
No
|
Baiken stabs at the opponent.
- Her best point-blank punish option, since it cancels into her WFT and all her relevant specials easily.
- Works as a situational anti-air against empty jumps or shallow jump normals.
|
|
Toggle Hitboxes Toggle Hitboxes
|
n.5C
n.5C
|
| Damage
|
Guard
|
Startup
|
Active
|
Recovery
|
Total
|
Hit Adv
|
Block Adv
|
Guard Dmg
|
Cancel
|
Recoil
|
Deflectable
|
Unarmed
|
| 200
|
Mid
|
13
|
3
|
28
|
43
|
-3
|
-28
|
25
|
No
|
Yes
|
Disarm
|
No
|
Baiken does a wide downward swing.
- Very long range and good startup for an n.5C.
- Lacks a good upward hitbox, despite the animation, but works well as a cross-under AA or a shallow jump AA.
- Can easily link into her SSM after a guard crush, but you may need to micro-dash into SSM if it crushes at max distance.
|
|
Toggle Hitboxes Toggle Hitboxes
|
Kicks
5D
5D
|
| Damage
|
Guard
|
Startup
|
Active
|
Recovery
|
Total
|
Hit Adv
|
Block Adv
|
Guard Dmg
|
Cancel
|
Recoil
|
Deflectable
|
Unarmed
|
| 50
|
Mid
|
12
|
4
|
11
|
26
|
-2
|
-5
|
5
|
No
|
No
|
No
|
Yes
|
Baiken does a donkey kick aimed at the opponent's face.
- Safe mid kick that moves Baiken forward slightly.
- Has a significant hitbox disjoint that works well for punishing or stuffing high normals.
- Can work as a situational far-distance anti-air.
|
|
Toggle Hitboxes Toggle Hitboxes
|
6D
6D
|
| Damage
|
Guard
|
Startup
|
Active
|
Recovery
|
Total
|
Hit Adv
|
Block Adv
|
Guard Dmg
|
Cancel
|
Recoil
|
Deflectable
|
Unarmed
|
| 30
|
Mid
|
14
|
8
|
18
|
39
|
-1
|
-5
|
5 p
|
No
|
No
|
No
|
Yes
|
Baiken does a forward-moving stomp kick.
- Very active, with great frame advantage when meaty or spaced to hit late.
|
|
Toggle Hitboxes Toggle Hitboxes
|
2D
2D
|
| Damage
|
Guard
|
Startup
|
Active
|
Recovery
|
Total
|
Hit Adv
|
Block Adv
|
Guard Dmg
|
Cancel
|
Recoil
|
Deflectable
|
Unarmed
|
| 24
|
Low
|
5
|
4
|
9
|
17
|
±0
|
-3
|
5
|
No
|
No
|
No
|
Yes
|
Baiken does a low crouching kick.
- Standard crouching kick.
- Slightly better range than her A normals.
|
|
Toggle Hitboxes Toggle Hitboxes
|
3D
3D Can't jump cancel this one frames 8~14 frames 15~17
|
| Damage
|
Guard
|
Startup
|
Active
|
Recovery
|
Total
|
Hit Adv
|
Block Adv
|
Guard Dmg
|
Cancel
|
Recoil
|
Deflectable
|
Unarmed
|
| 35
|
Low
|
8
|
10 (7,3)
|
23
|
40
|
KD(+92)
|
-13 / -9
|
5
|
No
|
No
|
No
|
Yes
|
Baiken does two rotating crouching kicks.
- Quick sweep with slight forward movement during the active frames.
- Has a tall enough hitbox to beat high profile attacks during early active frames (1~7).
- Can be safe on block with good spacing and timing when done meaty.
|
|
Toggle Hitboxes Toggle Hitboxes
|
Dash Normals
66A
66A
|
| Damage
|
Guard
|
Startup
|
Active
|
Recovery
|
Total
|
Hit Adv
|
Block Adv
|
Guard Dmg
|
Cancel
|
Recoil
|
Deflectable
|
Unarmed
|
| 50
|
Mid
|
7
|
6
|
17
|
29
|
-5
|
-12
|
5
|
Yes
|
Yes
|
Yes
|
No
|
Baiken quickly unsheathes her sword while running and slashes at the opponent.
- A quick special cancellable dashing slash for checking space.
- Great range and decently long active frames.
- Combos into 63214D+A or C on hit.
- Treated as a light normal on recoil (-1 on cancel) and deflect, making it unusually low risk for a dashing slash.
|
|
Toggle Hitboxes Toggle Hitboxes
|
66B
66B
|
| Damage
|
Guard
|
Startup
|
Active
|
Recovery
|
Total
|
Hit Adv
|
Block Adv
|
Guard Dmg
|
Cancel
|
Recoil
|
Deflectable
|
Unarmed
|
| 80
|
Mid
|
8
|
2
|
20
|
29
|
-1
|
-35
|
10
|
Yes
|
Yes
|
Disarm
|
No
|
Baiken does a running stab.
- Dash version of her n5B.
- Common punish/combo starter with terrible frame advantage on recoil.
|
|
Toggle Hitboxes Toggle Hitboxes
|
66C
66C
|
| Damage
|
Guard
|
Startup
|
Active
|
Recovery
|
Total
|
Hit Adv
|
Block Adv
|
Guard Dmg
|
Cancel
|
Recoil
|
Deflectable
|
Unarmed
|
| 120
|
Mid
|
12
|
4
|
36
|
51
|
KD(+91)
|
-17
|
20
|
No
|
No
|
Disarm
|
No
|
Baiken does a running slam with her sword.
- Visually identical to her 5C but with the added momentum of her dash while being twice as fast.
- Good in situations where Baiken is out of range for a 2C punish or in need of a slightly faster attack.
- Knocks down on hit, making it a situational combo ender.
|
|
Toggle Hitboxes Toggle Hitboxes
|
66D
66D
|
| Damage
|
Guard
|
Startup
|
Active
|
Recovery
|
Total
|
Hit Adv
|
Block Adv
|
Guard Dmg
|
Cancel
|
Recoil
|
Deflectable
|
Unarmed
|
| 70
|
Low
|
10
|
11
|
17
|
37
|
-5~+5
|
-11~-1
|
5
|
No
|
No
|
No
|
Yes
|
Baiken does a sliding kick.
- Good reach and frame advantage when spaced to hit late.
- Doesn't knock down.
- Used in high/low mix, as they're forced to guess between a dash-buffered TK Youzansen or slide.
|
|
Toggle Hitboxes Toggle Hitboxes
|
Air Normals
j.A
j.A
|
| Damage
|
Guard
|
Startup
|
Active
|
Recovery
|
Total
|
Hit Adv
|
Block Adv
|
Guard Dmg
|
Cancel
|
Recoil
|
Deflectable
|
Unarmed
|
| 50
|
High
|
7
|
3
|
-
|
-
|
-
|
-
|
5
|
No
|
No
|
No
|
Yes
|
Baiken does a quick backfist strike.
- Standard air to air normal.
|
|
Toggle Hitboxes Toggle Hitboxes
|
j.B
j.B
|
| Damage
|
Guard
|
Startup
|
Active
|
Recovery
|
Total
|
Hit Adv
|
Block Adv
|
Guard Dmg
|
Cancel
|
Recoil
|
Deflectable
|
Unarmed
|
| 100
|
High
|
15
|
6
|
-
|
-
|
-
|
-
|
10
|
Yes (gatling)
|
No
|
No
|
No
|
Baiken does a downward strike with her spiked chain-mace.
- Very long range air normal which lets her command lots of space while jumping in.
- Can cancel into her j.B+C on hit, making it a vital part of her air combos.
|
|
Toggle Hitboxes Toggle Hitboxes
|
j.C
j.C
|
| Damage
|
Guard
|
Startup
|
Active
|
Recovery
|
Total
|
Hit Adv
|
Block Adv
|
Guard Dmg
|
Cancel
|
Recoil
|
Deflectable
|
Unarmed
|
| 160
|
High
|
14
|
7
|
-
|
-
|
-
|
-
|
20
|
No
|
No
|
No
|
No
|
Baiken stabs down with her sword.
- High damage jump-in with excellent downward reach, but terrible horizontal range.
- Her go-to jump-in.
- Slightly unusual deep hit timing due to its size which might take some time getting used to.
|
|
Toggle Hitboxes Toggle Hitboxes
|
j.D
j.D
|
| Damage
|
Guard
|
Startup
|
Active
|
Recovery
|
Total
|
Hit Adv
|
Block Adv
|
Guard Dmg
|
Cancel
|
Recoil
|
Deflectable
|
Unarmed
|
| 30
|
High
|
10
|
7
|
-
|
-
|
KD
|
-
|
5
|
Yes (j.623S)
|
No
|
No
|
Yes
|
Baiken does an aerial upward split kick.
- Slightly slower and less range than Baiken's j.A, but her only air normal that hits above her.
- Cancels into j.623S for a mixup after a blocked jump-in, or a combo on hit with j623A/Rage j623C.
- Knocks down on air/ground hit, but air resets after a 236D juggle.
- Can hit crossup, but the spacing to do so is very precise.
|
|
Toggle Hitboxes Toggle Hitboxes
|
Unarmed Normals
u.5S
u.5S
|
| Damage
|
Guard
|
Startup
|
Active
|
Recovery
|
Total
|
Hit Adv
|
Block Adv
|
Guard Dmg
|
Cancel
|
Recoil
|
Deflectable
|
Unarmed
|
| 50
|
Mid
|
6
|
7
|
18
|
30
|
-4
|
-9
|
5
|
No
|
-
|
-
|
Only
|
Baiken does a quick punch
|
|
Toggle Hitboxes Toggle Hitboxes
|
u.2S
u.2S
|
| Damage
|
Guard
|
Startup
|
Active
|
Recovery
|
Total
|
Hit Adv
|
Block Adv
|
Guard Dmg
|
Cancel
|
Recoil
|
Deflectable
|
Unarmed
|
| 50
|
Mid
|
5
|
4
|
18
|
26
|
-1
|
-6
|
5
|
No
|
-
|
-
|
Only
|
Baiken does a quick crouching punch.
- Standard unarmed crouching jab.
- Slightly longer reach than u5S.
|
|
Toggle Hitboxes Toggle Hitboxes
|
ju.S
ju.S
|
| Damage
|
Guard
|
Startup
|
Active
|
Recovery
|
Total
|
Hit Adv
|
Block Adv
|
Guard Dmg
|
Cancel
|
Recoil
|
Deflectable
|
Unarmed
|
| 50
|
High
|
7
|
3
|
-
|
-
|
-
|
-
|
5
|
No
|
-
|
-
|
Only
|
Baiken does a quick backfist strike.
|
|
Toggle Hitboxes Toggle Hitboxes
|
u.66S
u.66S
|
| Damage
|
Guard
|
Startup
|
Active
|
Recovery
|
Total
|
Hit Adv
|
Block Adv
|
Guard Dmg
|
Cancel
|
Recoil
|
Deflectable
|
Unarmed
|
| 50
|
Mid
|
5
|
3
|
21
|
28
|
KD(+104)
|
-8
|
5
|
No
|
No
|
No
|
Only
|
Baiken does a running punch.
- Standard unarmed running attack that knocks down.
|
|
Toggle Hitboxes Toggle Hitboxes
|
Universal Mechanics
Guard Break
Guard Break (Throw)
5/6C+D / 4C+D Neutral / Forward Throw Neutral / Forward Throw Back Throw Back Throw
|
| Version
|
Damage
|
Guard
|
Startup
|
Active
|
Recovery
|
Total
|
Hit Adv
|
Block Adv
|
Guard Dmg
|
Cancel
|
Recoil
|
Deflectable
|
Unarmed
|
| Neutral / Forward
|
0
|
Throw
|
3
|
1
|
71
|
74
|
+20
|
N/A
|
N/A
|
No
|
No
|
No
|
Yes
|
Universal throw. Can be followed up with an attack.
|
| Back
|
0
|
Throw
|
5
|
1
|
69
|
74
|
+25
|
N/A
|
N/A
|
No
|
No
|
No
|
Yes
|
Universal throw. Can be followed up with an attack.
|
|
Toggle Hitboxes Toggle Hitboxes
|
Surprise Attack
Surprise Attack (Overhead)
5B+C
|
| Version
|
Damage
|
Guard
|
Startup
|
Active
|
Recovery
|
Total
|
Hit Adv
|
Block Adv
|
Guard Dmg
|
Cancel
|
Recoil
|
Deflectable
|
Unarmed
|
| Armed
|
70
|
High
|
21
|
3
|
21
|
44
|
+2
|
-11
|
10
|
-
|
-
|
-
|
No
|
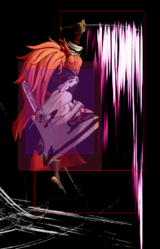
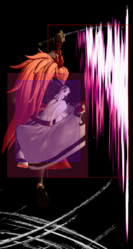
- High profiles on frames 7-36.
- Huge disjointed hitbox and generally safe on block if spaced.
|
| Unarmed
|
70
|
High
|
21
|
3
|
21
|
44
|
KD(+100)
|
-11
|
10
|
-
|
-
|
-
|
Only
|
Identical animation, but now knocks down. It's somehow still available while unarmed even though 2B and jB are not.
|
|
Toggle Hitboxes Toggle Hitboxes
|
Dodge
Dodge
5A+B
|
| Damage
|
Guard
|
Startup
|
Active
|
Recovery
|
Total
|
Hit Adv
|
Block Adv
|
Guard Dmg
|
Cancel
|
Recoil
|
Deflectable
|
Unarmed
|
| 0
|
N/A
|
1
|
16
|
22
|
38
|
N/A
|
N/A
|
-
|
N/A
|
-
|
N/A
|
Yes
|
Universal dodge. Avoids all attacks for a brief moment, and is mainly used to avoid throws.
Complete invincibility from frames 1 to 10. Strike invincibility from frames 11 to 16.
|
|
Stance Break
Stance Break
A+B during Just Defense
|
| Damage
|
Guard
|
Startup
|
Active
|
Recovery
|
Total
|
Hit Adv
|
Block Adv
|
Guard Dmg
|
Cancel
|
Recoil
|
Deflectable
|
Unarmed
|
| 0
|
Mid
|
5
|
10
|
38
|
52
|
KD
|
-24
|
-
|
No
|
-
|
-
|
Yes
|
Universal Stance Break. Invulnerable frames 1~5.
|
|
Toggle Hitboxes Toggle Hitboxes
|
Counter / Blade Catch
Counter / Blade Catch
236A+B Counter Counter Blade Catch Blade Catch
|
| Version
|
Damage
|
Guard
|
Startup
|
Active
|
Recovery
|
Total
|
Hit Adv
|
Block Adv
|
Guard Dmg
|
Cancel
|
Recoil
|
Deflectable
|
Unarmed
|
| Armed
|
0
|
N/A
|
2
|
12
|
33
|
46
|
+35~+59
|
N/A
|
N/A
|
N/A
|
N/A
|
N/A
|
No
|
Universal counter. Allows you to follow up with a guaranteed attack of your own. The amount of time you have to followup depends on the strength of the attack you counter, with heavy attacks staggering the opponent for the longest amount of time. Additionally, if you counter a heavy slash or a running slash, your opponent will be disarmed.
|
| Disarmed
|
0
|
N/A
|
2
|
11
|
10
|
22
|
KD
|
N/A
|
N/A
|
N/A
|
N/A
|
N/A
|
Yes
|
Universal counter. While disarmed, your counter will disarm and knock away your opponent regardless of slash level countered.
|
|
Toggle Hitboxes Toggle Hitboxes
|
Rage Explosion
Rage Explosion
5A+B+C
|
| Damage
|
Guard
|
Startup
|
Active
|
Recovery
|
Total
|
Hit Adv
|
Block Adv
|
Guard Dmg
|
Cancel
|
Recoil
|
Deflectable
|
Unarmed
|
| 0
|
Unblockable
|
21
|
3
|
35
|
58
|
0
|
-
|
-
|
-
|
-
|
-
|
No
|
Unblockable pushback attack.
|
|
Toggle Hitboxes Toggle Hitboxes
|
Lightning Blade
Lightning Blade (Issen)
5A+B+C during Rage Explosion
|
| Damage
|
Guard
|
Startup
|
Active
|
Recovery
|
Total
|
Hit Adv
|
Block Adv
|
Guard Dmg
|
Cancel
|
Recoil
|
Deflectable
|
Unarmed
|
| 300~709
|
Mid
|
9
|
8
|
65
|
81
|
KD
|
-44
|
-
|
No
|
No
|
No
|
No
|
Has full invincibility 1~16 and can anti-air. Damage scales up based on remaining health.
|
|
Toggle Hitboxes Toggle Hitboxes
|
Command Moves
Special Skill 1
Special Skill 1
6A
|
| Damage
|
Guard
|
Startup
|
Active
|
Recovery
|
Total
|
Hit Adv
|
Block Adv
|
Guard Dmg
|
Cancel
|
Recoil
|
Deflectable
|
Unarmed
|
| 30
|
Mid
|
7
|
4
|
14
|
24
|
-5
|
-8
|
5
|
Yes
|
No
|
No
|
Yes
|
Baiken does a quick upward palm strike
- Baiken's 6P from her Guilty Gear iterations.
- Head invulnerable during active frames.
- Good reactive antiair, but trades badly with jump-ins with big vertical hitboxes.
|
|
Toggle Hitboxes Toggle Hitboxes
|
Special Skill 2
Special Skill 2
(In air) B+C
|
| Damage
|
Guard
|
Startup
|
Active
|
Recovery
|
Total
|
Hit Adv
|
Block Adv
|
Guard Dmg
|
Cancel
|
Recoil
|
Deflectable
|
Unarmed
|
| 80
|
Mid
|
13
|
7
|
17 (landing)
|
-
|
KD
|
-
|
8
|
No
|
-
|
-
|
Yes
|
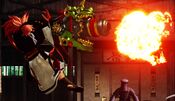
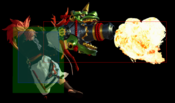
Baiken pulls out a cannon and shoots a blast of flame at the opponent.
- Can be cancelled into from jB as part of her unique air gatling.
- Halts Baiken's vertical momentum and pushes her backwards.
- Knocks down on hit.
- Tremendous horizontal range and very disjointed.
- Useful as an air to air or to stall and avoid an opponent's attack.
- Whiffs against most standing characters and hits mid despite being an air normal.
|
|
Toggle Hitboxes Toggle Hitboxes
|
Gatling 5C
Gatling 5C
(After n5B/66B hit) 5C
|
| Damage
|
Guard
|
Startup
|
Active
|
Recovery
|
Total
|
Hit Adv
|
Block Adv
|
Guard Dmg
|
Cancel
|
Recoil
|
Deflectable
|
Unarmed
|
| 100
|
-
|
13
|
3
|
28
|
43
|
-3
|
-28
|
10
|
No
|
Yes
|
Yes(disarm)
|
No
|
- Baiken has a unique chain into n5C from n5B and 66B
- Only gatlings on hit, which can be useful for auto-confirming hits while retaining the option for a different cancel or no cancel on recoil and whiff.
|
|
Toggle Hitboxes Toggle Hitboxes
|
Gatling jB+C
Gatling jB+C
(In air, after jB hit) B+C
|
| Damage
|
Guard
|
Startup
|
Active
|
Recovery
|
Total
|
Hit Adv
|
Block Adv
|
Guard Dmg
|
Cancel
|
Recoil
|
Deflectable
|
Unarmed
|
| 40
|
-
|
13
|
7
|
17
|
-
|
-
|
-
|
-
|
-
|
-
|
-
|
No
|
- Same properties as jB+C, but as a command followup from jB on hit only and servers as a unique air combo ender.
- Can whiff near max jB range.
|
|
Toggle Hitboxes Toggle Hitboxes
|
Special Moves
Azami (Standing)
Azami (Standing)
A+D or 4A+D
|
| Damage
|
Guard
|
Startup
|
Active
|
Recovery
|
Total
|
Hit Adv
|
Block Adv
|
Guard Dmg
|
Cancel
|
Recoil
|
Deflectable
|
Unarmed
|
| -
|
-
|
4
|
2~73
|
31
|
36~107
|
-
|
-
|
-
|
-
|
-
|
-
|
No
|
Baiken enters a standing defensive stance.
- Guard point starts on frame 4 and can be extended by holding any button.
- Parries mid and high blockable attacks, including most projectiles.
- Cannot parry supers, crossup attacks, or Yashamaru's Rage j214S.
- Can be cancelled into one of 4 followups on hit.
- Baiken can maintain Azami on successful parry by continuing to hold a button.
- Opponents can act on successful parry as if their attack was blocked by an unarmed opponent.
|
|
Toggle Hitboxes Toggle Hitboxes
|
Azami (Crouching)
Azami (Crouching)
2A+D or 1A+D
|
| Damage
|
Guard
|
Startup
|
Active
|
Recovery
|
Total
|
Hit Adv
|
Block Adv
|
Guard Dmg
|
Cancel
|
Recoil
|
Deflectable
|
Unarmed
|
| -
|
-
|
4
|
2~72
|
31
|
36~106
|
-
|
-
|
-
|
-
|
-
|
-
|
No
|
Baiken enters a crouching defensive stance.
- Same as the standing version, except it only parries low attacks.
|
|
Toggle Hitboxes Toggle Hitboxes
|
Suzuran
Suzuran
63214+D
|
| Damage
|
Guard
|
Startup
|
Active
|
Recovery
|
Total
|
Hit Adv
|
Block Adv
|
Guard Dmg
|
Cancel
|
Recoil
|
Deflectable
|
Unarmed
|
| -
|
-
|
12
|
17
|
17
|
45
|
-
|
-
|
-
|
-
|
-
|
-
|
No
|
Baiken rushes forward while holding her sword in front of her in a defensive stance.
- Travels up to halfscreen.
- Guard point against high and mid attacks during frames 12~28.
- Can cancel into followups on frame 3 except her D followup, Mawari-Komi, which cancels on frame 4.
- Cancel window lasts up until the start of her recovery animation.
- Followups can be performed on the first possible frame by holding the respective button while inputting Suzuran (example: 63214DA will buffer the A followup)
|
|
Toggle Hitboxes Toggle Hitboxes
|
Kuchinashi
Kuchinashi
[During Azami (Standing or crouching) or Suzuran ] A frame 9 frames 10~13
|
| Damage
|
Guard
|
Startup
|
Active
|
Recovery
|
Total
|
Hit Adv
|
Block Adv
|
Guard Dmg
|
Cancel
|
Recoil
|
Deflectable
|
Unarmed
|
| 120
|
Mid
|
9
|
5
|
52
|
65
|
KD(+80)
|
-41
|
12
|
-
|
-
|
-
|
No
|
Baiken does a rising upward slash.
- Air invulnerable frames 1~10.
- Effectively a frame 12 antiair attack when buffered from Suzuran.
- Baiken's fastest special, will even combo from lights if close enough.
|
|
Toggle Hitboxes Toggle Hitboxes
|
Sakura
Sakura
[During Azami (Standing or crouching) or Suzuran ] B
|
| Damage
|
Guard
|
Startup
|
Active
|
Recovery
|
Total
|
Hit Adv
|
Block Adv
|
Guard Dmg
|
Cancel
|
Recoil
|
Deflectable
|
Unarmed
|
| 100
|
Mid
|
17
|
5
|
23
|
44
|
-3
|
-12
|
12
|
-
|
-
|
-
|
No
|
Baiken turns around and stabs in retaliation.
- Fully invulnerable on frames 1~16 and 20f recovery when done from Azami.
- Moderate startup but relatively safe on block when spaced, especially after Azami.
|
|
Toggle Hitboxes Toggle Hitboxes
|
Rokkon Sogi
Rokkon Sogi
[During Azami (Standing or crouching) or Suzuran ] C
|
| Damage
|
Guard
|
Startup
|
Active
|
Recovery
|
Total
|
Hit Adv
|
Block Adv
|
Guard Dmg
|
Cancel
|
Recoil
|
Deflectable
|
Unarmed
|
| 80
|
Mid
|
13
|
4
|
32
|
48
|
KD(+91)
|
-15~-12
|
10
|
-
|
-
|
-
|
No
|
Baiken rushes forward and slashes the opponent while passing through them.
- Has 15f startup and 30f recovery after Azami.
- Always passes through the opponent on hit/block, even when spaced.
- Knocks down on hit.
|
|
Toggle Hitboxes Toggle Hitboxes
|
Mawari-Komi
Mawari-Komi
[During Azami (Standing or crouching) or Suzuran ] D
|
| Damage
|
Guard
|
Startup
|
Active
|
Recovery
|
Total
|
Hit Adv
|
Block Adv
|
Guard Dmg
|
Cancel
|
Recoil
|
Deflectable
|
Unarmed
|
| -
|
-
|
-
|
-
|
-
|
31 / 39
|
-
|
-
|
-
|
-
|
-
|
-
|
No
|
Baiken does a quick step dash.
- Can cross up the opponent (adds 8 frames recovery).
- Cannot be buffered into, due to coming out on frame 4 unlike the other followups, which come out on frame 3.
- Fully invulnerable frames 1-17 after Azami.
|
|
Tatami Gaeshi
Tatami Gaeshi
236D 236D j236D j236D falling
|
| Version
|
Damage
|
Guard
|
Startup
|
Active
|
Recovery
|
Total
|
Hit Adv
|
Block Adv
|
Guard Dmg
|
Cancel
|
Recoil
|
Deflectable
|
Unarmed
|
| Ground
|
40
|
Mid
|
19
|
11
|
18
|
47
|
KD(+127)
|
-14
|
6
|
-
|
-
|
-
|
Yes
|
Baiken stomps, summoning a tatami mat that hits the opponent.
- Baiken's signature tatami attack.
- Ground version launches on hit, allowing for follow up attacks on the ground or in the air. Only has a hitbox on the initial stomp.
- The grounded version interacts with other projectiles and cancels them out.
- The air version has a hitbox both on the initial hit and the tatami mat that falls after.
- Large hitbox and long active frames make it an effective albeit slow wall.
|
| Air
|
40
|
Mid
|
19
|
16, 1~landing
|
25 (landing)
|
-
|
-13~+3
|
-21~-1
|
6
|
-
|
-
|
-
|
Yes
|
Baiken summons a tatami mat mid-air.
- Carries air momentum.
- The air version has a hitbox while the tatami is falling.
- TK Tatami can hit crossup with precise spacing, but it's punishable on hit.
- Safe on block if started later in her jump.
- The tatami will disappear if Baiken is hit.
|
|
Toggle Hitboxes Toggle Hitboxes
|
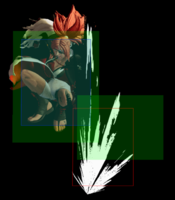
Yozan Sen
Yozan Sen
(in air) 623S j623A shown, hitboxes for other versions can differ slightly
|
| Version
|
Damage
|
Guard
|
Startup
|
Active
|
Recovery
|
Total
|
Hit Adv
|
Block Adv
|
Guard Dmg
|
Cancel
|
Recoil
|
Deflectable
|
Unarmed
|
| A
|
100
|
High
|
7
|
11
|
19
|
-
|
KD
|
-29
|
6
|
-
|
-
|
-
|
Yes
|
| B
|
110
|
High
|
9
|
11
|
19
|
-
|
KD
|
-27
|
9
|
-
|
-
|
-
|
Yes
|
| C
|
140
|
High
|
12
|
12
|
19
|
-
|
KD
|
-25
|
10
|
-
|
-
|
-
|
Yes
|
| Rage
|
34x4
|
High
|
7
|
12
|
19
|
-
|
KD
|
-33
|
25
|
-
|
-
|
-
|
Yes
|
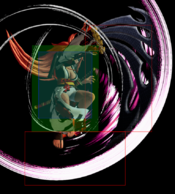
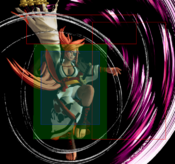
Baiken unsheathes blades from her prosthetic and does a circular slash.
- Baiken's infamous instant overhead.
- Heavier versions are slower, more damaging, and marginally safer but still very punishable on block.
- This move has significant air coverage and hits behind Baiken but suffers from a lack of air invincibility, especially when 6A and Kuchinashi are available.
- The hitbox travels around Baiken during active frames, starting down and in front then circling back to underneath her at the end.
- Available even while unarmed.
- Rage j623C trades a few points of damage for blazing fast startup and hits four times. All four hits come out even on block, making it effectively impossible to fuzzy guard against. However, it's even more punishable on block than the regular versions.
|
|
Toggle Hitboxes Toggle Hitboxes
|
Kabari
Kabari
41236+B or C B version B version C version Both versions reach max range on 5th active frame C version
|
| Version
|
Damage
|
Guard
|
Startup
|
Active
|
Recovery
|
Total
|
Hit Adv
|
Block Adv
|
Guard Dmg
|
Cancel
|
Recoil
|
Deflectable
|
Unarmed
|
| B
|
60
|
-
|
19
|
14
|
23
|
55
|
KD
|
-
|
-
|
-
|
-
|
-
|
Yes
|
Baiken fires out a grappling hook from her prosthetic.
- Cannot hit grounded opponents.
- On hit, can combo into three different followups.
- Can cancel into followups even on whiff.
- Safe on block, allowing for long range frame traps and aggressive pressure.
- Available while unarmed.
- B version is an anti-air grab with brief air invulnerability.
|
| C
|
40
|
Mid
|
23
|
14
|
28
|
64
|
-1
|
-3~-4
|
9
|
-
|
-
|
-
|
Yes
|
- The C version fires the hook a halfscreen distance forward in front of Baiken.
|
|
Toggle Hitboxes Toggle Hitboxes
|
Himawari
Himawari
(After Kabari) A
|
| Damage
|
Guard
|
Startup
|
Active
|
Recovery
|
Total
|
Hit Adv
|
Block Adv
|
Guard Dmg
|
Cancel
|
Recoil
|
Deflectable
|
Unarmed
|
| 100
|
Throw
|
31
|
12
|
51
|
93
|
KD(+68)
|
Unblockable
|
-
|
-
|
-
|
-
|
Yes
|
Baiken leaps forward and scoops the opponent up for a dunk.
- Slow and telegraphed, but may catch opponents off guard if used sparingly.
- Very lengthy recovery animation on whiff.
- The only followup attack available while unarmed.
|
|
Toggle Hitboxes Toggle Hitboxes
|
Tetsuzan Sen
Tetsuzan Sen
(After Kabari) B
|
| Damage
|
Guard
|
Startup
|
Active
|
Recovery
|
Total
|
Hit Adv
|
Block Adv
|
Guard Dmg
|
Cancel
|
Recoil
|
Deflectable
|
Unarmed
|
| 60
|
Mid
|
18
|
6
|
22
|
45
|
KD(+122)
|
-12
|
12
|
-
|
-
|
-
|
No
|
Baiken stomps and creates a ki shockwave.
- Frame traps from Kabari and pushes the opponent back slightly.
- Generally safe on block if Kabari was spaced properly.
- Launches for a followup attack on hit.
|
|
Toggle Hitboxes Toggle Hitboxes
|
Rokkon Sogi
Rokkon Sogi
(After Kabari) C
|
| Damage
|
Guard
|
Startup
|
Active
|
Recovery
|
Total
|
Hit Adv
|
Block Adv
|
Guard Dmg
|
Cancel
|
Recoil
|
Deflectable
|
Unarmed
|
| 80
|
Mid
|
13
|
4
|
32
|
48
|
KD(+91)
|
-15~-13
|
10
|
-
|
-
|
-
|
No
|
- Similar to the Azami/Suzuran followup, but slightly shorter range and won't cross up on hit.
|
|
Toggle Hitboxes Toggle Hitboxes
|
Supers
Weapon Flipping Technique
Tsurane Sanzu-watashi
236B+C
|
| Damage
|
Guard
|
Startup
|
Active
|
Recovery
|
Total
|
Hit Adv
|
Block Adv
|
Guard Dmg
|
Cancel
|
Recoil
|
Deflectable
|
Unarmed
|
| 100,100,150
|
Mid
|
1+17
|
4 (20) 4 (34) 4
|
52
|
135
|
KD
|
-23
|
-
|
-
|
-
|
-
|
No
|
Baiken does her iconic Overdrive where she slashes the opponent three times, finishing with a circular moon slash.
- Available only during Max Rage or Rage Explosion.
- Disarms on hit.
- Relatively short range, will not connect from spaced 5B.
- Can work as a situational anti-air against early jump buttons or in cross-under situations.
|
|
Toggle Hitboxes Toggle Hitboxes
|
Super Special Move
Koboissen
641236C+D Enable blood for the big red X Enable blood for the big red X
|
| Damage
|
Guard
|
Startup
|
Active
|
Recovery
|
Total
|
Hit Adv
|
Block Adv
|
Guard Dmg
|
Cancel
|
Recoil
|
Deflectable
|
Unarmed
|
| 100,300,250
|
Mid
|
10+17
|
3
|
66
|
95
|
KD
|
-36
|
-
|
-
|
-
|
-
|
No
|
Baiken dashes through the opponent and delivers a devastating crosscut slash.
- Available only once per match.
- Invulnerable on frames 1~10.
- Extremely short range, requiring you to microdash after a guard crush or dodge and is almost impossible to hit on light and medium deflects unless done at near point blank range.
|
|
Toggle Hitboxes Toggle Hitboxes
|
Combos
Midscreen Combos
| Starter
|
Followup 1
|
Followup 2
|
Damage
|
Notes
|
| 5A/2A/6A
|
xx 63214D+A
|
|
150
|
Light combo. Doesn't work from antiair 6A hits.
|
| 66A
|
xx 63214D+C
|
|
130
|
Sideswaps into knockdown.
|
| xx 63214D+A
|
|
170
|
More damage than D+C, but 66A has to hit very close for D+A to not whiff. Faster startup makes D+A fairly practical to hit confirm into if spacing allows.
|
| 5B
|
xx 63214D+C
|
|
180
|
Works at any range and knocks the opponent down. Will sideswap except at max 5B range. Can hit confirm from 5B pokes.
|
| xx 63214D+B
|
|
200
|
More damage than D+C, but doesn't work at max range and leaves the opponent standing. Slower startup on D+B is more difficult to hit confirm.
|
| xx WFT
|
|
540
|
Only connects at mid range of 5B.
|
| n5B/66B
|
xx 5C
|
|
180
|
Gatling followup. Moderate reward and leaves the opponent standing. Only cancels on hit, which is sometimes useful for recoil and whiff cancel mindgames.
|
| xx 63214D+A/B/C
|
|
200/180/160
|
Lower damage than 236D combos, but easier to hit confirm into when needed.
|
| xx 236D
|
66C
|
240
|
Good damage and knockdown that leaves you midscreen. Works from any spacing where 66B would connect, but requires microdash 66C at max range. Also works from 5B if close enough.
|
| 9jB
|
220
|
Air reset for mixup on landing. Does not work from max 66B range, and may leave Baiken just outside B+C range on landing on spaced hits.
|
| 9jB xx jB+C
|
260
|
High damage combo that knocks the opponent far away. Requires slightly closer spacing than jB alone.
|
| xx WFT
|
|
516
|
WFT confirm.
|
| 4/5/6CD
|
66B...
|
|
|
Follow up from throw with above 66B combos. Deals 329 damage with 66B xx WFT.
|
| 4CD
|
5B xx WFT
|
|
348
|
Can squeeze out a little more (19) damage on back throw WFT combo with 5B. Works on every character, but need to micro walk forward at least 1 frame for Yashamaru, Basara, Mina, Warden and Amakusa.
|
| 41236 B/C
|
xx C
|
|
140/120
|
Easy Kabari followup, but lower reward.
|
| xx B
|
66A
|
170/150
|
Air reset. Need to dash a bit before 66A to connect. Near corner this leaves the opponent close enough for a mixup on landing.
|
| 63214D+C
|
200/180
|
More damaging followup into knockdown. Sideswaps.
|
| 9jB+C
|
200/180
|
Same damage as 63214D+C, but knocks them fullscreen.
|
| jD
|
xx j623A
|
|
130
|
Rage j623C also combos, but does equal or less damage unless the opponent is slightly below Baiken.
|
Corner Combos
| Starter
|
Followup 1
|
Followup 2
|
Damage
|
Notes
|
| n5B/66B
|
xx 236D
|
9jC
|
280
|
High damage, air resets for a free mixup afterwards. If the combo starts from a deep jC then the second jC will cause knockdown instead.
|
Guard Crush Combos
| Starter
|
Followup 1
|
Followup 2
|
Damage
|
Notes
|
| Guard Crush n5C
|
xx SSM
|
|
728
|
Baiken's SSM has very short range, just enough to cover n5C range.
|
| Guard Crush n5C/5C
|
xx 63214D
|
n5B...
|
|
Use Suzuran to close space from any guard crush and follow up with the n5B combo of your choice.
|
| 66B...
|
|
|
Guard crush has enough frame advantage that you can also dash up for a full combo if inclined. Spaced 5C hits require a longer dash for 236D 9jB xx jB+C followups.
|
| Guard Crush 5C
|
xx 63214D+D
|
SSM
|
728
|
Very situational guard break SSM. Only connects in the corner or near max range of 5C such that 63214D~D won't cross up. Late D followup may also result in crossing up.
|
Videos
AndyOCR vs Kaopctate01 at Frosty Faustings XIV
ScrubSaibot vs sinisterx at Kumite in Tennessee 2022
Colors
External Links
Link to docs hosted in other sites.
