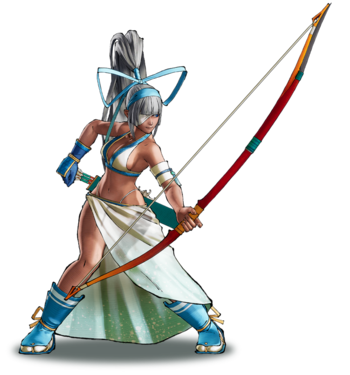
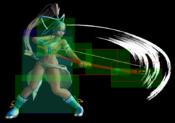
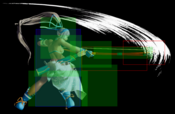
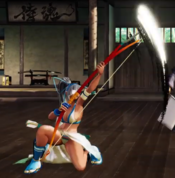
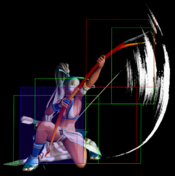
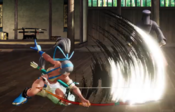
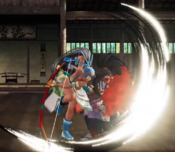
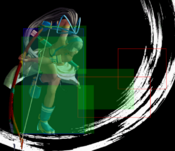
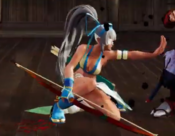
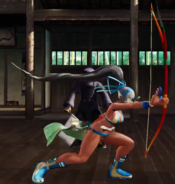
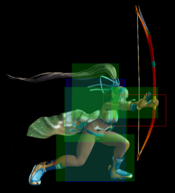
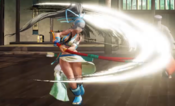
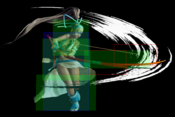
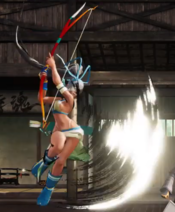
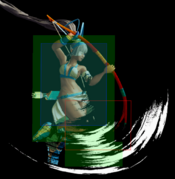
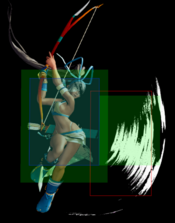
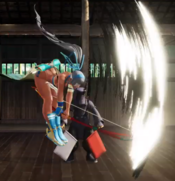
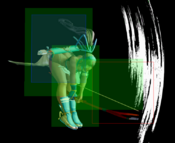
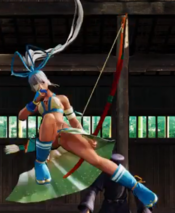
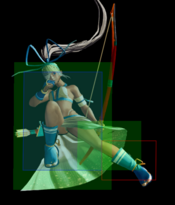
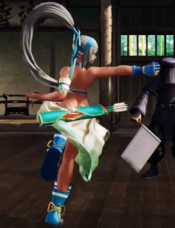
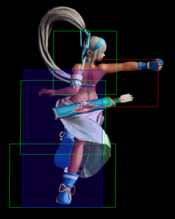
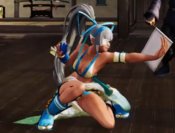
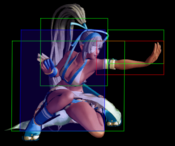
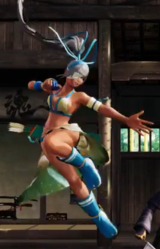
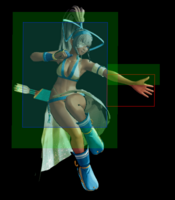
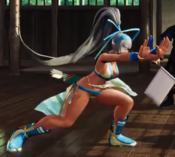
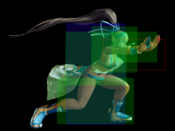
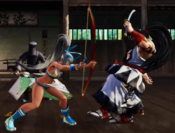
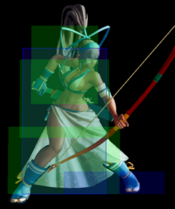
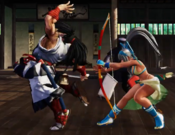
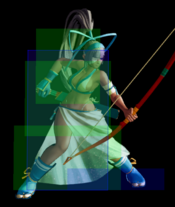
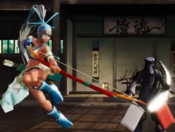
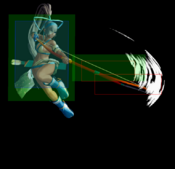
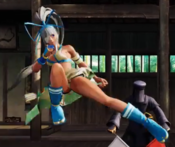
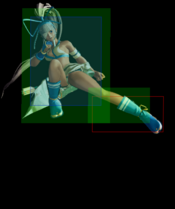
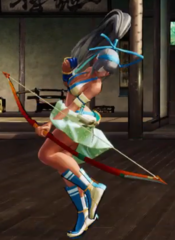
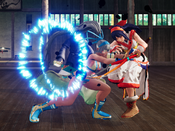
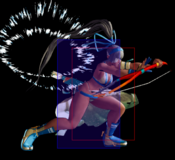
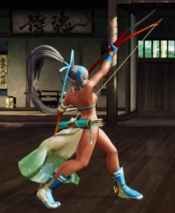
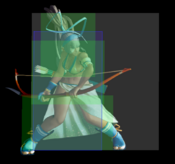
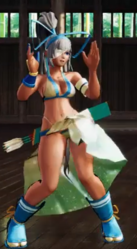
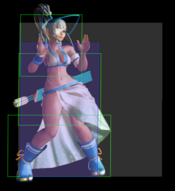
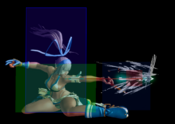
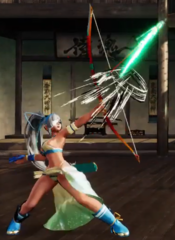
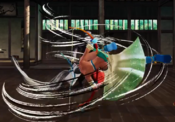
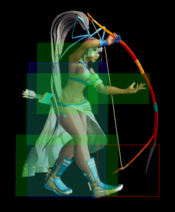
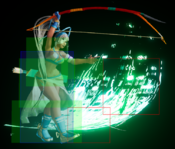
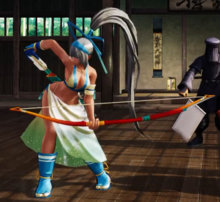
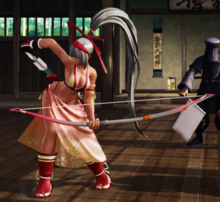
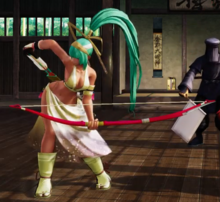
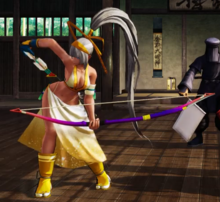
Mina Majikina
真鏡名 ミナ, Majikina Mina
|
- Damage Taken: 105%
- Rage Factor: 0.28
- Rage Duration: 12 seconds
- Jump: 46 frames (Average)
- Forward Walk Speed: 0.3 (Average)
- Back Walk Speed: 0.23 (Average)
- Dash Speed: 1.25 (Average)
- Back Dash: 33 frames
- Weapon Pickup / Drop: 40 / 31 frames
|
Introduction
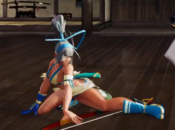
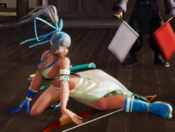
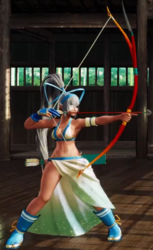
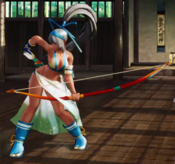
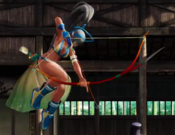
After spending her entire life being hounded for bringing a bow to swordfights, Mina finally takes matters into her own hands and decides to upgrade to a bow... with a short sword taped to the top limb.
In order to seal Chample's demonic power, Mina gave up some of her ability with her bow, leading to her new appearance and her new moveset. Rather than being the gimmicky part run-away/part mixup character she was previously in V Special, her current incarnation replaces all of her projectile normals with more traditional SamSho-styled normals, and puts her projectiles on a unique bow stance, making her into a more solid and traditional zoning character.
Playstyle
 Mina Majikina is a stance-based zoner with high mobility and strong buttons for every situation. Mina Majikina is a stance-based zoner with high mobility and strong buttons for every situation.
|
| Strengths |
Weaknesses
|
- Fantastic Zoning: Dominates the zoning game with low-commitment projectiles and two different high-profile options.
- Anti-Zoning Reflect: Her 236D absorbs projectiles and fires another of her own back at them. With 7 frame startup it's a reliable tool against zoners.
- Good Normals: Strong assortment of safe and long-range normals that lead to knockdowns.
- Good Run Speed: Great run speed and run normals for throw pressure.
- Amazing Pressure: Great lows, a far-range universal B+C and jump normals that are great for deep jump pressure and air-to-air exchanges.
|
- Low Damage: Generally a low-damage character.
- Lacking Anti-Airs in Stance: While she has some decent Anti-Airs (2A, 623D and sometimes 6D) her only option in stance is C Arrow. While not bad, her best Anti-Airs are still only accessible outside the stance.
- Poor Jump: Jump arc is high and narrow and jump normals have short range - hard to punish escape attempts without staying on the ground.
- Arrows Require Taking Risks: High arrow can easily be low profiled, requiring commitment to the more unsafe low arrow.
- Difficult Throw Combo: Optimal throw combo requires a difficult microwalk (microwalk 5B into WFT), though the 5B can be substituted for 66A for 50 less damage but being more consistent.
|
Gameplan
Mina has good options in all ranges and areas. Her arrows and her normals make her one of the longest range characters in the cast. Playing Mina is a game of in and out just like most of the characters. She isn't the sort of "in-your-face" character but her most damaging combos are set for close range, where most of her damages are from around mid range.
Neutral
Playing as Mina in neutral requires good control of spacing. Her 5B is her best normal. It's a great poke to stop a run-in, to punish in mid to close range converting into specials, or occasionally a good AA.
Her arrows are never meant to be spammed mindlessly, they are mostly used check on disrespectful attempts from the opponent. When the opponent is checked by arrows, she can take her steps to get in:
- Jump to air to air.
- 66A / 5B to check for dash-in attempt.
- 66B setup as a frame trap on punish attempt.
- Stay put to AA.
She has some good anti-air options. Her 2A is great if the close one doesn't come out. 623D has a great hitbox, the move is designed to be used only as an AA outside of combo. C arrows are great for AA as well, it almost never misses if the opponent did a jump attack. Her 6D is a great one too but is very unsafe on whiff.
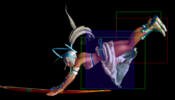
Mina has flips which is not used that much. Her back flip is for recoil cancel mostly. Her front flip is usually used when the opponent is cornered and you use the B version to flip to the wall and do a diving attack (usually 9C) for cross up or for baiting out something.
Her 236D is a great move as a project reflect (one of the better and more used ones). It also has ability to absorb Ruixiang's trap and Sogetsu's bubble, which gives her alternate options for the two match-ups.
Okizeme
Mina's Universal Overhead (5B+C) has great range, and serves a good tool for some damage and pressure on wake up. When spaced right, it's very hard to punish. Can be used with her 6D for some kind of high/low mix-up.
Another great option of her Oki is using her stance to beat the opponent. This is very likely to bait out a wake up DP or something with invul that has big recovery. This way can often lead to more damage than commiting to arrows alone.
Something else you can do (it works in neutral as well) is to use the A version of flip (214A) and land right next to the opponent, when they try to punish it, it's usually too late that you can set up for a grab / deflect / dodge.
Normal Moves
Far Slashes
5A
5A
|
| Damage
|
Guard
|
Startup
|
Active
|
Recovery
|
Total
|
Hit Adv
|
Block Adv
|
Guard Dmg
|
Cancel
|
Recoil
|
Deflectable
|
Unarmed
|
| 30
|
Mid
|
6
|
5
|
9
|
19
|
-1
|
-5
|
5
|
Yes
|
Yes
|
Yes
|
No
|
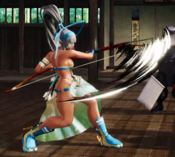
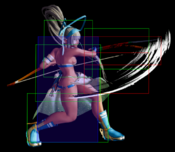
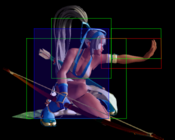
Short range cancelable light. Combos into 236D and 623D. Cannot cancel into 214D like 66A, but is much less minus on block.
|
|
Toggle Hitboxes Toggle Hitboxes
|
5B
5B
|
| Damage
|
Guard
|
Startup
|
Active
|
Recovery
|
Total
|
Hit Adv
|
Block Adv
|
Guard Dmg
|
Cancel
|
Recoil
|
Deflectable
|
Unarmed
|
| 80
|
Mid
|
10
|
4
|
18
|
31
|
-1
|
-12
|
10
|
Yes
|
Yes
|
Yes
|
No
|
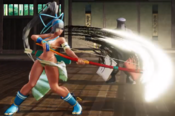
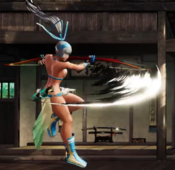
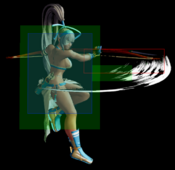
Really great far cancelable poke. Will combo into 214D from basically max range, making it a good punish option or hit confirm tool in neutral.
|
|
Toggle Hitboxes Toggle Hitboxes
|
5C
5C
|
| Damage
|
Guard
|
Startup
|
Active
|
Recovery
|
Total
|
Hit Adv
|
Block Adv
|
Guard Dmg
|
Cancel
|
Recoil
|
Deflectable
|
Unarmed
|
| 240
|
Mid
|
22
|
2
|
42
|
65
|
-2
|
-16
|
25
|
No
|
Yes
|
Yes
|
No
|
Nearly full screen heavy slash. The high amount of recoil blockstun makes it useful for recoil canceling; recoil canceling into 214C is a good way to create space to return to zoning.
|
|
Toggle Hitboxes Toggle Hitboxes
|
2A
2A
|
| Damage
|
Guard
|
Startup
|
Active
|
Recovery
|
Total
|
Hit Adv
|
Block Adv
|
Guard Dmg
|
Cancel
|
Recoil
|
Deflectable
|
Unarmed
|
| 30
|
Mid
|
9
|
5
|
10
|
23
|
-4
|
-5
|
5
|
Yes
|
Yes
|
Yes
|
No
|
Close range cancelable light. Combos into 236D and 623D. The angle makes it a good low-risk, low-reward anti-air, though be careful that you can get the close version of this normal if they jump at certain angles.
|
|
Toggle Hitboxes Toggle Hitboxes
|
2B
2B
|
| Damage
|
Guard
|
Startup
|
Active
|
Recovery
|
Total
|
Hit Adv
|
Block Adv
|
Guard Dmg
|
Cancel
|
Recoil
|
Deflectable
|
Unarmed
|
| 80
|
Low
|
10
|
5
|
24
|
38
|
-5
|
-12
|
10
|
No
|
No
|
No
|
No
|
The low-hitting property and the range makes it a good poke option, especially when used in tandem with 5BC.
|
|
Toggle Hitboxes Toggle Hitboxes
|
2C
2C
|
| Damage
|
Guard
|
Startup
|
Active
|
Recovery
|
Total
|
Hit Adv
|
Block Adv
|
Guard Dmg
|
Cancel
|
Recoil
|
Deflectable
|
Unarmed
|
| 160
|
Mid
|
18
|
4
|
27
|
48
|
-3
|
-28
|
25
|
No
|
Yes
|
Yes
|
No
|
Pretty standard heavy slash normal. Unlike many 2Cs, this does not hit low or knock down, making 5C preferable whenever possible for the better damage.
|
|
Toggle Hitboxes Toggle Hitboxes
|
Near Slashes
n.5C
n.5C
|
| Damage
|
Guard
|
Startup
|
Active
|
Recovery
|
Total
|
Hit Adv
|
Block Adv
|
Guard Dmg
|
Cancel
|
Recoil
|
Deflectable
|
Unarmed
|
| 200
|
Mid
|
19
|
3
|
28
|
49
|
-3
|
-28
|
25
|
No
|
Yes
|
Yes
|
No
|
Another pretty standard close heavy slash. This is Mina's highest damage close-range punish option without resources, though it doesn't knock down.
|
|
Toggle Hitboxes Toggle Hitboxes
|
n.2A
n.2A
|
| Damage
|
Guard
|
Startup
|
Active
|
Recovery
|
Total
|
Hit Adv
|
Block Adv
|
Guard Dmg
|
Cancel
|
Recoil
|
Deflectable
|
Unarmed
|
| 30
|
Mid
|
5
|
4
|
10
|
18
|
-1
|
-4
|
5
|
Yes
|
No
|
No
|
No
|
This normal exists to frustrate you while you're trying to get your actually useful anti-air normal. Combos into 236D and 623D.
|
|
Toggle Hitboxes Toggle Hitboxes
|
- All of Mina's other normals are identical regardless of proximity.
Kicks
5D
5D
|
| Damage
|
Guard
|
Startup
|
Active
|
Recovery
|
Total
|
Hit Adv
|
Block Adv
|
Guard Dmg
|
Cancel
|
Recoil
|
Deflectable
|
Unarmed
|
| 50
|
Mid
|
12
|
4
|
13
|
28
|
+2
|
0
|
5
|
No
|
No
|
No
|
Yes
|
Standing kick with good frame advantage on hit and on block.
|
|
Toggle Hitboxes Toggle Hitboxes
|
6D
6D Startup Startup On Hit/Block On Hit/Block On Whiff On Whiff
|
| Damage
|
Guard
|
Startup
|
Active
|
Recovery
|
Total
|
Hit Adv
|
Block Adv
|
Guard Dmg
|
Cancel
|
Recoil
|
Deflectable
|
Unarmed
|
| 50
|
Low
|
10
|
6
|
varies
|
varies
|
KD (+100)
|
-6
|
5
|
No
|
No
|
No
|
Yes
|
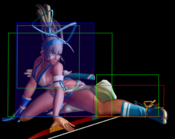
This normal hits low and will knock down like a sweep. On block, Mina will bounce off of the opponent and land far enough to be safe from Issens and Stance Breaks. On whiff however, Mina will fall over and be completely exposed to your opponent's favorite whiff punish. Use with caution.
|
|
Toggle Hitboxes Toggle Hitboxes
|
2D
2D
|
| Damage
|
Guard
|
Startup
|
Active
|
Recovery
|
Total
|
Hit Adv
|
Block Adv
|
Guard Dmg
|
Cancel
|
Recoil
|
Deflectable
|
Unarmed
|
| 20
|
Low
|
5
|
4
|
9
|
17
|
0
|
-3
|
5
|
No
|
No
|
No
|
Yes
|
Pretty standard crouching kick. Best used to check the opponent's movement up close or to apply minor pressure.
|
|
Toggle Hitboxes Toggle Hitboxes
|
3D
3D
|
| Damage
|
Guard
|
Startup
|
Active
|
Recovery
|
Total
|
Hit Adv
|
Block Adv
|
Guard Dmg
|
Cancel
|
Recoil
|
Deflectable
|
Unarmed
|
| 70
|
Low
|
9
|
12
|
31
|
51
|
KD (+82)
|
-22~-11
|
5
|
No
|
No
|
No
|
Yes
|
Very active forward moving sweep. Slightly more range and damage than 6D, but less safe on block. Mina will always enter a falling recovery animation similar to 6D's whiff animation but with less recovery time.
|
|
Toggle Hitboxes Toggle Hitboxes
|
Dash Normals
66A
66A
|
| Damage
|
Guard
|
Startup
|
Active
|
Recovery
|
Total
|
Hit Adv
|
Block Adv
|
Guard Dmg
|
Cancel
|
Recoil
|
Deflectable
|
Unarmed
|
| 30
|
Mid
|
5
|
7
|
17
|
28
|
-3
|
-12
|
5
|
Yes
|
Yes
|
Yes
|
No
|
Running 5A. One frame faster and more active, but slower to recover. Notably combos into 214D unlike her other lights, and is her safest route into WFT after throw at the cost of damage.
|
|
Toggle Hitboxes Toggle Hitboxes
|
66B
66B
|
| Damage
|
Guard
|
Startup
|
Active
|
Recovery
|
Total
|
Hit Adv
|
Block Adv
|
Guard Dmg
|
Cancel
|
Recoil
|
Deflectable
|
Unarmed
|
| 100
|
Mid
|
11
|
4
|
20
|
34
|
-3
|
-8
|
10
|
No
|
No
|
No
|
No
|
Being safe to deflects, this is a strong normal to use to check with out of her dash, though it is hard to make safe on block.
|
|
Toggle Hitboxes Toggle Hitboxes
|
66C
66C
|
| Damage
|
Guard
|
Startup
|
Active
|
Recovery
|
Total
|
Hit Adv
|
Block Adv
|
Guard Dmg
|
Cancel
|
Recoil
|
Deflectable
|
Unarmed
|
| 140
|
Mid
|
16
|
2
|
41
|
58
|
KD (+88)
|
-20
|
20
|
No
|
No
|
Yes
|
No
|
Huge range, but very unsafe on block. This is notably Mina's only heavy normal that knocks down on hit.
|
|
Toggle Hitboxes Toggle Hitboxes
|
66D
66D
|
| Damage
|
Guard
|
Startup
|
Active
|
Recovery
|
Total
|
Hit Adv
|
Block Adv
|
Guard Dmg
|
Cancel
|
Recoil
|
Deflectable
|
Unarmed
|
| 70
|
Low
|
10
|
9
|
22
|
40
|
KD (+94)
|
-14~-6
|
5
|
No
|
No
|
No
|
Yes
|
Standard dashing kick normal. Safer alternative to 6D or 3D if you're looking for a low check knockdown.
|
|
Toggle Hitboxes Toggle Hitboxes
|
Air Normals
j.A
j.A
|
| Damage
|
Guard
|
Startup
|
Active
|
Recovery
|
Total
|
Hit Adv
|
Block Adv
|
Guard Dmg
|
Cancel
|
Recoil
|
Deflectable
|
Unarmed
|
| 50
|
High
|
7
|
3
|
-
|
-
|
-
|
-
|
5
|
No
|
No
|
No
|
No
|
Quick jumping light normal. Good twitch reaction air-to-air mainly.
|
|
Toggle Hitboxes Toggle Hitboxes
|
j.B
j.B
|
| Damage
|
Guard
|
Startup
|
Active
|
Recovery
|
Total
|
Hit Adv
|
Block Adv
|
Guard Dmg
|
Cancel
|
Recoil
|
Deflectable
|
Unarmed
|
| 100
|
High
|
10
|
5
|
-
|
-
|
-
|
-
|
10
|
No
|
No
|
No
|
No
|
Mina's best air-to-air normal, has amazing hitbox priority similar to Rimururu or Kazuki's j.C's. Also her go-to crossup option.
|
|
Toggle Hitboxes Toggle Hitboxes
|
j.C
j.C
|
| Damage
|
Guard
|
Startup
|
Active
|
Recovery
|
Total
|
Hit Adv
|
Block Adv
|
Guard Dmg
|
Cancel
|
Recoil
|
Deflectable
|
Unarmed
|
| 150
|
High
|
15
|
6
|
-
|
-
|
-
|
-
|
20
|
No
|
No
|
No
|
No
|
Mina's highest damage jump normal and her go-to normal for deep jump-ins. This normal can cross-up in certain contexts, but is much more difficult to set up for such than j.B.
|
|
Toggle Hitboxes Toggle Hitboxes
|
j.D
j.D
|
| Damage
|
Guard
|
Startup
|
Active
|
Recovery
|
Total
|
Hit Adv
|
Block Adv
|
Guard Dmg
|
Cancel
|
Recoil
|
Deflectable
|
Unarmed
|
| 30
|
High
|
6
|
9
|
-
|
-
|
-
|
-
|
5
|
No
|
No
|
No
|
Yes
|
Very active air kick, useful as a defensive air-to-air option.
|
|
Toggle Hitboxes Toggle Hitboxes
|
Unarmed Normals
u.5S
u.5S
|
| Damage
|
Guard
|
Startup
|
Active
|
Recovery
|
Total
|
Hit Adv
|
Block Adv
|
Guard Dmg
|
Cancel
|
Recoil
|
Deflectable
|
Unarmed
|
| 50
|
Mid
|
5
|
7
|
15
|
26
|
-1
|
-6
|
5
|
No
|
No
|
No
|
Only
|
Mina does a very weak looking backfist.
|
|
Toggle Hitboxes Toggle Hitboxes
|
u.2S
u.2S
|
| Damage
|
Guard
|
Startup
|
Active
|
Recovery
|
Total
|
Hit Adv
|
Block Adv
|
Guard Dmg
|
Cancel
|
Recoil
|
Deflectable
|
Unarmed
|
| 30
|
Mid
|
5
|
3
|
11
|
18
|
-1
|
-4
|
5
|
Yes
|
No
|
No
|
Only
|
Basically the same as her close 2A while armed. Can still combo into 623D while disarmed.
|
|
Toggle Hitboxes Toggle Hitboxes
|
ju.S
ju.S
|
| Damage
|
Guard
|
Startup
|
Active
|
Recovery
|
Total
|
Hit Adv
|
Block Adv
|
Guard Dmg
|
Cancel
|
Recoil
|
Deflectable
|
Unarmed
|
| 50
|
High
|
6
|
8
|
-
|
-
|
-
|
-
|
5
|
No
|
No
|
No
|
Only
|
Very weak looking jump slap. Hits higher than her j.D.
|
|
Toggle Hitboxes Toggle Hitboxes
|
u.66S
u.66S
|
| Damage
|
Guard
|
Startup
|
Active
|
Recovery
|
Total
|
Hit Adv
|
Block Adv
|
Guard Dmg
|
Cancel
|
Recoil
|
Deflectable
|
Unarmed
|
| 50
|
Mid
|
11
|
5
|
15
|
30
|
KD
|
-4~0
|
5
|
No
|
No
|
No
|
Only
|
Knocks down like most unarmed dashing slash normals. Use the knockdown to pick up your bow.
|
|
Toggle Hitboxes Toggle Hitboxes
|
Universal Mechanics
Guard Break
Guard Break (Throw)
5C+D / 6C+D
(Forward Throw) 4C+D
(Back Throw) 4C+D
(Back Throw)
|
| Version
|
Damage
|
Guard
|
Startup
|
Active
|
Recovery
|
Total
|
Hit Adv
|
Block Adv
|
Guard Dmg
|
Cancel
|
Recoil
|
Deflectable
|
Unarmed
|
| Forward
|
0
|
Throw
|
3
|
1
|
71
|
74
|
+20
|
N/A
|
-
|
No
|
No
|
No
|
Yes
|
|
|
| Back
|
0
|
Throw
|
5
|
1
|
69
|
74
|
+25
|
N/A
|
-
|
No
|
No
|
No
|
Yes
|
|
|
|
Toggle Hitboxes Toggle Hitboxes
|
Surprise Attack
Surprise Attack (Overhead)
5B+C Armed Armed Unarmed Unarmed
|
| Version
|
Damage
|
Guard
|
Startup
|
Active
|
Recovery
|
Total
|
Hit Adv
|
Block Adv
|
Guard Dmg
|
Cancel
|
Recoil
|
Deflectable
|
Unarmed
|
| Armed
|
70
|
High
|
20
|
3
|
25
|
47
|
+1
|
-15
|
10
|
No
|
No
|
No
|
No
|
Mina's universal overhead. The amazing range on this UOH makes it useful as a poke in neutral, or as a low-risk, far range mixup, similar to Jubei's UOH. This can be used in tandem with 2B to create rather annoying mid-range mixups.
|
| Unarmed
|
70
|
High
|
20
|
2
|
22
|
43
|
KD (+100)
|
-11
|
10
|
No
|
No
|
No
|
Only
|
Forward moving hopkick. Mina's UOH knocks down while unarmed, giving you a prime oppurtunity to re-arm yourself.
|
|
Toggle Hitboxes Toggle Hitboxes
|
Dodge
Dodge
5A+B
|
| Damage
|
Guard
|
Startup
|
Active
|
Recovery
|
Total
|
Hit Adv
|
Block Adv
|
Guard Dmg
|
Cancel
|
Recoil
|
Deflectable
|
Unarmed
|
| -
|
-
|
1
|
16
|
22
|
38
|
-
|
-
|
-
|
-
|
-
|
-
|
Yes
|
Universal dodge.
Complete Invincibility from frames 1 to 10.
Strike Invincibility from frames 11 to 16.
|
|
Stance Break
Stance Break
A+B during Just Defense
|
| Damage
|
Guard
|
Startup
|
Active
|
Recovery
|
Total
|
Hit Adv
|
Block Adv
|
Guard Dmg
|
Cancel
|
Recoil
|
Deflectable
|
Unarmed
|
| 0
|
Mid
|
5
|
10
|
38
|
52
|
KD
|
-24
|
-
|
No
|
-
|
-
|
Yes
|
|
|
|
Toggle Hitboxes Toggle Hitboxes
|
Counter / Blade Catch
Counter / Blade Catch
236A+B Counter Counter Blade Catch Blade Catch
|
| Version
|
Damage
|
Guard
|
Startup
|
Active
|
Recovery
|
Total
|
Hit Adv
|
Block Adv
|
Guard Dmg
|
Cancel
|
Recoil
|
Deflectable
|
Unarmed
|
| Armed
|
0
|
N/A
|
2
|
12
|
33
|
46
|
+35~+59
|
N/A
|
-
|
N/A
|
N/A
|
N/A
|
No
|
Universal counter. Allows you to follow up with a guaranteed attack of your own. The amount of time you have to followup depends on the strength of the attack you counter, with heavy attacks staggering the opponent for the longest amount of time. Additionally, if you counter a heavy slash or a running slash, your opponent will be disarmed.
|
| Unarmed
|
0
|
N/A
|
2
|
11
|
10
|
22
|
KD
|
N/A
|
-
|
N/A
|
N/A
|
N/A
|
Only
|
Universal counter. While disarmed, your counter will disarm and knock away your opponent regardless of slash level countered.
|
|
Toggle Hitboxes Toggle Hitboxes
|
Rage Explosion
Rage Explosion
5A+B+C
|
| Damage
|
Guard
|
Startup
|
Active
|
Recovery
|
Total
|
Hit Adv
|
Block Adv
|
Guard Dmg
|
Cancel
|
Recoil
|
Deflectable
|
Unarmed
|
| 0
|
Unblockable
|
21
|
3
|
35
|
58
|
0
|
-
|
-
|
-
|
-
|
-
|
No
|
Unblockable pushback attack.
|
|
Toggle Hitboxes Toggle Hitboxes
|
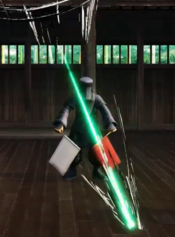
Lightning Blade
Lightning Blade (Issen)
5A+B+C during Rage Explosion Chample celebrating your demise. A fate worse than death. Chample celebrating your demise. A fate worse than death.
|
| Damage
|
Guard
|
Startup
|
Active
|
Recovery
|
Total
|
Hit Adv
|
Block Adv
|
Guard Dmg
|
Cancel
|
Recoil
|
Deflectable
|
Unarmed
|
| 300~709
|
Mid
|
9
|
8
|
65
|
-
|
KD
|
-44
|
-
|
No
|
No
|
No
|
No
|
Has full invincibility 1~16 and can anti-air. Damage scales up based on remaining health. Chample will sometimes appear after Mina lands an Issen to be cute.
|
|
Toggle Hitboxes Toggle Hitboxes
|
Command Moves
Wall Jump
Wall Jump
9 (near wall) Wall Jump Wall Jump
|
| Damage
|
Guard
|
Startup
|
Active
|
Recovery
|
Total
|
Hit Adv
|
Block Adv
|
Guard Dmg
|
Cancel
|
Recoil
|
Deflectable
|
Unarmed
|
| -
|
-
|
-
|
-
|
-
|
-
|
-
|
-
|
-
|
-
|
-
|
-
|
Yes
|
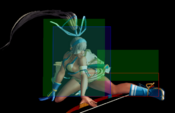
Mina can jump off walls, or simply the current edge of the screen. Doing so will increase jump height and change the landing trajectory, making it difficult for the opponent to position and time an anti-air. Mina can also wall jump after her 214S if the flip trajectory causes her to hit a wall; doing this can set up ambiguous crossups and make her very difficult to anti-air.
|
|
Special Moves
Vanising Soul Stance
Vanising Soul Stance
236S Charging arrow Charging arrow Overcharged Overcharged
|
| Version
|
Damage
|
Guard
|
Startup
|
Active
|
Recovery
|
Total
|
Hit Adv
|
Block Adv
|
Guard Dmg
|
Cancel
|
Recoil
|
Deflectable
|
Unarmed
|
| Uncharged
|
-
|
-
|
19 [15]
|
-
|
-
|
-
|
-
|
-
|
-
|
No
|
No
|
No
|
No
|
| Version
|
Damage
|
Guard
|
Startup
|
Active
|
Recovery
|
Total
|
Hit Adv
|
Block Adv
|
Guard Dmg
|
Cancel
|
Recoil
|
Deflectable
|
Unarmed
|
| Level 1
|
-
|
-
|
45 [41]
|
-
|
-
|
-
|
-
|
-
|
-
|
No
|
No
|
No
|
No
|
| Version
|
Damage
|
Guard
|
Startup
|
Active
|
Recovery
|
Total
|
Hit Adv
|
Block Adv
|
Guard Dmg
|
Cancel
|
Recoil
|
Deflectable
|
Unarmed
|
| Level 2
|
-
|
-
|
85 [71]
|
-
|
-
|
-
|
-
|
-
|
-
|
No
|
No
|
No
|
No
|
| Version
|
Damage
|
Guard
|
Startup
|
Active
|
Recovery
|
Total
|
Hit Adv
|
Block Adv
|
Guard Dmg
|
Cancel
|
Recoil
|
Deflectable
|
Unarmed
|
| Level 3
|
-
|
-
|
135 [101]
|
-
|
-
|
-
|
-
|
-
|
-
|
No
|
No
|
No
|
No
|
| Version
|
Damage
|
Guard
|
Startup
|
Active
|
Recovery
|
Total
|
Hit Adv
|
Block Adv
|
Guard Dmg
|
Cancel
|
Recoil
|
Deflectable
|
Unarmed
|
| Overcharge
|
100
|
Mid
|
176 [182] + 2
|
-
|
88
|
266 [272]
|
-64~-55
|
-63~-54
|
-
|
No
|
No
|
No
|
No
|
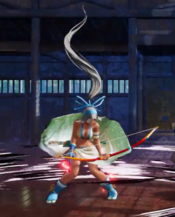
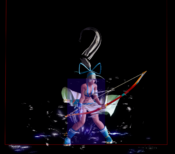
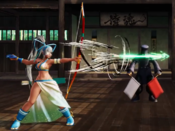
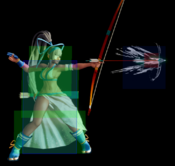
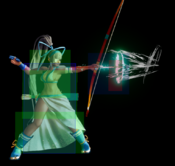
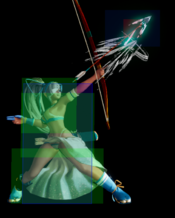
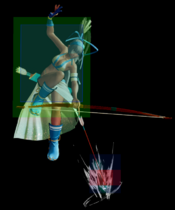
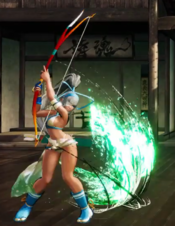
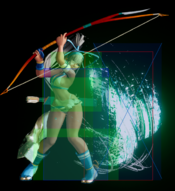
Mina's bow stance. Gone are all of her projectile normals, in favor of placing her bow-wielding abilities behind a committal stance. You can charge the your arrow up to 3 levels, and all angles from the stance can be charged. Charging will increase the damage of the fired arrow and improve the frame advantage on hit and block for Mina. Charging past the 3rd level will cause Mina to release an arrow that does the same damage as the level 1 charge arrow, but is very punishable on hit and block. While in rage, her arrows charge faster and have additional hitstun and blockstun, along with the normal rage damage buff.
|
|
Drop Stance
Drop Stance
236S (after Vanising Soul Stance)
|
| Damage
|
Guard
|
Startup
|
Active
|
Recovery
|
Total
|
Hit Adv
|
Block Adv
|
Guard Dmg
|
Cancel
|
Recoil
|
Deflectable
|
Unarmed
|
| -
|
-
|
-
|
-
|
-
|
29
|
-
|
-
|
-
|
No
|
No
|
No
|
No
|
Mina re-sheathes her arrow and cancels her stance. The cancel is relatively fast and can be used to bait some anti-projectile responses from your opponent (Shiki's SSM, for example), play mindgames after a recoil cancel or just to stay safe.
|
|
Mortal Missile
Mortal Missile
A (after Vanising Soul Stance) uncharged/overcharged levels 1~3
|
| Version
|
Damage
|
Guard
|
Startup
|
Active
|
Recovery
|
Total
|
Hit Adv
|
Block Adv
|
Guard Dmg
|
Cancel
|
Recoil
|
Deflectable
|
Unarmed
|
| Uncharged
|
80
|
Mid
|
3
|
-
|
-
|
37
|
0
|
-4
|
3
|
No
|
No
|
No
|
No
|
| Level 1
|
100
|
Mid
|
3
|
-
|
-
|
37
|
+2
|
-2
|
5
|
No
|
No
|
No
|
No
|
| Level 2
|
200
|
Mid
|
3
|
-
|
-
|
37
|
+6
|
+2
|
7
|
No
|
No
|
No
|
No
|
| Level 3
|
300
|
Mid
|
3
|
-
|
-
|
32
|
KD (+112)
|
+6
|
10
|
No
|
No
|
No
|
No
|
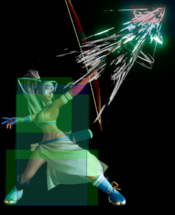
Mina fires an arrow at about shoulder height. Most characters in the game can crouch under the uncharged version, but charging to just level 1 will make the hitbox big enough to hit crouchers. This arrow will go over most ground-based projectiles without clashing so it can be useful in fireball wars, or as a situational far anti-air. The level 2 and level 3 versions are plus on block, and the level 3 version will knock down.
|
|
Toggle Hitboxes Toggle Hitboxes
|
Geo Drive
Geo Drive
B (after Vanising Soul Stance)
|
| Version
|
Damage
|
Guard
|
Startup
|
Active
|
Recovery
|
Total
|
Hit Adv
|
Block Adv
|
Guard Dmg
|
Cancel
|
Recoil
|
Deflectable
|
Unarmed
|
| Uncharged
|
70
|
Low
|
13
|
-
|
-
|
42
|
-7
|
-11
|
3
|
No
|
No
|
No
|
No
|
| Level 1
|
90
|
Low
|
13
|
-
|
-
|
42
|
-2
|
-9
|
5
|
No
|
No
|
No
|
No
|
| Level 2
|
120
|
Low
|
13
|
-
|
-
|
42
|
+3
|
-5
|
7
|
No
|
No
|
No
|
No
|
| Level 3
|
180
|
Low
|
13
|
-
|
-
|
42
|
+11
|
+5
|
10
|
No
|
No
|
No
|
No
|
Mina crouches and fires an arrow at about calf height. This arrow has slower startup than the A arrow, but will not whiff on crouchers and will hit low. This will likely be your main go-to angle to use while zoning as it will catch opponents walking or dashing more easily than the A arrow. This arrow will clash with other ground-based projectiles, unlike the A arrow. The level 3 version is plus on block, but will not knock down, unlike the A version.
|
|
Toggle Hitboxes Toggle Hitboxes
|
Heavenly Precipice
Heavenly Precipice
C (after Vanising Soul Stance) uncharged levels 1~3
|
| Version
|
Damage
|
Guard
|
Startup
|
Active
|
Recovery
|
Total
|
Hit Adv
|
Block Adv
|
Guard Dmg
|
Cancel
|
Recoil
|
Deflectable
|
Unarmed
|
| Uncharged
|
70
|
High
|
12
|
-
|
-
|
48
|
+23
|
+19
|
3
|
No
|
No
|
No
|
No
|
| Level 1
|
70
|
High
|
12
|
-
|
-
|
48
|
+23
|
+19
|
5
|
No
|
No
|
No
|
No
|
| Level 2
|
150
|
N/A
|
12
|
-
|
-
|
48
|
KD
|
N/A
|
-
|
No
|
No
|
No
|
No
|
| Level 3
|
300
|
N/A
|
12
|
-
|
-
|
48
|
KD
|
N/A
|
-
|
No
|
No
|
No
|
No
|
Mina aims at an angle upwards and fires an arrow towards the sky. The uncharged and level 1 versions will fall back down, like her old far 5A, and will hit overhead while falling back down. Up close, these versions of the arrow will also hit on a standing Earthquake. The level 2 and 3 versions will only hit airborne opponents, regardless of standing height and will not come back down.
[Note: The hit and block advantage listed for the uncharged and level 1 arrows are for when they come back down on the opponent's head, and not up close on a tall standing opponent.]
|
|
Toggle Hitboxes Toggle Hitboxes
|
Shooting Star
Shooting Star
4/5/6D (after Vanising Soul Stance)
|
| Damage
|
Guard
|
Startup
|
Active
|
Recovery
|
Total
|
Hit Adv
|
Block Adv
|
Guard Dmg
|
Cancel
|
Recoil
|
Deflectable
|
Unarmed
|
| -
|
-
|
6
|
-
|
20
|
70
|
-
|
-
|
-
|
No
|
No
|
No
|
No
|
Mina jumps while continuing to prime her arrow. The direction pressed with the D button will determine the direction she jumps in (e.g. 4D jumps back). You are not required to fire an arrow after jumping, but there is a very long and punishable landing recovery if an arrow is not fired; firing an arrow will cut the landing recovery in half.
|
|
Shooting Star - Fire Arrow
Shooting Star - Fire Arrow
S (after Shooting Star)
|
| Version
|
Damage
|
Guard
|
Startup
|
Active
|
Recovery
|
Total
|
Hit Adv
|
Block Adv
|
Guard Dmg
|
Cancel
|
Recoil
|
Deflectable
|
Unarmed
|
| Uncharged
|
70
|
High
|
3
|
-
|
14
|
-
|
-5
|
-16
|
5
|
No
|
No
|
No
|
No
|
| Level 1
|
90
|
High
|
3
|
-
|
14
|
-
|
-9
|
-16
|
7
|
No
|
No
|
No
|
No
|
| Level 2
|
120
|
High
|
3
|
-
|
14
|
-
|
-9
|
-17
|
10
|
No
|
No
|
No
|
No
|
| Level 3
|
160
|
High
|
3
|
-
|
14
|
-
|
KD/-1
|
-17
|
15
|
No
|
No
|
No
|
No
|
Mina fires an arrow downwards at an angle. Using a different slash button will not change the angle. This arrow can be used as a situational air-to-air or just as a method to harass an opponent who has been sufficiently conditioned by her grounded arrows.
Level 3 arrows will knock down opponent when arrow is shot when Mina is rising during her jump, but will not down opponent when it's shot during the fall of Mina's jump.
|
|
Toggle Hitboxes Toggle Hitboxes
|
Yuurii's Whisper
Yuurii's Whisper
214S
|
| Version
|
Damage
|
Guard
|
Startup
|
Active
|
Recovery
|
Total
|
Hit Adv
|
Block Adv
|
Guard Dmg
|
Cancel
|
Recoil
|
Deflectable
|
Unarmed
|
| A
|
-
|
-
|
-
|
-
|
-
|
50+10 frames after landing
|
-
|
-
|
-
|
No
|
No
|
No
|
No
|
| B
|
-
|
-
|
-
|
-
|
-
|
75+21 frames after landing
|
-
|
-
|
-
|
No
|
No
|
No
|
No
|
| C
|
-
|
-
|
-
|
-
|
-
|
73+21 frames after landing
|
-
|
-
|
-
|
No
|
No
|
No
|
No
|
Mina backflips. Unlike her old 623S in V Special, she will not fire an arrow at the end of the backflip, instead simply landing without attacking. The A version will flip forward about 1/3rd of the screen, the B version will flip almost full screen, and the C version will flip backwards almost full screen. The landing recovery can be canceled into Mina's bow stance, but not into any other special moves. Being frame 1 airborne, the move can be used defensively on a read against a throw as an alternative to dodge. The C version can be used after a recoil to create space as well. If Mina touches a wall while flipping, she can cancel the flip and jump off of the wall instead, which allows her to create some tricky jump angles that are difficult to block.
|
|
Bad Weather
Bad Weather
623D
|
| Damage
|
Guard
|
Startup
|
Active
|
Recovery
|
Total
|
Hit Adv
|
Block Adv
|
Guard Dmg
|
Cancel
|
Recoil
|
Deflectable
|
Unarmed
|
| 120 (80, 40)
|
Mid
|
11
|
4
|
21 (landing)
|
62+21 frames after landing
|
KD (+79)
|
-36
|
12
|
No
|
No
|
No
|
Yes
|
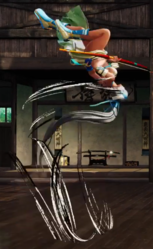
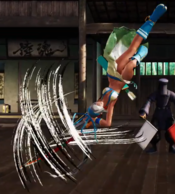
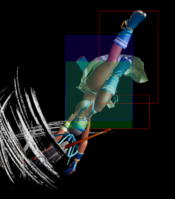
Mina kicks upwards in a DP-like fashion. While the move has no invincibility at all, it does low profile for part of the startup time and is very disjointed once active. It combos from all of her cancelable normals, making it her preferred followup at close range and in the corner after a forward throw.
|
|
Toggle Hitboxes Toggle Hitboxes
|
Ichimi Instincts
Ichimi Instincts
236D
|
| Damage
|
Guard
|
Startup
|
Active
|
Recovery
|
Total
|
Hit Adv
|
Block Adv
|
Guard Dmg
|
Cancel
|
Recoil
|
Deflectable
|
Unarmed
|
| 60
|
Mid
|
7
|
4
|
31
|
41
|
KD (+91)
|
-22
|
15
|
No
|
No
|
No
|
No
|
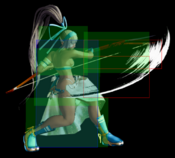
Mina creates an energy wave with her bow that will absorb projectiles and fire back one of her own. Reflects frames 7-13. The fast startup makes it relatively easy to use on reaction to a fireball. The returning projectile will rarely be fast enough to punish the opponent, but Mina can approach or set up behind it somewhat safely. Curiously, this reflect also works on non-traditional projectiles such as Wu-Ruixiang's traps or animal "projectiles" like Poppy and Mamahaha. The fast startup also makes it her fastest recoil option, in situations where you might want to beat a slow response from your opponent.
|
|
Toggle Hitboxes Toggle Hitboxes
|
Prophecy of Arabi
Prophecy of Arabi
214D
|
| Damage
|
Guard
|
Startup
|
Active
|
Recovery
|
Total
|
Hit Adv
|
Block Adv
|
Guard Dmg
|
Cancel
|
Recoil
|
Deflectable
|
Unarmed
|
| 100
|
Mid
|
14
|
2
|
32
|
47
|
KD (+97)
|
-15
|
20
|
No
|
No
|
No
|
No
|
Mina swings around her bow and kicks the opponent. This special is her main midscreen confirm, comboing from 5B even from max range. When well spaced, this can be somewhat troublesome for some characters to punish, though most characters can use a dash normal or dash throw to punish always.
Foot invincibility from frames 6 to 35.
|
|
Toggle Hitboxes Toggle Hitboxes
|
Supers
Weapon Flipping Technique
Sungan's Paranoia
236B+C
|
| Damage
|
Guard
|
Startup
|
Active
|
Recovery
|
Total
|
Hit Adv
|
Block Adv
|
Guard Dmg
|
Cancel
|
Recoil
|
Deflectable
|
Unarmed
|
| 60+260(384,448)
|
Mid
|
1+10
|
3
|
54
|
67
|
KD
|
-44
|
-
|
-
|
-
|
No
|
No
|
Mina's WFT. Hitbox on frame 10 is very small, gains full range on frame 11. Will combo from most of her cancelable normals, but the range makes it somewhat tricky to combo into after throw. A microwalk 5B after throw into WFT is optimal, or 66A can be substituted for consistency at the cost of 50 damage. This WFT can also be used as a situational anti-air due to its large hitbox and speed, but is still prone to trading, and the opponent will not be disarmed unless the full animation plays.
|
|
Toggle Hitboxes Toggle Hitboxes
|
Super Special Move
Yanamun's Wail
641236C+D
|
| Damage
|
Guard
|
Startup
|
Active
|
Recovery
|
Total
|
Hit Adv
|
Block Adv
|
Guard Dmg
|
Cancel
|
Recoil
|
Deflectable
|
Unarmed
|
| 640
|
Mid
|
10+20
|
2
|
75
|
106
|
-
|
-66
|
-
|
-
|
-
|
-
|
No
|
Mina's SSM, available once per match. Basically a normal SSM, you probably won't use this much outside of a DP punish or after a good deflect. Enters different animations on block or whiff, but both are extremely punishable.
Complete invincibility from frames 1 to 10.
|
|
Toggle Hitboxes Toggle Hitboxes
|
Combos
Midscreen
- (5A/2A/66A) xx 623D
Basic combo from lights. Have to be close for 623D to combo.
- 5B xx 214D
Mid range combo.
- (5CD/4CD)...
- (66A/5B) xx 214D
Normal throw combo.
- (66A/5B) xx WFT
After forward throw midscreen, microwalk for 5B xx WFT to combo.
- 2C
- 66C
- 66A xx 623D
A proper dash in will let you connect 623D midscreen against most characters.
- 5B xx 236S~A
5B can combo into an immediate A arrow on standing opponents, but this is rarely preferable to a knockdown.
- 5C
Max damage midscreen without rage from back throw but no knock down.
- Deep j.C...
- 5C / n.5C
Universal deep j.C follow up.
- (66A/5B) xx 214D
Normal jump-in combo.
- (66A/5B) xx WFT
Have to be close for 5B xx WFT to combo.
- 2C
- 66C
- 66A xx 623D
A proper dash in will let you connect 623D midscreen against most characters.
- 5B xx 236S~A
5B can combo into an immediate A arrow on standing opponents, but this is rarely preferable to a knockdown.
Corner
- (5CD/j.C) 5B xx 623D
Max damage corner forward throw/jump-in combo. Jump-in combo can work midscreen from specific angles.
Arrow Combos
- Level 3 Low Arrow...
- 5B xx 214D
Works midscreen but has to be right next to the opponent.
- 5B xx 623D / WFT
Corner only so DP and WFT aren't out of range.
- Lighting Blade
Issen combo.
- Level 3 Jump Arrow...
While Mina is falling of her jump...
- 5B xx 214D / 623D / WFT
DP and WFT might whiff if the 5B isn't deep enough.
- Lighting Blade
Issen combo.
- Level 0/1 High Arrow...
If the opponent is grounded, like they blocked low for some reason...
- 66A xx 214D / 623D / WFT
DP and WFT might whiff if the 66A isn't deep enough.
- Lighting Blade
Issen combo.
Guard Crush
- n.5C...
After recovery...
- SSM
SSM follow up. (Be careful with opponent bursting to avoid it)
- 5C...
After recovery...
- 5C
Max damage without rage but no knock down.
- n.5C / 5C...
Cancel recovery...
- Lighting Blade
Universal Issen combo.
- 214A...
Flip next to opponent...
- 5B xx 623D / WFT
Most damaging follow up / WFT combo.
Videos
Colors
External Links
