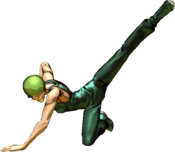
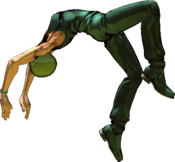
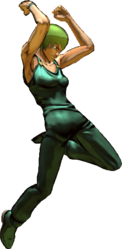
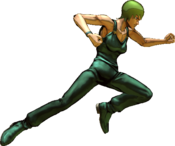
JoJo's Bizarre Adventure: All-Star Battle R/Foo Fighters

From Mizuumi Wiki
Jump to navigation Jump to search

Introduction

Insert character introduction here.

  • Move like F.F.: At the cost of a Plankton Stock, Foo Fighters can cancel certain special moves into each other.
Playstyle
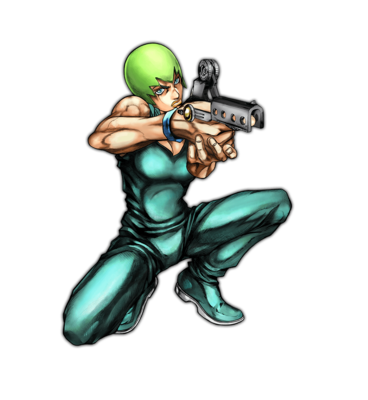
JJASBR FF Small Icon.png Foo Fighters is a Stand character who utilizes evasive maneuvers and special cancels to create relentless pressure.
Pros Cons
  • Cheap Combos: Foo Fighters' combos are very self-sufficient and build a lot of meter.
  • Versatile Strategy: Foo Fighters' kit allows for zoner or rushdown vortex playstyles, being able to switch gameplans on the fly depending on the matchup or situation.
  • Strong Defensive Options: Foo Fighters can escape pressure and setups with "Emergency Evade", unique meterless defensive options that can serve as either an attack or an evasive tool.
  • Guard Break: The only character in the game with a special move that can perform an instant Guard Break, which is an integral part to Foo Fighters' gameplan.
  • Movement: Foo Fighters has good movement in general, with decent speed and special moves that let her move around the stage.
  • Mid-Range Control: Foo Fighters is able to control neutral at mid-range thanks to her zoning and the threat of charged shots.
  • Hard Execution: Optimal combos require tight links and an overall high execution and reaction. They're also inconsistent and sub-optimal variants might be needed against Stand On characters.
  • Unstable Offense: While her normals are all fantastic on their own, none of them can be used to cross-up the opponent, resulting in a slightly less effective pressure game from up-close. Additionally, Foo Fighters lacks special moves that provide a hard knockdown, which can make specific matchups very difficult.
  • Projectile-Based Moveset: Aside from one special move, the rest of Foo Fighters' kit is entirely projectile-based, which can make matchups against characters who negate projectiles particularly difficult.
  • Low Damage: Due to her kit's nature, Foo Fighters doesn't have long combos; the bulk of her damage comes from her GHA, dealing below average damage otherwise.

Move like F.F.

The Plankton Icons

Foo Fighters possesses the ability to chain and combine projectile-based special moves, allowing the player to rapidly string attacks together in quick succession, the only exception being that it's impossible to chain a special move into itself.

The following moves are attached to the "Move like F.F." system:

Foo Fighters has 5 Plankton Stocks located above the HH Gauge. When canceling special moves into each other, one Plankton Stock is consumed per cancel performed; this is also visualized by a black effect representing shedding a visible plankton from her body. If "I've overcome my weakness." or "Get Weather Report to make it rain." manage to successfully complete, Plankton Stocks will replenished back to maximum.

Stats

Style Health Low Health Mode Hashtag(s)
Stand 900 Rumble #ASBR_FOO
#ASBR_FF

Move List

Normal Moves

5L
5L
JJASBR FF 5L.png
Empi Uchi
Empi Uchi
Damage Guard Startup Active Recovery Block Adv. Hit Adv.
12 Mid 4 - - -2 +2

A quick elbow strike.

  • The fastest normal.
  • Very good for stagger pressure.
  • Can be used for some advanced links.
5M
5M
JJASBR FF 5M.png
Aka.Haito
Aka.Haito
Damage Guard Startup Active Recovery Block Adv. Hit Adv.
21 Mid 6 - - -6 -2

A Ridge Hand Strike.

  • Mainly used as a combo filler.
  • It can also be used in specific juggles to combo into GHA when 5H isn't available.
5H
5H
JJASBR FF 5H.png
Aka.Nukite
Aka.Nukite
Damage Guard Startup Active Recovery Block Adv. Hit Adv.
33 Mid 10 - - -8 -2

A spear hand thrust.

  • Moves Foo Fighters forward a very small distance, which can help to connect some special moves.
  • Mainly used to create enough hitstun to go into other special moves.
2L
2L
JJASBR FF 2L.png
Damage Guard Startup Active Recovery Block Adv. Hit Adv.
11 Low 6 - - -2 +2

A quick crouching poke.

  • Used mostly for point-blank pressure and some links.
2M
2M
JJASBR FF 2M.png
Damage Guard Startup Active Recovery Block Adv. Hit Adv.
20 Low 8 - - -6 -2

A long range leg sweep.

  • The best poke, but might be hard to convert at max distance.
  • Can low profile some attacks.
2H
2H
JJASBR FF 2H.png
Damage Guard Startup Active Recovery Block Adv. Hit Adv.
35 Low 10 - - -10 HKD

A spinning back kick performed from a crouching position.

  • Launches the opponent away on hit, and causes a hard knockdown.
  • The best combo finisher to refill Plankton Stocks or chain into HHA.
1H
1H
Emergency Evade
JJASBR FF 1H.png
Damage Guard Startup Active Recovery Block Adv. Hit Adv.
21 Mid 10 - - -14 -

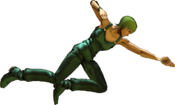
A back handspring flip.

  • The flip begins with an attack.
  • Invincible from activation until the animation ends.
  • The initial attack, when followed by 214L, is an essential starter for Foo Fighters' juggle combos.
3H
3H
Emergency Evade
JJASBR FF 3H.png
Damage Guard Startup Active Recovery Block Adv. Hit Adv.
- - - - Total XX - -

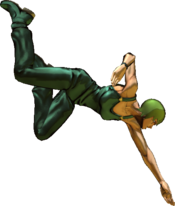
A front handspring flip.

  • Invincible to non-Throw attacks.
  • Can move through the opponent to switch sides.
JL
j.L
JJASBR FF Jump L.png
Damage Guard Startup Active Recovery Block Adv. Hit Adv.
17 Overhead 6 - - - -

An aerial knee strike.

  • Best air-to-air move.
  • Has an incredible amount of active frames.
JM
j.M
JJASBR FF Jump M.png
Damage Guard Startup Active Recovery Block Adv. Hit Adv.
25 Overhead 8 - - - -

A jumping side punch.

  • Mainly used in combo juggles.
JH
j.H
JJASBR FF Jump H (1).png
JJASBR FF Jump H (2).png
JJASBR FF Jump H (3).png
Damage Guard Startup Active Recovery Block Adv. Hit Adv.
49 (12*2, 25) Overhead 8(5)1(7)1 - - - -

Three successive downward punches.

  • The best jump-in normal.
  • Connecting the full three hits can be fairly difficult.

Special Moves

236X
F.F. Shot
236L/M/H
or
5L/M/H during "Move like F.F."
JJASBR FF 236X.png
Version Damage Guard Startup Active Recovery Block Adv. Hit Adv.
Light 35 [40] Mid - - - [Guard Break] [Crumple]
Medium 35 [40] Mid - - - [Guard Break] [Crumple]
Heavy 35 [40] Mid - - - [Guard Break] [Crumple]

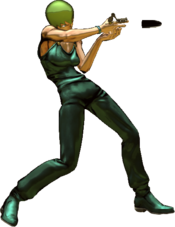
Foo Fighters shoots a plankton bullet from a standing position.

  • The version used determines the bullet's speed.
  • Bullets travel fullscreen.
  • Holding the button can charge the attack. Data in [] is for the charged version.
    • If fully charged, the projectile causes crumple on hit, as well as instantly causing a Guard Break.
  • Can spend one Plankton Stock to cancel into "Move like F.F." special moves to bypass the recovery frames.

L version:

  • Has the fastest startup and can be used in true blockstrings.
  • This version has the slowest recovery frames.

M version:

  • Balanced startup and recovery.

H version:

  • Has the slowest startup frames.
  • This version has the fastest recovery frames.
214X
I made it.
214L/M/H (Air OK)
or
8L/M/H during "Move like F.F."
JJASBR FF 214X (1).png
JJASBR FF 214X (2).png
JJASBR FF 214X (3).png
Version Damage Guard Startup Active Recovery Block Adv. Hit Adv.
Light 60 (20*3) Overhead - - - - -
Medium 60 (20*3) Overhead - - - - -
Heavy 60 (20*3) Overhead - - - - -

Foo Fighters performs a big leap while shooting three plankton bullets at different downward angles.

  • The version used determines Foo Fighters's arc.
  • This move can hit OTG.
  • Upon landing, one Plankton Stock can be spent to cancel into "Move like F.F." special moves.

L version:

  • Has the shortest travel distance.
  • Mainly used in juggle combos after 1H.
  • The instant air version of this move can link into a 5L on landing.

M version:

  • Has average travel distance.
  • Can be used for more advanced juggles.

H version:

  • Has the longest travel distance.
  • Used to OTG after a regular grab or to create some distance between Foo Fighters and the opponent.
22X
I've got this!
22L/M/H
or
2L/M/H during "Move like F.F."
JJASBR FF 22X.png
Version Damage Guard Startup Active Recovery Block Adv. Hit Adv.
Light 35 [40] Low - - - [Guard Break] [Crumple]
Medium 35 [40] Low - - - [Guard Break] [Crumple]
Heavy 35 [40] Low - - - [Guard Break] [Crumple]

Foo Fighters shoots a plankton bullet from a lie-down position.

  • The version used determines the bullet's speed.
  • Bullets travel fullscreen.
  • Foo Fighters able to low-profile some attacks.
  • Holding the button can charge the attack. Data in [] is for the charged version.
    • If fully charged, the projectile causes crumple on hit, as well as instantly causing a Guard Break.
  • Can spend one Plankton Stock to cancel into "Move like F.F." special moves to bypass the recovery frames.

L version:

  • This version has the fastest startup and can be used in true blockstrings.
  • This version has the slowest recovery frames.
  • Mainly used for combo extensions up close and pressure at max distance.

M version:

  • This version has an average startup and recovery.
  • Is mostly used for max distance hit confirms.

H version:

  • This version has the slowest startup frames.
  • This version has the fastest recovery frames.
6X
Get away from there! (Forward)
6L/M/H during "Move like F.F."
JJASBR FF 3H.png
JJASBR FF 236X.png
Version Damage Guard Startup Active Recovery Block Adv. Hit Adv.
Light 35 [40] Mid - - - - -
Medium 35 [40] Mid - - - - -
Heavy 35 [40] Mid - - - - -

Foo Fighters performs a front handspring flip followed by a Plankton shot performed from a standing position.

  • The version used determines the bullet's speed.
  • The flip portion of the attack is invincible to non-Throw attacks.
  • Foo Fighters can move through the opponent to switch sides.
  • Bullets travel fullscreen.
  • Holding the button can charge the attack. Data in [] is for the charged version.
    • If fully charged, the projectile causes crumple on hit, as well as instantly causing a Guard Break.
  • Can spend one Plankton Stock to cancel into "Move like F.F." special moves to bypass the recovery frames.

L version:

  • The gunshot portion has the fastest startup.
  • This version has the slowest recovery frames.

M version:

  • The gunshot portion has an average startup and recovery.

H version:

  • The gunshot portion has the slowest startup frames.
  • This version has the fastest recovery frames.
4X
Get away from there! (Back)
4L/M/H during "Move like F.F."
JJASBR FF 1H.png
JJASBR FF 236X.png
Version Damage Guard Startup Active Recovery Block Adv. Hit Adv.
Light 21 Mid - - - - -
Medium 21 Mid - - - - -
Heavy 21 Mid - - - - -
Bullet 35 [40] Mid - - - - -

Foo Fighters performs a back handspring flip followed by a Plankton shot performed from a standing position.

  • The version used determines the bullet's speed.
  • The flip begins with an attack.
  • The flip portion of the attack is invincible from activation until the animation ends.
  • Bullets travel fullscreen.
  • Holding the button can charge the attack. Data in [] is for the charged version.
    • If fully charged, the projectile causes crumple on hit, as well as instantly causing a Guard Break.
  • Can spend one Plankton Stock to cancel into "Move like F.F." special moves to bypass the recovery frames.

L version:

  • The gunshot portion has the fastest startup.
  • This version has the slowest recovery frames.

M version:

  • The gunshot portion has an average startup and recovery.

H version:

  • The gunshot portion has the slowest startup frames.
  • This version has the fastest recovery frames.
623X
Hwah!
623L/M/H
JJASBR FF 623X.png
Version Damage Guard Startup Active Recovery Block Adv. Hit Adv.
Light 62 (6*7, 20) Mid 12 - - -14 -
Medium 88 (9*7, 25) Mid 18 - - -18 -
Heavy 114 (12*7, 30) Mid 24 - - -24 -

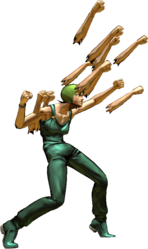
Foo Fighters throws a rapid punch barrage at an upwards angle.

  • The amount of punches depends on the version used.
  • Used as a combo ender or Flash Cancel combo filler.
  • This move doesn't have invulnerable frames, so it's not a true reversal.

L version:

  • Fastest startup but least amount of damage, connects after every normal.

M version:

  • Average startup and damage, but only connects after a 5H.

H version:

  • Longest startup but best damage, but only connects after a point blank 5H.
Jump 236X
I'll blow your head of your shoulders!
j.236L/M/H
JJASBR FF Jump 236L.png
Light
Light
JJASBR FF Jump 236M.png
Medium
Medium
JJASBR FF Jump 236H.png
Heavy
Heavy
Version Damage Guard Startup Active Recovery Block Adv. Hit Adv.
Light 60 (20*3) Mid - - - - -
Medium 80 (20*4) Mid - - - - -
Heavy 100 (20*5) Mid - - - - -

Foo Fighters shoots multiple F.F. Shots while airborne.

  • The version used determines the amount of projectiles, as well as the angle of fire.

L version:

  • This version shoots three projectiles straight forward.
  • Bullets travel fullscreen.
  • The instant air version of this special is one of the best zoning tools in Foo Fighters' kit.

M version:

  • This version shoots four projectiles at a diagonal downwards angle.
  • The instant air version of this move can link into a 5L on landing.

H version:

  • This version shoots five projectiles at an almost straight down angle.
  • Extremely unsafe to use.

System Mechanics

Throw
Throw
How's this!
5/4 + Any Two Attack Buttons
JJASBR FF Throw (1).png
JJASBR FF Throw (2).png
Damage Guard Startup Active Recovery Block Adv. Hit Adv.
110 (40+70) Throw - - - - -

Foo Fighters shoves the opponent to the side followed by a roundhouse to the chest followed by a mule kick that sends them flying.

  • Leaves the opponent extremely far away.
  • Both Throws are identical aside from direction.
  • This is Foo Fighters' only reliable hard knockdown.
  • It's possible to add extra damage with a well placed dash into 214H.
Assist
Assist
I made it.
JJASBR Assault Assist Icon.pngJJASBR Reversal Assist Icon.pngJJASBR Reversal Assist Icon.png
JJASBR FF 214X (1).png
JJASBR FF 214X (2).png
JJASBR FF 214X (3).png
Damage Guard Startup Active Recovery Block Adv. Hit Adv.
60 (20*3) Overhead - - - - -

Foo Fighters performs a big leap while shooting three Plankton bullets at different downward angles.

  • Assault Assist Stocks: 1
  • Reversal Assist Stocks: 2
  • Based on 214H
  • Can hit OTG.
5S
I've overcome my weakness.
5S
JJASBR FF 5S.png
Damage Guard Startup Active Recovery Block Adv. Hit Adv.
- - - - Total XX - -

Foo Fighters stops for a brief moment to take a long chug of water.

  • Refills Plankton Stocks back to full.
  • Getting hit before the animation ends will cancel the effect.

Heart Heat Attack

Get Weather Report to make it rain.
236 + Any Two Attack Buttons
JJASBR FF HHA (1).png
JJASBR FF HHA (2).png
Damage Guard Startup Active Recovery Block Adv. Hit Adv.
- - - - Total XX - -

Foo Fighters contacts Weather Report via walkie-talkie to make it rain.

  • Foo Fighters recovers 100 life, refills all Plankton Stocks back to full, and gains access to a one-time buff to "F.F. Shot" if successfully completed.
Enhanced 236X
F.F. Shot (Enhanced)
236L/M/H after "Get Weather Report to make it rain."
JJASBR FF Plankton (Enhanced) Icon.png
JJASBR FF 236X.png
Damage Guard Startup Active Recovery Block Adv. Hit Adv.
116 (18, 10*8, 18) [138 (40, 10*8, 18)] Mid - - - [Guard Break] KD [Crumple]

After being rehydrated, Foo Fighters shoots an enhanced plankton bullet.

  • Move performance is identical for all versions.
  • The final hit launches.
  • Bullet travels fullscreen at a slightly higher speed than the H version of its normal counterpart, in addition to having increased priority.
  • Holding the button can charge the attack. Data in [] is for the charged version.
    • If fully charged, the first hit instantly causes a Guard Break, while the final hit causes crumple.
  • Can spend one Plankton Stock to cancel into "Move like F.F." special moves to bypass the recovery frames.

Great Heat Attack

I am a being of superior intellect than you!
236L+M+H
JJASBR FF GHA (1).png
JJASBR FF GHA (2).png
JJASBR FF GHA (3).png
Damage Guard Startup Active Recovery Block Adv. Hit Adv.
390 (60+37*8+34) Mid - - - - -

Foo Fighters shoots a focused plankton bullet. If it connects, the opponent is then restrained by a sub-body of her Stand, with Foo Fighters taking advantage of this to fire small bits of plankton colony towards the insides of the opponent's body, destroying it from within.

  • The initial hit is considered aprojectile that reaches fullscreen.
  • The most damaging non-counter GHA in the game.

Costumes

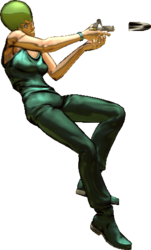
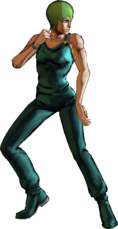
Normal (Color 1)
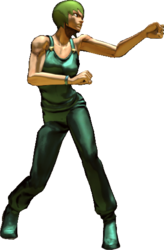
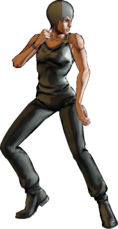
Normal (Color 2)
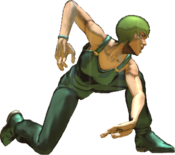
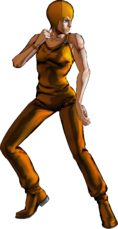
Normal (Color 3)
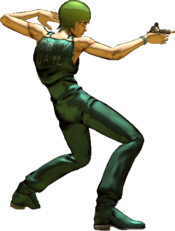
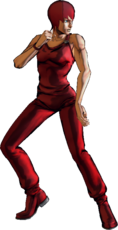
Normal (Color 4)

Notable Players

Disclaimer: This list is derived from community input and is in no way comprehensive or a form of ranking of any kind. Our community criteria can be found here.
Name Usual Color Region Contact Example Play
DJTurbo3030 JJASBR FF Color 4.png Flag us.png
United States
@Djturbo30 Tournament Footage

Navigation

General
FAQ
Controls
Stages
HUD
System
Esoterics
Character Data
Patch Notes
Glossary
JJASBR Part 1 Emblem.png
Phantom Blood
Jonathan
Zeppeli
Speedwagon
Dio Brando
JJASBR Part 2 Emblem.png
Battle Tendency
Joseph
Caesar
Lisa Lisa
Stroheim
Wamuu
Esidisi
Kars
JJASBR Part 3 Emblem.png
Stardust Crusaders
Jotaro (Part 3)
Old Joseph
Avdol
Kakyoin
Polnareff
Iggy
Hol Horse
Mariah
Pet Shop
Vanilla Ice
DIO
JJASBR Part 4 Emblem.png
Diamond is Unbreakable
Josuke (Part 4)
Jotaro (Part 4)
Koichi
Okuyasu
Yukako
Rohan
Shigechi
Yuya
Keicho
Akira
Kira
Kosaku
JJASBR Part 5 Emblem.png
Vento Aureo
Giorno
Bucciarati
Mista
Narancia
Fugo
Trish
Abbacchio
Prosciutto
Ghiaccio
Risotto
Diavolo
JJASBR Part 6 Emblem.png
Stone Ocean
Jolyne
Ermes
Foo Fighters
Anasui
Weather
Pucci (WS)
Pucci (Final)
JJASBR Part 7 Emblem.png
Steel Ball Run
Johnny
Gyro
Diego
AW Diego
Valentine
JJASBR Part 8 Emblem.png
JoJolion
Josuke (Part 8)
Wonder of U
Baoh the Visitor
Baoh