Among Us Arena/Impostor/Colors: Difference between revisions

From Mizuumi Wiki
Jump to navigation Jump to search
m (→‎Purple: no rollback?)
m (→‎Mint: no rollback?)
Line 1,317: Line 1,317:
  |description=
  |description=
Mint throws out a projectile that travels forward fullscreen. The projectile stays on screen until either Mint uses a super, hits an opponent or simply goes off screen. The frame advantage on block corresponds to the move being used point blank
* Cannot interact with other hitboxes. This includes 5G
* Cannot interact with other hitboxes. This includes 5G.


Line 1,328: Line 1,328:
*'''Poor Counter Zoning''': Mint's projectile cannot interact with other hitboxes, and thus loses to options such as 5G or Coral's 5S.
*'''Extensive Counterplay''': Getting the most out of mint's fireballs will require staying on top of exhausting mindgames, knowing solutions to many situations, and getting proper reads on your opponent.
*'''No Rollback''': This isn't a direct negative to the gameplay, but unless Input Delay is set to 5, playing as Mint (or Purple) will disable rollback netcode.


}}
}}

Revision as of 09:03, 11 October 2022

Overview

Each one of the 21 different colored Impostors have their own unique Signature Color Attacks, accessed by pressing the Sus button. These can range from combo tools to options that could fundamentally change how one would want to approach playing, both to the player and their opponent. Learn what each one does, the playstyles that they bolster and learn/prepare against any potential strategies that may arise from them.

Combo Terminology Table

Symbol Meaning
> Cancel from the previous move to the following move.
land The player must land.
, Link from the previous move to the following move.
dl./delay Delay before using the following move.
X(w)/whiff Whiff the following move (do not hit).
jc Jump Cancel.
AA Anti-Air, must hit an airborne opponent
[X] Hold the input.
(X) Optional input.
[X]*N Repeat (sequence) N number of times.

Signature Color Attacks

Red

Vent
AUA-IMP-S-RED.png
Low hit
Low hit
AUA-IMP-JS-RED.png

High hit

High hit
Version Damage Startup Active Recovery On Hit On Block Guard Chip Property Invuln
Low Vent
S
300 38 5 14 Launch -9 Low 65 Launch -
High Vent
2 when entering vent
300 31 24 3 +18 -2 High 65 - -

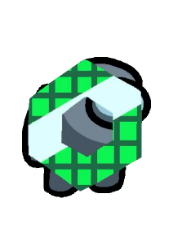
Red goes into a vent before coming out at a set distance, hitting low. By pressing 2 when entering the vent, Red comes out from above, hitting overhead. This move is mostly used in midscreen as combo filler, alongside high/low mixups. In the corner, Red doesn't get much mileage off of their Sus because it always steals the corner DESPITE NOT HITTING CROSSUP.

  • Overhead version causes a hard knockdown on airborne opponents
  • High version hits crouchers at frame 51 (49 for standing opponents)


Strengths Weaknesses
  • Corner Carry: Red can convert most hits into a combo that'll most likely put his opponents into the corner. This is most effective when coupled with wallbounces from 2H and 5G.
  • High Meterless Damage: While awkward to insert in combos without the help of 5G or 2H, Red gets access to very high meterless damage.
  • Telegraphed: The startup on this move is pretty high by itself (especially the overhead variant), making mixups with it mediocre at best midscreen.
  • Limited Combo Use: Red's Sus can only reliably be comboed into by using a wallbounce, limiting its combo opportunities.
Red Sequences/Combos
Combo Position Damage Difficulty Video Notes
5L/2L/j.L > 5H > 5K > 2K > 5G > dl.5S, 5H > 2K > 5G > dl.5S, Dash 5L > 2K > j.L > j.H, dl.5H > 2K > j.L > j.H, 2K > j.G > j.K(w)/j.S Midscreen 1808 Medium -

Meterless BnB that puts the opponent in the corner from almost anywhere on the screen. Dash 5L can be replaced by 5H, but this makes the combo way harder. Likewise, dl.5H can be replaced by 5L for an easier combo. Only use j.S if you reach the corner, otherwise you'll be minus. Does not work when started close to the corner

5S~2, 5H > 5K > 2K > j.L > j.H, 5H > 2K > j.L > j.H, [5H > 2K > dl.2H > Dash]*2, j.K Anywhere - Medium -

Basic combo off of 5S' overhead

5S, (Dash) [5H > 2K > j.L > j.H]*2, 5H > 2K > dl.2H > 5S, Dash 5L > 2K > 5G > dl.5S > (Super1) Anywhere - Medium -

Basic combo off of 5S' low hit. Replace 2H with 5G to prevent a side switch

Blue

Spin Slash
Damage Startup Active Recovery On Hit On Block Guard Chip Property Invuln
150, 175 11 21 24 Launch -12 Mid 20,20 Launch -

A duo of two sluggish, but powerful spin slashes. Can be cancelled into from any normal on hit, most notably j.K and j.G, but falls down quickly if done in the air. You can link after this move by dashing forwards after the 2nd hit, enabling consistent, high damage loops.

  • The second hit of the ground version can be dash cancelled, the air version can not. Basic conversions can be done Buttons > 2K > S > 66 > Buttons.
  • The second hit of both ground and air versions can be jump cancelled.


Strengths Weaknesses
  • Falling conversions: The falling hitboxes and momentum from cancelling into S from moves like j.G and low j.K allow for cool combos not normally possible from strong aerial positions.
  • High meterless damage: The ability to link after this move gives blue high damage corner carry routes that don't require any meter.
  • Limiting: Blue’s ability to convert off normally impossible pickups is much more specific and trickier than the other colors that share this niche, trading off some of that utility for extra damage that must be utilized to perfection to make a difference.
Blue Sequences/Combos
Combo Position Damage Difficulty Video Notes
5L > 5H > 5K > S, dash 5L > 5H > S, dash 5L > 5H > S, dash 5L > 5H > S > Super1 Anywhere 1762 Easy Link

Easy sample combo that shows off the combo potential of this move. Since this combo doesn't use any bounces, it is quite easy to extend this however you want by sneaking in a 2H/j.H after 3 or 4 reps.

Green

Swipe Card
AUA-IMP-S-GREEN.png
Ground version
Ground version
AUA-IMP-JS-GREEN.png
Air version
Air version
Version Damage Startup Active Recovery On Hit On Block Guard Chip Property Invuln
S 90 15 6 14 +5 -10 High 10 - -
j.S 115 10 7 27 - - High 10 - -

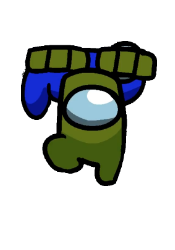
Green takes out his card and quickly swipes it down, hitting as an overhead. The aerial version has Green doing a flip in mid-air, swiping the card all around him.

  • Can be cancelled into normals or dash on hit.


Strengths Weaknesses
  • Carry Loops: Green's Sus can be followed up with Light, leading into easy wall carry loop combos such as 5L > 5H > 5S > 5L > 5H > 5S.
  • King of 50/50s: The speed of Green's Sus moves combined with 2L makes high low mixups so volatile and unpredictable your opponent might as well mash pushblock the moment they have to face any pressure.
  • Prone to Being Pushblocked: Proper pushblock usage may force a whiff on Green's part during repeated pressure strings, potentially turning an advantageous situation into a dangerous one.
  • Scaling: Green's loops scale horribly. 2 out of the 3 moves involved are essentially jabs, meaning that you'll just convert the opening 5S into a regular combo most of the time.
Green Sequences/Combos
Combo Position Damage Difficulty Video Notes
- Anywhere 1200 Medium Link

flavortext

Pink

Canister Air
AUA-IMP-S-PINK.png
Ground version
Ground version
AUA-IMP-JS-PINK.png
Air version
Air version
Version Damage Startup Active Recovery On Hit On Block Guard Chip Property Invuln
S 110 8 2 21 Launch -18 Mid 35 Launch -
j.S 110 8 2 Until landing +21 Launch - Mid 35 Launch -

Pink takes out an oxygen bottle and uses it to go into the air. The aerial version shoots Pink downwards at a similar speed.


Strengths Weaknesses
  • Loopable: The grounded version of this attack can be directly chained into the aerial version of this attack, and can be followed up on after either hit, making this an amazing combo extender.
  • Mobility: Both versions of the move will quickly move you vertically in the air, allowing you to be tricky and utilize aerial gun poking in neutral off of the grounded version and get out of the air with the aerial version.
  • Conversions: Almost all attacks can lead into Pink's sus, which can easily be converted into a full combo.
  • Horizontal Range: You will need to get in and confirm this off of a hit to be able to fully utilize it in combos. Additionally, you will need to time this properly during certain juggles as it may miss.
Pink Sequences/Combos
Combo Position Damage Difficulty Video Notes
- Anywhere 1200 Medium Link

flavortext

Orange

Vote Kicks
AUA-IMP-S-ORANGE.png
CHESTO!
CHESTO!
Version Damage Startup Active Recovery On Hit On Block Guard Chip Property Invuln
S 80, 100 8 10 8+3 after landing Launch -7 Mid 20, 20 Launch -
j.S 80, 100 8 10 31 Launch - Mid 20, 20 Launch -

Orange does two kicks while advancing forward. Travels great distances, cancels from just about anything on hit and allows for new conversions from incredible distances while also opening up new branches in existing combo routes.

  • Projectile Invincible.


Strengths Weaknesses
  • Anti Zoning King: A good advancing move with projectile invulnerable properties allows you the single best approach option against zoning, beating out Coral S and j.S, Mint 5S, and Guns.
  • Conversions: You can convert off of more things, and do longer combos.
  • Corner Carry: Due to how far forwards it goes and how easy it is to use in your combos, you can get large corner carry fairly easily.
  • Poor Scaling: The scaling is abysmal, both hits scale as much as a jab, which scales combos with this move heavily.
Orange Sequences/Combos
Combo Position Damage Difficulty Video Notes
- Anywhere 1200 Medium Link

flavortext

Yellow

Ass Blaster
AUA-IMP-S-YELLOW.png
Version Damage Startup Active Recovery On Hit On Block Guard Chip Property Invuln
S 250 20 5 13 Launch -10 Mid 55 Launch -
j.S 250 20 Until landing 13 Launch - Mid 55 Launch -

Yellow hops a short distance butt-first, causing an explosion that flings the opponent away on hit.

  • Can break armor


Strengths Weaknesses
  • Armor Breaker: Yellow beats all armor. 5[K] mindgames may be invalidated, olive will struggle to command grab, and wakeup super loses out entirely.
  • Cannon Ball: Interrupting certain aerial moves by cancelling into S may catch opponents off guard on timing and trajectory.
  • Abysmal Range: Yellow's S hops such a short distance that most hits have to be assisted by the corner or the pull of gravity.
  • Rare opportunities: The best situations to use this move are uncommon, and may not come at all during rounds.
Yellow Sequences/Combos
Combo Position Damage Difficulty Video Notes
5L/2L/j.L > Taunt > 5L > 5K > 5S, Taunt > 5L > 2K > 5S, Taunt > 5L > 2K > 2G(1) > 2K > 2G > Super1 Corner - Hard Link

A combo that is as unoptimal as it is funny to watch. Difficult to perform due to how taunts are performed (222)

- Anywhere 1200 Medium Link

flavortext

Black

Electrical Wiring Grip Fist
AUA-IMP-S-BLACK.png
Ground version
Dorya!
Ground version
Dorya!
Hyakki Gosus (Divekick)
AUA-IMP-JS-BLACK.png
Air version
Air version
Version Damage Startup Active Recovery On Hit On Block Guard Chip Property Invuln
S
Electrical Wiring Grip Fist
120 17 1 21 Launch -17 Mid 60 Launch -

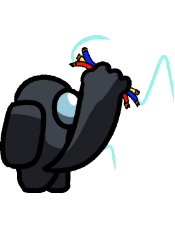
Black performs an electrical uppercut with a notoriously low hitbox, launching opponents on hit and sending them flying away if blocked in air. Amazing combo tool, has devastating pushback on air block, but deceptively risky on the ground despite how easy it feels to throw out

Version Damage Startup Active Recovery On Hit On Block Guard Chip Property Invuln
j.S
Divekick
85 11 Until landing 3 - - Mid 0 - -

Divekick. Exactly what it says on the tin. Decently fast startup and descends at a 45-degree angle towards the opponent.


Strengths Weaknesses
  • Nasty High Crush: In a similar nature to the inspiration of this move, a super short hurtbox allows electrics to low profile many high attacks, beating out many jump normals, j.K, 5H, and even 5K.
  • Aerial Keepout: Although risky on the floor, the EWGF causes such severe pushback on air block that the opponent will be flung to the opposite end of the screen, enabling some strong keepout.
  • Divekick Pressure: Even as a mid, the divekick allows for incredible pressure off of aerial normals, and falls at an incredible speed to open up punishes and other miscellaneous catches to throw your opponent off guard and convert into full combos.
  • Difficult Utility: A long startup means using the EWGF outside of combos is unreliable if you aren't already experienced with the exact situations to preemptively throw this out. Either your reactions must be absurdly fast, or you'll need to develop a sense of timing for when your opponent wants to approach in the air.
  • Risky Commitment: The EWGF is very punishable on whiff and on block. If you're not perfectly on top of the situation or have any sense of good reads on your opponent, you're just praying to the Devil Gene every time you throw an electric out.
  • Anti Air prone: Divekicks are far from being uncontestable. If predictable, expect to get anti aired, especially against colors with reversal Sus moves (such as maroon and white.)
Black Sequences/Combos
Combo Position Damage Difficulty Video Notes
High crush demonstration video - - - Link

EWGF evasion examples and applications.

5L/2L > 5H > 5K > 2K > 5S, dl.5H > 2K > 5S, dl.2K > 5S, [2K > 5S]*3 Anywhere 1583 Medium -

Delay on second 5H is important to make it and the following 5S not whiff. Delay on third 2K is abit tight. Delay too late and you might not be able to get 3 reps of 2K > 5S.

5L/2L > 5H > 5K > 2K > 5S, 5S, [2L > 2K > 5S]*2, 2L > 2H, dash 2K > 5G, dash 5L/2L > 5H > 5K Anywhere 1574 Medium -

Alternative BnB. Might need to adjust dashes or other spacing to make moves connect after wallbounce. Otherwise easy to perform.

White

Shoryusus
AUA-IMP-S-WHITE.png
Version Damage Startup Active Recovery On Hit On Block Guard Chip Property Invuln
S 210 8 4 28+22 after landing Launch -43 Mid 35 Launch Invincible
j.S 210 8 4 Until landing +22 Launch - Mid 35 Launch Invincible
  • Invincible on startup
  • Air OK
  • Grounded version is dash-cancellable on hit (but not on block) for 25 meter

White rises into the air with a powerful punch. The grounded version of this move can be cancelled into dash for 25 meter for a short time after hitting, making for easy combo extensions. Since you will be using a good portion of your meter on dash cancelling, this move is mainly used with the Report super.


Strengths Weaknesses
  • Fully Invincible: Being fully invincible makes this move great as a reversal, be it on wakeup or while being pressured.
  • One Hit: 250 damage in one hit makes this move work quite well in combos, where it will add significant chunks of damage while adding very little scaling.
  • Dp Conversions: Dash cancelling this move on hit makes it consistently the most damaging true reversal in the game, leading to 1600+ damage off a DP for just 23 meter.
  • Extremely Punishable: This move has the longest recovery in the game, meaning if you whiff or your opponent blocks this while you don't have meter, you can kiss your ass goodbye.
  • Meter Glutton: White's extremely heavy meter reliance during combos ensures that you're never using 100 Meter supers, and without proper management may end up locking you out of vital metered options such as pushblocking and bursts for extended periods of time.
White Sequences/Combos
Combo Position Damage Difficulty Video Notes
5L > 5H > 5K > 2K > 5S > Dash, [5H, 2K > j.L > j.H]*2 [5H, 2K > 5S > Dash]*3, 5H > 2K > 2G(1) > 2K > 5S > Dash [5L > 2K > 2H]*2, Dash 5S Cornered 2209 Hard Link

100 meter dump combo example. Note the corner to corner wall carry.

Purple

Sus Platinum
AUA-IMP-S-PURPLE.png
As if millions of Lavender fans suddenly cried out in terror, and were suddenly silenced.
Damage Startup Active Recovery On Hit On Block Guard Chip Property Invuln
15x8, 100 24 32 35 Launch -- Mid 5x8, 30 Wallbounce --
  • Stays out if Purple is hit.
  • Can act before the attack ends.

Purple summons a Ghost which performs a series of punches, used in combos or to clash with other attacks.


Strengths Weaknesses
  • Pressure: The ghost stays out even if you are hit out of it, allowing you to easily win interactions by using this move to clash.
  • Combos: This move is fantastic for combos due to the high damage and wall bounce, creating disgusting extensions off of farther hits.
  • Safe Okizeme: If you summon the ghost on your opponent during their wakeup, they can only block and not counter, as the ghost will punish them afterwards. Additionally, the opponent can only burst towards the end of the attack's animation, as using a burst too early will also get them punished by the ghost.
  • Super 2 Synergy: The way damage is calculated when in Sabotage makes this move's minimum damage exceptionally high while the super is in effect.
  • Finnicky: Utilizing this move (and getting away with it) is a scenario that requires extensive knowledge and patience. Even using it in combos can be inconsistent and difficult at times.
  • No Rollback: This isn't a direct negative to the gameplay, but unless Input Delay is set to 5, playing as Purple (or Mint) will disable rollback netcode.
Purple Sequences/Combos
Combo Position Damage Difficulty Video Notes
- Anywhere 1200 Medium Link

flavortext

Brown

Lasso
AUA-IMP-S-BROWN.png
Ground version
Ground version
AUA-IMP-JS-BROWN.png
Air version
Air version
Version Damage Startup Active Recovery On Hit On Block Guard Chip Property Invuln
S 50, 300 25 7 19 Launch -18 - - Grab, Groundbounce -
j.S 50, 200 28 4 Until landing +3 Launch - Mid 40 Launch -

Brown pulls out a lasso then tosses it upwards, slightly moving forward. An anti-air grab which works as a combo extender.

The aerial version throws out the lasso downwards at a forward diagonal angle. A air-to-ground long range jump-in.

  • Ground version ground bounces on hit
  • Aerial versions launches on hit.


Strengths Weaknesses
  • Screen Control: The Lasso provides as a good threat to aerial approaches in it's target area, making it dangerous to jump at a distance.
  • Limited Use: There being only one version of Lasso makes it only usable after specific hits and set-ups, making it hard to use at close range, or optimally in a combo.
  • Slow: Lasso has one of the longest start-ups in the game, being active on frame 28 and having 51 total frames, making it easily punishable when used incorrectly.
Brown Sequences/Combos
Combo Position Damage Difficulty Video Notes
- Anywhere 1200 Medium Link

flavortext

Cyan/Teal

Spin to Wind
AUA-IMP-S-TEAL.png
flurry
flurry
Damage Startup Active Recovery On Hit On Block Guard Chip Property Invuln
- - - Total 21 - - - - - -

Cyan twirls, pulling the opponent towards them.

  • The air version can recover before landing, letting you act before Cyan touches the ground.
  • If you don't act before landing after air version recovers in the air, Cyan has an additional 3 frames of landing recovery once you land.
  • If Cyan lands before the recovery of the air version ends, Cyan has an additional 21 frames of landing recovery.


Strengths Weaknesses
  • Mix God: Cyan is the lord of pressure. Infinite blockstrings, double overheads with a left/right mix sprinkled on top, you name it. Midscreen, It's so unpredictable and random even the cyan player won't know what mixups will happen, or when.
  • Meter Burner: Infinite blockstrings and the immediate fear of an unseeable left/right threat will force all players to resort to pushblocking very quickly, burning chunks of meter if done repeatedly.
  • Backfire: Pulling opponents in when you're not in complete control of the situation may be a double edged sword, granting extra range to their moves and sometimes allowing them to mix YOU up instead.
Cyan/Teal Sequences/Combos
Combo Position Damage Difficulty Video Notes
- Anywhere 1200 Medium Link

flavortext

Lime

Sprout Lash
AUA-IMP-S-LIME.png
Damage Startup Active Recovery On Hit On Block Guard Chip Property Invuln
160 13 6 13 Launch -9 Mid 35 Wallbounce -

A large grassy whip swings in front of lime, causing a wallbounce. In midair, it rockets Lime forward, adding considerable range.


Strengths Weaknesses
  • Big Button: Lime's j.S is a walking flail. With proper spacing, you can throw yourself at the opponent repeatedly, snipe them at super long ranges, beat out a large portion of buttons outright, and win trades with ease.
  • Conversions: Line's j.S Can be used after j.K, j.G, or any jump cancelable move to move forwards and convert off of hits that opponents would normally be way too far away for, made easier and more consistent with the wallbounce.
  • Spacing Required: The sprout finds itself incredibly punishable if you ever find yourself in the range of a 2L or 5L. Proper planning is required if you plan on not eating full combos because you "decided" to press S just a little bit too close.
Lime Sequences/Combos
Combo Position Damage Difficulty Video Notes
- Anywhere 1200 Medium Link

flavortext

Tan

SUS!
AUA-IMP-S-TAN.png
Ground version
"Almost vented" means he didn't vent!
Ground version
"Almost vented" means he didn't vent!
AUA-IMP-JS-TAN.png
Air version
Dominant jump-in
Air version
Dominant jump-in
Version Damage Startup Active Recovery On Hit On Block Guard Chip Property Invuln
S 115 25 11 15 +29 -16 Mid 10 Slowdown -
j.S 115 16 5 20 - - High 10 Slowdown -

Tan screams so hard an Ace Attorney speech bubble appears in front of him. In the air, he shouts downwards. The ground version can be used as a strong preemptive anti-air which can start combos which can give Tan tons of meter. The aerial version is one of the best jump-ins in the entire game, given the very deep, disjointed hitbox. It can also be used as a quick overhead with a short hop, which can lead to whatever combo you felt like doing today.

  • Slows down opponents on hit
  • Can be dash cancelled on the ground


Strengths Weaknesses
  • Disjointed: The speech bubble does not have a hurtbox, making it a very strong anti-air, as well as an incredible jump-in.
  • Corner Carry: The slowdown properties of his Sus means he can cover greater distances while comboing before having to use a wall bounce.
  • High whiff recovery: Whiffing this means the opponent can most certainly whiff punish Tan
  • Poor air-to-air: While j.S is an amazing jump-in, it is also an extremely bad air-to-air, since the speech bubble hits super low
  • Not Spammable: A cooldown imposed on this move that prevents you from using it in quick succession, which means you may have to get crafty to maintain your pressure at times.
Tan Sequences/Combos
Combo Position Damage Difficulty Video Notes
L/S > 5H > 5K > 2K > j.L > j.H > j.S, 5H > 2K > j.L > j.H > j.S, [5H > 2K > dl.2H > Dash j.L > j.S]*2, 5H > 5K Midscreen 1565 Medium Link

Midscreen meterless Tan BnB that goes almost corner-to-corner. Depending on your execution, you might not have to delay the second 2H. Sometimes j.S can whiff, ending the combo early, but you'll still be in position to apply pressure. Can be extended after the second-to-last j.S with super 2

5L/2L/5S/j.L/j.S > [5H > 2K > 5S > (Dash)]*3 [5H > 2H > 2K > 5S]*2, 5L > 2K > 2G(1) > 2K > 2G Corner - Medium Link

Corner meterless Tan BnB. Every 5S used in the combo can be dash cancelled, if that makes the combo easier for you. The first 2H of the combo might have to be delayed, depending on your timing. Can be optimised further, as it doesn't use any ground bounces

[j.G(1) > j.S]*4 > Combo Anywhere - Very Hard Link (starts at 0:08)

A loop that can be placed at the beginning of most Tan combos and punishes. Trades damage for corner carry and meter build (this loop alone gives 31% meter). Doing another rep of the loop will trigger the infinite prevention system

Rose

Rose Bomber
AUA-IMP-S-ROSE.png
Version Damage Startup Active Recovery On Hit On Block Guard Chip Property Invuln
S 350 13 11 33+3 after landing Launch -31 Mid 15 - -
S
Whiff
- 13 11 7+3 after landing - - - - - -
j.S 350 13 11 Until landing +3 Launch - Mid 15 - -
j.S
Whiff
- 13 11 Until landing +3 - - - - - -

Rose hops a medium distance butt-first, causing a heart explosion that keeps Rose airborne and can distance Rose and the opponent up to fullscreen.

  • Rose Bomber behaves differently depending on whether the moves whiffs or not
  • If Rose Bomber hits or gets blocked, Rose will be pushed back quite far away from the opponent.
  • Projectile invincible.


Strengths Weaknesses
  • Zoning callout: The large lunge of this move combined with projectile invincible properties gives you a tool to demolish zoning tools if they let you get just a little too close.
  • Great Neutral: Due to the constant threat of this move, the opponent has to be wary of you at a much larger range than other characters. This is supplemented with the move's pushback, allowing you to threaten at ranges far greater than usual with relative ease.
  • No Comboing: The most you can do is end off your combo with a single rose bomber, leaving you full screen. You can't even get any sort of okizeme unless you're in the corner.
  • Prone to KADC: Rose's normally safe pushback is made irrelevant if the opponent can react fast enough to Knife Armor Dash Cancel the move, turning a safe move into a launch punishable one.
Rose Sequences/Combos
Combo Position Damage Difficulty Video Notes
- Anywhere 1200 Medium Link

flavortext

Banana

Zweites Kaltes Hinterhalt
AUA-IMP-S-BANANA.png
AUA-IMP-JS-BANANA.png
Version Damage Startup Active Recovery On Hit On Block Guard Chip Property Invuln
5S 90 19 2 11 Launch -3 Mid 10 Launch -
j.S - - - Total 15 - - - - - -
  • Fast cross up.
  • The aerial version can be cancelled into from any move and into any move.

Banana slides forward then punches backwards. In the air, Banana only dashes forward, acting as an airdash. If you are on the other side of the opponent while airborne, holding back and performing this move will make you airdash backwards.


Strengths Weaknesses
  • Crossup: The move is a quick crossup, allowing for better mixup game.
  • Pseudo-Airdash: The move functions as a pseudo-airdash that you can cancel to and from just about any other move in the air, allowing for different approaches and combos than other characters.
  • Meh Combos: This move doesn't really add much to your characters combo game, other than the fact you can start a combo with it and may have some extra hits you get sneak in with the air sus.
  • Lose your turn: If this move is blocked, it is -3, and since you can only hit it close range, that means the enemy can jab you to steal a turn.
Banana Sequences/Combos
Combo Position Damage Difficulty Video Notes
- Anywhere 1200 Medium Link

flavortext

Maroon

Genocide Susser
AUA-IMP-S-MAROON.png
Ground version
Prohibido jugar con Maroon
Ground version
Prohibido jugar con Maroon
Axe Kick
AUA-IMP-JS-MAROON.png
Ground version
Ground version
Version Damage Startup Active Recovery On Hit On Block Guard Chip Property Invuln
S
Genocide Susser
150x2, 207 11 5 14+22 after landing Launch -30 Mid 35, 35 Launch -
  • Invincible on Startup.
  • Can only be comboed out of with meter.

Maroon kicks upwards in a circular crescent motion, accompanied with a curved outline following it. Kicks again if the move hits.

Version Damage Startup Active Recovery On Hit On Block Guard Chip Property Invuln
j.S
Axe Kick
350 21 5 Until landing +3 - - High 10 - -

Maroon slams their feet downwards. Puts the opponent into a knockdown on hit.


Strengths Weaknesses
  • Omega Chunk: 500 Damage is among the highest single moves in the game on top of being a comboable move, vastly increasing Maroon's damage potential, and providing a reversal on par with Counter's damage.
  • Privilege: Maroon posesses monstrous priority with 5S, combining a large vertical hitbox with startup invincibility to allow for some truly heinous occurences on anti airs.
  • Simply Disregards Armor.: YOU CANNOT COUNTER THIS MOVE. The single best high risk wakeup option in the game, it also blasts out supers and KADC attempts.
  • Stubby DP: Maroon's 5S isn't any less risky than conventional reversal options leading to heavy punishment on block and whiff, furthered by the move's deceptively short horizontal range.
  • Unremarkable Air Sus: Axe kick solely exists to end combos. Using it as an overhead leads to very low reward, and there's no leeway to use it in other ways.
  • Combo Difficulty: Using Maroon's 5S in the middle of combos requires extensive execution, also demanding the use of supers to get around the move's monstrous endlag and uncooperative knockback.
Maroon Sequences/Combos
Combo Position Damage Difficulty Video Notes
5L > 5H > 5K > 2K > Dash 5S > Super3, Dash 5S > Super3, 2K > Dash 2K > j.L > j.H, 5H > 2K > j.L > j.H, [5H > 2K > 2H]*2, 5L > 2K > 2H > 5S Midscreen 2380 Very Hard Link

Requires 100 meter. Note that this is extraordinary damage for the Megaphone super.

Gray

Deflector
AUA-IMP-S-GRAY.png
No items, Gray only, final destination.
Damage Startup Active Recovery On Hit On Block Guard Chip Property Invuln
75 4 1 74 Launch -55 Mid 10 Launch -

A shine quickly pops up around gray, serving as a super quick launcher, reversal, and anti zoning move, as it reflects all Gun normals and is invincible on the first frame. An unparalleled defensive tool, it allows you safe escape options out of many previously inescapable situations while also demolishing zoning and enabling some clunky but powerful offensive pressure.

  • Jump Cancellable
  • Invincible on frame 1
  • Reflects gun normals and Rose taunt
  • Air Sus Spikes the opponent onto the ground.


Strengths Weaknesses
  • Spammable reversal: The fear of getting launched the moment you leave a gap in your pressure as small as 1 frame allows turns to be stolen constantly, even if blocked. If done consistently, players may hesitate to put pressure you at all.
  • Reflector: Gray S demolishes any gun normals thrown at the player. Supplement your own zoning while making it uncontestable for the opponent, get knockdowns from afar to rush in with good reactions, you name it.
  • Short Ranged: While its reversal is spammable it really only covers your character and not much else.
  • High Execution: Gray's combos can do up to 2000 or so damage mid screen meterless, but they require very hard execution to pull off.
Gray Sequences/Combos
Combo Position Damage Difficulty Video Notes
- Anywhere 1200 Medium Link

flavortext

Coral

Battering Slam
AUA-IMP-S-CORAL.png
Ground version
Ground version
Sussing Fist
AUA-IMP-JS-CORAL.png
Air version
Air version
Version Damage Startup Active Recovery On Hit On Block Guard Chip Property Invuln
S
Battering Slam
250 20 2 29 Launch -21 Low 35 Launch, OTG -
  • Hits OTG

Coral punches the ground, creating a full screen low hitbox. Will clip unsuspecting opponents repeatedly, causing a strong zoning game where they either start jumping repeatedly or stand still crouching at full range, or make unwise decisions in general due to frustration and impatience. Heavily punishable if successfully avoided.

Version Damage Startup Active Recovery On Hit On Block Guard Chip Property Invuln
j.S
Sussing Fist
100, 100 21 13 Until landing +3 Launch - Mid 35, 35 Wallbounce -

Coral swings their fists into the air, creating two surges of wind one after another, each traveling fullscreen. The second hit wallbounces the opponent. This attack does not affect crouching opponents in any way, even if very low to the ground.


Strengths Weaknesses
  • OTG: You can usually get this move as an OTG hit after any combo you do for some added damage.
  • Zoning: Sus is a fullscreen move that starts up almost twice as fast as gun does, Allowing it to beat gun wars fairly easily.
  • Super Synergy: Ground sus meshes well with all three supers. You can confirm into RHM laser from anywhere after 5S. You can combo off of it if you're close enough, even after the OTG hit with sabotage and report.
  • Punishable: If you do this too close to your opponent, or if they just jump over it, you are left fairly punishable.
  • Committal: A fairly long endlag after both versions of the move means that you likely don't want your shots to miss when zoning out your opponent. One whiff is enough cause for a scramble.
Coral Sequences/Combos
Combo Position Damage Difficulty Video Notes
- Anywhere 1200 Medium Link

flavortext

Olive

Olive Buster
AUA-IMP-S-OLIVE.png
Ground version
Ground version
Dunk
AUA-IMP-JS-OLIVE.png
Air version
Air version
Version Damage Startup Active Recovery On Hit On Block Guard Chip Property Invuln
S
Olive Buster
1000, 225 25 3 23 - - - - Grab -

The famed Olive Buster command grab. Doing 1250 damage on hit, this move is the single highest damage attack in the game, on top of being a command grab with quite large range. Olive is easily one of the scariest characters on the roster, as it only takes landing this once to completely turn the tide of a round.

Version Damage Startup Active Recovery On Hit On Block Guard Chip Property Invuln
j.S
Dunk
350 8 1 27 - - - - Grab -

An air grab. Olive can tack on massive damage to a combo as it deals high damage in one hit. This allows Olive to get strong conversions without relying on universal combos.


Strengths Weaknesses
  • Fear: Olive's mix and pressure is 10x scarier when you have to constantly worry about the threat of a sneaky tick throw with the highest single hit damage in the entire game, which may cause unprepared opponents to panic into a plethora of panic decisions.
  • Insane damage: Olive's air grab gives them a reliable way to end air combos with high damage. If Olive has meter, you can expect to take well beyond 2/3 health off a single hit.
  • Great oki: Both of Olive's Sus moves leave the opponent knocked down and point blank, fully vulnerable to whatever gross mix you have planned for them.
  • Death on whiff: If you whiff this, your are almost guaranteed eating a full punish. Be very selective about where and when you use this.
  • Potentially slow: This move has a notably long startup. If you haven't put the work in to disguise the startup or really throw off your opponent, the startup may be reactable, or easy to predict and dodge.
Olive Sequences/Combos
Combo Position Damage Difficulty Video Notes
- Anywhere 1200 Medium Link

flavortext

Mint

Hadousus
AUA-IMP-S-MINT.png
TIGER!
TIGER!
Version Damage Startup Active Recovery On Hit On Block Guard Chip Property Invuln
S 200 18 Until hit Total 17 Launch 0 Mid 60 Launch -
j.S 200 18 Until hit Total 17 Launch - Mid 60 Launch -

Mint throws out a projectile that travels forward fullscreen. The projectile stays on screen until either Mint uses a super, hits an opponent or simply goes off screen. The frame advantage on block corresponds to the move being used point blank

  • Cannot interact with other hitboxes. This includes 5G.


Strengths Weaknesses
  • Versatile: Mint's projectile stays on the screen for a long period of time, and can be used in the air. You can use this to cover your approach, zone your opponent especially hard, and apply pressure on wakeup.
  • Approaching tool: Mint can act while the projectile is active, cutting off options to stop your aggression if utilized to its fullest extent.
  • Poor Counter Zoning: Mint's projectile cannot interact with other hitboxes, and thus loses to options such as 5G or Coral's 5S.
  • Extensive Counterplay: Getting the most out of mint's fireballs will require staying on top of exhausting mindgames, knowing solutions to many situations, and getting proper reads on your opponent.
  • No Rollback: This isn't a direct negative to the gameplay, but unless Input Delay is set to 5, playing as Mint (or Purple) will disable rollback netcode.
Mint Sequences/Combos
Combo Position Damage Difficulty Video Notes
Zoning game explanation - - - Link

Video detailing how to use and deal with fireballs

Fortegreen

Vanish
AUA-IMP-S-FORTEGREEN.png
Damage Startup Active Recovery On Hit On Block Guard Chip Property Invuln
- - - 50 - - - - - Invincible

Fortegreen flashes invincible for a moment, allowing him to cancel any attack and chain it into another one, on hit and on block. In the air, it freezes his position briefly. The unorthodox cancels allow for some unique combos & blockstings, especially on aerial moves, and can be utilized in very tricky ways to steal turns or even get out of certain situations.

  • Invincible, except against armor breaker moves.


Strengths Weaknesses
  • Insane Combos & Pressure: Fortegreen being able to cancel its moves allows many combo options that other character just don't have. Utilizing this cancel in blockstrings can make you wildly unpredictable, and adds windows of invulnerability in your pressure.
  • Invincibility: There are a plethora of applications for Fortegreen's invinciblity. Ignore projectiles, Call out buttons with less defensive commitment, Get away on wakeup, you name it.
  • Anti Abare: Wanted to press a button to get out of pressure? too bad. Fortegreen ended up pressing S mid-blockstring, and you've just whiffed a move in open air despite being right next to them, eating a fat punish.
  • Not 100% invincible: Any moves with armor breaking properties can break through the vanish, which means you'll still have to be restrained during your pressure at times due to the threat of counter.
Fortegreen Sequences/Combos
Combo Position Damage Difficulty Video Notes
- Anywhere 1200 Medium Link

flavortext


General
FAQ
System
Controls
Strategy
Links
Characters
Impostor