YomiHustle/Mutant: Difference between revisions
No edit summary |
(→Pounce) |
||
| (162 intermediate revisions by 4 users not shown) | |||
| Line 1: | Line 1: | ||
{{WIP}} | {{WIP}} | ||
[[Category:Mutant]] | |||
{{Profile-YH | {{Profile-YH | ||
| Line 11: | Line 13: | ||
|pros= | |pros= | ||
*'''Good ground game''': | *'''Good ground game''': | ||
*'''Fast normals''': | *'''Fast normals''': Mutant has some of the fastest normals in the game, resulting in a constant threat when they are in range. | ||
*'''Great blockstrings''': | *'''Great blockstrings''': Fast moves and even debuffs such as [[#Envenom|Envenom]] result in the strongest [[YomiHustle/Glossary#Block String|block strings]] any of the fighters can offer. | ||
*'''Powerful oki''': | *'''Powerful oki''': [[#Shockwave|Shockwave]] and [[#Caustic Spike|Caustic Spike]] make for easy and effective [[YomiHustle/Glossary#Okizeme|okizeme]]. | ||
*'''Jukes''': | *'''Jukes''': As the name implies, [[#Juke|jukes]] are very effective at making sudden shifts in your movement, in order to create space or close the gap quickly. | ||
*'''Snowballs (positive)''': | *'''Snowballs (positive)''': | ||
|cons= | |cons= | ||
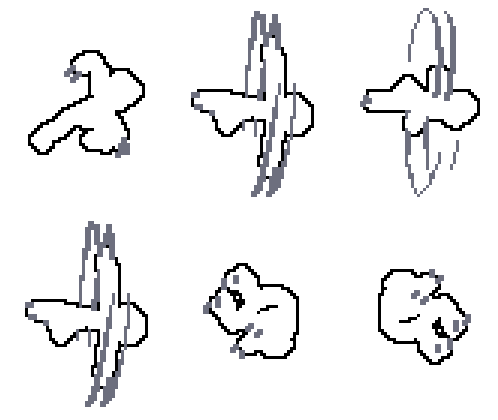
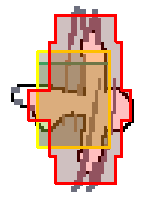
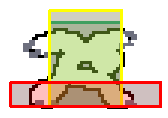
*'''Incredibly weak air game''': | *'''Incredibly weak air game''': Mutant's selection of air moves is rather limited, making airborne play difficult. Additionally, while every other character has a fast and easy way to reach the ground, Mutant has to rely on basic fall speed or a riskier downwards dodge or [[#Pounce|pounce]] in order to reach the ground after accending. | ||
*'''Low damage combos''': | *'''Low damage combos''': Mutant's moves have low damage overall, with many dealing lower damage in combo. Additionally many of Mutant's moves have high [[YomiHustle/Combo Mechanics#Proration|proration]], leading to an even lower overall damage output. | ||
*'''Damage vulnerability''': | *'''Damage vulnerability''': Mutant takes 10% additional damage from all sources, making it have effectively ~91% as much health as other fighters. Additionally many of Mutant's moves are a lot less disjointed than other fighters, making it easy to be counterhit. | ||
*'''Very short range (Without Jukes)''': | *'''Very short range (Without Jukes)''': Mutant has a very short effective range compared to other fighters, requiring [[#Juke|jukes]] to close the gap. | ||
*'''Difficulty approaching''': | *'''Difficulty approaching''': | ||
*'''Snowballs (negative)''': | *'''Snowballs (negative)''': | ||
}} | }} | ||
| Line 29: | Line 30: | ||
==Unique Mechanics== | ==Unique Mechanics== | ||
====<font style="visibility:hidden; float:right"></font>==== | ====<font style="visibility:hidden; float:right">Juke</font>==== | ||
{{MoveData | {{MoveData | ||
|image= | |image=YH_Mutant_DashBackward0.png | ||
|hitbox= | |hitbox= | ||
|input= | |input=[[Image:YH_Mutant_Pip.png]] | ||
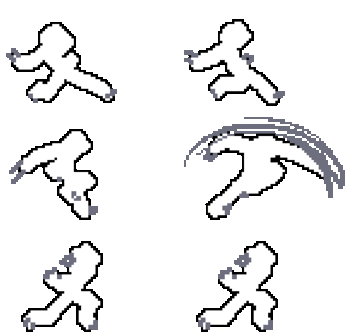
|caption= | |caption= So like, imagine Ninja's backsway, except the commitment is gone. Yeah. | ||
|name=Juke | |name=Juke | ||
|data= | |data= | ||
| Line 40: | Line 41: | ||
|description= | |description= | ||
* Mutant's unique movement mechanic. | * Mutant's unique movement mechanic. | ||
** Juke | ** Juke moves Mutant in the selected direction. | ||
** Costs two pips per use. | ** Costs two pips per use. | ||
** 1 pip is restored upon hitting an enemy (successful hit or on block). | ** 1 pip is restored upon hitting an enemy (successful hit or on block,) using Dash with 100 distance, or starting and continuing a Super Dash. | ||
** 2 pips are restored upon hustling. | ** 2 pips are restored upon hustling. | ||
** Can hold 10 pips max. | ** Can hold 10 pips max. | ||
* Holding a [[YomiHustle/Glossary#Free Cancel|free canceled]] move and applying Juke opens the door to niche knowledge checks and similar shenanigans. | |||
* Cannot Juke after blocking and not being hit by an attack. | |||
}} | }} | ||
}} | }} | ||
====<font style="visibility:hidden; float:right"></font>==== | ====<font style="visibility:hidden; float:right"></font>==== | ||
{{MoveData | {{MoveData | ||
|image= | |image=YH_Mutant_Idle.png | ||
|hitbox= | |hitbox= | ||
|input= | |input= | ||
|caption=frail little creature | |caption=frail little creature | ||
|name=Glass | |name=Glass Cannon | ||
|data= | |data= | ||
{{AttackData-YH-Mechanic | {{AttackData-YH-Mechanic | ||
|description= | |description= | ||
* Mutant takes 10% additional damage. | * Mutant takes 10% additional damage. | ||
}} | |||
}} | |||
====<font style="visibility:hidden; float:right"></font>==== | |||
{{MoveData | |||
|image=YH_Mutant_Howl.png | |||
|hitbox= | |||
|input= | |||
|caption= Such a lust for revenge!? | |||
|name=Bloodlust | |||
|data= | |||
{{AttackData-YH-Mechanic | |||
|description= | |||
* Mutant receives ~1.2x-1.5x more sadness. | |||
}} | |||
}} | |||
====<font style="visibility:hidden; float:right">Projectile Invun</font>==== | |||
{{MoveData | |||
|image=YH_Mutant_Idle.png | |||
|hitbox= | |||
|input= | |||
|caption= | |||
|name=Projectile Invun on Hit | |||
|data= | |||
{{AttackData-YH-Mechanic | |||
|description= | |||
* When Mutant lands a sucessful hit on the opponent, Mutant will be immune to projectiles for the remaining duration of that move, I.e. until Mutant does another move or until that move's animation ends. | |||
}} | }} | ||
}} | }} | ||
==Movement== | ==Movement== | ||
====<font style="visibility:hidden; float:right"></font>==== | ====<font style="visibility:hidden; float:right">Dash</font>==== | ||
{{MoveData | {{MoveData | ||
|image=YH_Mutant_DashForward.gif | |||
|hitbox=YH_Mutant_DashForwardHB0.png | |||
|input=[[Image:YH_Icon_Dash.png]] | |||
|name=Dash | |name=Dash | ||
| Line 69: | Line 104: | ||
{{AttackData-YH-Movement | {{AttackData-YH-Movement | ||
|version= | |version= | ||
|firstactionable= | |firstactionable=10-15 | ||
|consumesairoption=No | |||
|movementstartsat=1 | |||
|description= | |description= | ||
* Always interruptible when opponent is able to act. | * Always interruptible when opponent is able to act. | ||
* IASA increases as the speed slider is increased. | * IASA increases as the speed slider is increased. | ||
* "auto" toggle will cause Mutant to turn around mid dash to always be dashing towards the opponent. | |||
* Low profiles. | |||
}} | |||
}} | |||
====<font style="visibility:hidden; float:right">Back Dash</font>==== | |||
{{MoveData | |||
|image=YH_Mutant_DashBackward0.png | |||
|hitbox=YH_Mutant_DashBackwardHB0.png | |||
|input=[[Image:YH_Icon_DashBack.png]] | |||
|caption= | |||
|name=Back Dash | |||
|data= | |||
{{AttackData-YH-Movement | |||
|version= | |||
|firstactionable=11 | |||
|movementstartsat=1 | |||
|description= | |||
* Always interruptible when opponent is able to act. | |||
** Does not become actionable if opponent uses forward movement. | |||
* Grab immune frames 1-7. | |||
}} | }} | ||
}} | }} | ||
| Line 80: | Line 138: | ||
{{YomiHustleFrameAdvantage}} | {{YomiHustleFrameAdvantage}} | ||
====<font style="visibility:hidden; float:right"></font>==== | ====<font style="visibility:hidden; float:right">Swipe</font>==== | ||
{{MoveData | {{MoveData | ||
|image= | |image=YH_Mutant_Swipe2.gif | ||
|hitbox= | |hitbox=YH_Mutant_SwipeHB2.png | ||
|input= | |input=[[Image:YH_Mutant_SwipeIcon.png]] | ||
|caption= | |caption= | ||
|name=Swipe | |name=Swipe | ||
|data= | |data= | ||
{{AttackData-YH | {{AttackData-YH | ||
|damage= 400 | |damage= 480, 400 (sourspot) | ||
|startup= 4, 3 (with [[YomiHustle/Glossary#Initiative|initiative]]) | |startup= 4, 3 (with [[YomiHustle/Glossary#Initiative|initiative]]) | ||
|active= 2 | |active= 2 | ||
| Line 100: | Line 158: | ||
|description= | |description= | ||
* Very fast jab with high proration. | * Very fast jab with high proration. | ||
* | * Sourspot is very difficult to hit, only possible on aerial opponents at specific heights. | ||
}} | }} | ||
}} | }} | ||
====<font style="visibility:hidden; float:right"></font>==== | ====<font style="visibility:hidden; float:right">Up Swipe</font>==== | ||
{{MoveData | {{MoveData | ||
|image= | |image=YH_Mutant_SwipeUp.gif | ||
|hitbox= | |hitbox=YH_Mutant_SwipeUpHB4.png | ||
|input= | |input=[[Image:YH_Mutant_SwipeIcon.png]] | ||
|caption= | |caption= | ||
|name= Swipe (up angle) | |name= Swipe (up angle) | ||
| Line 123: | Line 181: | ||
|blockadvantage=0 | |blockadvantage=0 | ||
|description= | |description= | ||
* Covers good distance, somewhat functional anti-air. | * Covers good distance, somewhat functional and low committal anti-air. | ||
}} | }} | ||
}} | }} | ||
====<font style="visibility:hidden; float:right"></font>==== | ====<font style="visibility:hidden; float:right">Low Swipe</font>==== | ||
{{MoveData | {{MoveData | ||
|image= | |image=YH_Mutant_SwipeDown.gif | ||
|hitbox= | |hitbox=YH_Mutant_SwipeDownHB4.png | ||
|input= | |input=[[Image:YH_Mutant_LowSwipeIcon.png]] | ||
|caption= | |caption= | ||
|name=Low Swipe | |name=Low Swipe | ||
| Line 146: | Line 204: | ||
|blockadvantage=0 | |blockadvantage=0 | ||
|description= | |description= | ||
* Low | *Low profiles. | ||
}} | }} | ||
}} | }} | ||
====<font style="visibility:hidden; float:right"></font>==== | ====<font style="visibility:hidden; float:right">Slash</font>==== | ||
{{MoveData | {{MoveData | ||
|image=YH_Mutant_Slash. | |image=YH_Mutant_Slash.gif | ||
|hitbox= | |hitbox=YH_Mutant_SlashHB5.png | ||
|input= | |input=[[Image:YH_Mutant_SlashIcon.png]] | ||
|caption= | |caption= | ||
|name=Slash | |name=Slash | ||
| Line 163: | Line 221: | ||
|active=4 | |active=4 | ||
|guard=High | |guard=High | ||
|firstactionable= | |firstactionable=18 | ||
|hitstun=13 | |hitstun=13 | ||
|proration=1 | |proration=1 | ||
| Line 169: | Line 227: | ||
|blockadvantage=+1 | |blockadvantage=+1 | ||
|description= | |description= | ||
*Fast and lots of forward movement. | |||
}} | }} | ||
}} | }} | ||
====<font style="visibility:hidden; float:right"></font>==== | ====<font style="visibility:hidden; float:right">Shred</font>==== | ||
{{MoveData | {{MoveData | ||
|image= | |image=YH_Mutant_GroundToAirSpin.gif | ||
| | |hitbox=YH_Mutant_GroundToAirSpinHB6.png | ||
|input= | |hitbox2=YH_Mutant_LandingHB0.png | ||
|input=[[Image:YH_Mutant_ShredIcon.png]] | |||
|caption= | |caption= | ||
|name=Shred | |name=Shred | ||
| Line 186: | Line 246: | ||
|guard=High | |guard=High | ||
|firstactionable=38 | |firstactionable=38 | ||
| | |frameadvantage=15 | ||
|proration=1 | |proration=1 | ||
|blockadvantage=+1 | |blockadvantage=+1 | ||
|airok=Yes | |airok=Yes | ||
|description= | |description= | ||
* Multi hit move good for building up juke charge | * Multi hit move good for building up juke charge. | ||
* Land cancel has a hitbox. | |||
}} | }} | ||
| Line 198: | Line 259: | ||
|damage=190 | |damage=190 | ||
|startup=on landing | |startup=on landing | ||
|active= | |active=1 | ||
|guard=Low | |guard=Low | ||
|firstactionable= | |firstactionable= | ||
| Line 205: | Line 266: | ||
|blockadvantage=+1 | |blockadvantage=+1 | ||
|description= | |description= | ||
*Can become active deceptively fast depending on distance to the ground and fall speed. | |||
}} | }} | ||
}} | }} | ||
====<font style="visibility:hidden; float:right"></font>==== | ====<font style="visibility:hidden; float:right">Sweep</font>==== | ||
{{MoveData | {{MoveData | ||
|image=YH_Mutant_Sweep. | |image=YH_Mutant_Sweep.gif | ||
|hitbox= | |hitbox=YH_Mutant_SweepHB9.png | ||
|input= | |input=[[Image:YH_Icon_Sweep.png]] | ||
|caption= | |caption= | ||
|name=Sweep | |name=Sweep | ||
| Line 231: | Line 293: | ||
}} | }} | ||
====<font style="visibility:hidden; float:right"></font>==== | ====<font style="visibility:hidden; float:right">Kick</font>==== | ||
{{MoveData | {{MoveData | ||
|image=YH_Mutant_Kick. | |image=YH_Mutant_Kick.gif | ||
|hitbox= | |hitbox=YH_Mutant_KickHB10.png | ||
|input= | |input=[[Image:YH_Mutant_KickIcon.png]] | ||
|caption= | |caption= | ||
|name=Kick | |name=Kick | ||
| Line 247: | Line 309: | ||
|frameadvantage=16 | |frameadvantage=16 | ||
|proration=0 | |proration=0 | ||
|blockadvantage=2 | |blockadvantage=+2 | ||
|description= | |description= | ||
}} | }} | ||
}} | }} | ||
====<font style="visibility:hidden; float:right"></font>==== | ====<font style="visibility:hidden; float:right">Overhead Claw</font>==== | ||
{{MoveData | {{MoveData | ||
|image=YH_Mutant_OverheadClaw. | |image=YH_Mutant_OverheadClaw.gif | ||
|hitbox= | |hitbox=YH_Mutant_OverheadClawHB11.png | ||
|input= | |input=[[Image:YH_Mutant_OverheadClawIcon.png]] | ||
|caption= | |caption= | ||
|name=Overhead Claw | |name=Overhead Claw | ||
| Line 263: | Line 325: | ||
|damage=1000, 900 (in combo) | |damage=1000, 900 (in combo) | ||
|startup=12 | |startup=12 | ||
|active= | |active=3 | ||
|guard=High ( | |guard=High (Guardbreak) | ||
|firstactionable=23 | |firstactionable=23 | ||
|frameadvantage=23 | |frameadvantage=23 | ||
| Line 272: | Line 334: | ||
*Groundbounces. | *Groundbounces. | ||
*Projectile immunity frames 5-13. | *Projectile immunity frames 5-13. | ||
*By using a [[#Juke|Juke]] with Overhead Claw it is possible to cause it to hit the opponent on the second active frame rather than the first, which can result in a guardbreak. | |||
}} | }} | ||
}} | }} | ||
====<font style="visibility:hidden; float:right"></font>==== | ====<font style="visibility:hidden; float:right">Dash Attack</font>==== | ||
{{MoveData | {{MoveData | ||
|image= | |image=YH_Mutant_ForwardDashFollowup.gif | ||
|hitbox= | |hitbox=YH_Mutant_ForwardDashFollowupHB0.png | ||
|input= | |hitbox2=YH_Mutant_ForwardDashFollowupHB4.png | ||
|hitbox3=YH_Mutant_ForwardDashFollowupHB6.png | |||
|hitboxCaption3=Note that this is still the first hit | |||
|hitbox4=YH_Mutant_ForwardDashFollowupHB18.png | |||
|input=[[Image:YH_Mutant_DashAttackIcon.png]] | |||
|caption= | |caption= | ||
|name=Dash Attack | |name=Dash Attack | ||
| Line 287: | Line 354: | ||
|damage=600 | |damage=600 | ||
|startup=5 | |startup=5 | ||
|active= | |active=4 | ||
|guard=High | |guard=High | ||
|firstactionable=39 | |firstactionable=39 | ||
| Line 307: | Line 361: | ||
|blockadvantage=+2 | |blockadvantage=+2 | ||
|description= | |description= | ||
*Projectile immunity frames 1-6. | |||
*Low profiles frame 1-6. | |||
}} | }} | ||
{{AttackData-YH | {{AttackData-YH | ||
|version= | |version=Second Hit | ||
|damage=1100 | |damage=1100 | ||
|startup=19 | |startup=19 | ||
| Line 320: | Line 376: | ||
|description= | |description= | ||
*[[YomiHustle/Combo Mechanics#Wall Splats|Wallsplats]]. | *[[YomiHustle/Combo Mechanics#Wall Splats|Wallsplats]]. | ||
*Can be used in tandem with [[#Juke|jukes]] for insane corner carries. | |||
}} | }} | ||
}} | }} | ||
====<font style="visibility:hidden; float:right"></font>==== | ====<font style="visibility:hidden; float:right">Backwards Dash Attack</font>==== | ||
{{MoveData | {{MoveData | ||
|image= | |image=YH_Mutant_ForwardDashBackFollowup.gif | ||
|hitbox= | |hitbox=YH_Mutant_ForwardDashBackFollowupHB7.png | ||
|input= | |input=[[Image:YH_Mutant_DashAttackIcon.png]] | ||
|caption= | |caption= | ||
|name=Dash Attack (Backwards) | |name=Dash Attack (Backwards) | ||
| Line 342: | Line 399: | ||
|description= | |description= | ||
*Can launch Mutant forwards if flipped. | *Can launch Mutant forwards if flipped. | ||
*Mutant goes airborne frame 1, making it a decent choice for [[YomiHustle/Glossary#RPS|weighted RPS]] to call out grab, even hitting shorthop forward depending on fighter velocity, though losing if the opponent chooses to jab. | |||
}} | |||
}} | |||
====<font style="visibility:hidden; float:right">Grab</font>==== | |||
{{MoveData | |||
|image=YH_Mutant_Grab.gif | |||
|hitbox=YH_Mutant_GrabHB2.png | |||
|input=[[Image:YH_Icon_Grab.png]] | |||
|caption= | |||
|name=Grab | |||
|data= | |||
{{AttackData-YH | |||
|damage=1500 | |||
|startup=3 | |||
|active=3 | |||
|guard=N/A | |||
|firstactionable=37 | |||
|frameadvantage=Varries | |||
|proration=0 | |||
|blockadvantage=N/A | |||
|airok=Yes | |||
|description= | |||
*Universal grab, though Mutant's is above average. | |||
*Grounded grab will result in a [[YomiHustle/Combo Mechanics#Knockdowns|knockdown]], while air grab will result in a [[YomiHustle/Combo Mechanics#Knockdowns|hard knockdown]]. | |||
*Carries Mutant's momentum through the throw, resulting in vastly different distances based on throw direction and opponent [[YomiHustle/Combo Mechanics#Directional Influence|DI]]. | |||
*Using neutral [[#Juke|Juke]] during a grounded throw will result in a groundbounce rather than a [[YomiHustle/Combo Mechanics#Knockdowns|knockdown]]. | |||
** This combined with [[#Juke|Jukes]] can lead into a combo or an [[YomiHustle/Glossary#Okizeme|Oki]]. | |||
}} | }} | ||
}} | }} | ||
| Line 349: | Line 434: | ||
{{YomiHustleFrameAdvantage}} | {{YomiHustleFrameAdvantage}} | ||
====<font style="visibility:hidden; float:right"></font>==== | ====<font style="visibility:hidden; float:right">Air Swipe</font>==== | ||
{{MoveData | {{MoveData | ||
|image= | |image=YH_Mutant_ForwardDashBackFollowup.gif | ||
|hitbox= | |hitbox=YH_Mutant_ForwardDashBackFollowupHB7.png | ||
|input= | |input=[[Image:YH_Mutant_AirSwipeIcon.png]] | ||
|caption= | |caption=haven't i seen this somewhere before... | ||
|name=Air Swipe | |name=Air Swipe | ||
|data= | |data= | ||
| Line 368: | Line 453: | ||
|description= | |description= | ||
}} | }} | ||
}} | }} | ||
====<font style="visibility:hidden; float:right"></font>==== | ====<font style="visibility:hidden; float:right">Air Kick</font>==== | ||
{{MoveData | {{MoveData | ||
|image= | |image=YH_Mutant_Kick.gif | ||
|hitbox= | |hitbox=YH_Mutant_KickHB10.png | ||
|input= | |input=[[Image:YH_Mutant_KickIcon.png]] | ||
|caption= | |caption= | ||
|name=Kick | |name=Kick | ||
| Line 396: | Line 481: | ||
{{YomiHustleFrameAdvantage}} | {{YomiHustleFrameAdvantage}} | ||
====<font style="visibility:hidden; float:right"></font>==== | ====<font style="visibility:hidden; float:right">Caustic Spike</font>==== | ||
{{MoveData | {{MoveData | ||
|image= | |image=YH_Mutant_CausticSpike.gif | ||
|image2=YH_Mutant_CausticSpike.png | |||
|hitbox= | |hitbox= | ||
|input= | |input=[[Image:YH_Mutant_CausticSpikeIcon.png]] | ||
| | |caption2=tandem spike | ||
|name=Caustic Spike | |name=Caustic Spike | ||
|data= | |data= | ||
{{AttackData-YH | {{AttackData-YH | ||
|damage= | |damage=1200 | ||
|startup=15 (to spawn), 21 (explosion) | |startup=15 (to spawn), 21 (explosion) | ||
|active=6 | |active=6 | ||
| Line 416: | Line 502: | ||
* Spike toggle deletes active caustic spike. | * Spike toggle deletes active caustic spike. | ||
* Being hit deletes active caustic spike. | * Being hit deletes active caustic spike. | ||
* A powerful [[YomiHustle/Glossary#Okizeme|okizeme]] tool. | |||
* Spike toggle allows for an easy 50/50 mixup after [[YomiHustle/Combo Mechanics#Knockdowns|knockdowns]] by deleting the spike the same turn you use [[#Envenom|Envenom]]. | |||
}} | |||
}} | |||
====<font style="visibility:hidden; float:right">Leap Slash</font>==== | |||
{{MoveData | |||
|image=YH_Mutant_AcidSlashJ.gif | |||
|hitbox=YH_Mutant_AcidSlashJHB9.png | |||
|input=[[Image:YH Mutant LeapSlashIcon.png]] | |||
|caption= | |||
|name=Leap Slash | |||
|data= | |||
{{AttackData-YH | |||
|damage=900 | |||
|startup=10 | |||
|active=6 | |||
|guard=High | |||
|firstactionable=31 | |||
|frameadvantage=20 | |||
|proration=0 | |||
|blockadvantage=-2 | |||
|airok=Yes | |||
|description= | |||
*Cannot hit grounded opponents. | |||
*Has a large amount of forward and upwards movement, applied on frame 10. | |||
*Very committal without the use of a [[YomiHustle/Glossary#Free Cancel|free cancel]]. | |||
}} | }} | ||
}} | }} | ||
====<font style="visibility:hidden; float:right"></font>==== | ====<font style="visibility:hidden; float:right">Leap Slash (up)</font>==== | ||
{{MoveData | {{MoveData | ||
|image= | |image=YH_Mutant_AcidSlashJUp.gif | ||
|hitbox= | |hitbox=YH_Mutant_AcidSlashJUpHB9.png | ||
|input= | |input=[[Image:YH Mutant LeapSlashIcon.png]] | ||
|caption= | |caption= | ||
|name=Leap Slash (up) | |||
|data= | |||
{{AttackData-YH | |||
|damage=900 | |||
|startup=10 | |||
|active=6 | |||
|guard=High | |||
|firstactionable=31 | |||
|frameadvantage=20 | |||
|proration=0 | |||
|blockadvantage=-2 | |||
|airok=Yes | |||
|description= | |||
*Cannot hit grounded opponents. | |||
*Has a large amount of forward and upwards movement, applied on frame 10. | |||
*Very committal without the use of a [[YomiHustle/Glossary#Free Cancel|free cancel]]. | |||
}} | |||
}} | |||
====<font style="visibility:hidden; float:right">Corkscrew</font>==== | |||
{{MoveData | |||
|image=YH_Mutant_TwistAttack.gif | |||
|hitbox=YH_Mutant_TwistAttackHB10.png | |||
|hitbox2=YH_Mutant_TwistAttackHB13.png | |||
|input=[[Image:YH_Mutant_CorkscrewIcon.png]] | |||
|caption= [https://www.youtube.com/watch?v=ve1889zS030 "It's treason, then."] | |||
|name=Corkscrew | |name=Corkscrew | ||
|data= | |data= | ||
| Line 441: | Line 580: | ||
*Multi hit, good for building juke. | *Multi hit, good for building juke. | ||
}} | }} | ||
}} | }} | ||
====<font style="visibility:hidden; float:right"></font>==== | ====<font style="visibility:hidden; float:right">Shockwave</font>==== | ||
{{MoveData | {{MoveData | ||
|image= | |image=YH_Mutant_Shockwave.gif | ||
|hitbox= | |image2=YH_Mutant_Shockwave.png | ||
|input= | |hitbox=YH_Mutant_ShockwaveHB11.png | ||
|input=[[Image:YH_Mutant_ShockwaveIcon.png]] | |||
|caption= | |caption= | ||
|name=Shockwave | |name=Shockwave | ||
| Line 462: | Line 602: | ||
|blockadvantage=+2 | |blockadvantage=+2 | ||
|description= | |description= | ||
}} | }} | ||
{{AttackData-YH | {{AttackData-YH | ||
|version=Projectile | |version=Projectile | ||
|damage= | |damage=750 | ||
|startup=14 (projectile spawn) | |startup=14 (projectile spawn) | ||
|active= | |active= | ||
| Line 476: | Line 615: | ||
|blockadvantage=+2 | |blockadvantage=+2 | ||
|description= | |description= | ||
* | *Projectile slowly moves along the ground. | ||
*Very powerful as an [[YomiHustle/Glossary#Okizeme|okizeme]]. | |||
*Useful tool that allows Mutant to combo out of [[#Envenom|Envenom]]. | |||
*The projectile hitting low allows for [[#Juke|Juke]] backwards Shockwave to be used in blockstrings. | |||
}} | }} | ||
}} | }} | ||
====<font style="visibility:hidden; float:right"></font>==== | ====<font style="visibility:hidden; float:right">Envenom</font>==== | ||
{{MoveData | {{MoveData | ||
|image= | |image=YH_Mutant_BiteGrab.gif | ||
|hitbox= | |hitbox=YH_Mutant_BiteGrabHB3.png | ||
|input= | |hitbox2=YH_Mutant_BiteGrabHB12.png | ||
| | |input=[[Image:YH_Mutant_EnvenomIcon.png]] | ||
|caption2=so do all the fighters taste the same, or... | |||
|name=Envenom | |name=Envenom | ||
|data= | |data= | ||
{{AttackData-YH | {{AttackData-YH | ||
|version=Bite | |||
|damage=600, 400 (in combo), 100 (minimum) | |damage=600, 400 (in combo), 100 (minimum) | ||
|startup=13 | |startup=13 | ||
| Line 504: | Line 648: | ||
**Envenomed opponents spawn 2 bubbles on being hit or blocking an attack, with a 35 frame internal cooldown. | **Envenomed opponents spawn 2 bubbles on being hit or blocking an attack, with a 35 frame internal cooldown. | ||
**Opponent can cleanse venom by landing a hit on Mutant. | **Opponent can cleanse venom by landing a hit on Mutant. | ||
* While difficult, in tandem with [[#Shockwave|Shockwave]] it is possible to combo out of Envenom. | |||
** A setup for this (known colloquially as a Mongolian Ball Detonation) is to utilize the frame advantage gained if the opponent DIs away after [[#Sweep|Sweep]], which results in a [[YomiHustle/Combo Mechanics#Knockdowns|hard knockdown]] and gives the Mutant ~41 frames of advantage. Following the sweep, use [[#Caustic Spike|Caustic Spike]], followed by a [[YomiHustle/Glossary#Free Cancel|free cancelled]] [[#Shockwave|Shockwave]]. The Caustic Spike acts as a [[YomiHustle/Glossary#Meaty|meaty]], hitting the opponent on the first frame of their getup, making the only option to avoid being hit to block. If a fighter recently blocked a move, they are immune to grabs, causing envenom to whiff. However, thanks to the ability to disable the Caustic Spike manually by use of the toggle, the opponent will block nothing while allowing Envenom to hit, which if sucessful will then cause the opponent to be hit by the aformentioned Shockwave, leading to a full combo. However, if the opponent suspects you to use this tech is is possible for them to interupt or otherwise evade the envenom, making this a 50/50 mix. | |||
**Another setup for this can be achieved by landing a counter hit [[#H Acid Slash|H. Acid Slash]]. See [[#H Acid Slash|H. Acid Slash]] for details. | |||
}} | }} | ||
| Line 513: | Line 660: | ||
|guard=High | |guard=High | ||
|firstactionable= | |firstactionable= | ||
|frameadvantage= | |frameadvantage=15 | ||
|proration=0 | |proration=0 | ||
|blockadvantage=0 | |blockadvantage=0 | ||
|description= | |description= | ||
*Bubbles being generated on block can make Mutant blockstrings truely oppresive. | |||
*Bubbles will not [[YomiHustle/Combo Mechanics#Damage Scaling|scale]] the combo. | |||
**This combined with their relatively high [[YomiHustle/Combo Mechanics#Hitstun|hitstun]] allows for Mutant to rack up high damage in combo. | |||
*Bubbles can be destroyed when hit by an attack from the opponent. | |||
**However, when Mutant hits the bubbles they will be pushed around rather than destroyed. | |||
***Additionally, when Mutant hits a bubble with a melee attack, the attack will become [[YomiHustle/Glossary#Free Cancel|free cancelled]] even if the move was not [[YomiHustle/Glossary#Free Cancel|free cancelled]] when it was used. Be sure to disable [[YomiHustle/Glossary#Free Cancel|free cancel]] if your move will hit a bubble. | |||
}} | }} | ||
}} | }} | ||
====<font style="visibility:hidden; float:right"></font>==== | ====<font style="visibility:hidden; float:right">Pounce</font>==== | ||
{{MoveData | {{MoveData | ||
|image= | |image=YH_Mutant_WallTrick4.png | ||
|hitbox= | |image2=YH_Mutant_WallTrickFollowup3.png | ||
|input= | |image3=YH_Mutant_WallTrickFollowup23.png | ||
|image4=YH_Mutant_WallTrickFollowup33.png | |||
|hitbox=YH_Mutant_WallTrickFollowupHB3.png | |||
|hitbox2=YH_Mutant_WallTrickFollowup2HB3.png | |||
|hitbox3=YH_Mutant_WallTrickFollowup3HB3.png | |||
|input=[[Image:YH_Mutant_PounceIcon.png]] | |||
|caption= | |caption= | ||
|name=Pounce | |name=Pounce | ||
| Line 541: | Line 699: | ||
*Projectile immunity frames 2-8. | *Projectile immunity frames 2-8. | ||
*Grab immune frames 1-8. | *Grab immune frames 1-8. | ||
*Opponent will be in hitstun until hitting the ground, upon which they will suffer a [[YomiHustle/Combo Mechanics#Knockdowns|knockdown]]. | *Opponent will be in [[YomiHustle/Combo Mechanics#Hitstun|hitstun]] until hitting the ground, upon which they will suffer a [[YomiHustle/Combo Mechanics#Knockdowns|knockdown]]. | ||
*The lack of disjointed hitboxes makes Pounce susceptible to anti-airs. | |||
*Whiffing this will cause Mutant to tumble, before ending in a [[YomiHustle/Combo Mechanics#Knockdowns|knockdown]] (the downward version of this move will not tumble). | |||
}} | }} | ||
}} | }} | ||
====<font style="visibility:hidden; float:right"></font>==== | ====<font style="visibility:hidden; float:right">H Acid Slash</font>==== | ||
{{MoveData | {{MoveData | ||
|image= | |image=YH_Mutant_AcidSlashH.gif | ||
|hitbox= | |hitbox=YH_Mutant_AcidSlashHHB13.png | ||
|input= | |input=[[Image:YH_Mutant_HAcidSlashIcon.png]] | ||
|caption= | |caption= | ||
|name=H. Acid Slash | |name=H. Acid Slash | ||
| Line 559: | Line 719: | ||
|guard=High | |guard=High | ||
|firstactionable=26 | |firstactionable=26 | ||
|frameadvantage=28 | |frameadvantage=28, 15 (in combo) | ||
|proration=0 | |proration=0 | ||
|blockadvantage=+2 | |blockadvantage=+2 | ||
| Line 565: | Line 725: | ||
|description= | |description= | ||
*Has a decent amount of forward movement. | *Has a decent amount of forward movement. | ||
*Immense horizontal hitbox makes it a good tool for catching dodges. | |||
*When landed as a counter hit at all but the max range and [[YomiHustle/Combo Mechanics#Directional_Influence|DI]] out (or point blank and [[YomiHustle/Combo Mechanics#Directional_Influence|DI]] in), following up with [[#Shockwave|Shockwave]] and then [[#Envenom|Envenom]] allows you to continue the combo after [[#Envenom|Envenom]]. Note that depending on range, applying [[#Juke|Juke]] (either forward to chase at longer range or backward to ensure that the projectile doesn't hit before [[#Envenom|Envenom]]) to the [[#Shockwave|Shockwave]] may be required. | |||
*A good move to use with Flippies, where Mutant does a flipped move after dashing directly into an enemy, phasing through them. The distance of can be modified using [[#Juke|Juke]]. Note that this only works if Mutant is to the right of the opponent. | |||
}} | }} | ||
}} | }} | ||
====<font style="visibility:hidden; float:right"></font>==== | ====<font style="visibility:hidden; float:right">V Acid Slash</font>==== | ||
{{MoveData | {{MoveData | ||
|image= | |image=YH_Mutant_AcidSlashV.gif | ||
|hitbox= | |hitbox=YH_Mutant_AcidSlashVHB9.png | ||
|input= | |input=[[Image:YH_Mutant_VAcidSlashIcon.png]] | ||
|caption= | |caption= | ||
|name=V. Acid Slash | |name=V. Acid Slash | ||
| Line 588: | Line 751: | ||
|description= | |description= | ||
*Has a decent amount of downwards movement. | *Has a decent amount of downwards movement. | ||
*[[YomiHustle/Combo Mechanics#Ground bounces|Groundbounces]]. | *[[YomiHustle/Combo Mechanics#Ground bounces|Groundbounces]] grounded opponents. | ||
}} | }} | ||
}} | }} | ||
====<font style="visibility:hidden; float:right"></font>==== | ====<font style="visibility:hidden; float:right">Vault</font>==== | ||
{{MoveData | {{MoveData | ||
|image= | |image=YH_Mutant_ProjectileGrab0.png | ||
|hitbox= | |image2=YH_Mutant_ProjectileGrabJump0.png | ||
|input= | |caption2=WEEEEEEEE | ||
|hitbox=YH_Mutant_ProjectileGrabHB5.png | |||
|hitbox2=YH_Mutant_ProjectileGrabJumpHB0.png | |||
|hitboxCaption=Detection box | |||
|input=[[Image:TH_Mutant_VaultIcon.png]] | |||
|caption= | |caption= | ||
|name=Vault | |name=Vault | ||
| Line 612: | Line 779: | ||
|description= | |description= | ||
*Can only be used in the air. | *Can only be used in the air. | ||
*Detection | *Detection box, activated when colliding with a player or projectile, upon which Mutant will perform Vault Followup. | ||
*Projectile immune frames 6-16. | *Projectile immune frames 6-16. | ||
}} | }} | ||
| Line 629: | Line 796: | ||
*Projectile immune frames 1-3 | *Projectile immune frames 1-3 | ||
*Can select the arc of the jump. | *Can select the arc of the jump. | ||
*[[YomiHustle/Combo Mechanics#Ground bounces| | *Taller hitbox [[YomiHustle/Combo Mechanics#Ground bounces|groundbounces]]. | ||
}} | }} | ||
}} | }} | ||
====<font style="visibility:hidden; float:right"></font>==== | ====<font style="visibility:hidden; float:right">Sneak Attack</font>==== | ||
{{MoveData | {{MoveData | ||
|image= | |image=YH_Mutant_DashThroughAttack.gif | ||
|hitbox= | |hitbox=YH_Mutant_DashThroughAttackHB11.png | ||
|input= | |input=[[Image:YH_Mutant_SneakAttackIcon.png]] | ||
|caption= | |caption= | ||
|name=Sneak Attack | |name=Sneak Attack | ||
| Line 650: | Line 817: | ||
|proration=0 | |proration=0 | ||
|blockadvantage=0 | |blockadvantage=0 | ||
|airok=Yes | |||
|description= | |description= | ||
*Can only use after forward dash, slop dash, dash attack, or air dash. | *Can only use after forward dash, slop dash, dash attack, or air dash. | ||
| Line 661: | Line 829: | ||
{{YomiHustleFrameAdvantage}} | {{YomiHustleFrameAdvantage}} | ||
====<font style="visibility:hidden; float:right"></font>==== | ====<font style="visibility:hidden; float:right">Rebirth</font>==== | ||
{{MoveData | {{MoveData | ||
|image= | |image=YH_Mutant_Rebirth.png | ||
|caption= | |caption= | ||
|hitbox= | |hitbox=YH_Mutant_RebirthHB0.png | ||
|image2= | |image2= | ||
|hitbox2= | |hitboxCaption=detection box for pulling in the opponent | ||
|input=[[Image:YH-Rebirth.png | |hitbox2=YH_Mutant_RebirthHB11.png | ||
|input=[[Image:YH-Rebirth.png]] | |||
|name= Rebirth | |name= Rebirth | ||
|data= | |data= | ||
| Line 684: | Line 853: | ||
|blockadvantage=-1 | |blockadvantage=-1 | ||
|description= | |description= | ||
* Pulls opponent | * Pulls opponent for the entire duration of the move | ||
* On hit or block, provides benefits to mutant: | * On hit or block, provides benefits to mutant: | ||
** Heal 250 health | ** Heal 250 health | ||
| Line 692: | Line 861: | ||
}} | }} | ||
====<font style="visibility:hidden; float:right"></font>==== | ====<font style="visibility:hidden; float:right">Caustic Barrage</font>==== | ||
{{MoveData | {{MoveData | ||
|image= | |image=YH_Mutant_CausticBarrage1.png | ||
|image2=YH_Mutant_CausticBarrage2.png | |||
|hitbox= | |hitbox= | ||
|input= | |input=[[Image:YH_Mutant_CausticBarrageIcon.png]] | ||
|input2=[[Image:YH_Mutant_CausticBarrageIcon2.png]] | |||
|caption= | |caption= | ||
|name=Caustic Barrage | |name=Caustic Barrage | ||
| Line 716: | Line 887: | ||
}} | }} | ||
====<font style="visibility:hidden; float:right"></font>==== | ====<font style="visibility:hidden; float:right">Howl</font>==== | ||
{{MoveData | {{MoveData | ||
|image= | |image=YH_Mutant_Howl.png | ||
|hitbox= | |hitbox= | ||
|input= | |input=[[Image:YH_Mutant_HowlIcon.png]] | ||
|caption=AWOOOOOOOOOOOOO | |caption=AWOOOOOOOOOOOOO | ||
|name=Howl | |name=Howl | ||
| Line 742: | Line 913: | ||
}} | }} | ||
====<font style="visibility:hidden; float:right"></font>==== | ====<font style="visibility:hidden; float:right">Slop Dash</font>==== | ||
{{MoveData | {{MoveData | ||
|image= | |image=YH_Mutant_SlopDash.png | ||
|hitbox= | |hitbox= | ||
|input= | |input=[[Image:YH_Mutant_SlopDashIcon.png]] | ||
|caption= | |caption= | ||
|name=Slop Dash | |name=Slop Dash | ||
| Line 765: | Line 936: | ||
}} | }} | ||
}} | }} | ||
{{Navbox-YH}} | |||
Latest revision as of 10:44, 11 June 2024
Under Construction
|
Profile
Mutant (colloquially known as slop man) is an aggressive rushdown character whith fast ground mobility, extremely quick normals, and extremely unpredictable mixups.
| Strengths | Weaknesses |
|---|---|
|
|
Move List
Unique Mechanics
Juke
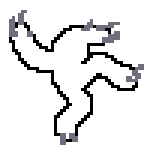
So like, imagine Ninja's backsway, except the commitment is gone. Yeah. So like, imagine Ninja's backsway, except the commitment is gone. Yeah.
|
|---|
Glass Cannon frail little creature frail little creature
|
|---|
Bloodlust Such a lust for revenge!? Such a lust for revenge!?
|
|---|
Projectile Invun
Projectile Invun on Hit
|
|---|
Movement
Dash
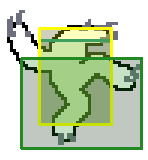
Toggle Hitboxes Toggle Hitboxes
|
|---|
Back Dash
Toggle Hitboxes Toggle Hitboxes
|
|---|
Grounded Normals
* Frame advantage is assuming no restands, knockdowns, wall bounces, or wall splats on the first time the move used during the combo. In game frame advantage WILL vary. See Combo Mechanics for more detail.
Swipe
Toggle Hitboxes Toggle Hitboxes
|
|---|
Up Swipe
Toggle Hitboxes Toggle Hitboxes
|
|---|
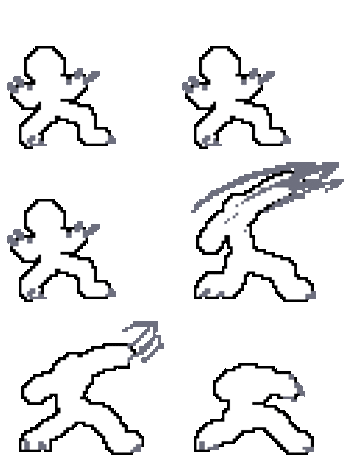
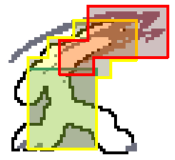
Low Swipe
Toggle Hitboxes Toggle Hitboxes
|
|---|
Slash
Toggle Hitboxes Toggle Hitboxes
|
|---|
Shred
Toggle Hitboxes Toggle Hitboxes
|
|---|
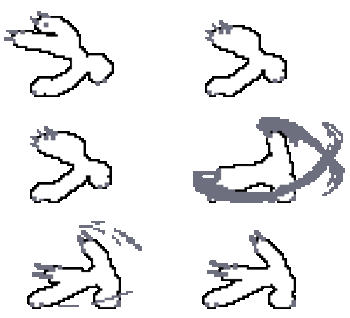
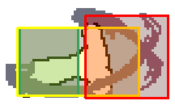
Sweep
Toggle Hitboxes Toggle Hitboxes
|
|---|
Kick
Toggle Hitboxes Toggle Hitboxes
|
|---|
Overhead Claw
Toggle Hitboxes Toggle Hitboxes
|
|---|
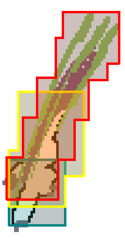
Dash Attack
Note that this is still the first hit
|
|
|---|---|
Toggle Hitboxes Toggle Hitboxes
|
Backwards Dash Attack
Toggle Hitboxes Toggle Hitboxes
|
|---|
Grab
Toggle Hitboxes Toggle Hitboxes
|
|---|
Aerials
* Frame advantage is assuming no restands, knockdowns, wall bounces, or wall splats on the first time the move used during the combo. In game frame advantage WILL vary. See Combo Mechanics for more detail.
Air Swipe
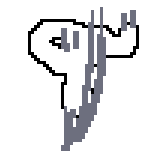
haven't i seen this somewhere before... haven't i seen this somewhere before...
|
|
|---|---|
Toggle Hitboxes Toggle Hitboxes
|
Air Kick
Toggle Hitboxes Toggle Hitboxes
|
|---|
Specials
* Frame advantage is assuming no restands, knockdowns, wall bounces, or wall splats on the first time the move used during the combo. In game frame advantage WILL vary. See Combo Mechanics for more detail.
Caustic Spike
tandem spike tandem spike
|
|---|
Leap Slash
Toggle Hitboxes Toggle Hitboxes
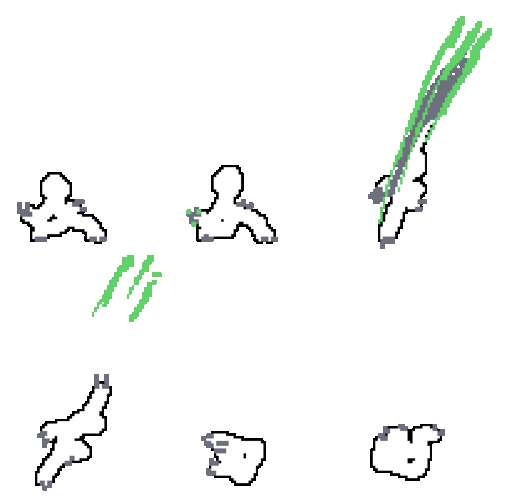
|
|---|
Leap Slash (up)
Toggle Hitboxes Toggle Hitboxes
|
|---|
Corkscrew
Toggle Hitboxes Toggle Hitboxes
|
|---|
Shockwave
Toggle Hitboxes Toggle Hitboxes
|
|---|
Envenom
so do all the fighters taste the same, or... so do all the fighters taste the same, or...
|
|
|---|---|
Toggle Hitboxes Toggle Hitboxes
|
Pounce
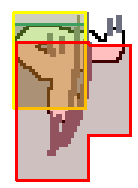
Toggle Hitboxes Toggle Hitboxes
|
|---|
H Acid Slash
Toggle Hitboxes Toggle Hitboxes
|
|---|
V Acid Slash
Toggle Hitboxes Toggle Hitboxes
|
|---|
Vault
Detection box WEEEEEEEE WEEEEEEEE
|
|
|---|---|
Toggle Hitboxes Toggle Hitboxes
|
Sneak Attack
Toggle Hitboxes Toggle Hitboxes
|
|---|
Supers
* Frame advantage is assuming no restands, knockdowns, wall bounces, or wall splats on the first time the move used during the combo. In game frame advantage WILL vary. See Combo Mechanics for more detail.
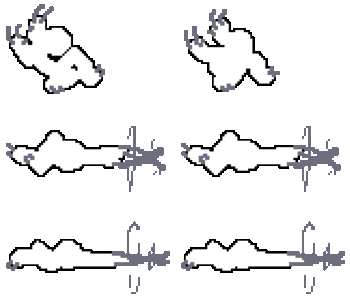
Rebirth
detection box for pulling in the opponent
|
|
|---|---|
Toggle Hitboxes Toggle Hitboxes
|
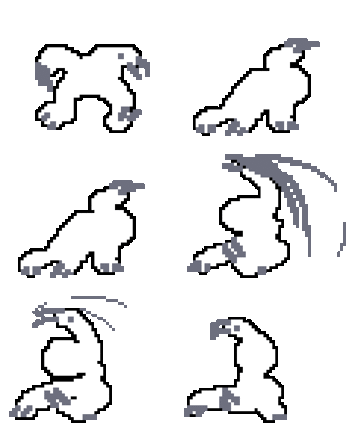
Caustic Barrage
Howl
AWOOOOOOOOOOOOO AWOOOOOOOOOOOOO
|
|---|
Slop Dash
