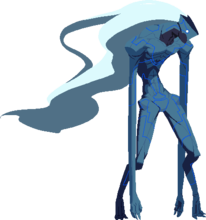
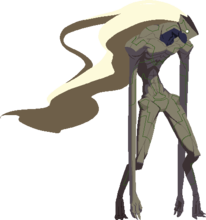
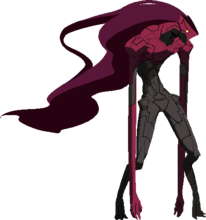
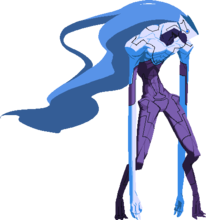
|
|
| Line 111: |
Line 111: |
| |frameAdv=-10 | | |frameAdv=-10 |
| |hitbox= | | |hitbox= |
| |description=Merkava just shoots his arms out at about 3/4 of the entire screen. Big silly poke, also makes its way into combos. Be careful, has quite a bit of recovery to compensate for its range. | | |description=Merkava just shoots his arms out at about 3/4 of the entire screen. Big silly poke, also makes its way into combos. Be careful, has quite a bit of recovery to compensate for its range. 214A could be better if you are not going to spend meter. You can hit confirm 214C off of this. |
| }} | | }} |
| }} | | }} |
Introduction
"BRAWK BRAWK BRAWK BRAWK"
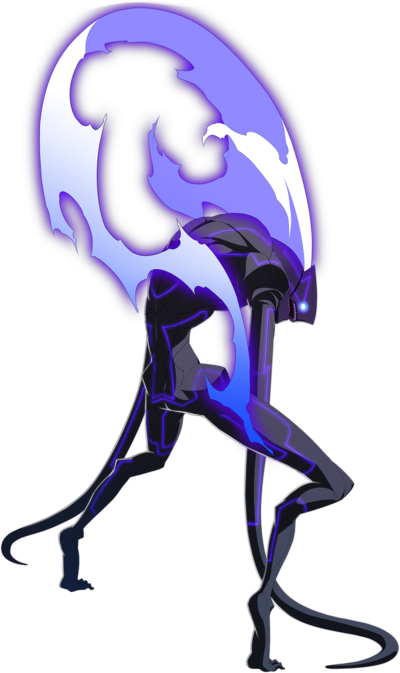
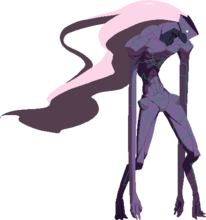
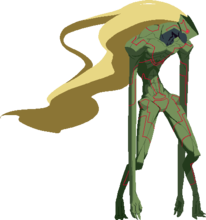
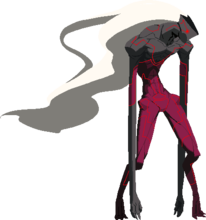
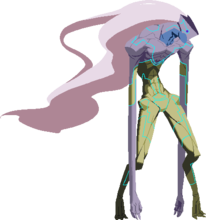
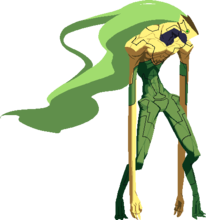
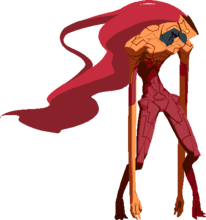
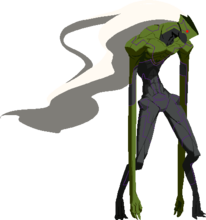
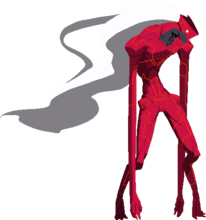
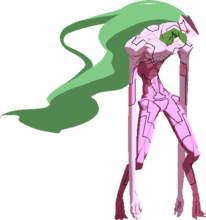
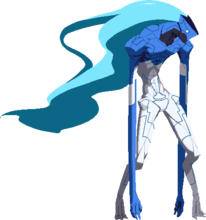
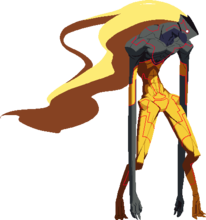
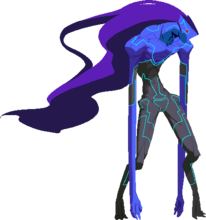
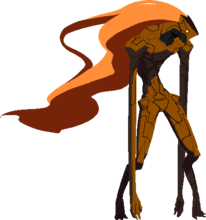
Merkava is a big, horrible void creature that has huge buttons and can fly. If you want to play a character that excels in neutral with some safe pressure, he's what you're looking for. The trade off for his safe neutral & pressure is that he doesn't really have a super strong mix up game or strong defense once he's forced to block. That being said, he still has more than enough options to deal with most situations and is generally able to win games by playing to his strengths. You'll need a strong sense of risk vs reward in order to excel with him in [st], especially in some of his harder match ups.
Story
lol anime story
Unique Trait/Health
Health: 10,400
Character Trait: Merkava's unique trait is the ability to fly. By pressing up twice Merkava will begin to fly. From flight he can perform air normal/special moves. Flight is a very important tool to learn to use well. In neutral it gives him a lot of strong space control and when used for okizeme it can have very strong results. He also gains access to a glide attack that comes in very fast and can be hard to anti-air. He can cancel into normals from this attack on hit or block, even if your opponent shields it. Cancelling into j.B leads to a short combo on hit and frame advantage on block, so it's a good idea to do so most of the time. If he flies for too long without landing or performing a move, he will fall to the ground and be subjected to a large amount of recovery.
"Fast Flight" is a very important technique to master to get the most out of your flight. It's necessary in neutral to quickly and safely get spacing moves out, and you'll need it to get flight okizeme set up in time. It's very simple to perform. All you need to do is jump diagonally either forward or back, quickly input a seceond upwards motion, then quickly switch to holding down on the joystick. If performed correctly Merkava will quickly enter flight low to the ground. In neutral this allows him to get low to the ground air normals and keep himself safer when deciding to fly. Throwing out j.B low to the ground is very common, since it covers a large amount of space with a very small amount of recovery.
When used for okizeme, flight can become a very strong mix up. After 66C ender, immediately fast fly and you have a few different oki options. j.A hits high and can safejump certain reversals. If somebody respects your oki or lacks a reversal, you can attempt to set up something like j.C > j.B for multiple high hitting moves in one string. The low option is to whiff a button to get rid of flight recovery, then go low with 2B. The whiff can also be used to bait reversals or set up a throw. There's a very large amount of mind games past the high/low/throw game, so be creative with it.
Vorpal Trait: In Vorpal, Merkava's worms do not disappear when blocking. His force function damaged is increased up to +124, given +5f of untech time, and becomes special cancelable.
Move List
L = Low, H = High, UNB = Unblockable, CS = Chain Shift
Startup includes the first active frame.
Normal Moves
| 2B
|
| Damage
|
Startup
|
Active
|
Recovery
|
Frame Adv
|
Cancels
|
Guard/Shield
|
Hitbox
|
| 445
|
7
|
2*2
|
22
|
-4
|
Sp,EX,CS
|
L
|
-
|
This thing is pretty awesome. 2 hit low with a lot of active frames. Great in pressure since it hits twice and can gatling into small gaps with things like 2C. Has deceptively long range as well, so can be used to get things started. Be careful though, on whiff this move leaves you really open.
|
|
| 5C
|
| Damage
|
Startup
|
Active
|
Recovery
|
Frame Adv
|
Cancels
|
Guard/Shield
|
Hitbox
|
| 710
|
14
|
5
|
23
|
-10
|
Sp,EX,CS
|
HL
|
-
|
Merkava just shoots his arms out at about 3/4 of the entire screen. Big silly poke, also makes its way into combos. Be careful, has quite a bit of recovery to compensate for its range. 214A could be better if you are not going to spend meter. You can hit confirm 214C off of this.
|
|
| 2C
|
| Damage
|
Startup
|
Active
|
Recovery
|
Frame Adv
|
Cancels
|
Guard/Shield
|
Hitbox
|
| 570
|
12
|
7
|
24
|
-9
|
Sp,EX,CS
|
L
|
-
|
Merkava takes a second to lunge forward with a low hit that knocks the opponent airborne on hit. This thing is also pretty awesome. It's one of Merkava's main combo tools since it leads into a launch and can be confirmed with multiple different buttons. It's also fairly useful in pressure since the delay on it creates a bit of a frametrap, and on block you can gatling out of it. The range on this thing is also great, which leads to some good punishes and call outs.
|
|
| j.B
|
| Damage
|
Startup
|
Active
|
Recovery
|
Frame Adv
|
Cancels
|
Guard/Shield
|
Hitbox
|
| 504
|
10
|
3*2
|
X+3
|
Varies
|
Sp,EX,CS
|
H/AS
|
-
|
j.B - 2 hit move where Merkava throws his arm out across the screen. Its primary use is to control space and it does a very good job of that. Combined with low flight, Merkava can throw this out very low to the ground to cover great space with very little recovery. Its 2 hits also make it good for extending air combos as Merkava lands.
|
|
Command Normals
| 4B
|
| Damage
|
Startup
|
Active
|
Recovery
|
Frame Adv
|
Cancels
|
Guard/Shield
|
Hitbox
|
| 666
|
10
|
5
|
19
|
-4
|
Sp,EX,CS
|
HL
|
-
|
Merkava gives them the elbow. This is a strong anti-air that leads to a full combo on hit and is a pretty good starter. On air hit it spikes the opponent down to the ground and causes a knockdown, so it also is a primary combo ender for a large amount of combos.
|
|
| 6C
|
| Damage
|
Startup
|
Active
|
Recovery
|
Frame Adv
|
Cancels
|
Guard/Shield
|
Hitbox
|
| 754
|
18
|
6
|
20
|
-8
|
Sp,EX,CS
|
HL
|
-
|
Anti-air version of 5C, looks the same just angled upwards. Can be used as an anti-air in very specific situations, but has so much recovery on whiff that it rarely comes into play. It's also a good combo extender as well.
|
|
| 2CC
|
| Damage
|
Startup
|
Active
|
Recovery
|
Frame Adv
|
Cancels
|
Guard/Shield
|
Hitbox
|
| 302
|
15
|
4
|
24
|
-11
|
(Sp),(EX),(CS)
|
L
|
-
|
Launches the opponent pretty high on hit, making it a primary combo tool. This was updated in [st] to allow cancelling into special moves on block, so it's a bit safer than in UNiEL. You should still not autopilot this on block since that will severely limit your options still.
|
|
| 4C
|
| Damage
|
Startup
|
Active
|
Recovery
|
Frame Adv
|
Cancels
|
Guard/Shield
|
Hitbox
|
| 862
|
29
|
2
|
23
|
-7
|
Sp,EX,CS
|
H
|
-
|
Merkava tilts his arms back, then slams them down. Hits overhead. Has quite a bit of range, so you'll see this towards the end of pressure once Merk has been pushed out a little bit. The delay sometimes catches people trying to do something, and since it comes down it will catch people attempting to jump out. Pretty safe if blocked from far out, but don't try using it at close range. Can be followed up on hit but might be a little tricky.
|
|
| 3C
|
| Damage
|
Startup
|
Active
|
Recovery
|
Frame Adv
|
Cancels
|
Guard/Shield
|
Hitbox
|
| 612, 488
|
9
|
3(21)10
|
15
|
-10
|
Sp,EX,CS
|
H
|
-
|
Merkava goes airborne and slams down with an overhead. This move is really good. Since Merkava is so high, he'll go over a lot of grounded moves and throws, catching opponents who like to mash. On hit it is easily confirmable into a combo. Has a hitbox on the way up that is a surprisingly good anti-air as well. On block it's unsafe, but can be special cancelled into air fireball to make it safer. It's also used as a combo extension in the corner. In [st], you can cancel this move into flight on block or hit.
|
|
| 3[C]
|
| Damage
|
Startup
|
Active
|
Recovery
|
Frame Adv
|
Cancels
|
Guard/Shield
|
Hitbox
|
| 612
|
9
|
3
|
34
|
|
Sp,EX,CS
|
H
|
-
|
The feint button. If you hold the button C the whole way, Merkava won't do the second part of normal 3C and instead slam back to his original position. If you hold it a little bit, it will appear as the regular 3[C] animation, but will do the second attack of 3C instead.
|
|
| j.2C
|
| Damage
|
Startup
|
Active
|
Recovery
|
Frame Adv
|
Cancels
|
Guard/Shield
|
Hitbox
|
| 410
|
10
|
21 (max)
|
10
|
Stand: -6
Crouch: -3
|
Sp,EX,CS
|
HL
|
-
|
Divekick. Has quite a bit of recovery so it's hard to make safe. On hit, it causes a knockdown that can easily be followed up or used for okizeme. Mostly used in combos for the knockdown, but has gimmicky uses for oki and pressure.
|
|
Dash Normals
| 66B
|
| Damage
|
Startup
|
Active
|
Recovery
|
Frame Adv
|
Cancels
|
Guard/Shield
|
Hitbox
|
| 789
|
7
|
3
|
21
|
-2
|
Sp,EX,CS
|
L
|
-
|
Dash version of 2B. Saw an extensive overhaul in [st] where it has become extremely useful. The move has a very generous special cancel window now, as well as juggling downed opponents in a way that can be followed up. Major combo tool and can be used in pressure now.
|
|
| 66C
|
| Damage
|
Startup
|
Active
|
Recovery
|
Frame Adv
|
Cancels
|
Guard/Shield
|
Hitbox
|
| 800
|
6
|
3(18)6
|
20
|
-7
|
Sp,EX,CS
|
H
|
-
|
Sped up version of 3C. Has all the same benefits except it is faster and goes a bit farther. Since it's faster you'll see it used as a combo extension for a lot of BnBs. Merkava is left with massive amounts of frame advantage after this, making it a very good combo ender in the corner.
|
|
Universal Mechanics
Execute Agitation
B+C
|
| Damage
|
Startup
|
Active
|
Recovery
|
Frame Adv
|
Cancels
|
Guard/Shield
|
Hitbox
|
| 1630
|
11
|
3
|
22
|
-9
|
(CS)
|
HL
|
-
|
Shake the baby. Can't think of many uses for this other than as a combo extension in the corner. Pretty unsafe on block as well, but can be special cancelled into safety. Need to spin the stick and mash buttons to get full hits.
|
|
Throw
A+D
|
| Damage
|
Startup
|
Active
|
Recovery
|
Frame Adv
|
Cancels
|
Guard/Shield
|
Hitbox
|
| 1730 (max)
|
4
|
1
|
22
|
+29 (hit)
|
-
|
UNB
|
-
|
Merkava slams the opponent around. To get more hits(up to 8) and damage, spin the stick in 360 motions while mashing all your buttons. Has thankfully been updated so that you can get all 8 hits without having to break your stick.
|
|
Veil Off
A+B+C
|
| Damage
|
Startup
|
Active
|
Recovery
|
Frame Adv
|
Cancels
|
Guard/Shield
|
Hitbox
|
| 0
|
21 (min)
69 (max)
|
2
|
37
|
Blocked: -13
Hit: +36
|
-
|
HLA
|
-
|
Universal reversal. Invincible from start-up until the first active frame. You can delay the start-up until the 69th frame, but there's no real incentive to do so outside of thwarting meaty attacks.
|
|
Special Moves
Flying Attack
66 during flight
|
|
Execute Drill
「我、 穿つ」
236X
|
| Version
|
Damage
|
Startup
|
Active
|
Recovery
|
Frame Adv
|
Cancels
|
Guard/Shield
|
Hitbox
|
| A
|
1335
|
9
|
8
|
25
|
-5
|
EX,CS
|
HL
|
-
|
Merkava flails his arms forward in a flurry of punches. Combo fodder to be used at the end of combos. With Chain Shift available this becomes a pretty scary special to use in pressure since it hits from far out and is a decent starter.
|
| Version
|
Damage
|
Startup
|
Active
|
Recovery
|
Frame Adv
|
Cancels
|
Guard/Shield
|
Hitbox
|
| B
|
1510
|
13
|
8
|
29
|
-9
|
EX,CS
|
HL
|
-
|
About the same as A version but moves Merkava forward and deals a bit more damage. Leaves opponent airborne on hit.
|
| Version
|
Damage
|
Startup
|
Active
|
Recovery
|
Frame Adv
|
Cancels
|
Guard/Shield
|
Hitbox
|
| EX
|
1955
|
12
|
16
|
22
|
-2
|
(CS)
|
HL
|
-
|
Super version. Has invuln up until it's active, which means it can be used as a reversal but is at risk to trade or be beaten outright, so be careful. On block it's safe unless the last hit is shielded. On hit, it wallbounces the opponent which can easily be followed up.
|
|
Execute Pierce
「我、 穹窿を貫く」
623X
|
|
Execute Seize and Devour
「我、捕獲して喰らう」
214X
|
| Version
|
Damage
|
Startup
|
Active
|
Recovery
|
Frame Adv
|
Cancels
|
Guard/Shield
|
Hitbox
|
| A
|
1476
|
11
|
12
|
12
|
-11 to -14
|
(CS)
|
HL
|
-
|
Merkava extends his arm horizontally across the screen, and on hit it grabs the opponent and brings Merkava to them where he then eats their face. This is completely blockable and whiffs entirely on airborne opponents. The arm will go through projectiles, making this a very good way to punish or discourage people from using them. If you press D while the arm is extending, the arm will stop and stay active for a few frames. On hit, this can be Chain Shifted which leads to really big damage from across the entire screen. On block this is very unsafe point blank, but most of the time you use it your opponent will be very far away and will have a tough time punishing depending on who they are. Massive whiff recovery, so you will be punished if they jump it.
|
| Version
|
Damage
|
Startup
|
Active
|
Recovery
|
Frame Adv
|
Cancels
|
Guard/Shield
|
Hitbox
|
| B
|
1476
|
11
|
12
|
12
|
+39 (combo stun)
|
(CS)
|
UNB
|
-
|
Functions the same as 214A, but goes at an upward angle. Can grab airborne opponents but whill whiff on standing ones. Aside from being used as an anti-air, is also commonly used to end long range combos.
|
| Version
|
Damage
|
Startup
|
Active
|
Recovery
|
Frame Adv
|
Cancels
|
Guard/Shield
|
Hitbox
|
| EX
|
1980
|
1+5
|
23
|
9
|
-2 to -12
|
(CS)
|
HL
|
-
|
Is a very fast and more damaging version of 214A, with the exception that it can grab airborne opponents. Can confirm into it off of max range 5C.
|
|
Execute Breathe
「我、息吹く」
j.214X
|
| Version
|
Damage
|
Startup
|
Active
|
Recovery
|
Frame Adv
|
Cancels
|
Guard/Shield
|
Hitbox
|
| A
|
700
|
15
|
30 (max)
|
22
|
+1 to +3
|
EX,CS
|
HLA
|
-
|
Air fireball. Pretty straightforward to use in neutral to control space. Is also used after a blocked 3C to help make it safer. Can be used as a combo extension in some cases as well. [st] adds a charged version of this that hits twice, making it a staple combo tool as well as being much stronger if blocked.
|
| Version
|
Damage
|
Startup
|
Active
|
Recovery
|
Frame Adv
|
Cancels
|
Guard/Shield
|
Hitbox
|
| B
|
700
|
16
|
53 (max)
|
20
|
-1 to +1
|
EX,CS
|
HLA
|
-
|
Same as the A version except it travels at a more horizontal angle.
|
| Version
|
Damage
|
Startup
|
Active
|
Recovery
|
Frame Adv
|
Cancels
|
Guard/Shield
|
Hitbox
|
| EX
|
1725
|
7
|
86 (max)
|
19
|
-4 to -6
|
(CS)
|
HLA
|
-
|
Fires off 3 fireballs instead of one. Can be used to end air combos or to make certain situations safer.
|
|
Execute Coil
「我、執拗に纏わり付く」
22X
|
| Version
|
Damage
|
Startup
|
Active
|
Recovery
|
Frame Adv
|
Cancels
|
Guard/Shield
|
Hitbox
|
| A
|
427
|
168 (worm)
|
4
|
43 (Merkava)
|
+
|
-
|
HL
|
-
|
Merkava throws down his arm and spawns a little worm creature after a bit of time. If Merkava is hit, blocks, or techs a grab the worm disappears. His new Vorpal trait in [st] makes it so they won't go away if Merkava blocks while in Vorpal. The worm itself can also be hit before it becomes a threat. They sped these up substantially in [st], so you can very easily set them up for better oki now.
|
| Version
|
Damage
|
Startup
|
Active
|
Recovery
|
Frame Adv
|
Cancels
|
Guard/Shield
|
Hitbox
|
| B
|
427*2
|
169 (worm)
|
4
|
43 (Merkava)
|
+
|
-
|
HL
|
-
|
More or less same thing as 22A but the worm bites twice.
|
| Version
|
Damage
|
Startup
|
Active
|
Recovery
|
Frame Adv
|
Cancels
|
Guard/Shield
|
Hitbox
|
| EX
|
999 (Merkava)
1228, 836 (Worms)
|
18 (Merkava)
169 (Worms)
|
1 (Merkava)
~16 (Worms)
|
22 (Merkava)
|
-5 (Merkava)
+ (Worms)
|
-
|
H
|
-
|
With the super version, Merkava will actually hit the opponent with his arm and knock them down, giving him much more time to set up. Additionally, this versions spawns 3 worms that will attack three times. Sees a lot of use as an oki option at the end of combos, as well as extending CVO combos. Note: Merkava hits you with an overhead as hes setting down his worms.
|
|
Execute Domination
「我、跳梁する」
41236C
|
| Damage
|
Startup
|
Active
|
Recovery
|
Frame Adv
|
Cancels
|
Guard/Shield
|
Hitbox
|
| 2109
|
14
|
18
|
15
|
-6
|
(CS)
|
HL
|
-
|
Merkava goes airborne then swoops at the opponent. On hit he slams them into the ground for a bit of damage and knockdown. Has a bit of invuln so can be used in reversal situations or to scoop somebody out of the air. Its invlun is up before it is active so you can't be too crazy with it. Doesn't see a whole lot of use since there are usually better options to go with.
|
|
Infinite Worth
Infinite Words EXS
Execute Trample
「我、蹂躙せん」
A+B+C+D
|
| Damage
|
Startup
|
Active
|
Recovery
|
Frame Adv
|
Cancels
|
Guard/Shield
|
Hitbox
|
| 3665
|
16
|
3
|
49
|
-26
|
-
|
HLA
|
-
|
Same as other IWEXS moves. Starts with a pillar of light as the hitbox with some invuln. On hit, Merkava just eats the opponent in a pretty flashy animation. On block it's pretty unsafe.
|
|
Strategy
Neutral
Playing Merkava in neutral is fairly straightforward for the most part. He's got some pretty huge limbs that he can get confirms of or reverse gatling to make himself more safe. 2B, 5B, 5C, 2C are going to be your primary pokes to keep people in check. Fast flight (doing a diagonal jump into immediate flight then holding down) into j.B or an air fireball are also good ways to control space. You can use the threat of his massive buttons to stop your opponent from using their own buttons, which means you can run up and get pressure started. Merkava thrives on the idea of forcing people to be scared of his buttons so that he can freely move forward without being challenged. Combine flight options with his strong grounded normals to create a very suffocating situation for the other player.
When playing more defensively, Merkava will still be looking to safely poke people out. 4B is a god tier anti-air that can shut down aerial approaches. Fireballs remain a pretty good option to cover space. 214A/B can be used to punish players that want to throw their own projectiles or hang out on the other side of the screen in general. If you are trapped in the corner, using glide as an escape option is not the worst idea ever. Other than that, the normal neutral gameplan should work fine. A warning however, is that Merkava's general size and the slower speeds of his moves make playing defensively a bit harder against certain characters that can challenge his reach. You don't want to keep the pressure off people for too long in neutral if you can help it.
Pressure
Merkava's pressure isn't anything too special. Most of the time in pressure he will be using his massive reach to threaten people so that he can attempt to move forward for a pressure reset or a grab. Outside of grab and assault, he doesn't really have much else in his standing mix up game. The upside of this is that his pressure is extremely safe and can be maintained over a distance. 2A is a great frametrap tool and the go to pressure starter when you get in close. Since 2A hits twice but can be cancelled into itself on the first hit, you can make it an odd number of times which can be tricky. 2B's double hit and large amount of hitstop can also help make frametraps a possibility. 2C is the primary frame trap tool you'll be using. There's enough start up to it to create gaps in your pressure to blow up mashing, however this can lose to invincible reversals. If 2C is blocked, you can easily gatling into 5A or 5B to help end your pressure safely. Those buttons will also confirm into full combos if 2C happens to land a hit. Consider delaying a special cancel into 623A for a frametrap as well since it's very good on block. 3C/66C can be used to go over some low mash, but they remain slow and easy to block overheads in normal conditions.
Once you do get pushed out from your pressure string, be sure to save 5A for a reverse gatling so that you can be safe. Just simple things like 5B and 5C can chain into 5A to be safe and threatening from some space. Most of his stuff is pretty minus on block. Being slightly minus at range isn't the end of the world though, especially if the opponents back is to the corner. Just use your normals to keep control over some of that space and work your way back in.
It's also worth noting that Merkava does not have many strong options in strings to beat shielding once he is a couple hits in. Most of his moves are minus and can't lead to tick grab set ups outside of his A buttons, the overheads he can gatling into like 3C and 4C are both slow and not great in general, and some of the multihit moves are really telegraphed. That means if you go into strings just slamming through all your buttons, you will lose GRD (and thus Vorpal) fast and just end up pushed out. Remember to try to use spacing and the threat of huge normals to control your opponent.
Example strings:
2AxN > 2C (2C acts as a frametrap) > 5AxN(hold up to keep doing 5A on block without getting autocombo) > 4B
2B > 5C (can partial charge for high reward frame trap) > 2C > etc
2A > 2A (cancel on the first hit to get 3 hits instead of 4) > grab
5B > 5C > 5A whiff > 5B or run up 2B or wait to react to something (there's a pretty massive gap here, but if you have some space most mashed buttons will whiff)
5AxN > 2B > 2C > delayed 623A (without the 5A to gatling back into, your options are limited and delayed 623A can catch things still)
Defense
236C is your primary reversal option. It's pretty safe and leads to a combo on hit, but it loses invincibility on the first active frame so it can lose to a few things post superflash. Infinite Worth has more invincibility if you are desperate and can blow meter, but it's also really unsafe and generally a pretty terrible idea. Merkava's defense in general is pretty standard since you don't have any other reversals outside of that. Mashing is not greatly advised since his buttons are kinda slow. Using his divekick as a fuzzy defensive option isn't all that bad to get out of throws and lows, but note this can be not so safe on block or just blown up in general.
Knockdown
Merkava's knockdown game is actually pretty good. Whenever you end a combo it will generally be with 4B or 66C. Midscreen, you don't actually get a whole lot but you'll at least be at advantage. After either of these knockdowns you can cancel into 22A/B. The worms midscreen aren't the most useful things ever, especially if the opponent back techs and they need to catch up. In the corner however, they are extremely good at forcing a situation in your favor. If you grab while worms are coming out they'll even grab you some extra damage. 22C can create some really wild situations since they hit 3 times and corner vacuum for unique cross ups. Cancelling into worms is going to be one of your major two knockdown options.
The other option in the corner is to go for flight oki. After a 66C, you have enough frame advantage to enter into low flight and then hit a button as your opponent wakes up. If you time a j.A correctly, it will safe jump most reversals (you're not safejumping Vatista). You can also just whiff the j.A to get rid of flight's landing recovery and go low. This can be fuzzy guarded, but there are some extra options you can sneak in here to keep them guessing. A video guide on how to this from UNiEL exists on Youtube: click here to watch. This video is from UNiEL, but all the same concepts and ideas work just as well in ST.
Combos
WIP. Please check the updated combo guide on Evernote.
Colors
| Hell's Viper
|
Scallop
|
Brown Lizard
|
Scream Hades
|
Green Iguana
|
|
|
|
|
|
|
| Bloody Basilisk
|
Violet Naja
|
Sea Snake
|
Dust Sand
|
Hephaistos
|
|
|
|
|
|
|
| Wise Marlin
|
Noble Turtle
|
Ladybug
|
Sauterelle Prince
|
Rose Crane
|
|
|
|
|
|
|
| Lark Dancer
|
Cruel Penguin
|
Killer Bee
|
Sombre Corbeau
|
Humble Falcon
|
|
|
|
|
|
|
Template:UNIST
