User:ChairGTables/Riki: Difference between revisions
Jump to navigation
Jump to search
ChairGTables (talk | contribs) No edit summary |
ChairGTables (talk | contribs) No edit summary |
||
| Line 18: | Line 18: | ||
== Move List == | == Move List == | ||
=== | ===Normals (Holding Ball)=== | ||
===== | {{MoveData | ||
|image=SDB_Riki_NormalThrow.png | |||
|name=Normal Throw | |||
|input=5A | |||
|data= | |||
{{AttackData-SDB | |||
|damage=20 | |||
|chip=6 | |||
|hits=1 | |||
|knockdown=No | |||
|startup=6 | |||
|active=Always Upon Throw | |||
|recovery=13 | |||
|stun=20% | |||
|description= | |||
: Throw with no additional inputs. | |||
}} | |||
}} | |||
{{MoveData | {{MoveData | ||
|image=SDB_Riki_Portrait.png | |image=SDB_Riki_Portrait.png | ||
|name= | |name=Running Throw | ||
|input=66A | |||
|data= | |||
{{AttackData-SDB | |||
|damage=20 | |||
|chip=6 | |||
|hits=1 | |||
|knockdown=No | |||
|startup=6 | |||
|active=Always Upon Throw | |||
|recovery=13 | |||
|stun=20% | |||
|description= | |||
: Throw during the running state. | |||
}} | |||
}} | |||
{{MoveData | |||
|image=SDB_Riki_Portrait.png | |||
|name=Feint | |||
|input=5D | |||
|data= | |||
{{AttackData-SDB | |||
|damage=20 | |||
|chip=6 | |||
|hits=1 | |||
|knockdown=No | |||
|startup=6 | |||
|active=Always Upon Throw | |||
|recovery=13 | |||
|stun=20% | |||
|description= | |||
: Fake a throw. | |||
}} | |||
}} | |||
{{MoveData | |||
|image=SDB_Riki_NormalThrow.png | |||
|name=Air Throw | |||
|input=5A | |||
|data= | |||
{{AttackData-SDB | |||
|damage=20 | |||
|chip=6 | |||
|hits=1 | |||
|knockdown=No | |||
|startup=6 | |||
|active=Always Upon Throw | |||
|recovery=13 | |||
|stun=20% | |||
|description= | |||
: Throw with no additional inputs while jumping. | |||
}} | |||
}} | |||
{{MoveData | |||
|image=SDB_Riki_Portrait.png | |||
|name=Running Air Throw | |||
|input=66A | |||
|data= | |||
{{AttackData-SDB | |||
|damage=20 | |||
|chip=6 | |||
|hits=1 | |||
|knockdown=No | |||
|startup=6 | |||
|active=Always Upon Throw | |||
|recovery=13 | |||
|stun=20% | |||
|description= | |||
: Throw while jumping in the running state. | |||
}} | |||
}} | |||
{{MoveData | |||
|image=SDB_Riki_Portrait.png | |||
|name=Air Feint | |||
|input=5D | |||
|data= | |||
{{AttackData-SDB | |||
|damage=20 | |||
|chip=6 | |||
|hits=1 | |||
|knockdown=No | |||
|startup=6 | |||
|active=Always Upon Throw | |||
|recovery=13 | |||
|stun=20% | |||
|description= | |||
: Fake a throw in the air. Resets gravity when performed. | |||
}} | |||
}} | |||
===Normals (Hands Free)=== | |||
{{MoveData | |||
|image=SDB_Riki_Portrait.png | |||
|name=Catch | |||
|input=5A | |input=5A | ||
|data= | |data= | ||
| Line 35: | Line 151: | ||
|stun=20% | |stun=20% | ||
|description= | |description= | ||
: Throw with | : Catch an incoming ball. | ||
}} | |||
}} | |||
{{MoveData | |||
|image=SDB_Riki_Portrait.png | |||
|name=Dodge | |||
|input=5B | |||
|data= | |||
{{AttackData-SDB | |||
|damage=20 | |||
|chip=6 | |||
|hits=1 | |||
|knockdown=No | |||
|startup=6 | |||
|active=Always Upon Throw | |||
|recovery=13 | |||
|stun=20% | |||
|description= | |||
: Riki kneels on the ground to dodge an incoming attack. Use sparingly, as teammates behind you can still get hit. | |||
}} | |||
}} | |||
===Specials (Holding Ball)=== | |||
{{MoveData | |||
|image=SDB_Riki_Portrait.png | |||
|name=Mach Shoot | |||
|input=236A | |||
|data= | |||
{{AttackData-SDB | |||
|damage=20 | |||
|chip=6 | |||
|hits=1 | |||
|knockdown=No | |||
|startup=6 | |||
|active=Always Upon Throw | |||
|recovery=13 | |||
|stun=20% | |||
|description= | |||
: Riki spins towards the enemy while surrounding himself with the ball's flames. | |||
}} | |||
}} | |||
{{MoveData | |||
|image=SDB_Riki_Portrait.png | |||
|name=Skylark Shoot | |||
|input=623A | |||
|data= | |||
{{AttackData-SDB | |||
|damage=20 | |||
|chip=6 | |||
|hits=1 | |||
|knockdown=No | |||
|startup=6 | |||
|active=Always Upon Throw | |||
|recovery=13 | |||
|stun=20% | |||
|description= | |||
: Riki jumps in the air then dives diagonally towards the opponent. The initial jump can move forward, allowing it to be a good crossup tool. | |||
}} | |||
}} | |||
{{MoveData | |||
|image=SDB_Riki_Portrait.png | |||
|name=Special Pass | |||
|input=623B | |||
|data= | |||
{{AttackData-SDB | |||
|damage=20 | |||
|chip=6 | |||
|hits=1 | |||
|knockdown=No | |||
|startup=6 | |||
|active=Always Upon Throw | |||
|recovery=13 | |||
|stun=20% | |||
|description= | |||
: Riki performs a powerful throw after receiving the ball from a teammate. | |||
}} | |||
}} | |||
===Specials (Hands Free)=== | |||
{{MoveData | |||
|image=SDB_Riki_Portrait.png | |||
|name=Hanazono Counter | |||
|input=623A | |||
|data= | |||
{{AttackData-SDB | |||
|damage=20 | |||
|chip=6 | |||
|hits=1 | |||
|knockdown=No | |||
|startup=6 | |||
|active=Always Upon Throw | |||
|recovery=13 | |||
|stun=20% | |||
|description= | |||
: Riki quickly does a spinning uppercut to reflect the ball back at the opponent. Can only be used when Riki is not holding the ball. | |||
}} | |||
}} | |||
===Supers (Holding Ball)=== | |||
{{MoveData | |||
|image=SDB_Riki_Portrait.png | |||
|name=Burning Upper | |||
|input=641236A | |||
|data= | |||
{{AttackData-SDB | |||
|damage=20 | |||
|chip=6 | |||
|hits=1 | |||
|knockdown=No | |||
|startup=6 | |||
|active=Always Upon Throw | |||
|recovery=13 | |||
|stun=20% | |||
|description= | |||
: Riki passes the ball to his teammates. As his teammates spin to bounce the ball towards each other to build speed, Riki runs to the ball and performs a powerful spinning uppercut to set the ball on flames toward the opponent. | |||
}} | }} | ||
}} | }} | ||
== Gameplan == | == Gameplan == | ||
:Jumping past the middle line and using his | :Jumping past the middle line and using his Skylark Shoot will have him sometimes attack from behind, leaving your opponents open. | ||
Revision as of 01:12, 30 January 2023

| “ |
That was fun! A little more toughness and you'd be the perfect match. |
” |
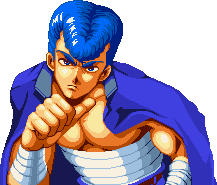
Overview
Riki is the main rival of Kunio, but also treats him as his best friend. His tools offer him many mixup opportunities.
| Strengths | Weaknesses |
|---|---|
|
|
Move List
Normals (Holding Ball)
Normal Throw 5A  |
|---|
Running Throw 66A |
|---|
Feint 5D |
|---|
Air Throw 5A |
|---|
Running Air Throw 66A |
|---|
Air Feint 5D |
|---|
Normals (Hands Free)
Catch 5A |
|---|
Dodge 5B |
|---|
Specials (Holding Ball)
Mach Shoot 236A |
|---|
Skylark Shoot 623A |
|---|
Special Pass 623B |
|---|
Specials (Hands Free)
Hanazono Counter 623A |
|---|
Supers (Holding Ball)
Burning Upper 641236A |
|---|
Gameplan
- Jumping past the middle line and using his Skylark Shoot will have him sometimes attack from behind, leaving your opponents open.