Story
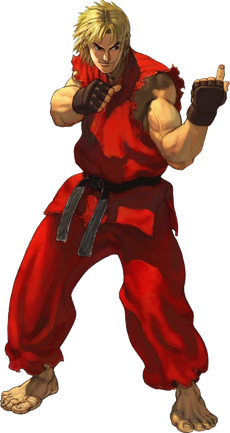
Ken Masters is the deuteragonist from the Street Fighter series of fighting games alongside with his best friend Ryu, having made appearances in all major incarnations of the main series. Together, the two childhood friends seek to hone their martial arts skills and protect those they care about.
Gameplay
Ken is the quintessential aggressive shoto, possessing solid mixups, a powerful if fragile fireball game, and the ability to efficiently approach his opponent. He easily sets up high damage safe attacks. In particular, his notorious Ax Kick is one of the game's most reliable and high damage methods of confirming power boosts, often ending games in checkmates.
The tradeoff is that Ken's defensive tools are tepid, his obliterating safe attacks all require setup, and like all Street Fighter characters, he demands careful positional play and resource management. One too many failed mixups, poorly considered boosts, or steps into the wrong range will lead into an aggressive opponent outpressuring him and destroying his ability to find gauge and damage.
| Strengths |
Weaknesses
|
- High damage safe attacks: Ken converts resources into massive, low risk damage. Opponents who play passively or protract neutral can expect to get repeatedly chunked.
- A rushdown character that rarely struggles with being zoned: Ken's fireball is threatening enough to force many opponents into close range, but even when this fails, he easily closes gaps.
- Threatening mixup game: Ken has a suite of bread and butter mixup tools that work off of a single gauge at any range from 2-5, meaning the opponent is unlikely to have any completely reliable options on defense.
|
- Careful footsies required: Most of Ken's attacks are awkward except at specific ranges, and until he has 4 gauge to play Shinryuken, he is much weaker at range 1 than range 2. While his unique ability moves him in, neither his ability nor his specials move him out.
- Resource hungry: Many of Ken's mixups only exist on critical attacks, and therefore do not help him build gauge.
- Weak defense: Ken has no reversals, and his guarded specials are not particularly punishing on defense.
|
Unique Ability and Exceed
Unique Ability
Ken Masters
|
| Front Side
|
Exceed Cost
|
| 3
|
|
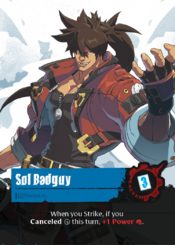
As an action, you may Close 1 and draw a card..
- This is an extremely efficient approach tool. It also helps mitigate the risk of getting stranded at a bad range that playing Cross or boosting Backstep would otherwise present.
|
| Exceed Side
|
Exceed Cost
|
| -
|
|
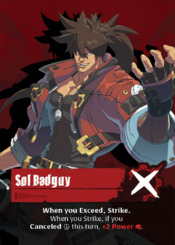
When you Exceed, draw a card and Close up to 2.
As an action, you may Close 1 and draw a card. Then, you may Strike.
- This is extremely effective in cracking open opponents that try to run a pure zoning game. In other matchups, exceeding is never prioritized over keeping up the threat of Shinryuken.
|
|
Normals
Link to the relevant normals page
Specials
Ax Kick / Ki Charge
Ax Kick / Ki Charge
|
| Ax Kick
|
Range
|
Power
|
Speed
|
Armor
|
Guard
|
Gauge Cost
|
Force Cost
|
| 1
|
5
|
4
|
0
|
0
|
-
|
-
|
|
Critical: +2 Speed.
Ignore Armor.
Before: Close 1.
- This is almost always played at range 2 as a critical attack. On its own, this is on curve and therefore relatively safe against unguarded attacks, but trades very poorly against slows. With a power boost, this card becomes a completely different beast. With +1 power, it stuns focus, and with +2 power it also stuns sweep, meaning it crushes every non-EX normal. With Way of the Warrior boosted, Ax Kick cleanly beats every EX normal except EX sweep, making it one of the most safe attacks in the game. Using this attack to confirm power bonuses is core to Ken's offense, enough so that many players will refuse to play it EX.
|
|
PLACEHOLDER
|
| Ki Charge
|
Type
|
Gauge Cost
|
Force Cost
|
Cancellable
|
| Instantaneous
|
0
|
0
|
No
|
|
Add this card to your gauge.
- A fine boost which can accelerate your early game pressure. Nonetheless, this is almost never played, due to the potency and ease of use of Ax Kick.
|
|
Hadoken / Overpower
Hadoken / Overpower
|
| Hadoken
|
Range
|
Power
|
Speed
|
Armor
|
Guard
|
Gauge Cost
|
Force Cost
|
| 3-6
|
4
|
4
|
0
|
0
|
-
|
-
|
|
Critical: +2 Power.
After: If you hit, you may return this card to the top of your Deck. If you do, add the top card of your discard pile to your gauge.
- Recurring Hadoken (usually with wild swings) is powerful, but gauge negative if your discard pile is empty, which limits the value you can get from this in the early game. Your first gauge is enough to turn this into a real recursion threat, one which will force even most ranged characters to close in on you.
- Range 5 is safe from all normals, but defending with a Hadoken at range 3-4 is almost always risky. Even at range 4 on offense, beware of EX Dive. Dive is a priority card against Ken, and opponents may actively dig into their deck for it, so the likelihood of this is high.
- Landing a range 2 Cross, especially a defensive cross, and going into hadoken recursion with wild swings is an easy source of value. Don't get greedy - when things start to feel risky, let Hadoken go to gauge, or just draw it for later use.
- A critical attack at range 4-5 presents a move/don't move mixup between Hadoken and Knee Bash. The mixup is significantly improved at range 5, where Knee Bash punishes an attempt to gap close with EX Dive and does not lose to Focus.
|
|
PLACEHOLDER
|
| Overpower
|
Type
|
Gauge Cost
|
Force Cost
|
Cancellable
|
| Continuous
|
0
|
0
|
No
|
|
+1 Power.
NOW: Strike.
- Not an impressive addition to your attack stats, but a fast and low commitment way to make defensive Sweep unsafe (against the threat of your own Sweep) or to contribute to pushing Ax Kick past breakpoints.
|
|
Knee Bash / Custom Combo
Knee Bash / Custom Combo
|
| Knee Bash
|
Range
|
Power
|
Speed
|
Armor
|
Guard
|
Gauge Cost
|
Force Cost
|
| 1-2
|
5
|
2
|
0
|
5
|
-
|
-
|
|
+0~1 Range if you initiated this Strike.
Critical, Before: Close 2.
- A usually mediocre slow, despite its occasionally juicy positional benefits. At range 2 on offense, this catches Cross when played as a critical attack. Since critical Shoryuken and Ax Kick also beat Cross at this range, you are not likely to bait out a Cross this way. More plausibly, this answers Cross at range 1 on defense, which Ken normally cannot do without Grasp or stat increases.
- A critical attack at range 4-5 presents a move/don't move mixup between Hadoken and Knee Bash. The mixup is significantly improved at range 5, where Knee Bash punishes an attempt to gap close with EX Dive and does not lose to Focus.
|
|
PLACEHOLDER
|
| Custom Combo
|
Type
|
Gauge Cost
|
Force Cost
|
Cancellable
|
| Continuous
|
0
|
0
|
No
|
|
Now: Draw 2 cards.
Hit: Gain Advantage (you take the next turn, regardless of who initiated the Strike).
- Since Knee Bash is usually a below average attack, playing this boost is usually no worse than preparing. Ideally, this comes out when the opponent is low on cards and unlikely to simply strike into you, but if you don't have any strong play at the moment and your positioning seems good, go ahead and boost this. If the turn does come back to you with this boost out, you have a strong incentive to play an easy to land attack rather than go for a risky mixup.
- You may be tempted to create the ultimate reward bomb by loading this onto a relatively safe attack you already have set up, but there is a high chance Scramble, Reading, Parry, etc. will show up to expose your greed.
|
|
Ultras
Heavy Mob Cemetery / Find Your One Way
Heavy Mob Cemetery / Find Your One Way
|
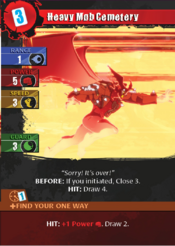
| Heavy Mob Cemetery
|
Range
|
Power
|
Speed
|
Armor
|
Guard
|
Gauge Cost
|
Force Cost
|
| 1
|
5
|
3
|
0
|
3
|
3
|
-
|
|
BEFORE: If you initiated, Close 3.
HIT: Draw 4.
- Description of shape and so on.
|
|
PLACEHOLDER
|
| Find Your One Way
|
Type
|
Gauge Cost
|
Force Cost
|
Cancellable
|
| Continuous
|
0
|
0
|
Yes
|
|
HIT: +1 Power. Draw 2.
- Description of uses and so on.
|
|
Tyrant Rave / Flame of Corruption
Tyrant Rave / Flame of Corruption
|
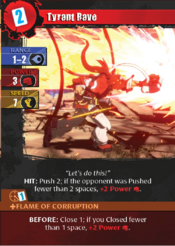
| Tyrant Rave
|
Range
|
Power
|
Speed
|
Armor
|
Guard
|
Gauge Cost
|
Force Cost
|
| 1-2
|
3
|
7
|
0
|
0
|
2
|
-
|
|
HIT: Push 2; if the opponent was Pushed fewer than 2 spaces, +2 Power.
- Description of shape and so on.
|
|
PLACEHOLDER
|
| Flame of Corruption
|
Type
|
Gauge Cost
|
Force Cost
|
Cancellable
|
| Continuous
|
0
|
0
|
Yes
|
|
BEFORE: Close 1; if you Closed fewer than 1 space, +2 Power.
- Description of uses and so on.
|
|
External Links
