Under Night In-Birth/UNIEL/Seth: Difference between revisions
(credits to Brett) |
|||
| Line 279: | Line 279: | ||
= Combos = | = Combos = | ||
stuff | '''214C~C > 6C route | ||
You basically want to go into this whenever possible. The damage is good and it ends in oki. | |||
A full notation example using a midscreen 5A starter: | |||
5A > 5B > 5C > 214C~C > 6C > j.236B > j.214A > 214B~B > [stuff] > Orb Hits > 6C > j.236B. | |||
The [stuff] section is basically anything that hits them enough to buy time till the orb you made earlier hits. The basic easy one is 214B~B > 22 > 2C(1) > 623A > Orb Hits > j.236B. You actually have a good amount of time to link that 2C, so executionally I find this one easiest, since you can visually watch them drop and time your 2C as they fall near. | |||
Once you get the hang of this, I personally suggest using this route midscreen: 214B~B > 22 > dash C > Orb Hits > 6C > etc. The reason I suggest this one if you can do it is because you can go into an unblockable setup extremely easily from this. The timing is a bit stricter. I haven't confirmed it, but either his 22 fastfall is dash cancellable or it just psychologically is really easy to time if you immediately input 6 6+C right after doing 22 (or 2 A+B). In any case in my personal experience, taking your time with the 214B~B > 22 link, and then executing the dash 66C quickly works much better than the other way around. Also if you want, you can cancel 6C into BC for a charge in the middle of the combo. | |||
The third common way to fill midscreen is with 214B~B > back airdash OR delay j.214A. This route is nice because if you're bad at getting your 22 out, you don't have to worry about it here. It's a bit easier on the hands so if you're having a lot of trouble, try this route. | |||
If you're having trouble with the 214C~C > 6C link, if you look at the opponent who's being stunned by 214C, you'll see that the initial "stunned" effect diminishes right about the time you need to input 6C. If you're having trouble with this link, try that as a visual queue. Alternatively, looking for when seth recovers from 214C~C looks viable too. | |||
Also if you're not getting your first j.236B > j.214A link, try doing it later than you might expect. | |||
The main issue with this 214C~C > 6C route is that it only links from certain starters. The big one is that 2A into a B then a C before 214C won't combo. You need to do 2A > 5C straight into 214C or something similar if you want it from a 2A starter. This actually influences the way you poke and do block strings if you're looking for something good from 2A (unless you're just a god at confirming off of single 2A hit Kappa). If you are combos off of 2A and you're not confident you can hit / block confirm well enough, that's when you should start looking for alternate combos. | |||
'''Unblockable Route - ~214B~B > 22 > dash C > Orb Hits > 236A/B > EX Command Grab > j.2C > j.214B (Orb forces block inbetween j.2C and j.214B) | |||
Really straight forward unblockable setup (in case you don't know, j.214B throws them even in block stun) and one of the main reason I'm going to list comboing off of j.214B > CS as an essential thing to know how to do. If you're already familiar with the dash C version of the midscreen BnB, adding this ender on is really great. Gives you ~4.5k total for using one super . | |||
Note that if you are not close enough after dash C, you won't reach with EX command grab. If you're having issues with this, hold your 66 input for a bit before pressing C, gauging the height as they fall. You want to hit them as low to the ground as possible so that you have more time to dash and get closer to them to be in range. | |||
'''Air to air stuff > j.B > j.C > j.214A > 214B~B > j.236B | |||
Doing oki off this setup can be a bit more awkward than the 6C > j.236B route, and seems to be less prefered, but it's an extremely crucial combo route to know. If you had to many ground hits etc to do 214C~C > 6C, this is the route you want to do instead. | |||
The main issue you may come across is that when you do j.214A too high in the air, it either becomes really obnoxious to actually special cancel into 214B, and sometimes nothing will come out. Other times, 214B~B won't combo, even when the proration etc is fine, just due to positioning. As a result, you want them to be as low as possible before doing j.214A. You can do this either by delaying your jump normals or adding extra normals in (doing j.A > j.C > j.B for example). If you're not sure whether it's going to work as an ender, remember that the ender is probably the most essential part of any Seth combo. If you don't know, try using the alternative of j.214A > land > 236A/B (for when you're unsure if 214B~B will combo) OR canceling your jump normal into j.236A/B). | |||
'''j.214B > CS > Assault j.A > delay j.B/j.C > 2C(1) > 214C~C > 6C > etc | |||
Since a lot of his gameplay runs around unblockables and the threat of unblockables, it's extremely important to know how to get damage off of landing your B dive. Comboing off of it via CS is one of the easiest ways. During CS, you have a huge buffer window, so you can input your j.6D fairly early during the CS flash and be assured that your assault will come out properly and as early as you need it to. The j.A afterwards can generally just be done early, with a big amount of delay before the j.B. You generally will want to use j.B, but use j.C on light characters. You don't need to delay much if using j.C. | |||
'''Corner: Stuff > 214C~C > 6C > j.236B > j.214A > 623B into corner > 623A out of corner > 236C > (236A/B) | |||
Really basic easy corner unblockable setup. Just watch what they do and then confirm into B dive once they block EX orb, or combo if they flailed. Can omit the 236C and just do a basic 6C ender which makes this an easy corner combo as well. | |||
'''Airhit 5B > 623B routes | |||
Note that a lot of the time, you need to slightly delay 623B. If you cancel immediately, the followup into 214A/C ~ C will whiff because they're too high (char specific I'm sure). | |||
=Colors= | =Colors= | ||
Revision as of 02:10, 5 August 2014
Introduction
fluff
Story
lol anime story
Unique Trait/Health
Seth is the only character with an air backdash and fastfall (j.22 or j.2A+B). The air backdash does not consume the usual 1 block of GRD. His ground backdash pops him up into the air with a backwards jump unless a downwards direction is pressed before the backdash finishes.
Health: 8,100
Gameplay
fluff
Move List
Normal Moves
| 5A
Short fast horizontal slash with knife. Good hitbox for catching jumping opponents but don't expect it to outright beat anything. |
| 2A
Short kick that hits low. Very fast for a low (5f) and can be mashed for stagger pressure, but prorates badly. |
| 5B
Circular slash with knife. Decent hitbox (for Seth) and prorates well, making it a good combo starter. |
| 2B
Slash that hits low. Better range and proration than 2A but reach is still average. Still extremely fast (6f) for a low with good proration and respectable range. |
| 5C
Seth steps forward and slashes. Moves Seth forward, giving it the longest range out of all of Seth's basic ground normals. |
| 2C
Low sweep that hits low. Both hits must be blocked low and Seth can cancel into other normals on either hit, allowing you to vary up your chains a bit. As an added bonus, the second hit is extremely safe on block (-1). |
| j.A
Downwards-angled kick. Good downwards hitbox but has short range overall. Take advantage of the speed to call out opponents expecting slower jump-ins like j.B or j.C. |
| j.B
Double slash to both sides with both knives. Has an excellent crossup hitbox and covers all directions well. |
| j.C
Double downwards slash with both knives. Has an extremely deep vertical hitbox making it excellent for jump-ins, and also has a decent horizontal hitbox for air-to-air, but don't expect to beat out everything with it. |
Command Normals
| 3B
Seth stabs above his head with his knife. Sort of an anti-air but has a weak hitbox making it not actually that well-suited for that purpose. |
| 3C
High upwards slash with knife. Better anti-air hitbox than 3B. |
| 6C
Seth flips forward and kicks. Pretty obvious even as far as UNIEL overheads go but has good range and is fairly safe on block. Can be canceled into air movement for some real mixups, or used in combos for the long aerial knockdown enabling extended combos. |
| 5CC
Followup to 5C. Seth lunges forward in an animation similar to 66C. Primarily combo filler, don't use it on block since it's super unsafe and you can't chain into any other normals off this. |
| 66B
Dash B normal. Seth runs forward and does a two-hitting spinning slash that looks sort of like his 5B. |
| 66C
Seth does a running slash that looks like 5CC. Very good range (especially for Seth) making it a good option for poking out of blockstrings with bigger gaps when your opponent thinks you can't reach him. |
| j.2C
Divekick. Fairly safe on block as Seth will bounce off the opponent on hit or block; cancel into j.214A for a followup on hit or into air movement options on block. |
| j.6C
Same as 6C except doable in the air. Primarily used for comboing opponents high in the air for a knockdown finisher. |
| j.44
Air backdash. Unlike ground backdash, does not cost GRD. Can be canceled into other air movement options, i.e. Assault or fastfall. Can also be performed with j.4A+B. |
| j.22
Fastfall. Seth quickly drops straight down to the ground. Has some recovery so try not to land somewhere you can be punished. |
Dash Normals
| 66B
Knee kick into 5B slash. |
| 66C
Wide wallslam slash. |
Universal Mechanics
| Force Function B+C
Makes next Segment of Stitch Binding (236) orb appear farther away and only destroyable by hitting Seth. |
| Force Function (charged) [B+C]
fluff |
| Throw A+D
Seth grabs the opponent and slashes them away with a rising uppercut. |
Special Moves
| Houkou no Segment 「縫縛のセグメント」 236 A/B/C
(eng. Segment of Stitch Binding) Places an orb that fires a long-stunning projectile after a short delay. The orbs are destroyable if they or Seth are hit before they activate.
|
| Soukou no Vengeance 「双鈎のヴェンジェンス」 623 A/B/C
(eng. Vengeance of Twin Hooks) Slash-through dash. Launches on hit.
|
| Soushitsu no Confusion 「消失のコンフュージョン」 214 A/B/C
(eng. Confusion of Vanishing) Teleport.
|
| Sentsuu no Penetrate 「穿通のペネトレイト」 (In midair) 214 A/B/C
(eng. Penetrate of Piercing) Divebomb.
|
| Zaikyuu no Convict 「罪咎のコンビクト」 632146 A/B/C
(eng. Convict of Wrongdoing) Command throw. A/B versions are identical and knock down (Chain Shift to follow up), while EX version leaves the opponent standing and leads into a combo.
|
Infinite Words
| Rensa no Nefarious 「連鎖のネファリウス」 41236 D
(eng. Nefarious of Chaining) Short invul. on startup. |
Infinite Words EXS
| Kyoukai no Distant 「境界のディスタント」 A+B+C+D
(eng. Distant of Boundary) infinite words exs |
Combos
214C~C > 6C route
You basically want to go into this whenever possible. The damage is good and it ends in oki. A full notation example using a midscreen 5A starter:
5A > 5B > 5C > 214C~C > 6C > j.236B > j.214A > 214B~B > [stuff] > Orb Hits > 6C > j.236B.
The [stuff] section is basically anything that hits them enough to buy time till the orb you made earlier hits. The basic easy one is 214B~B > 22 > 2C(1) > 623A > Orb Hits > j.236B. You actually have a good amount of time to link that 2C, so executionally I find this one easiest, since you can visually watch them drop and time your 2C as they fall near.
Once you get the hang of this, I personally suggest using this route midscreen: 214B~B > 22 > dash C > Orb Hits > 6C > etc. The reason I suggest this one if you can do it is because you can go into an unblockable setup extremely easily from this. The timing is a bit stricter. I haven't confirmed it, but either his 22 fastfall is dash cancellable or it just psychologically is really easy to time if you immediately input 6 6+C right after doing 22 (or 2 A+B). In any case in my personal experience, taking your time with the 214B~B > 22 link, and then executing the dash 66C quickly works much better than the other way around. Also if you want, you can cancel 6C into BC for a charge in the middle of the combo.
The third common way to fill midscreen is with 214B~B > back airdash OR delay j.214A. This route is nice because if you're bad at getting your 22 out, you don't have to worry about it here. It's a bit easier on the hands so if you're having a lot of trouble, try this route.
If you're having trouble with the 214C~C > 6C link, if you look at the opponent who's being stunned by 214C, you'll see that the initial "stunned" effect diminishes right about the time you need to input 6C. If you're having trouble with this link, try that as a visual queue. Alternatively, looking for when seth recovers from 214C~C looks viable too.
Also if you're not getting your first j.236B > j.214A link, try doing it later than you might expect.
The main issue with this 214C~C > 6C route is that it only links from certain starters. The big one is that 2A into a B then a C before 214C won't combo. You need to do 2A > 5C straight into 214C or something similar if you want it from a 2A starter. This actually influences the way you poke and do block strings if you're looking for something good from 2A (unless you're just a god at confirming off of single 2A hit Kappa). If you are combos off of 2A and you're not confident you can hit / block confirm well enough, that's when you should start looking for alternate combos.
Unblockable Route - ~214B~B > 22 > dash C > Orb Hits > 236A/B > EX Command Grab > j.2C > j.214B (Orb forces block inbetween j.2C and j.214B)
Really straight forward unblockable setup (in case you don't know, j.214B throws them even in block stun) and one of the main reason I'm going to list comboing off of j.214B > CS as an essential thing to know how to do. If you're already familiar with the dash C version of the midscreen BnB, adding this ender on is really great. Gives you ~4.5k total for using one super .
Note that if you are not close enough after dash C, you won't reach with EX command grab. If you're having issues with this, hold your 66 input for a bit before pressing C, gauging the height as they fall. You want to hit them as low to the ground as possible so that you have more time to dash and get closer to them to be in range.
Air to air stuff > j.B > j.C > j.214A > 214B~B > j.236B
Doing oki off this setup can be a bit more awkward than the 6C > j.236B route, and seems to be less prefered, but it's an extremely crucial combo route to know. If you had to many ground hits etc to do 214C~C > 6C, this is the route you want to do instead.
The main issue you may come across is that when you do j.214A too high in the air, it either becomes really obnoxious to actually special cancel into 214B, and sometimes nothing will come out. Other times, 214B~B won't combo, even when the proration etc is fine, just due to positioning. As a result, you want them to be as low as possible before doing j.214A. You can do this either by delaying your jump normals or adding extra normals in (doing j.A > j.C > j.B for example). If you're not sure whether it's going to work as an ender, remember that the ender is probably the most essential part of any Seth combo. If you don't know, try using the alternative of j.214A > land > 236A/B (for when you're unsure if 214B~B will combo) OR canceling your jump normal into j.236A/B).
j.214B > CS > Assault j.A > delay j.B/j.C > 2C(1) > 214C~C > 6C > etc
Since a lot of his gameplay runs around unblockables and the threat of unblockables, it's extremely important to know how to get damage off of landing your B dive. Comboing off of it via CS is one of the easiest ways. During CS, you have a huge buffer window, so you can input your j.6D fairly early during the CS flash and be assured that your assault will come out properly and as early as you need it to. The j.A afterwards can generally just be done early, with a big amount of delay before the j.B. You generally will want to use j.B, but use j.C on light characters. You don't need to delay much if using j.C.
Corner: Stuff > 214C~C > 6C > j.236B > j.214A > 623B into corner > 623A out of corner > 236C > (236A/B)
Really basic easy corner unblockable setup. Just watch what they do and then confirm into B dive once they block EX orb, or combo if they flailed. Can omit the 236C and just do a basic 6C ender which makes this an easy corner combo as well.
Airhit 5B > 623B routes
Note that a lot of the time, you need to slightly delay 623B. If you cancel immediately, the followup into 214A/C ~ C will whiff because they're too high (char specific I'm sure).
Colors
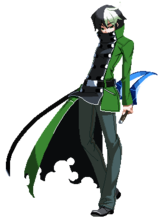
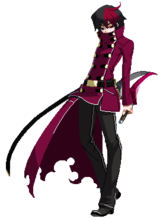
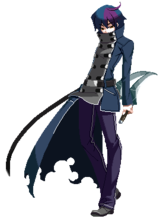
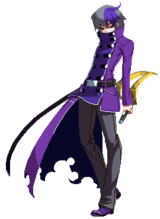
| Shadow Approaches | Light is Refuse | Rain Murder | Coin and Balance | The Edge of Poison |
|---|---|---|---|---|
| Light in Darkness | Ashes Incinerator | Clothed in Fire | Natural Tree | Nightcap Wine |
| Coral Comet | Glorious Brown | Cosmos Black | Pulito Foschia | Cerisier |
| Ombra Abisso | Luna Mezzanotte | Mountain July | Sunrise Yellow | Hawk Sign |
