|
|
| Line 636: |
Line 636: |
| |frameAdv=x | | |frameAdv=x |
| |hitbox= | | |hitbox= |
| |description=fluff | | |description=Byakuya sets his swords on the ground. If the opponent touches the swords he will be locked into a long anime sequence for high damage. This move is an UNBLOCKABLE command throw that can be comboed into but can ALWAYS be jumped out of on reaction. Also has NO invul so don't try to use it as a reversal. |
| }} | | }} |
| }} | | }} |
Revision as of 10:28, 12 August 2014
Introduction
fluff
Story
lol anime story
Unique Trait/Health
unique trait stuff
Health: unknown
Gameplay
stuff
Move List
Normal Moves
Command Normals
| 3[C]
|
| Damage
|
Startup
|
Active
|
Recovery
|
Frame Adv
|
Cancels
|
Guard/Shield
|
Hitbox
|
| x
|
x
|
x
|
x
|
x
|
x
|
x
|
-
|
Charged version of 3C. Hits overhead (one of his two grounded overheads, the other being his Force Function) and has vastly increased horizontal range (same as 2C!). Only special, EXS and IW(tho IW misses) cancelable (tip: 214C….).
|
|
| j.2C
|
| Damage
|
Startup
|
Active
|
Recovery
|
Frame Adv
|
Cancels
|
Guard/Shield
|
Hitbox
|
| x
|
x
|
x
|
x
|
x
|
x
|
x
|
-
|
Byakuya's claws circle around him for a while. Doesn’t hit overhead. Hitbox all around Byakuya. If done instantly after jumping the jump arc resembles that of 6D. If done while descending Byakuya does a small hop in the air and gains forward momentum. Good move in general, but the charged one has more use.
|
|
| j.[2]C
|
| Damage
|
Startup
|
Active
|
Recovery
|
Frame Adv
|
Cancels
|
Guard/Shield
|
Hitbox
|
| x
|
x
|
x
|
x
|
x
|
x
|
x
|
-
|
Charged version of j2C. Same movement altering properties but a bigger hitbox and instead of 3 hits it does 6. Launches into an untechable knockdown which can be converted into a combo with basically anything (2C > 5C..). Plus on block! Very good move making Byakuya very scary if he is above the opponent. Use it!
|
|
Dashing Normals
| 66C
|
| Damage
|
Startup
|
Active
|
Recovery
|
Frame Adv
|
Cancels
|
Guard/Shield
|
Hitbox
|
| x
|
x
|
x
|
x
|
x
|
x
|
x
|
-
|
Extends his hands ordering his claws to rapidly attack an area one character space away from him, leaving the space between him and the claws unharmed. Blows away the victim leading to a wall bounce. Can be special, EXS or IW canceled before the last(9th) hit to continue the combo.
|
|
Universal Mechanics
Force Function
B+C
|
| Damage
|
Startup
|
Active
|
Recovery
|
Frame Adv
|
Cancels
|
Guard/Shield
|
Hitbox
|
| x
|
x
|
x
|
x
|
x
|
x
|
x
|
-
|
Overhead with the same startup animation as his 214-Series, fake web appears and claws attack from above leading into a knockdown. Misses point-blank and can only be followed up with Chain Shift.
|
|
Force Function (charged)
[B+C]
|
|
Throw
A+D
|
| Damage
|
Startup
|
Active
|
Recovery
|
Frame Adv
|
Cancels
|
Guard/Shield
|
Hitbox
|
| x
|
x
|
x
|
x
|
x
|
x
|
x
|
-
|
Byakuya grabs the opponent with his claws and slams him into the ground. 4 can be held during the throw to make Byakuya toss the opponent behind him and possibly drop him into a web allowing followup.
|
|
Special Moves
How shall I cook you?
「どう料理しよう?」
236X
|
| Version
|
Damage
|
Startup
|
Active
|
Recovery
|
Frame Adv
|
Cancels
|
Guard/Shield
|
Hitbox
|
| A
|
x
|
x
|
x
|
x
|
x
|
x
|
x
|
-
|
Byakuya's rekka. Moves forward while hitting multiple times with spinning blades. Can go into 214X web series (by inputting 4X) or rekka followups with 6X.
|
| Version
|
Damage
|
Startup
|
Active
|
Recovery
|
Frame Adv
|
Cancels
|
Guard/Shield
|
Hitbox
|
| B
|
x
|
x
|
x
|
x
|
x
|
x
|
x
|
-
|
B version moves forward further and launches on hit. Otherwise identical to A version.
|
| Version
|
Damage
|
Startup
|
Active
|
Recovery
|
Frame Adv
|
Cancels
|
Guard/Shield
|
Hitbox
|
| EX
|
x
|
x
|
x
|
x
|
x
|
x
|
x
|
-
|
Byakuya does a five-part rekka automatically. Mostly used as a combo ender for good extra damage as it will always combo from a rekka ender. Note that there is a slight gap on block between each rep of the rekkas where an opponent with an invulnerable reversal can mash out, so Chain Shift this on block early.
|
|
Is chopped fine?
「微塵切りがいいかな?」
6X
After How shall I cook you?
|
|
Or Maybe shredded to pieces?
「それとも八つ裂き?」
6X
Is chopped fine?
|
|
Should I leave it around here?
「この辺に仕掛けておこうかな?」
214X
|
| Version
|
Damage
|
Startup
|
Active
|
Recovery
|
Frame Adv
|
Cancels
|
Guard/Shield
|
Hitbox
|
| A
|
x
|
x
|
x
|
x
|
x
|
x
|
x
|
-
|
Byakuya floats upward and sets a web. Very advantageous on block but has very slow startup and long recovery so opponent can easily mash out on reaction if you are too predictable with the set. The web trap has the following properties:
- If the opponent is hit by the web, it will stun him for a long time and steal one block of GRD. Subsequent web hits will drain GRD but will only have normal hitstun, without the extra duration snaring animation.
- The web can be destroyed by B and C level moves but doing so will drain (not steal) half a block of GRD. It will put the opponent in blockstun if blocked but will not drain GRD.
- Byakuya can set three webs total: grounded 214X, air 214X, and ground web from 623X or 214X~X~D followup.
- Webs take a few frames to trigger (around 15 frames for "meaty" oki web") once the opponent is in range. This means that your opponent CAN mash through your webs on wakeup even if they have no invul on the move.
|
| Version
|
Damage
|
Startup
|
Active
|
Recovery
|
Frame Adv
|
Cancels
|
Guard/Shield
|
Hitbox
|
| B
|
x
|
x
|
x
|
x
|
x
|
x
|
x
|
-
|
Byakuya sets the web slightly further and higher. Also has slightly more startup than A version. Air version sets the web lower than A version instead.
|
| Version
|
Damage
|
Startup
|
Active
|
Recovery
|
Frame Adv
|
Cancels
|
Guard/Shield
|
Hitbox
|
| C
|
x
|
x
|
x
|
x
|
x
|
x
|
x
|
-
|
Sets the web even farther and higher (air version set the even even lower).
|
|
It's useless to run
「逃げてもムダさ」
X
After Should I leave it around here?
|
|
See, I caught you
「ほーら、 捕まえた」
X
After It's useless to run
|
| Version
|
Damage
|
Startup
|
Active
|
Recovery
|
Frame Adv
|
Cancels
|
Guard/Shield
|
Hitbox
|
| A
|
x
|
x
|
x
|
x
|
x
|
x
|
x
|
-
|
Byakuya does an attack with the same animation as his j.C. Usually advantageous on ground block depending on height and knocks down on hit allowing OTG pickup.
|
| Version
|
Damage
|
Startup
|
Active
|
Recovery
|
Frame Adv
|
Cancels
|
Guard/Shield
|
Hitbox
|
| B
|
x
|
x
|
x
|
x
|
x
|
x
|
x
|
-
|
Byakuya cancels his air momentum and floats upward while stabbing straight downwards, slamming the opponent down on hit. Hits overhead and has a good hitbox. Can be canceled into any air normal to eliminate the long landing recovery or to make it safer, but beware of opponents shielding this on reaction to prevent the cancel.
|
| Version
|
Damage
|
Startup
|
Active
|
Recovery
|
Frame Adv
|
Cancels
|
Guard/Shield
|
Hitbox
|
| C
|
x
|
x
|
x
|
x
|
x
|
x
|
x
|
-
|
Spikes stick out in every direction. Wallbounces opponent on hit and has a very good crossup hitbox.
|
| Version
|
Damage
|
Startup
|
Active
|
Recovery
|
Frame Adv
|
Cancels
|
Guard/Shield
|
Hitbox
|
| D
|
x
|
x
|
x
|
x
|
x
|
x
|
x
|
-
|
Byakuya bounces up again while setting a web beneath him. Moves Byakuya really far forward and is good for certain pressure setups but beware of doing this anywhere where the web isn't guaranteed to make them block as the recovery on this move is REALLY long and easily punishable.
|
|
Isn't it good for eating now?
「そろそろ食べ頃かな?」
623X
|
| Version
|
Damage
|
Startup
|
Active
|
Recovery
|
Frame Adv
|
Cancels
|
Guard/Shield
|
Hitbox
|
| A
|
x
|
33
|
x
|
x
|
x
|
x
|
x
|
-
|
Byakuya teleports forward and sets a web on the ground. This is actually a command throw, albeit a super obvious one with tons of startup; if the opponent is standing where the web would appear, Byakuya will automatically snare them in a web. Otherwise, he will simply set a ground web behind him. Note that despite the "disappearing" animation, Byakuya has NO invul during this move so you can be mashed out.
|
| Version
|
Damage
|
Startup
|
Active
|
Recovery
|
Frame Adv
|
Cancels
|
Guard/Shield
|
Hitbox
|
| B
|
x
|
x
|
x
|
x
|
x
|
x
|
x
|
-
|
Byakuya goes a bit further. Otherwise identical to A version.
|
| Version
|
Damage
|
Startup
|
Active
|
Recovery
|
Frame Adv
|
Cancels
|
Guard/Shield
|
Hitbox
|
| EX
|
x
|
x
|
x
|
x
|
x
|
x
|
x
|
-
|
Has considerably faster startup and catches the opponent in a long-duration web similar to Carmine's crystal. Still doesn't have invul unfortunately.
|
|
Infinite Words
Become a part of me
「僕の一部になりなよ」
41236D
|
| Damage
|
Startup
|
Active
|
Recovery
|
Frame Adv
|
Cancels
|
Guard/Shield
|
Hitbox
|
| x
|
x
|
x
|
x
|
x
|
x
|
x
|
-
|
Byakuya sets his swords on the ground. If the opponent touches the swords he will be locked into a long anime sequence for high damage. This move is an UNBLOCKABLE command throw that can be comboed into but can ALWAYS be jumped out of on reaction. Also has NO invul so don't try to use it as a reversal.
|
|
Infinite Words EXS
Endless Nightmare
「終わらない悪夢」
A+B+C+D
|
|
Combos
A-starters:
2A>2B>2C>5C>214BAA>2C>236B4AAA>2C>236A6A6A
- Basic 2A starter. 4AAA part has to be really fast, and 2C pick up must be timed because you already used 2C once, so you have to wait until it's usable again.
- If you delay 214B, you can switch the position.
- At corner, you can use 236C at the end for a bit more damage. At mid-screen, it may whiff.
- You can end it with 236A4AAA as well. (same with combos below). Some claim it's better for oki set up, but I personally like this easier input.
5A/2A>2B>5B>2C>5C>214BAA>2C>236B4AAA>2C>236A6A6A
- 5A/2A starter for quick punish. If you can start from 5A, you can use 5B as well.
5A/2A>2B>5B>2C>5C>214BCC>214CAA>2C>236A6A6A
- Basic carry from a quick 5A punish. You can start it from 2B or 2C if you want.
5A>5B>5C>236B4ABB>JA(whiff)>2C>236B4AAA>2C>236A6A6A
- A variant of B follow up combo.
- Switches side at the B follow up.
2A>2B>2C>236A4AAD>2C>236B4AAA>2C>236A6A6A>oki
- 214AAD sets up a trap below your opponent, so you can go for oki on wake up. Be careful with their DP/ throw mash, tho.
5A/2A>5B>2B>2C>5C>214BBB>JA(whiff)>2C>236B4AAA>2C>236A6A6A
- If you are in corner, and when you could mash out of their blockstring, use this to reverse the side.
- Now your opponent is in the corner instead.
B starters:
2B>2C>5C>214BAA>2C>236B4AAA>2C>236A6A6A
- Same as the one above. Pretty useful.
2B>5B>2C>5C>214BCC>214CAA>2C>236A6A6A
- Same as one above. Good carry, so why not?
2B>2C>236A4A>land>66C>214CAA>2C>236B4AAA>2C>236A6A6A
- Cool looking carry it carries quite a bit, so use this if you are far enough from corner you are facing.
- If you do 236A4AA>land 2C instead of 236A4A>land>66C, then you can switch side.
2B>5B>2C>5C>214BBB>JA(whiff)>66B>236A4ABB>JA(whiff)>66B>236A6A6A
- Combo from official Byakuya introduction video.
- Switches side twice for swag (not really good, if you are looking for carry, unfortunately).
2B>2C>236A4AAD>2C>236B4AAA>2C>236A6A6A>oki
C starters:
- Just use the same sequence as ones above and start from 2C>5C
- In the case of 5C hit without 2C being available, go straight into 236B into rest of the regular sequence.
3C(anti-air/ hits low on ground)>J2C>JC>2C>5C>214BAA>2C>236B4AAA>2C>236A6A6A
3[C](overhead)>214CAA>2C>236B4AAA>2C>236A6A6A
- From an overhead. Yay, mix up with one above!
Dash attack starters:
66B>236B4ACC>214CAA>2C>236A6A6A
- Basic pick up from 66B. You can actually just use 66B>236B even when blocked, but, in that case, use 236BBB>JB(>JA) to keep the pressure going.
66C>214BCC>214CAA>2C>236A6A6A
- You can cancel on any hits of 66C, so make sure you cancel the last hit.
- It can carry quite a bit too.
Force Function starters:
FF(overhead)>CS>2C>5C>214BAA>2C>236B4AAA>2C>236A6A6A
- You can only follow up FF by using CS. 2C and beyond is the regular sequence used above.
- You can even use the 214BCC>214CAA>2C>236A6A6A instead for carry, if you are stuck in corner.
Aerial starters:
6D>JC>5A>5B>2B>2C>5C>214BAA>2C>236B4AAA>2C>236A6A6A
- From Assault JC. JC itself is slow, so not really reliable overhead, but it's there.
- The combo piece is same as the basic one, really.
J2[C]>land>5C>214ACC>214CAA>2C>236A6A6A
- Basic pick up from low air J2[C] hits.
J2[C]>land>5C>J2C>JC>C>214AAD>2C>236B4AAA>2C>236A4AAA>oki
- 214AAD sets up a trap below your opponent, so you can go for oki on wake up.
- Be careful with their DP/ throw mash, tho.
J2[C]>land>5C>J2C>JC>5C>214BCC>2C>66C>214CAA>2C>236B6BB>236C
- Can carry from end of the screen to the other. Use this if you got meter.
J2[C]>land>5C>JB>JC>J214BAA>2C>236B4AAA>2C>236A6A6A
- Works only in corner, but does high damage (3.4k with Vorpal)
214 trap starters:
Trap hits>dash, if far from opponent>2C>5C>214BAA>2C>236B4AAA>2C>236A6A6A
Trap hits>dash, if far from opponent>2C>5C>214BCC>214CAA>2C>236A6A6A
- Just use the regular pick ups.
Trap hits>66C>214BCC>214CAA>2C>236A6A6A
- In case too far to dash in.
623 command throw starter:
Use the same sequence as with the 214 trap starter for the most part, but command throw got quite some hitstun proration, so you need to cut the combo short.
623A/B>dash>2C>5C>214BAA>2C>236B4AAA
- You can't connect another 236s in there, unfortunately.
- You should might as well cancel the last hit with 623C and go for oki set up.
Web trap placement follow up attack starter:
Follow up A attack>dash>2C>5C>J2CJC>C>214BAA>2C>236B4AAA>2C>236A6A6A
Follow up B attack>J2[C]>land>5C>214BAA>2C>236B4AAA>2C>236A6A6A
- Works only in corner but does quite some damage (3.5k with Vorpal)
Oki set ups with web traps:
At center, set up TK214BBA>214A
At corner, set up 214A>TK214C
- Use these after 623C or IW ender.
- When the trap hits, do to the follow ups above.
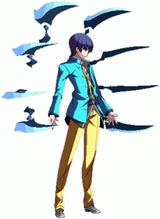
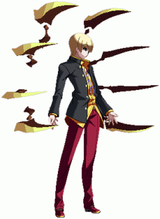
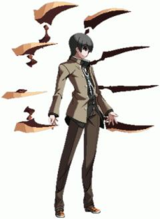
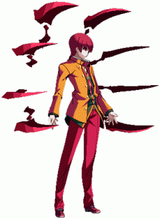
Colors
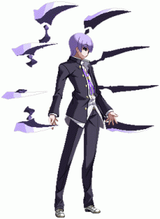
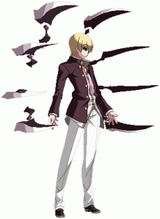
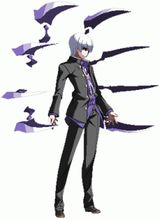
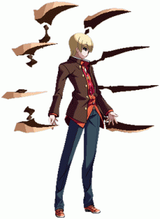
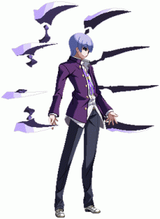
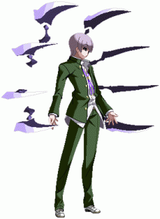
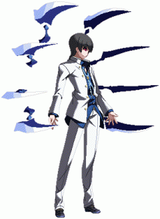
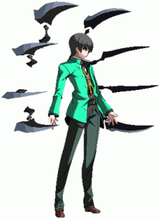
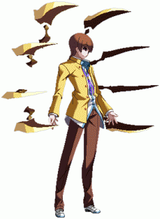
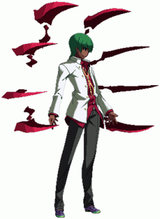
| Midnight Spider
|
Hell Smoke
|
Ende Regen
|
Drought Earth
|
Rotten Pomegranate
|
|
|
|
|
|
|
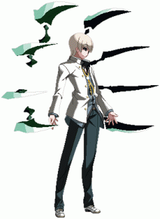
| Falsehood Night
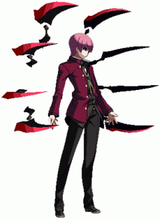
|
Maple October
|
Dirty Wisteria
|
Bamboo Spear
|
Withered Lilac
|
|
|
|
|
|
|
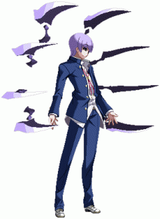
| Blue Ripple
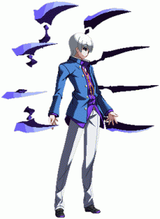
|
Another Galaxy
|
Knight of Mercury
|
Mud Crater
|
Bottom of Abyss
|
|
|
|
|
|
|
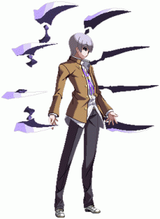
| Desert Sun
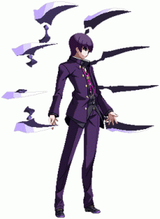
|
Flash White
|
Fullmoon Light
|
Cunning Tiger
|
Valley Magnolia
|
|
|
|
|
|
|
Template:UNIB
