Under Night In-Birth/UNIEL/Byakuya: Difference between revisions
No edit summary |
(→Combos) |
||
| Line 661: | Line 661: | ||
= Combos = | = Combos = | ||
''' | '''Universal route off ground A/B/C starters''' | ||
2A (5B) 2B 5C (2C) 236B~4A 214CC~delayA 2B 236A~4AAA 2B > 236A~4AAA OR 236A~6A6A 236C/41236D | 2A (5B) 2B 5C (2C) 236B~4A 214CC~delayA 2B 236A~4AAA 2B > 236A~4AAA OR 236A~6A6A 236C/41236D | ||
| Line 669: | Line 669: | ||
* Practical and optimal pretty much anywhere. If you have to learn one combo, go with this one. | * Practical and optimal pretty much anywhere. If you have to learn one combo, go with this one. | ||
2A (5B) 2B 5C (2C) 236B~4A 214CC~delayA 2B 236A~ | 2A (5B) 2B 5C (2C) 236B~4A 214CC~delayA 2B 236A~4AAA 2C 236A 623C > web setup | ||
* Same as above but gives up a bit of corner carry and GRD drain for 623C oki setup potential. 623C still does quite a bit of damage and drains an additional GRD on hit so the tradeoff isn't as severe as the shortened combo makes it look. This should generally be your default route if you have the meter to spare. | * Same as above but gives up a bit of corner carry and GRD drain for 623C oki setup potential. 623C still does quite a bit of damage and drains an additional GRD on hit so the tradeoff isn't as severe as the shortened combo makes it look. This should generally be your default route if you have the meter to spare. | ||
2A (5B) 2B 5C (2C) 236B~4AAB j.A(whiff) 2B > | 2A (5B) 2B 5C (2C) 236B~4AAB j.A(whiff) 2B > standard routes | ||
* Sideswap route. Deals slightly less damage than the above and doesn't steal as much GRD, but otherwise works pretty much identically. | * Sideswap route. Deals slightly less damage than the above and doesn't steal as much GRD, but otherwise works pretty much identically. | ||
| Line 684: | Line 684: | ||
2A 2B 2C 5C 214BBX etc. | 2A 2B 2C 5C 214BBX etc. | ||
* Alternative | * Alternative starter. Generally not recommended as a default confirm because being forced to keep 5C for combos after 2C cuts off a lot of your pressure options. | ||
* 2B works in lieu of 5C if 5C has already been used and 2B has not. | * 2B works in lieu of 5C if 5C has already been used and 2B has not. | ||
* Prorates hitstun slightly less than 236B route, so still useful for very bad proration starters (i.e. 2A 2A 2B 2C). | * Prorates hitstun slightly less than 236B route, so still useful for very bad proration starters (i.e. 2A 2A 2B 2C). | ||
| Line 708: | Line 708: | ||
* Pickup from overhead. Goes into pretty much all standard routes, albeit with heavy damage proration. | * Pickup from overhead. Goes into pretty much all standard routes, albeit with heavy damage proration. | ||
'''Corner-only combos''' | |||
Strong starter > web snare > 2C 5C j.2C j.C 2C 236A~4AAA > ender | |||
* Extremely high damage route. Doesn't drain as much grid due to lack of web hits but deals massive damage. | |||
* Only works off good starters, i.e. B or C normals. | |||
Strong starter > web snare > 214C~4AA~delayA 2B j.2C j.C 2B 214A~4AAA > ender | |||
* Compromise between damage and GRD drain. Doesn't do as much damage as the above combo but doesn't sacrifice any web hits so you still get maximum GRD drain. | |||
'''Dash attack starters:''' | '''Dash attack starters:''' | ||
| Line 714: | Line 724: | ||
66C 214B etc. | 66C 214B etc. | ||
* Must cancel before last hit. If last hit connects, opponent will wallbounce and be very difficult to pick up with a combo. | * Must cancel before last hit. If last hit connects, opponent will wallbounce and be very difficult to pick up with a combo. | ||
| Line 719: | Line 730: | ||
B+C CS 2C etc. | B+C CS 2C etc. | ||
* Standard pickup from B+C overhead. CS is required in the general course. | * Standard pickup from B+C overhead. CS is required in the general course. | ||
B+C (corner) 2A 5B j.ABC 2B 214BBB 2B etc. | B+C (corner) 2A 5B j.ABC 2B 214BBB 2B etc. | ||
* Pickup off point-blank B+C in the corner. 2A only reaches if very close in the corner. | * Pickup off point-blank B+C in the corner. 2A only reaches if very close in the corner. | ||
B+C (CH) 2B 214B etc. | B+C (CH) 2B 214B etc. | ||
* Counterhit confirm off B+C. Counterhit adds extra untech time allowing 2B to pick them up. | * Counterhit confirm off B+C. Counterhit adds extra untech time allowing 2B to pick them up. | ||
| Line 730: | Line 744: | ||
J2[C] land 5C 214A etc. | J2[C] land 5C 214A etc. | ||
* Basic pick up from low air J2[C] hits. | * Basic pick up from low air J2[C] hits. | ||
| Line 739: | Line 754: | ||
Trap hits > 2C 236B~4A etc. | Trap hits > 2C 236B~4A etc. | ||
* Standard pickup. It is possible to hit the opponent before they are launched by the trap (i.e. with 2B) but confirming it in practice can be difficult. Better to go straight into 2C. | * Standard pickup. It is possible to hit the opponent before they are launched by the trap (i.e. with 2B) but confirming it in practice can be difficult. Better to go straight into 2C. | ||
* Note that trap trigger will use up your first long-duration snare stun so you will have to go straight into followups after your first web set (no double web hits). | * Note that trap trigger will use up your first long-duration snare stun so you will have to go straight into followups after your first web set (no double web hits). | ||
Trap hits > 66C 214B etc. | Trap hits > 66C 214B etc. | ||
* In case too far to dash in with 2C. | * In case too far to dash in with 2C. | ||
| Line 748: | Line 766: | ||
Follow up A attack > dash 2C etc. | Follow up A attack > dash 2C etc. | ||
* Usual combo routes. | * Usual combo routes. | ||
Follow up B attack > j.A(whiff) 2A 5B j.ABC 2B 214B etc. | Follow up B attack > j.A(whiff) 2A 5B j.ABC 2B 214B etc. | ||
* Standard followup route. You have less time to follow up since the opponent is already on the ground, so go straight into a 2A pickup to be safe. | * Standard followup route. You have less time to follow up since the opponent is already on the ground, so go straight into a 2A pickup to be safe. | ||
Follow up B attack > J2[C] land 5C 214B etc. | Follow up B attack > J2[C] land 5C 214B etc. | ||
* Works only in corner but adds a fair bit of damage. | * Works only in corner but adds a fair bit of damage. | ||
Revision as of 11:27, 24 August 2014
Introduction
fluff
Story
lol anime story
Unique Trait/Health
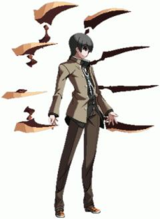
Certain of Byakuya's moves set webs onscreen, similar to Testament's traps. Webs will steal one block of GRD from the opponent if they hit, or half a block if they are destroyed by an attack. Additionally, webs will snare opponents on hit for a relatively long time, allowing for easy followup combos.
Health: 9500
Gameplay
stuff
Move List
Normal Moves
| 5A |
|---|
| 2A |
|---|
| 5B |
|---|
| 2B |
|---|
| 5C |
|---|
| 2C |
|---|
| j.A |
|---|
| j.B |
|---|
| j.C |
|---|
Command Normals
| 3C |
|---|
| 3[C] |
|---|
| j.2C |
|---|
| j.[2]C |
|---|
Dashing Normals
| 66B |
|---|
| 66C |
|---|
Universal Mechanics
| Force Function B+C |
|---|
| Force Function (charged) [B+C] |
|---|
| Throw A+D |
|---|
Special Moves
| How shall I cook you? 「どう料理しよう?」 236X |
|---|
| Is chopped fine? 「微塵切りがいいかな?」 6X After How shall I cook you? |
|---|
| Or Maybe shredded to pieces? 「それとも八つ裂き?」 6X Is chopped fine? |
|---|
| Should I leave it around here? 「この辺に仕掛けておこうかな?」 214X |
|---|
| It's useless to run 「逃げてもムダさ」 X After Should I leave it around here? |
|---|
| See, I caught you 「ほーら、 捕まえた」 X After It's useless to run |
|---|
| Isn't it good for eating now? 「そろそろ食べ頃かな?」 623X |
|---|
Infinite Words
| Become a part of me 「僕の一部になりなよ」 41236D |
|---|
Infinite Words EXS
| Endless Nightmare 「終わらない悪夢」 A+B+C+D |
|---|
Combos
Universal route off ground A/B/C starters
2A (5B) 2B 5C (2C) 236B~4A 214CC~delayA 2B 236A~4AAA 2B > 236A~4AAA OR 236A~6A6A 236C/41236D
- Probably the best general use combo; can add normals in parens for extra damage with better starters but combo listed will work even off 2A. Offers close-to-optimal meterless damage for most basic ground starters, substantial corner carry, and hits with four webs for massive GRD advantage.
- End with rekkas instead of 4AAA if you want to go into IW or EX for more damage.
- Practical and optimal pretty much anywhere. If you have to learn one combo, go with this one.
2A (5B) 2B 5C (2C) 236B~4A 214CC~delayA 2B 236A~4AAA 2C 236A 623C > web setup
- Same as above but gives up a bit of corner carry and GRD drain for 623C oki setup potential. 623C still does quite a bit of damage and drains an additional GRD on hit so the tradeoff isn't as severe as the shortened combo makes it look. This should generally be your default route if you have the meter to spare.
2A (5B) 2B 5C (2C) 236B~4AAB j.A(whiff) 2B > standard routes
- Sideswap route. Deals slightly less damage than the above and doesn't steal as much GRD, but otherwise works pretty much identically.
5B/2B 5C 2C 236B~4AAC 214CC~delayA 2B 236A~6A6A (236C)
- Corner carry route. The standard route already carries pretty far but this one carries REALLY far, at the cost of having less GRD drain and no 623C oki option.
- Note that this only works off B starters or better.
2A 2B 2C 5C 214BBX etc.
- Alternative starter. Generally not recommended as a default confirm because being forced to keep 5C for combos after 2C cuts off a lot of your pressure options.
- 2B works in lieu of 5C if 5C has already been used and 2B has not.
- Prorates hitstun slightly less than 236B route, so still useful for very bad proration starters (i.e. 2A 2A 2B 2C).
5B/2B 2C 236B~4A 66C 214CAA 2C 236B4AAA 2C 236A~6A6A
- Swag carry combo for style points.
2B>5B>2C>5C>214BBB>JA(whiff)>66B>236A4ABB>JA(whiff)>66B>236A6A6A
- Combo from official Byakuya introduction video.
- Switches side twice for swag (not really good, if you are looking for carry, unfortunately).
Specific starters
3C (anti-air or grounded) J2C JC 2C 5C 214BAA 2C 236B4AAA 2C 236A6A6A
- Basic 3C anti-air combo.
- Works off ground hit but don't expect to hit it super often since the visual difference between 3C low and 3[C] overhead is super obvious.
3[C](overhead) 214CAA etc.
- Pickup from overhead. Goes into pretty much all standard routes, albeit with heavy damage proration.
Corner-only combos
Strong starter > web snare > 2C 5C j.2C j.C 2C 236A~4AAA > ender
- Extremely high damage route. Doesn't drain as much grid due to lack of web hits but deals massive damage.
- Only works off good starters, i.e. B or C normals.
Strong starter > web snare > 214C~4AA~delayA 2B j.2C j.C 2B 214A~4AAA > ender
- Compromise between damage and GRD drain. Doesn't do as much damage as the above combo but doesn't sacrifice any web hits so you still get maximum GRD drain.
Dash attack starters:
66B 236B4A etc.
66C 214B etc.
- Must cancel before last hit. If last hit connects, opponent will wallbounce and be very difficult to pick up with a combo.
Force Function starters:
B+C CS 2C etc.
- Standard pickup from B+C overhead. CS is required in the general course.
B+C (corner) 2A 5B j.ABC 2B 214BBB 2B etc.
- Pickup off point-blank B+C in the corner. 2A only reaches if very close in the corner.
B+C (CH) 2B 214B etc.
- Counterhit confirm off B+C. Counterhit adds extra untech time allowing 2B to pick them up.
Aerial starters:
J2[C] land 5C 214A etc.
- Basic pick up from low air J2[C] hits.
J2[C] land 5C JB JC J214BAA 2C 236B4AAA 2C 236A6A6A
- Works only in corner, but does high damage (3.4k with Vorpal)
214 trap starters:
Trap hits > 2C 236B~4A etc.
- Standard pickup. It is possible to hit the opponent before they are launched by the trap (i.e. with 2B) but confirming it in practice can be difficult. Better to go straight into 2C.
- Note that trap trigger will use up your first long-duration snare stun so you will have to go straight into followups after your first web set (no double web hits).
Trap hits > 66C 214B etc.
- In case too far to dash in with 2C.
Web trap placement follow up attack starter:
Follow up A attack > dash 2C etc.
- Usual combo routes.
Follow up B attack > j.A(whiff) 2A 5B j.ABC 2B 214B etc.
- Standard followup route. You have less time to follow up since the opponent is already on the ground, so go straight into a 2A pickup to be safe.
Follow up B attack > J2[C] land 5C 214B etc.
- Works only in corner but adds a fair bit of damage.
Oki set ups with web traps:
At center, set up TK214BBA>214A
At corner, set up 214A>TK214C
- Basic setups that put multiple webs out and give you plenty of time afterwards to act freeform.
At center: Jump back j.214CAA 214AAD
- Sets two webs in front of opponent and one behind. Webs will not trigger immediately on the opponent's wakeup but will trigger if he moves at all. Ground and air web in front of opponent make it difficult for him to mash as he can potentially be snared by both webs if he fails to hit both of them in one attack. Moreover, if you block his attack, you can green shield him backwards into the web behind for a free combo.
In corner: 214AAD TK j.214BBB (whiff) falling j.B
- Three-web setup that leads into a safejump setup. Do j.214BBB whiff as the opponent falls out of the 623C web, requires a bit of timing vs. faster DPs.
- If the opponent doesn't have a DP or you don't think he will use it, you can delay the j.214BBB whiff slightly to get more forward movement and still get meaty falling j.B into an ambiguous landing crossup.
- Opponent can avoid being safejumped by doing normal wakeup (not holding any buttons). In this case you still have enough time to do a regular meaty.
- You can switch the order of the jumping and ground web placements (i.e. doing j.214AAD first instead of 214AAD to slightly alter the web arrangement if you prefer.
In corner: 214BB TK j.214BBD
- Three-web setup that puts you into corner with one meaty web and webs above and behind opponent, cutting multiple wakeup options. You are DP-safe and mashing will lose to webs (either meaty ground web if not a low or otherwise green shield into web behind). They will be forced into blocking the web above if they jump leading to free air-unblockable.
- Note that opponent can throw you to clear the webs (even if you tech the throw). Either just tech the throw for the free frame advantage or call it out with a meaty.
Colors
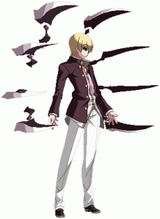
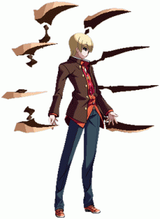
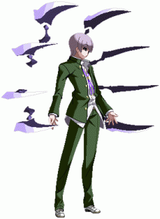
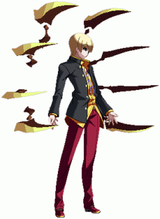
| Midnight Spider | Hell Smoke | Ende Regen | Drought Earth | Rotten Pomegranate |
|---|---|---|---|---|
| Falsehood Night | Maple October | Dirty Wisteria | Bamboo Spear | Withered Lilac |
| Blue Ripple | Another Galaxy | Knight of Mercury | Mud Crater | Bottom of Abyss |
| Desert Sun | Flash White | Fullmoon Light | Cunning Tiger | Valley Magnolia |
