|
|
| Line 305: |
Line 305: |
|
| |
|
| == Special Moves == | | == Special Moves == |
| ====== <font style="visibility:hidden" size="0">236A/B/C</font> ====== | | ====== <font style="visibility:hidden" size="0">236X</font> ====== |
| {{MoveData | | {{MoveData |
| |image=BBBR_Manbou_236A.png | | |image=BBBR_Manbou_236A.png |
| Line 334: |
Line 334: |
| |advBlock= | | |advBlock= |
| |cancel=J, Su | | |cancel=J, Su |
| |description=Manbou puffs up and shoots a water drop silghtly upwards. This can be used as a setup or to trip up the opponent. | | |description=Manbou puffs up and shoots a water drop slightly upwards. This can be used as a setup or to trip up the opponent. |
| }} | | }} |
| {{AttackData-BBBR | | {{AttackData-BBBR |
| Line 350: |
Line 350: |
| }} | | }} |
|
| |
|
| ====== <font style="visibility:hidden" size="0">623X</font> ====== | | ====== <font style="visibility:hidden" size="0">214X</font> ====== |
| {{MoveData | | {{MoveData |
| |image=BBBR_Senna_623X.png | | |image=BBBR_Manbou_214X.png |
| |caption= | | |caption= |
| |name=Gekka | | |name=Suichu |
| |input=623A/B/C | | |input=214A/B/C |
| |data= | | |data= |
| {{AttackData-BBBR | | {{AttackData-BBBR |
| |version=A | | |version=A |
| |damage=900 | | |damage=400 |
| |guard=Mid | | |guard= |
| |property=Invincible | | |property= |
| |startup= | | |startup= |
| |active= | | |active= |
| |recovery= | | |recovery= |
| |advBlock= | | |advBlock= |
| |cancel=NC | | |cancel= |
| |description=Senna quickly jumps up while swinging her sword in a crescent moon arc around her. A standard DP with startup invincibility, making it a very valuable option for escaping pressure. It's also air unblockable and possesses a large hitbox, causing it to be an excellent anti-air. However, if it whiffs or a grounded opponent blocks it, you'll be extremely minus and in great danger. | | |description=Manbou creates a column of water the shoots up next to it. Useful anti air tools potentially, as well as a way to get out of sticky situations. |
| }} | | }} |
| {{AttackData-BBBR | | {{AttackData-BBBR |
| |header=no | | |header=no |
| |version=B | | |version=B |
| |damage=900 | | |damage=400 |
| |guard=Mid | | |guard= |
| |property= | | |property= |
| |startup= | | |startup= |
| Line 380: |
Line 380: |
| |advBlock= | | |advBlock= |
| |cancel=Su | | |cancel=Su |
| |description=Senna crouches down, and then after a notable period of startup, jumps high into the air and swings her sword the same way she does in 623A. Likely intended to be a better anti-air due to its higher vertical hitbox, but the startup is usually too long for this purpose. Does not retain 623A's startup invincibility. Recovers in the air, allowing you to do an air normal or j623X before landing, which could allow it to be used as a pressure reset or knowledge check. | | |description=Manbou creates a column of water the shoots up a little ways it. Also useful anti air, and a good way to check an opponent's approach. |
| }} | | }} |
| {{AttackData-BBBR | | {{AttackData-BBBR |
| |header=no | | |header=no |
| |version=C | | |version=C |
| |damage=500*2 (910) | | |damage=400 |
| |guard=All | | |guard= |
| |property=Invincible
| |
| |startup=
| |
| |active=
| |
| |recovery=
| |
| |advBlock=
| |
| |cancel=NC
| |
| |description=Senna performs a jumping crescent slash similar to 623A, but creates a larger horizontal hitbox and moves herself backwards in the process. If the move connects, the first hit will groundbounce the opponent, and a followup hit will occur that wallbounces them. You can combo off of this wallbounce near the corner, but the preceding groundbounce means that your options are limited. This version is an invincible DP like 623A, but it can be blocked in the air, so if used as an anti-air it's much riskier. The combo you can get off of this makes it a valuable alternative to 623A, but its inferior anti-air abilities mean it isn't an outright replacement. Even more unsafe on whiff or block.
| |
| }}
| |
| }}
| |
| | |
| ====== <font style="visibility:hidden" size="0">j623X</font> ======
| |
| {{MoveData
| |
| |image=BBBR_Senna_623X.png
| |
| |caption=
| |
| |name=Gekka (Air)
| |
| |input=j623A/B/C
| |
| |data=
| |
| {{AttackData-BBBR
| |
| |version=A/B
| |
| |damage=900
| |
| |guard=All
| |
| |property= | | |property= |
| |startup=
| |
| |active=
| |
| |recovery=
| |
| |advBlock=
| |
| |cancel=Su
| |
| |description=Air version of Senna's 623X series. Unlike the ground version, j623A and j623b are functionally the same, and neither are invincible. Main use is to combo into j623D in order to end a combo.
| |
| }}
| |
| {{AttackData-BBBR
| |
| |header=no
| |
| |version=C
| |
| |damage=500*2 (910)
| |
| |guard=All
| |
| |property=Invincible
| |
| |startup= | | |startup= |
| |active= | | |active= |
| Line 427: |
Line 393: |
| |advBlock= | | |advBlock= |
| |cancel=NC | | |cancel=NC |
| |description=Air version of 623C, retaining the same hitbox, movement, and combo properties. Unlike j623A, j623C still has its ground version's invincibility. Can be used as a strong air-to-air as a result, but only if you're sure that the opponent won't dodge or block it. | | |description=Manbou creates a column of water the shoots up far from it. A good way to keep your opponent on their toes no matter where they are. |
| }}
| |
| }}
| |
| | |
| ====== <font style="visibility:hidden" size="0">214A</font> ======
| |
| {{MoveData
| |
| |image=Senna_214A.png
| |
| |caption=
| |
| |name=Shunpuu
| |
| |input=214A
| |
| |data=
| |
| {{AttackData-BBBR
| |
| |damage=450
| |
| |guard=Low/Air
| |
| |property=
| |
| |startup=
| |
| |active=
| |
| |recovery=
| |
| |advBlock=
| |
| |cancel=U
| |
| |description=Senna hops a small distance backwards and then slides along the ground with a foot extended. Travels around half screen and hits low, and has 3 different followups it can be cancelled into soon after the start of the move. Does not need to hit opponent to be cancelled.
| |
| }}
| |
| }}
| |
| | |
| ====== <font style="visibility:hidden" size="0">214A~A</font> ======
| |
| {{MoveData
| |
| |image=Senna_214AA.png
| |
| |caption=
| |
| |name=Sakura
| |
| |input=214A~A
| |
| |data=
| |
| {{AttackData-BBBR
| |
| |damage=800
| |
| |guard=All
| |
| |property=
| |
| |startup=
| |
| |active=
| |
| |recovery=
| |
| |advBlock=
| |
| |cancel=Sp, Su
| |
| |description=Senna does an aerial slash, one of her follow-ups out of Shunpuu. Combos from 214A as long as it's slightly delayed after 214A hits. Can be cancelled into j623X, and will combo if done while close enough to the opponent. Causes a knockdown on hit, so it's a great combo ender.
| |
| }}
| |
| }}
| |
| | |
| ====== <font style="visibility:hidden" size="0">214A~B</font> ======
| |
| {{MoveData
| |
| |image=BBBR_Senna_214AB.png
| |
| |caption=
| |
| |name=Shoubu
| |
| |input=214A~B
| |
| |data=
| |
| {{AttackData-BBBR
| |
| |damage=950
| |
| |guard=High, Air
| |
| |property=
| |
| |startup=
| |
| |active=
| |
| |recovery=
| |
| |advBlock=
| |
| |cancel=Su
| |
| |description=Senna does a slow overhead slash, which ground bounces the opponent on the ground or slides the opponent in the air. Startup makes it a situational mixup tool, but it can catch the opponent unawares. It only combos from 214A if the opponent is airborne, and can cancel into j.623D.
| |
| }}
| |
| }}
| |
| | |
| ====== <font style="visibility:hidden" size="0">214A~C</font> ======
| |
| {{MoveData
| |
| |image=BBBR_Senna_214AC.png
| |
| |caption=
| |
| |name=Botan
| |
| |input=214A~C
| |
| |data=
| |
| {{AttackData-BBBR
| |
| |damage=800
| |
| |guard=Low
| |
| |property=
| |
| |startup=
| |
| |active=
| |
| |recovery=
| |
| |advBlock=
| |
| |cancel=Su
| |
| |description=Senna cancels into her 2C. This follow-up hits low and combos from 214A. Can also combo into 236D and 623D when timed properly. Can't be cancelled into other special moves, but can be cancelled into 5D.
| |
| }}
| |
| }}
| |
| | |
| ====== <font style="visibility:hidden" size="0">41236C</font> ======
| |
| {{MoveData
| |
| |image=BBBR_Senna_214C.png
| |
| |caption=2 hits
| |
| |name=Ibuki
| |
| |input=214C
| |
| |data=
| |
| {{AttackData-BBBR
| |
| |damage=400*2 (728)
| |
| |guard=Mid
| |
| |property=
| |
| |startup=
| |
| |active=
| |
| |recovery=
| |
| |advBlock=
| |
| |cancel=Su
| |
| |description=A quick slash upwards, followed by a quick slash downwards. 2nd hit will groundbounce an airborne opponent, making it an integral combo extender. Air unblockable, and theoretically your highest reward anti-air, but getting both hits to connect requires finicky spacing, and you're probably better off using 623A anyway. Neutral on block, allowing safe pressure resets. Both hits can be cancelled into 5D in addition to EX moves.
| |
| }}
| |
| }}
| |
| | |
| ====== <font style="visibility:hidden" size="0">41236C</font> ======
| |
| {{MoveData
| |
| |image=BBBR_Senna_41236C_1.png
| |
| |image2=BBBR_Senna_41236C_2.png
| |
| |caption=Startup
| |
| |caption2=Max travel distance
| |
| |name=Tsubaki
| |
| |input=41236C
| |
| |data=
| |
| {{AttackData-BBBR
| |
| |damage=700
| |
| |guard=All
| |
| |property=
| |
| |startup=
| |
| |active=
| |
| |recovery=
| |
| |advBlock=
| |
| |cancel=Su
| |
| |description=Senna cuts towards the ground, forming a dust cloud at her feet that moves forward slowly. It has significant startup and travels a very short distance, so you won't be throwing this out in neutral as a projectile. The cloud's hitbox that will launch the opponent into the air on hit, giving a somewhat tight window to perform a combo. Very plus on block if there's any gap between the time Senna's animation ends and the time it reaches the opponent, so it can be very useful if used immediately after getting a knockdown. Recovery can be cancelled into 5D or EX moves.
| |
| }} | | }} |
| }} | | }} |
 |
Under Construction
- This page is a work in progress.
- Please be patient and check back later for additional changes.
|
Manbou Estimated Health (After Scaling): 10000 Guts Rating: 2 Introduction
Manbou is an odd character, but surprisingly strong for a presumed joke character. Manbou has good normals, some interesting moves, and a lot of ways to control space. Playing this character may take some getting used to, but with on of the best BBMs in the game, you'll be drowning your opponent in no time.
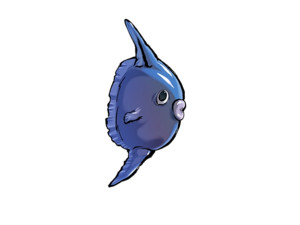
Manbou is based on a generic enemy that shows up in Daibanchou. The enemy that the playable Manbou is based on doesn't have a consistent name, but in Big Bang Beat Revolve simply uses the Japanese name of the mola mola or ocean sunfish, which is the type of fish that it resembles.
General Strategy
Manbou has a lot of great normals and command normals to play with, as well as various spacing tools. Midrange is where Manbou gets the most usage out of its specials, so the general strategy is to secure a knockdown in mid to long range, then start pressure with Manbou's pretty good buttons.
Normal Moves
Standing Normals
5A
5A
|
| Damage
|
Guard
|
Property
|
Startup
|
Active
|
Recovery
|
Block Adv
|
Cancel
|
| 150
|
Ground
|
-
|
-
|
-
|
-
|
-
|
J, N, Sp, Su
|
Standard jab. It's quick, has a decent hitbox, and is air unblockable. Pretty decent range, making for a good quick poke
|
|
5B
5B
|
| Damage
|
Guard
|
Property
|
Startup
|
Active
|
Recovery
|
Block Adv
|
Cancel
|
| 300
|
Mid
|
-
|
-
|
-
|
-
|
-
|
J, N, Sp, Su
|
A reasonably fast poke from Manbou's fin. Good in neutral, although it is a little slower than one might like, but it also moves you forward.
|
|
5C
5C
|
| Version
|
Damage
|
Guard
|
Property
|
Startup
|
Active
|
Recovery
|
Block Adv
|
Cancel
|
| 5C
|
700*2 (1192)
|
All
|
-
|
-
|
-
|
-
|
-
|
J, N, Sp, Su
|
A downwards fin swing that hits twice. This is easily Manbou's best normal, and you can use it to bully your opponent whether it be in combo or catching a mash.
|
|
Crouching Normals
2A
2A
|
| Damage
|
Guard
|
Property
|
Startup
|
Active
|
Recovery
|
Block Adv
|
Cancel
|
| 120
|
Low
|
-
|
-
|
-
|
-
|
-
|
N, Sp, Su
|
A quick low poke. Has decent range for a low poke and is the only true low in Manbou's normals, so it's good for catching standing opponents.
|
|
2B
2B
|
| Damage
|
Guard
|
Property
|
Startup
|
Active
|
Recovery
|
Block Adv
|
Cancel
|
| 300
|
All
|
-
|
-
|
-
|
-
|
-
|
J, N, Sp, Su
|
Manbou does a poke similar to its 5B. It looks like it should be low, but it hits mid, and it's not a great button outside of poking while avoiding a higher attack.
|
|
2C
2C
|
| Damage
|
Guard
|
Property
|
Startup
|
Active
|
Recovery
|
Block Adv
|
Cancel
|
| 700
|
All
|
-
|
-
|
-
|
-
|
-
|
N, Sp, Su
|
A large swipe from Manbou's fin. This is another mid, but it's a strong tool, especially for combos.
|
|
Air Normals
jA
jA
|
| Damage
|
Guard
|
Property
|
Startup
|
Active
|
Recovery
|
Block Adv
|
Cancel
|
| 100
|
High
|
-
|
-
|
-
|
-
|
-
|
N, Sp, Su
|
Shares the same animation as Manbou's 5A, and has similar properties. Not a very useful button overall.
|
|
jB
jB
|
| Damage
|
Guard
|
Property
|
Startup
|
Active
|
Recovery
|
Block Adv
|
Cancel
|
| 400
|
High
|
-
|
-
|
-
|
-
|
-
|
N, Sp, Su
|
Once again, uses the same animation as Manbou's 5B. It also maintains the property of moving you forward, which allows this to be a pretty decent air stall to trip up your opponent's anti air game.
|
|
jC
jC
|
| Damage
|
Guard
|
Property
|
Startup
|
Active
|
Recovery
|
Block Adv
|
Cancel
|
| 510
|
High
|
-
|
-
|
-
|
-
|
-
|
N, Sp, Su
|
I assume they reused all of the animations because Manbou is constantly floating above the ground regardless. Anyways, this is a great jump in button, if a bit slow, and, like the other moves, keeps a lot of the properties of the grounded move.
|
|
Command Normals
6A
6A
|
| Damage
|
Guard
|
Property
|
Startup
|
Active
|
Recovery
|
Block Adv
|
Cancel
|
| 800
|
Mid
|
-
|
-
|
-
|
-
|
-
|
J, N, Sp, Su
|
Good damage is about all this command normal has going for it. Overall it's a rather slow button and in addition you need to be surprisingly close for it to even hit.
|
|
6B
6B
|
| Damage
|
Guard
|
Property
|
Startup
|
Active
|
Recovery
|
Block Adv
|
Cancel
|
| 400
|
Low
|
-
|
-
|
-
|
-
|
-
|
N, Sp, Su
|
Manbou goes flat and slides. This is a pretty decent slide to trip up your opponent, and the startup can avoid some moves the opponent throws out. However, the long recovery time means you should be careful when using it. The low profile is very belligerent, allowing it to even anti air if the Manbou reads it.
|
|
Universal Mechanics
5/2D
Sanran Riku
5/2D
|
| Version
|
Damage
|
Guard
|
Property
|
Startup
|
Active
|
Recovery
|
Block Adv
|
Cancel
|
| 5D
|
400
|
All
|
-
|
-
|
-
|
-
|
-
|
-
|
Manbou drops an egg with hatches into a small Manbou, who shoots a drop of water horizontally. This works similarly to Manbou's own special, but having it be a separate entity allows for pressure and setup potential, making it fairly strong.
|
| Version
|
Damage
|
Guard
|
Property
|
Startup
|
Active
|
Recovery
|
Block Adv
|
Cancel
|
| 2D
|
400
|
All
|
-
|
-
|
-
|
-
|
-
|
-
|
Essentially the same, only the water drop is shot upwards instead. This can be useful for setups or just to make your opponent squirm a bit.
|
|
Throw
Throw
4/5AB
|
| Damage
|
Guard
|
Property
|
Startup
|
Active
|
Recovery
|
Block Adv
|
Cancel
|
| 700
|
Unblockable
|
-
|
-
|
-
|
-
|
-
|
NC
|
Manbou makes a surprised face and the opponent just kinda... gets grabbed? It's good for mixing block happy opponents.
|
|
Big Bang Mode
Big Bang Mode
ABC
|
| Damage
|
Guard
|
Property
|
Startup
|
Active
|
Recovery
|
Block Adv
|
Cancel
|
| N/A
|
N/A
|
-
|
-
|
-
|
-
|
-
|
-
|
Universal Big Bang Mode activation. Requires 3 bars and can be done anytime you have control on the ground. Lasts for about 7 seconds. Manbou has the unique trait of slowing the opponent down, allowing for combos not previously possible and making it one of the strongest BBMs in the game.
They love reusing sprites with this fish...
|
|
Special Moves
236X
Mizudeppo
236A/B/C
|
| Version
|
Damage
|
Guard
|
Property
|
Startup
|
Active
|
Recovery
|
Block Adv
|
Cancel
|
| A
|
600
|
Mid
|
-
|
-
|
-
|
-
|
-
|
J, Su
|
Manbou puffs up and shoots a water drop horizontally. This can be a strong poke tool.
|
| Version
|
Damage
|
Guard
|
Property
|
Startup
|
Active
|
Recovery
|
Block Adv
|
Cancel
|
| B
|
600
|
Mid
|
-
|
-
|
-
|
-
|
-
|
J, Su
|
Manbou puffs up and shoots a water drop slightly upwards. This can be used as a setup or to trip up the opponent.
|
| Version
|
Damage
|
Guard
|
Property
|
Startup
|
Active
|
Recovery
|
Block Adv
|
Cancel
|
| C
|
600
|
Mid
|
-
|
-
|
-
|
-
|
-
|
J, Su
|
Manbou puffs up and shoots a water drop upwards. This is the highest arc, and can trip up the opponent if they're not watching for it, as well as allow you to keep them blocking.
|
|
214X
Suichu
214A/B/C
|
| Version
|
Damage
|
Guard
|
Property
|
Startup
|
Active
|
Recovery
|
Block Adv
|
Cancel
|
| A
|
400
|
-
|
-
|
-
|
-
|
-
|
-
|
-
|
Manbou creates a column of water the shoots up next to it. Useful anti air tools potentially, as well as a way to get out of sticky situations.
|
| B
|
400
|
-
|
-
|
-
|
-
|
-
|
-
|
Su
|
Manbou creates a column of water the shoots up a little ways it. Also useful anti air, and a good way to check an opponent's approach.
|
| C
|
400
|
-
|
-
|
-
|
-
|
-
|
-
|
NC
|
Manbou creates a column of water the shoots up far from it. A good way to keep your opponent on their toes no matter where they are.
|
|
B-Power Arts
22D
Yusaikake
22D
|
| Damage
|
Guard
|
Property
|
Startup
|
Active
|
Recovery
|
Block Adv
|
Cancel
|
| N/A
|
N/A
|
-
|
-
|
-
|
-
|
-
|
-
|
Senna takes her 5D stance and quickly recovers 1026 health, at the cost of 1 bar of meter. Can be used in the same way as her 5D, and will heal her dramatically faster, but spending 1 bar in order to restore 10% of your max health might not be worth it. Can't be held like 5D can; you will always receive exactly 1026 health when you use this move. Most of the animation happens during the super flash, so you can act almost immediately. Decreases remaining duration of Big Bang Mode by about 40% if used during that.
|
|
236D
Nagikaze Ran
236D
|
| Damage
|
Guard
|
Property
|
Startup
|
Active
|
Recovery
|
Block Adv
|
Cancel
|
| 120*18 (1563)
|
Mid
|
-
|
-
|
-
|
-
|
-
|
NC
|
A second version of 236A that costs 1 bar of meter. Senna spins while swinging her jacket 4 times instead of just once, hitting the enemy several times. Not invincible and does notably less damage than 623D, making it a dubious choice to spend your meter on. You can link off of this with 5A for a small combo, although doing this is extremely hard and will still result in less damage than if you had just used 623D. It's air unblockable and pretty fast so you could use it as an anti-air, but you're probably better off using 623A or 623C depending on the situation. Not safe on block.
|
|
623D
Ouka Hishousen
623D
|
| Damage
|
Guard
|
Property
|
Startup
|
Active
|
Recovery
|
Block Adv
|
Cancel
|
| 1200*3 (2106)
|
All, High/Air
|
Invincible
|
-
|
-
|
-
|
-
|
NC
|
An alternate version of Senna's DP that costs 1 bar of meter. After performing the same upwards crescent slash as 623A, she then swings her blade diagonally downwards two more times. If the first hit connects, the next two always will, regardless of distance. Invincibility on startup and solid damage means this can be used as a high-reward way to escape pressure, although since she has two other invincible DPs you might be better off saving the meter for something else. The main way you'll see this move is when the air version is used as a combo ender. The third hit is technically an overhead, but it's extremely telegraphed if the first hit is blocked and will whiff on most crouchers, so this doesn't matter.
|
|
j.623D
Ouka Hishousen (Air)
j623D
|
| Damage
|
Guard
|
Property
|
Startup
|
Active
|
Recovery
|
Block Adv
|
Cancel
|
| 1200*3 (2106)
|
All, High/Air
|
Invincible
|
-
|
-
|
-
|
-
|
NC
|
Air version of 623D. Keeps the ground version's invincibility, but more importantly functions as a high damage combo ender.
|
|
Big Bang Break
41236ABC
Setsu Gekka
41236ABC
|
| Damage
|
Guard
|
Property
|
Startup
|
Active
|
Recovery
|
Block Adv
|
Cancel
|
| 5121
|
Mid
|
-
|
-
|
-
|
-
|
-
|
-
|
Senna executes a Gekka. If it connects, she disappears and slashes the enemy multiple times. When she lands and sheathes her sword, the enemy is cut by one final slash. Good as a combo ender when in Big Bang mode, especially if you're aiming to kill. Ends Big Bang Mode instantly.
|
|
Combos
Combo Theory
- Combo damage varies from character to character, so all damage numbers come from testing on a full-health Rouga.
- Generally, you can do any normals you want before going into the 2C > 214C sequence, as long as you don't push them back too far.
- 214C will cause a groundbounce on an aerial opponent, and 623C/j.623C will cause a groundbounce and then a wallbounce regardless of how they hit the opponent.
- Bouncing the opponent 3 times will force your combo to end, so you can only do 214C twice in the standard loop.
- This is also why 623C is a poor combo component, because if there's too many bounces the second hit won't land, and it can't be super cancelled.
Midscreen
- 5/2A > 5B > (5C) > 2C > 214C, 2C > 214C, 2C > 214AA (2112)
- This is your standard universal knockdown combo that gives okizeme opportunities. 5C can whiff if you're too far from the opponent, so omit it accordingly. If you're instead extremely close and fighting a large enough character, you can fit in a bonus 6A for 2311 damage. You'll probably be using this one the most midscreen.
- 5/2A > 5B > (5C) > 2C > 214C, 2C > 214C, 2C > 214A, 5B > 5C (jump cancel) j.B > j.C > j.623B > j.623D (2882)
- This is an iteration of the above combo that costs 1 bar and sacrifices okizeme for roughly 600~900 more damage. Only suggest using this for guaranteeing a KO. If you're having trouble landing the second 5B, you can instead go into 214AA > j.623B > j.623D for an incredibly minor damage loss.
Corner
- 5/2A > 5B > (5C) > 2C > 214AB, 2A > 214C, 2C > 214AA > j.623B > j.623D (3201)
- High-damage combo for when your opponent is close to the corner. The 2A link after 214AB is difficult at first and only possible if you land very close to the opponent (which is why this only works in the corner), but it gets easier if you focus on trying to 2A as soon as Senna touches the ground. Costs 1 bar, but you can omit the j.623B and j.623D to still get 2448 damage and a better knockdown.
- 623C/j.623C > j.B > j.C > j.623B > j.623D (2105)
- Followup to landing a raw 623C. Spends one bar and gives no oki, so only use if it'll kill.
- 5/2A > 5B > (5C) > 2C > 214AB, 2A > 214C, 2C > 214AA > j.623B > land > ABC > combo drops, opponent techs > 41236ABC (7587)
- A gimmicky reset for 3 bars that takes advantage of 41236ABC's air unblockable properties to land it outside of a combo, and therefore have it be completely unscaled. This loses to your opponent not teching or delaying their tech significantly, but if you catch someone with it they're pretty much dead. It's a fake option, but an option nonetheless.
Colors
BBBR Navigation


