|
|
| Line 521: |
Line 521: |
| |cancel=NC | | |cancel=NC |
| |description=Probably Kinako's best use of meter, this command grab gives you 3 souls, as well as doing some decent damage. You'll want to land this, since it restores another B-Power Art's worth of soul charges. It can also make your mix a lot stronger. | | |description=Probably Kinako's best use of meter, this command grab gives you 3 souls, as well as doing some decent damage. You'll want to land this, since it restores another B-Power Art's worth of soul charges. It can also make your mix a lot stronger. |
| }}
| |
| }}
| |
|
| |
| ====== <font style="visibility:hidden" size="0">623D</font> ======
| |
| {{MoveData
| |
| |image=BBBR_Senna_623X.png
| |
| |caption=
| |
| |name=Ouka Hishousen
| |
| |input=623D
| |
| |data=
| |
| {{AttackData-BBBR
| |
| |damage=1200*3 (2106)
| |
| |guard=All, High/Air
| |
| |property=Invincible
| |
| |startup=
| |
| |active=
| |
| |recovery=
| |
| |advBlock=
| |
| |cancel=NC
| |
| |description=An alternate version of Senna's DP that costs 1 bar of meter. After performing the same upwards crescent slash as 623A, she then swings her blade diagonally downwards two more times. If the first hit connects, the next two always will, regardless of distance. Invincibility shortly after the superflash (not frame 1) and solid damage means this can be used as a high-reward way to escape pressure, although since she has two other invincible DPs you might be better off saving the meter for something else. The main way you'll see this move is when the air version is used as a combo ender. The third hit is technically an overhead, but it's extremely telegraphed if the first hit is blocked and will whiff on most crouchers, so this doesn't matter.
| |
| }}
| |
| }}
| |
|
| |
| ====== <font style="visibility:hidden" size="0">j.623D</font> ======
| |
| {{MoveData
| |
| |image=BBBR_Senna_623X.png
| |
| |caption=
| |
| |name=Ouka Hishousen (Air)
| |
| |input=j623D
| |
| |data=
| |
| {{AttackData-BBBR
| |
| |damage=1200*3 (2106)
| |
| |guard=All, High/Air
| |
| |property=Invincible
| |
| |startup=
| |
| |active=
| |
| |recovery=
| |
| |advBlock=
| |
| |cancel=NC
| |
| |description=Air version of 623D. Keeps the ground version's (delayed) invincibility, but more importantly functions as a high damage combo ender.
| |
| }} | | }} |
| }} | | }} |
| Line 567: |
Line 527: |
| ====== <font style="visibility:hidden" size="0">41236ABC</font> ====== | | ====== <font style="visibility:hidden" size="0">41236ABC</font> ====== |
| {{MoveData | | {{MoveData |
| |image=BBBR_Senna_623X.png | | |image=BBBR_Kinako_BBB.png |
| |name=Setsu Gekka | | |name=Setsu Gokourin |
| |input=41236ABC | | |input=41236ABC |
| |data= | | |data= |
| Line 580: |
Line 540: |
| |advBlock= | | |advBlock= |
| |cancel= | | |cancel= |
| |description=Senna executes a Gekka. If it connects, she disappears and slashes the enemy multiple times. When she lands and sheathes her sword, the enemy is cut by one final slash. Good as a combo ender when in Big Bang mode, especially if you're aiming to kill. Ends Big Bang Mode instantly. | | |description=Kinako summons a spell circle underneath the opponent, rising them into the air while a horde of monsters fire a damaging laser beam. Good as a combo ender when in Big Bang mode, especially if you're aiming to kill. Ends Big Bang Mode instantly. |
| }} | | }} |
| }} | | }} |
| Line 587: |
Line 547: |
| ===<u>Combo Theory</u>=== | | ===<u>Combo Theory</u>=== |
| :*Combo damage varies from character to character, so all damage numbers come from testing on a full-health Rouga. | | :*Combo damage varies from character to character, so all damage numbers come from testing on a full-health Rouga. |
| :*Generally, you can do any normals you want before going into the 2C > 214C sequence, as long as you don't push them back too far.
| | |
| :*214C will cause a groundbounce on an aerial opponent, and 623C/j.623C will cause a groundbounce and then a wallbounce regardless of how they hit the opponent.
| |
| :*Bouncing the opponent 3 times will force your combo to end, so you can only do 214C twice in the standard loop.
| |
| ::*This is also why 623C is a poor combo component, because if there's too many bounces the second hit won't land, and it can't be super cancelled.
| |
| ===<u>Midscreen</u>=== | | ===<u>Midscreen</u>=== |
| :* '''5/2A > 5B > (5C) > 2C > 214C, 2C > 214C, 2C > 214AA''' (2112)
| |
| ::* This is your standard universal knockdown combo that gives okizeme opportunities. 5C can whiff if you're too far from the opponent, so omit it accordingly. If you're instead extremely close and fighting a large enough character, you can fit in a bonus 6A for 2311 damage. You'll probably be using this one the most midscreen.
| |
|
| |
| :* '''5/2A > 5B > (5C) > 2C > 214C, 2C > 214C, 2C > 214A, 5B > 5C (jump cancel) j.B > j.C > j.623B > j.623D''' (2882)
| |
| ::* This is an iteration of the above combo that costs 1 bar and sacrifices okizeme for roughly 600~900 more damage. Only suggest using this for guaranteeing a KO. If you're having trouble landing the second 5B, you can instead go into 214AA > j.623B > j.623D for an incredibly minor damage loss.
| |
|
| |
|
| ===<u>Corner</u>=== | | ===<u>Corner</u>=== |
| :* '''5/2A > 5B > (5C) > 2C > 214AB, 2A > 214C, 2C > 214AA > j.623B > j.623D''' (3201)
| |
| ::* High-damage combo for when your opponent is close to the corner. The 2A link after 214AB is difficult at first and only possible if you land very close to the opponent (which is why this only works in the corner), but it gets easier if you focus on trying to 2A as soon as Senna touches the ground. Costs 1 bar, but you can omit the j.623B and j.623D to still get 2448 damage and a better knockdown.
| |
|
| |
| :* '''623C/j.623C > j.B > j.C > j.623B > j.623D''' (2105)
| |
| ::* Followup to landing a raw 623C. Spends one bar and gives no oki, so only use if it'll kill.
| |
|
| |
| :* '''5/2A > 5B > (5C) > 2C > 214AB, 2A > 214C, 2C > 214AA > j.623B > land > ABC > combo drops, opponent techs > 41236ABC ''' (7587)
| |
| ::* A gimmicky reset for 3 bars that takes advantage of 41236ABC's air unblockable properties to land it outside of a combo, and therefore have it be completely unscaled. This loses to your opponent not teching or delaying their tech significantly, but if you catch someone with it they're pretty much dead. It's a fake option, but an option nonetheless.
| |
|
| |
|
| ==Colors== | | ==Colors== |
| {{ColorGallery | filePrefix=Senna- | colors= | | {{ColorGallery | filePrefix=Kinako- | colors= |
| {{ColorGallery/Color|1| text= A Color}} | | {{ColorGallery/Color|1| text= A Color}} |
| {{ColorGallery/Color|2| text= B Color}} | | {{ColorGallery/Color|2| text= B Color}} |
 |
Under Construction
- This page is a work in progress.
- Please be patient and check back later for additional changes.
|

Kinako Estimated Health (After Scaling): 11038 Introduction
Kinako is a setup and trap character who relies on her doll, Grimoire-chan, to lock down the opponent and keep them guessing until they inevitably get caught. She takes a bit of time to learn as is stardard with a setup character, but she is suffocating when played well, making any opponent fear your traps.
Tsukuyomi Kinako is a student at Seijou Academy and the president of the Occult Club, of which she is effectively the only member. She constantly performs strange experiments which often results in explosions. Kinako is always seen carrying her doll Grimoire-chan, which she believes speaks to her.
General Strategy
As is typical of a setup and trap character, your primary goal is to secure a knockdown using Kinako's faster buttons, then set up your traps during knockdown. WIth a command grab and various traps in various places, you can make it a chore for your opponent to even move, and mix them to hell. Although her damage isn't among the higher damage of the cast, she makes up for it with some of the most oppressive pressure and mix in the game.
Normal Moves
Standing Normals
5A
5A
|
| Damage
|
Guard
|
Property
|
Startup
|
Active
|
Recovery
|
Block Adv
|
Cancel
|
| 150
|
Mid
|
-
|
-
|
-
|
-
|
-
|
J, N, Sp, Su
|
Standard jab. It's quick, has a decent hitbox, and is air unblockable. Its range makes it a good fast poke, and is a pretty decent close range tool.
|
|
5B
5B
|
| Version
|
Damage
|
Guard
|
Property
|
Startup
|
Active
|
Recovery
|
Block Adv
|
Cancel
|
| 5B
|
500
|
All
|
-
|
-
|
-
|
-
|
-
|
J, N, Sp, Su
|
A tentacle comes out of Grimoire-chan's mouth. A pretty good poke in neutral, although it's not super fast.
|
| Version
|
Damage
|
Guard
|
Property
|
Startup
|
Active
|
Recovery
|
Block Adv
|
Cancel
|
| 5[B]
|
500*2 (870)
|
All
|
-
|
-
|
-
|
-
|
-
|
J, N, Sp, Su
|
This version hits twice, and the second hit pulls the opponent towards you. It can be useful, but it's also slow, so keep that in mind.
|
|
5C
5C
|
| Damage
|
Guard
|
Property
|
Startup
|
Active
|
Recovery
|
Block Adv
|
Cancel
|
| 300*2(596)
|
All
|
-
|
-
|
-
|
-
|
-
|
J, N, Sp, Su
|
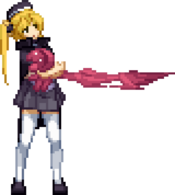
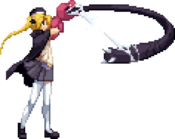
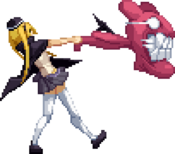
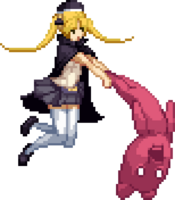
Kinako swings Grimoire-chan, who chomps. This move hits twice, and is pretty strong in most situations. It's especially good at keeping your opponent locked down in pressure.
|
|
Crouching Normals
2A
2A
|
| Damage
|
Guard
|
Property
|
Startup
|
Active
|
Recovery
|
Block Adv
|
Cancel
|
| 100
|
Low
|
-
|
-
|
-
|
-
|
-
|
N, Sp, Su
|
Grimoire-chan kicks with a surprisingly muscular foot. This has almost no range, and isn't a great button in general. It does hit low, but that's about it.
|
|
2B
2B
|
| Damage
|
Guard
|
Property
|
Startup
|
Active
|
Recovery
|
Block Adv
|
Cancel
|
| 350
|
Low
|
-
|
-
|
-
|
-
|
-
|
J, N, Sp, Su
|
Grimoire-chan's head goes into the ground and then pokes up a little while away. This button feels a but awkward due to the animation, but it is a low, and is useful as such, as well as having fairly decent range.
|
|
2C
2C
|
| Damage
|
Guard
|
Property
|
Startup
|
Active
|
Recovery
|
Block Adv
|
Cancel
|
| 550
|
All
|
-
|
-
|
-
|
-
|
-
|
N, Sp, Su
|
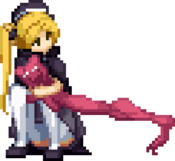
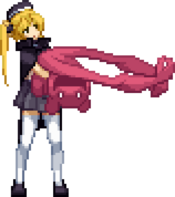
Kinako falls forward with Grimoire-chan. This is a mid hitting move that is pretty strong since it moves you forward a bit. It is a bit slow, but not too bad for a C move.
|
|
Air Normals
jA
jA
|
| Damage
|
Guard
|
Property
|
Startup
|
Active
|
Recovery
|
Block Adv
|
Cancel
|
| 200
|
High
|
-
|
-
|
-
|
-
|
-
|
N, Sp, Su
|
Kinako's cape swings. It's a pretty good air button, with a decent hitbox and fast startup time, good for use when close as an air-to-air.
|
|
jB
jB
|
| Damage
|
Guard
|
Property
|
Startup
|
Active
|
Recovery
|
Block Adv
|
Cancel
|
| 350
|
High
|
-
|
-
|
-
|
-
|
-
|
N, Sp, Su
|
Grimoire-chan swings its head down. This is a good jump in button, as the hitbox is mostly going down.
|
|
jC
jC
|
| Damage
|
Guard
|
Property
|
Startup
|
Active
|
Recovery
|
Block Adv
|
Cancel
|
| 600
|
High
|
-
|
-
|
-
|
-
|
-
|
N, Sp, Su
|
Grimoire-chan opens its mouth downwards. This move can be a bit awkward since the entire hitbox exists below it, but it has a crossup hitbox allowing for potential left/right mix under the right circumstances.
|
|
Command Normals
6A
6A First hit First hit Second hit Second hit
|
| Damage
|
Guard
|
Property
|
Startup
|
Active
|
Recovery
|
Block Adv
|
Cancel
|
| 200 (1st hit) 500 (2nd hit)
|
Mid
|
-
|
-
|
-
|
-
|
-
|
J, N, Sp, Su
|
A two hit punch from Grimoire-chan. Hits mid, and it pretty good in pressure and neutral. The second hit does more damage than the first.
|
|
Universal Mechanics
5D
Kourei
5D
|
| Damage
|
Guard
|
Property
|
Startup
|
Active
|
Recovery
|
Block Adv
|
Cancel
|
| N/A
|
N/A
|
-
|
-
|
-
|
-
|
-
|
NC
|
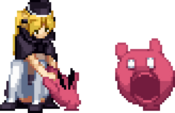
Kinako wiggles Grimoire-chan's head. Releasing a soul. These souls are extremely necessary for Kinako to do pretty much anything worthwhile as most of her setups use souls. Get very used to doing this move, as you'll need to refill your souls whenever possible. YOu can see your stock of souls above your health bar.
|
|
Throw
Throw
4/5AB
|
| Damage
|
Guard
|
Property
|
Startup
|
Active
|
Recovery
|
Block Adv
|
Cancel
|
| 1000
|
Unblockable
|
-
|
-
|
-
|
-
|
-
|
NC
|
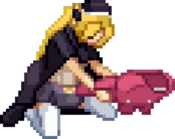
Grimoire-chan latches onto the opponent and takes a bite. This leaves you very close to the opponent, allowing for great oki setups. WHen this is used in tandem with her command grab, her strike throw mix becomes very strong.
|
|
Big Bang Mode
Big Bang Mode
ABC
|
| Damage
|
Guard
|
Property
|
Startup
|
Active
|
Recovery
|
Block Adv
|
Cancel
|
| N/A
|
N/A
|
-
|
-
|
-
|
-
|
-
|
-
|
Universal Big Bang Mode activation. Requires 3 bars and can be done anytime you have control on the ground. Lasts for about 7 seconds. During BBM Kinako gains infinite soul charges, allowing you to do some combos not otherwise possible, as well as setups a lot stronger than usual.
|
|
Special Moves
236X
Otomodachi wo Shoukai Shimasu
(j)236A/B/C Kinako's animation Kinako's animation Light soul friend, before activation (left) and after activation (right) Light soul friend, before activation (left) and after activation (right) Medium soul friend Medium soul friend Heavy soul friend Heavy soul friend
|
| Version
|
Damage
|
Guard
|
Property
|
Startup
|
Active
|
Recovery
|
Block Adv
|
Cancel
|
| A
|
700
|
Mid
|
-
|
-
|
-
|
-
|
-
|
J, Su
|
Costs 1 soul. Kinako sends out a yellow ball that bounces across the ground until it touches something or goes offscreen. Once it touches something it expands and deals damage, before disappearing. This is a good tool for long range neutral.
|
| Version
|
Damage
|
Guard
|
Property
|
Startup
|
Active
|
Recovery
|
Block Adv
|
Cancel
|
| B
|
750
|
Mid
|
-
|
-
|
-
|
-
|
-
|
J, Su
|
Costs 1 soul. Kinako sends a cat balloon into the air where it stays and floats for a while. If the opponent runs into it during this time it will pop and deal damage. Otherwise, it will pop itself. Good for keeping your opponent from jumping out of pressure as easily
|
| Version
|
Damage
|
Guard
|
Property
|
Startup
|
Active
|
Recovery
|
Block Adv
|
Cancel
|
| C
|
700
|
Mid
|
-
|
-
|
-
|
-
|
-
|
J, Su
|
Costs 1 soul. Kinako sends out a spiky friend, who launches a short range projectile. Deals good damage if it hits, as well as a good way to keep your opponent locked down during pressure.
|
|
623X
Ooki na Otomodachi wo Shoukai Shimasu
623A/B/C Kinako's animation Kinako's animation light friend light friend medium friend medium friend heavy friend heavy friend
|
| Version
|
Damage
|
Guard
|
Property
|
Startup
|
Active
|
Recovery
|
Block Adv
|
Cancel
|
| A
|
600*2 (1092)
|
Mid
|
-
|
-
|
-
|
-
|
-
|
NC
|
Costs 2 souls. Kinako sends out the yellow friend, who unzips into a chomping head that hits twice. A strong lockdown tool to keep your opponent from trying to escape.
|
| B
|
1000
|
Mid
|
-
|
-
|
-
|
-
|
-
|
Su
|
Costs 2 souls. Kinako sends out the cat balloon, which pops and reveals a hand that deals damage. A strong ability and you can set it up to prevent the opponent from closing in.
|
| C
|
600
|
All
|
Invincible
|
-
|
-
|
-
|
-
|
NC
|
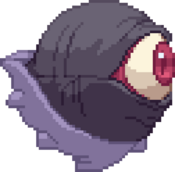
Costs 2 souls. Kinako sends out the spiky friend, who peels back into an eye. After the eye beats twice it fires a beam from its eye. A strong delayed projectile to enforce continued pressure.
|
|
214A
Shield of the Grimoire
214A Parry animation Parry animation Counterattack animation Counterattack animation
|
| Damage
|
Guard
|
Property
|
Startup
|
Active
|
Recovery
|
Block Adv
|
Cancel
|
| 900
|
-
|
-
|
-
|
-
|
-
|
-
|
Su
|
Kinako holds up Grimoire-chan in front of her. If the opponent attacks during this, Kinako performs a damaging counterhit. As with any parry, this is a great option to prevent your opponent from pressing buttons as much.
|
|
214BC
Fly in the Fly
(j)214B/C
|
| Version
|
Damage
|
Guard
|
Property
|
Startup
|
Active
|
Recovery
|
Block Adv
|
Cancel
|
| B
|
NA
|
NA
|
-
|
-
|
-
|
-
|
-
|
-
|
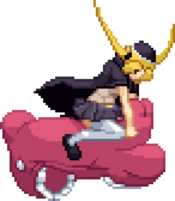
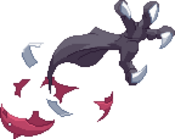
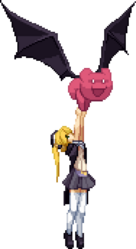
Grimoire-chan turns into a bat and carries Kinako forward in the air for a little while. Air version keeps you in place, so it's a very good air stall.
|
| Version
|
Damage
|
Guard
|
Property
|
Startup
|
Active
|
Recovery
|
Block Adv
|
Cancel
|
| C
|
NA
|
NA
|
-
|
-
|
-
|
-
|
-
|
-
|
Grimoire-chan turns into a bat and carries Kinako upwards in place. You can use this as a sort of dodge into the air, just be careful. Air version carries you backwards, allowing you to dodge out of the way of a lot of anti airs.
|
|
63214A
Tasting
63214A
|
| Damage
|
Guard
|
Property
|
Startup
|
Active
|
Recovery
|
Block Adv
|
Cancel
|
| ~986
|
All
|
-
|
-
|
-
|
-
|
-
|
Sp, Su
|
This is a hitgrab, and when it hits, the opponent will take 2 hits of damage from Grimoire-chan, and give you 1 soul. It being a hit grab means it's not great for mix, but it has high damage output and is pretty decent as a meterless combo ender, and is also useful for building soul charges.
|
|
41236C
Spinning Thrust
(j)41236C
|
| Damage
|
Guard
|
Property
|
Startup
|
Active
|
Recovery
|
Block Adv
|
Cancel
|
| 500*3 (1566)
|
All
|
-
|
-
|
-
|
-
|
-
|
Su
|
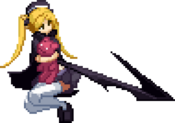
Kinako launches forward with Grimoire-chan. This does 3 hits on the ground and 5 in the air, and a pretty good move in combos. Out of combos it has situational use due to it's slow nature, but it's still decent in some situations.
|
|
B-Power Arts
236D
Grimoire★Hard Punch
236D
|
| Damage
|
Guard
|
Property
|
Startup
|
Active
|
Recovery
|
Block Adv
|
Cancel
|
| 2500
|
All
|
-
|
-
|
-
|
-
|
-
|
-
|
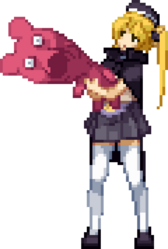
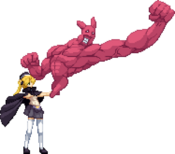
Costs 3 souls. Grimoire-chan gets buff and does a hard punch. A very strong super move, and well worth the souls if you have them to do damage or close out a combo.
|
|
63214D
Takkei
63214D
|
| Damage
|
Guard
|
Property
|
Startup
|
Active
|
Recovery
|
Block Adv
|
Cancel
|
| 1822
|
Unblockable
|
-
|
-
|
-
|
-
|
-
|
NC
|
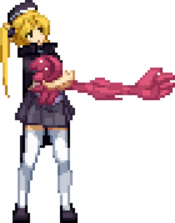
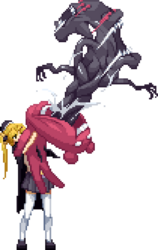
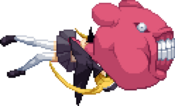
Probably Kinako's best use of meter, this command grab gives you 3 souls, as well as doing some decent damage. You'll want to land this, since it restores another B-Power Art's worth of soul charges. It can also make your mix a lot stronger.
|
|
Big Bang Break
41236ABC
Setsu Gokourin
41236ABC
|
| Damage
|
Guard
|
Property
|
Startup
|
Active
|
Recovery
|
Block Adv
|
Cancel
|
| 5121
|
Mid
|
-
|
-
|
-
|
-
|
-
|
-
|
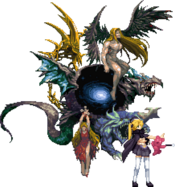
Kinako summons a spell circle underneath the opponent, rising them into the air while a horde of monsters fire a damaging laser beam. Good as a combo ender when in Big Bang mode, especially if you're aiming to kill. Ends Big Bang Mode instantly.
|
|
Combos
Combo Theory
- Combo damage varies from character to character, so all damage numbers come from testing on a full-health Rouga.
Midscreen
Corner
Colors
BBBR Navigation

