|
|
| Line 436: |
Line 436: |
| ====== <font style="visibility:hidden" size="0">214D</font> ====== | | ====== <font style="visibility:hidden" size="0">214D</font> ====== |
| {{MoveData | | {{MoveData |
| |image=BBBR_Rouga_214C.png | | |image=BBBR_Miyazato_63214D.png |
| |caption= | | |image2=BBBR_Miyazato_41236X.png |
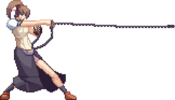
| |name=Wild Fang | | |caption=initial punches |
| |input=214D | | |caption2=final chain whip |
| | |name=Rumble Chain |
| | |input=63214D |
| |data= | | |data= |
| {{AttackData-BBBR | | {{AttackData-BBBR |
| |damage=1500 (close) 1600 (far) | | |damage=300*7 + 1100 |
| |guard=All | | |guard=Mid |
| |property= | | |property= |
| |startup=7+3 | | |startup= |
| |active= | | |active= |
| |recovery= | | |recovery= |
| |advBlock=0 | | |advBlock= |
| |cancel= | | |cancel= |
| |description=Rouga does a powered up Fang. This is a fantastic tool but especially good as a 1 meter combo ender. | | |description=Miyazato does a series of punches followed by a final chain whip. This does a lot of damage, and many hits are air unblockable, but it scales pretty bad. Even so, it is worth using as a metered combo ender. |
| }} | | }} |
| }} | | }} |
Revision as of 14:34, 9 June 2024
 |
Under Construction
- This page is a work in progress.
- Please be patient and check back later for additional changes.
|

Miyazato
Estimated Health (After Scaling): 12578 Introduction
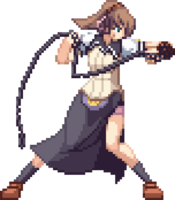
Miyazato has a lot of strange tools, including a set of assists, and in general she can be very hard to get a hang of at the beginning. Once you start understanding her tools however she has some of the best neutral in the game and a lot of strong tools to keep the opponent where you want them.
General Strategy
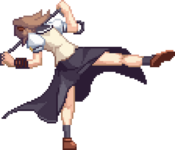
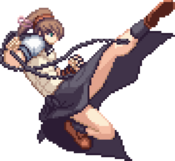
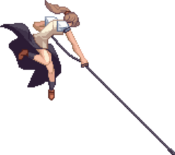
Miyazato's greatest strength lies in her pokes. Her C attacks have great range and do moderate damage on their own. Super jumps are more important for Miyazato than the rest of the cast as they extend the range that she can safely execute a j.C while jumping in on an opponent.
She is the only character with assists, and one of their greatest strengths is that they can't be stopped. The instant Miyazato does the summoning animation, the assists will come out and attempt their attacks, no matter what. Saki is best used for pressuring your opponent when in close and even keeping them out or punishing their attacks. Shouko is great for numerous setups as she has delay, tracking, and will bounce your opponent up on hit.
Miyazato's combos are rather "cookie cutter," and thanks to the game's scaling she has a hard time breaking into the 3k range for damage. This is somewhat negligible as long combos aren't really her thing and a lot of her short, simple combos are much more reliable and damaging. Her super, when used by itself, does more damage than most characters in the same situation. You to get true block strings on your opponent. 41236C can be used in mixup for throw attempts if your opponent is expecting the kick, but use it sparingly because it's not safe.
Normal Moves
Standing Normals
5A
5A
|
| Damage
|
Guard
|
Property
|
Startup
|
Active
|
Recovery
|
Block Adv
|
Cancel
|
| 150
|
Mid
|
-
|
-
|
-
|
-
|
-
|
J, N, Sp, Su
|
A solid standard jab. It's air unblockable, and is a pretty decent poke.
|
|
5B
5B
|
| Damage
|
Guard
|
Property
|
Startup
|
Active
|
Recovery
|
Block Adv
|
Cancel
|
| 500
|
Mid
|
-
|
-
|
-
|
-
|
-
|
J, N, Sp, Su
|
This is also air unblockable, and is a great normal in general due to its fantastic range.
|
|
5C
5C
|
| Damage
|
Guard
|
Property
|
Startup
|
Active
|
Recovery
|
Block Adv
|
Cancel
|
| 750
|
Mid
|
-
|
-
|
-
|
-
|
-
|
J, N, Sp, Su
|
A very strong poke tool with a massive range. You'll be using this a lot in neutral, and it's air unblockable to boot.
|
|
Crouching Normals
2A
2A
|
| Damage
|
Guard
|
Property
|
Startup
|
Active
|
Recovery
|
Block Adv
|
Cancel
|
| 100
|
Mid
|
-
|
-
|
-
|
-
|
-
|
N, Sp, Su
|
A fast low jab. Not a low, which makes it not a great low button, but it can have usage in pressure strings.
|
|
2B
2B
|
| Damage
|
Guard
|
Property
|
Startup
|
Active
|
Recovery
|
Block Adv
|
Cancel
|
| 400
|
Low
|
-
|
-
|
-
|
-
|
-
|
J, N, Sp, Su
|
A fast low kick. A very good low poke, especially with the range. This is very useful to get a low poke in.
|
|
2C
2C
|
| Damage
|
Guard
|
Property
|
Startup
|
Active
|
Recovery
|
Block Adv
|
Cancel
|
| 650
|
Mid
|
-
|
-
|
-
|
-
|
-
|
N, Sp, Su
|
A crouching chain swing. Unfortunately it's not a low, making it inferior to 5C in most ways.
|
|
Air Normals
jA
jA
|
| Damage
|
Guard
|
Property
|
Startup
|
Active
|
Recovery
|
Block Adv
|
Cancel
|
| 100
|
High
|
-
|
-
|
-
|
-
|
-
|
N, Sp, Su
|
A fast air jab. This button is best used as an air-to-air, as it doesn't have much combo potential and is an unreliable jump-in.
|
|
jB
jB
|
| Damage
|
Guard
|
Property
|
Startup
|
Active
|
Recovery
|
Block Adv
|
Cancel
|
| 600
|
High
|
-
|
-
|
-
|
-
|
-
|
N, Sp, Su
|
A high kick in the air. A decent air to air when you have the time for it.
|
|
jC
jC
|
| Damage
|
Guard
|
Property
|
Startup
|
Active
|
Recovery
|
Block Adv
|
Cancel
|
| 750
|
High
|
-
|
-
|
-
|
-
|
-
|
N, Sp, Su
|
A chain whip downwards. A fantastic jump-in, but be careful when you press, as pressing while too close to the ground will cause the move to mess up and leave you vulnerable to a punish.
|
|
Command Normals
6A
6A
|
| Damage
|
Guard
|
Property
|
Startup
|
Active
|
Recovery
|
Block Adv
|
Cancel
|
| 600
|
Mid
|
-
|
-
|
-
|
-
|
-
|
J, N, Sp, Su
|
An upwards chain whip. This is a launcher and also a pretty good anti air due to its range. It's good in combos to add a little extra damage.
|
|
6B
6B
|
| Damage
|
Guard
|
Property
|
Startup
|
Active
|
Recovery
|
Block Adv
|
Cancel
|
| 600
|
Mid
|
-
|
-
|
-
|
-
|
-
|
N, Sp, Su
|
A short hop into her j.B. This hits mid but its aerial state means you can avoid some low attacks with a proper read, and it launches allowing for combos.
|
|
Universal Mechanics
Throw
Throw
4/5AB
|
| Damage
|
Guard
|
Property
|
Startup
|
Active
|
Recovery
|
Block Adv
|
Cancel
|
| 1300
|
Unblockable
|
-
|
-
|
-
|
-
|
-
|
NC
|
Miyazato grabs the opponent and punches them to the ground. Always a good option to trip up blocking opponents.
|
|
Big Bang Mode
Big Bang Mode
ABC
|
| Damage
|
Guard
|
Property
|
Startup
|
Active
|
Recovery
|
Block Adv
|
Cancel
|
| N/A
|
N/A
|
-
|
-
|
-
|
-
|
-
|
-
|
Universal Big Bang Mode activation. Requires 3 bars and can be done anytime you have control on the ground. Lasts for about 7 seconds.
|
|
Special Moves
214A
Saki!
214A 1st hit 1st hit 2nd hit 2nd hit
|
| Damage
|
Guard
|
Property
|
Startup
|
Active
|
Recovery
|
Block Adv
|
Cancel
|
| 400+500
|
Mid
|
-
|
-
|
-
|
-
|
-
|
-
|
Miyazato calls in Saki, who performs two consecutive slashes. The second slash launches, allowing for combos. This assist has a long cooldown.
|
|
214B
Shouko!
214B
|
| Damage
|
Guard
|
Property
|
Startup
|
Active
|
Recovery
|
Block Adv
|
Cancel
|
| 1000
|
Mid
|
-
|
-
|
-
|
-
|
-
|
-
|
Miyazato calls in Shouko to belly flop onto the opponent. This has a fast assist recovery, making it less risky to use. It launches on hit and has slight tracking properties, making it a decent neutral tool.
|
|
214C
I'll!
214C
|
| Damage
|
Guard
|
Property
|
Startup
|
Active
|
Recovery
|
Block Adv
|
Cancel
|
| 700
|
High
|
-
|
-
|
-
|
-
|
-
|
-
|
Miyazato runs forward and falls on her face. This is a pretty slow overhead, but it has its uses in pressure, and landing it launches for a full combo.
|
|
41236X
Tight Chain
41236A/B(~4C)
|
| Version
|
Damage
|
Guard
|
Property
|
Startup
|
Active
|
Recovery
|
Block Adv
|
Cancel
|
| A
|
NA
|
All
|
-
|
-
|
-
|
-
|
-
|
Su
|
A fast hitgrab that does no damage on its own but allows for a followup with 4C, a decent sideswitch poke in this case.
|
| Version
|
Damage
|
Guard
|
Property
|
Startup
|
Active
|
Recovery
|
Block Adv
|
Cancel
|
| B
|
NA
|
NA
|
Unblockable
|
-
|
-
|
-
|
-
|
Su
|
This verion is a lot slower but is a command grab, making it fairly useful to mix your opponent, although keep in mind it is pretty slow.
|
| Version
|
Damage
|
Guard
|
Property
|
Startup
|
Active
|
Recovery
|
Block Adv
|
Cancel
|
| ...~4C
|
1200
|
-
|
-
|
-
|
-
|
-
|
-
|
-
|
You'll pretty much want to do this follow-up every time, since it does the damage of the move. This will thro the opponent behind you though, so be prepared for that.
|
|
63214C
Cyclone Chain
63214C
|
| Damage
|
Guard
|
Property
|
Startup
|
Active
|
Recovery
|
Block Adv
|
Cancel
|
| 10+200*7+500
|
All
|
-
|
-
|
-
|
-
|
-
|
Sp, Su
|
Miyazato spins her chain around. This pushes the opponent very far back on block, ad wallbounces on hit, making it a decent combo tool.
|
|
623X
Spiral Chain
623A/B/C
|
| Version
|
Damage
|
Guard
|
Property
|
Startup
|
Active
|
Recovery
|
Block Adv
|
Cancel
|
| A
|
800
|
Mid
|
-
|
-
|
-
|
-
|
-
|
-
|
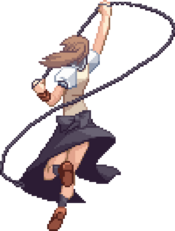
Pretty standard DP, where Miyazato twirls into the air with her chain.
|
| Version
|
Damage
|
Guard
|
Property
|
Startup
|
Active
|
Recovery
|
Block Adv
|
Cancel
|
| B
|
900
|
Mid
|
-
|
-
|
-
|
-
|
-
|
-
|
This version still hits once, but goes higher up and does more damage.
|
| Version
|
Damage
|
Guard
|
Property
|
Startup
|
Active
|
Recovery
|
Block Adv
|
Cancel
|
| C
|
400+500+600
|
Mid
|
-
|
-
|
-
|
-
|
-
|
-
|
This version goes the highest and can hit up to 3 times.
|
|
B-Power Arts
214D
Rumble Chain
63214D initial punches initial punches final chain whip final chain whip
|
| Damage
|
Guard
|
Property
|
Startup
|
Active
|
Recovery
|
Block Adv
|
Cancel
|
| 300*7 + 1100
|
Mid
|
-
|
-
|
-
|
-
|
-
|
-
|
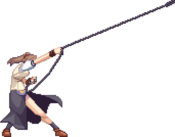
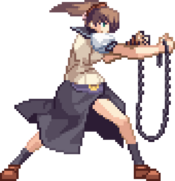
Miyazato does a series of punches followed by a final chain whip. This does a lot of damage, and many hits are air unblockable, but it scales pretty bad. Even so, it is worth using as a metered combo ender.
|
|
j214D
Wild Shoot
j214D
|
| Damage
|
Guard
|
Property
|
Startup
|
Active
|
Recovery
|
Block Adv
|
Cancel
|
| 1400
|
Mid
|
-
|
12+2
|
-
|
-
|
+12
|
NC
|
Rouga does a powered up Shoot. This is a great divekick and can be TKed for what is basically an instant overhead.
|
|
j214D~22D
Wolf Shoot Chase
j214D~22D
|
| Damage
|
Guard
|
Property
|
Startup
|
Active
|
Recovery
|
Block Adv
|
Cancel
|
| 1400
|
High
|
-
|
10+0
|
-
|
-
|
+8
|
NC
|
A follow-up to j214D, Rouga does a powered up version of 6B. This is essentially another divekick after the first, and is useful to squeeze out some extra damage or catch an opponent who block j214D.
|
|
Big Bang Break
41236ABC
Wolf Fang
41236ABC
|
| Damage
|
Guard
|
Property
|
Startup
|
Active
|
Recovery
|
Block Adv
|
Cancel
|
| 3895
|
All
|
-
|
-
|
-
|
-
|
-
|
-
|
Rouga does a B-Dash forwards. If he hits the opponent he charges up a massive punch that sends the opponent flying. Good as a combo ender when in Big Bang mode, especially if you're aiming to kill. Ends Big Bang Mode instantly.
|
|
Combos
Combo Theory
- Combo damage varies from character to character, so all damage numbers come from testing on a full-health Rouga.
Midscreen
- 5B > 5C > 2C xx 214A xx 214B > 5B xx 214A xx dl.214B > 2C > 6A > dl.5C > j.B xx Boost > j.A > j.B xx j.214A (3747)
- A very strong meterless midscreen combo, for all intents and purposes Rouga's BNB. It will always send the opponent to the corner, and give you oki on the knockdown.
- 6B xx j.214A xx Boost > dl.j.B > 214A xx dl.214B > 5B xx 214A xx dl.214B > 2C > 6A > dl.5C > 6A xx *623A (2961)
- Good midscreen confirm off Rouga's overhead.
- 5B > 5C xx 2147D > *5C xx 214B > 2C xx 214A xx 214B > 2C > 6A > dl.5C > 6A xx *623A (5183)
- A very damaging combo midscreen that uses 1 meter. Just solid all around.
Corner
- 6B xx j.214A > 5C xx 214A xx dl.214B > 5B xx 214A xx dl.214B > 2C > 6A > dl.5C > 6A xx dl.623A (3589)
- Meterless corner combo for Rouga. This character has more damage than practically anyone else in the game, and this is a great example.
Colors
BBBR Navigation

