Big Bang Beat Revolve/Devil: Difference between revisions
Jump to navigation
Jump to search
(→214D) |
mNo edit summary |
||
| Line 4: | Line 4: | ||
== Introduction == | == Introduction == | ||
Devil Daigo is an air-focused character whose options there excel more than anything else. Unfortunately, he doesn't have much going for him. | |||
This is Daigo's powered up form (although you wouldn't guess it from his strength in this game). | This is Daigo's powered up form (although you wouldn't guess it from his strength in this game). | ||
== General Strategy == | == General Strategy == | ||
Honestly, this character really can't do much. Your best option is to air stall and bait an anti air from the opponent, before going in for a punish. Daigo's only move the knocks down is his | Honestly, this character really can't do much. Your best option is to air stall and bait an anti-air from the opponent, before going in for a punish. Daigo's only move the knocks down is his B-Power Art, which can only be done on the ground, so when you have meter the best plan is to route a ground based combo so you can get oki and get the rare chance to pressure the opponent. | ||
== Normal Moves == | == Normal Moves == | ||
| Line 124: | Line 124: | ||
|advBlock= | |advBlock= | ||
|cancel=N, Sp, Su | |cancel=N, Sp, Su | ||
|description=A forward moving uppercut | |description=A forward-moving uppercut. Pretty decent anti-air, but is mainly used in combos as a launcher. | ||
}} | }} | ||
}} | }} | ||
| Line 163: | Line 163: | ||
|advBlock= | |advBlock= | ||
|cancel=N, Sp, Su | |cancel=N, Sp, Su | ||
|description= An air kick. This is a good air to air and not much else, a pretty standard button with good damage. | |description= An air kick. This is a good air-to-air and not much else, a pretty standard button with good damage. | ||
}} | }} | ||
}} | }} | ||
| Line 170: | Line 170: | ||
{{MoveData | {{MoveData | ||
|image=BBBR_Devil_jC-1.png | |image=BBBR_Devil_jC-1.png | ||
|caption=1st hit | |||
|image2=BBBR_Devil_jC-2.png | |image2=BBBR_Devil_jC-2.png | ||
|caption2=2nd hit | |caption2=2nd hit | ||
|name=jC | |name=jC | ||
| Line 189: | Line 189: | ||
== Command Normals == | == Command Normals == | ||
====== <font style="visibility:hidden" size="0">6B</font> ====== | ====== <font style="visibility:hidden" size="0">6B</font> ====== | ||
{{MoveData | {{MoveData | ||
|image=BBBR_Devil_2B.png | |image=BBBR_Devil_2B.png | ||
|caption= | |caption= | ||
|name= | |name=j6C | ||
|data= | |data= | ||
{{AttackData-BBBR | {{AttackData-BBBR | ||
| Line 210: | Line 209: | ||
== Universal Mechanics == | == Universal Mechanics == | ||
====== <font style="visibility:hidden" size="0">Throw</font> ====== | ====== <font style="visibility:hidden" size="0">Throw</font> ====== | ||
{{MoveData | {{MoveData | ||
| Line 264: | Line 262: | ||
|data= | |data= | ||
{{AttackData-BBBR | {{AttackData-BBBR | ||
|version=A | |version=A | ||
|damage=700 | |damage=700 | ||
|guard=Mid | |guard=Mid | ||
| Line 277: | Line 275: | ||
{{AttackData-BBBR | {{AttackData-BBBR | ||
|version=B/C | |version=B/C | ||
|damage=700 | |damage=700 | ||
|guard=Mid | |guard=Mid | ||
|property= | |property= | ||
| Line 286: | Line 284: | ||
|cancel= | |cancel= | ||
|description=This version is standing, and it's not clear what the difference in height does. | |description=This version is standing, and it's not clear what the difference in height does. | ||
{{AttackData-BBBR | |||
|version=jA/B/C | |||
|damage=700 | |||
|guard=Mid | |||
|property= | |||
|startup= | |||
|active= | |||
|recovery= | |||
|advBlock= | |||
|cancel= | |||
|description=Daigo does an aerial beam. | |||
}} | |||
}} | }} | ||
}} | }} | ||
| Line 327: | Line 337: | ||
|advBlock= | |advBlock= | ||
|cancel= | |cancel= | ||
|description=Devil's standard DP | |description=Devil's standard DP. It has a very long range, but is air-blockable, making it a lot weaker. This version goes higher and lasts longer. | ||
}} | }} | ||
{{AttackData-BBBR | {{AttackData-BBBR | ||
| Line 380: | Line 390: | ||
|advBlock= | |advBlock= | ||
|cancel= | |cancel= | ||
|description=Devil fires a massive Daigo | |description=Devil fires a massive Daigo Beam, hitting to opponent many times. Decent as a combo ender when in Big Bang Mode, especially if you're aiming to kill. Ends Big Bang Mode instantly. | ||
}} | }} | ||
}} | }} | ||
| Line 403: | Line 413: | ||
{{Navbox-BBBR}} | {{Navbox-BBBR}} | ||
[[Category:Big Bang Beat Revolve]] | [[Category:Big Bang Beat Revolve]] | ||
[[Category: | [[Category:Devil Daigo]] | ||
Revision as of 20:58, 9 June 2024
 |
Under Construction
|

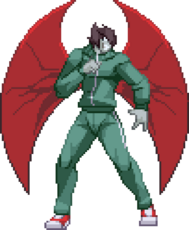
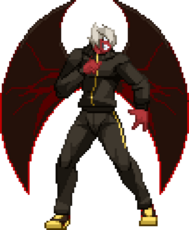
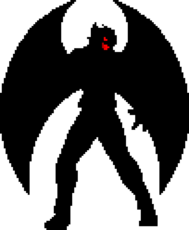
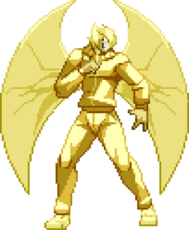
Introduction
Devil Daigo is an air-focused character whose options there excel more than anything else. Unfortunately, he doesn't have much going for him.
This is Daigo's powered up form (although you wouldn't guess it from his strength in this game).
General Strategy
Honestly, this character really can't do much. Your best option is to air stall and bait an anti-air from the opponent, before going in for a punish. Daigo's only move the knocks down is his B-Power Art, which can only be done on the ground, so when you have meter the best plan is to route a ground based combo so you can get oki and get the rare chance to pressure the opponent.
Normal Moves
Standing Normals
5A
5A  |
|---|
5B
5B  |
|---|
5C
5C  |
|---|
Crouching Normals
2A
2A  |
|---|
2B
2B  |
|---|
2C
2C  |
|---|
Air Normals
jA
jA  |
|---|
jB
jB  |
|---|
jC
jC  1st hit 1st hit  2nd hit 2nd hit
|
|---|
Command Normals
6B
j6C |
|---|
Universal Mechanics
Throw
Throw 4/5AB  |
|---|
Big Bang Mode
Big Bang Mode ABC  |
|---|
Special Moves
236X
Daigo Beam! (j)236A/B/C A version A version B/C version B/C version Air version Air version
|
|---|
214A
Daigo Voice! 214A  |
|---|
623X
Daigo Wing! (j)623A/B  |
|---|
B-Power Arts
214D
I Am a Devil ! ! 236D |
|---|
Big Bang Break
41236ABC
Super Daigo Beam! 41236ABC  |
|---|
Combos
Combo Theory
- Combo damage varies from character to character, so all damage numbers come from testing on a full-health Rouga.
Midscreen
Corner
Colors
A Color

B Color

C Color

D Color
