|
|
| Line 273: |
Line 273: |
| |advBlock= | | |advBlock= |
| |cancel= | | |cancel= |
| |description=Universal Big Bang Mode activation. Requires 3 bars and can be done anytime you have control on the ground. Lasts for about 7 seconds. | | |description=Universal Big Bang Mode activation. Requires 3 bars and can be done anytime you have control on the ground. Lasts for about 7 seconds. During Big Bang Mode, 5D has much faster startup and more active frames, allowing for an improved defensive use. |
| }} | | }} |
| }} | | }} |
Revision as of 19:11, 15 June 2024
 |
Under Construction
- This page is a work in progress.
- Please be patient and check back later for additional changes.
|

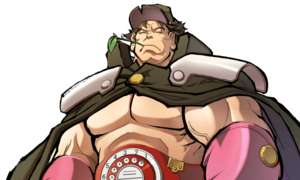
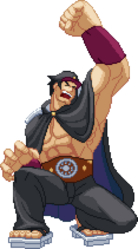
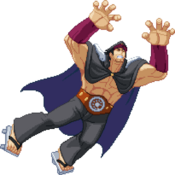
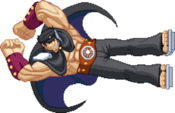
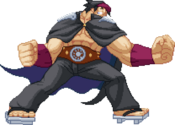
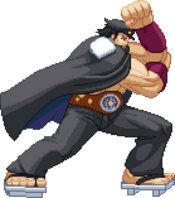
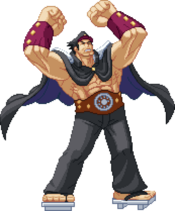
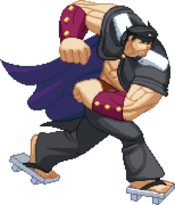
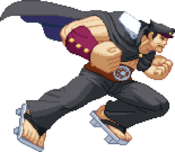
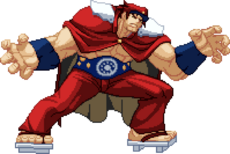
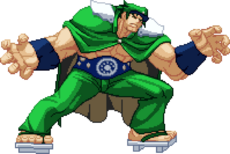
Sanzou
Estimated Health (After Scaling): 13234 Introduction
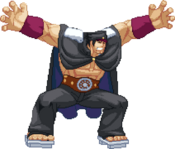
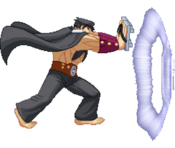
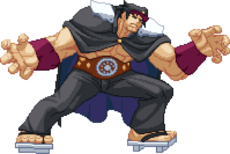
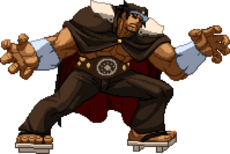
Sanzou is the token grappler of the game, but he is also one of the worst characters in the game. With a reactable command grab, inconsistent damage, and slow movement, you have to work very hard to get what you want with him.
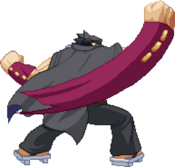
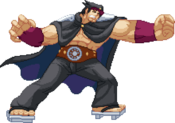
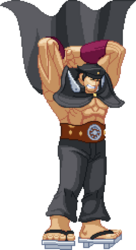
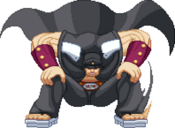
Sanzou Kongoumaru is the head supporter, as well as Gang Leader of Tokyo's Sensouji School. His fighting power is so great he's called "the Iron Wall of Kongoumaru". Except, he is extremely weak when it comes to his sister Aya. His buckle is a mobile phone.
General Strategy
This character is fairly undeveloped because of his weak abilities, but the gameplan is that of a standard grappler. His command grab isn't great but his normal throw can be used for some mix, and his Aegis Reflector super can be used for some crazy stuff. Overall the goal is to get in close, and use the command grab to set up combos and try to squeeze out as much damage while you're in as possible.
Normal Moves
Standing Normals
5A
5A
|
| Damage
|
Guard
|
Property
|
Startup
|
Active
|
Recovery
|
Block Adv
|
Cancel
|
| 150
|
Mid
|
-
|
8
|
-
|
-
|
+2
|
J, N, Sp, Su
|
A decently fast jab. It has a awkward animation, but it's pretty fast, so it's decent when close to the opponent.
|
|
5B
5B
|
| Damage
|
Guard
|
Property
|
Startup
|
Active
|
Recovery
|
Block Adv
|
Cancel
|
| 600
|
All
|
-
|
8
|
-
|
-
|
-10
|
-
|
A relatively slow but long range punch. Great in midrange but it can't convert very well in general.
|
|
5C
5C
|
| Damage
|
Guard
|
Property
|
Startup
|
Active
|
Recovery
|
Block Adv
|
Cancel
|
| 600*2
|
All
|
-
|
14
|
-
|
-
|
-9
|
-
|
A strong swipe down. Hits 2 times, and is very good overall, but pushes away the opponent to a point that makes it harder to do combos.
|
|
Crouching Normals
2A
2A 
|
| Damage
|
Guard
|
Property
|
Startup
|
Active
|
Recovery
|
Block Adv
|
Cancel
|
| 150
|
Mid
|
-
|
8
|
-
|
-
|
+2
|
N, Sp, Su
|
A pretty far reaching jab. Not a bad tool at mid-to-close range.
|
|
2B
2B 
|
| Damage
|
Guard
|
Property
|
Startup
|
Active
|
Recovery
|
Block Adv
|
Cancel
|
| 200+400
|
Mid
|
-
|
11
|
-
|
-
|
+3
|
J, N, Sp, Su
|
A crouching punch down. It's air-unblockable, but it's got a short range. Pretty good in pressure since it hits twice.
|
|
2C
2C 
|
| Damage
|
Guard
|
Property
|
Startup
|
Active
|
Recovery
|
Block Adv
|
Cancel
|
| 800+300
|
Mid
|
-
|
21
|
-
|
-
|
0
|
J, N, Sp, Su
|
Sanzou's best and worst launcher. on hit it can lead to some high damage combos, but it has horribly short range, meaning even the usual chains won't work for this button.
|
|
Air Normals
jA
jAjump 
|
| Damage
|
Guard
|
Property
|
Startup
|
Active
|
Recovery
|
Block Adv
|
Cancel
|
| 600
|
High
|
-
|
5
|
-
|
-
|
-
|
N, Sp, Su
|
A solid air jab. This is best used as an air-to-air due to its good amount of range.
|
|
jB
jBjump 
|
| Damage
|
Guard
|
Property
|
Startup
|
Active
|
Recovery
|
Block Adv
|
Cancel
|
| 700
|
High
|
-
|
8
|
-
|
-
|
-
|
N, Sp, Su
|
A bellyflop. This is a decent jump-in with some combo potential, but it's a pretty weak button overall.
|
|
jC
jCjump 
|
| Damage
|
Guard
|
Property
|
Startup
|
Active
|
Recovery
|
Block Adv
|
Cancel
|
| 900
|
High
|
-
|
15
|
-
|
-
|
-
|
N, Sp, Su
|
Easily Sanzou's best air normal. Long range, good hitbox, it's got everything you would want from an air normal.
|
|
Command Normals
6B
6BTile Breaker 
|
| Damage
|
Guard
|
Property
|
Startup
|
Active
|
Recovery
|
Block Adv
|
Cancel
|
| 700
|
Mid
|
-
|
15
|
-
|
-
|
-2
|
N, Sp, Su
|
This is the only move in Sanzou's entire tookit that makes landing 2C any more consistent. This is a great button, a forward-moving punch, and is especially good in combos to get into that point-blank range Sanzou needs.
|
|
Universal Mechanics
5D
Steel Guard
|
| Damage
|
Guard
|
Property
|
Startup
|
Active
|
Recovery
|
Block Adv
|
Cancel
|
| N/A
|
N/A
|
-
|
8
|
-
|
-
|
-
|
J, N, Sp, Su
|
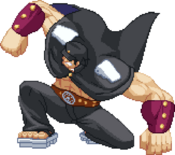
Sanzou braces his arms and parries an attack. Can be canceled into any action if the parry is successful. This has situational uses to punish some things, but the opponent can cancel after hitting the parry, making it a risky tool to use whenever.
|
|
Throw
|
|
| Damage
|
Guard
|
Property
|
Startup
|
Active
|
Recovery
|
Block Adv
|
Cancel
|
| 1100
|
Unblockable
|
-
|
-
|
-
|
-
|
-
|
NC
|
Sanzou picks up the opponent and throws them to the ground. Since his command throw is so bad, this will be your main source of mix.
|
|
Big Bang Mode
|
|
| Damage
|
Guard
|
Property
|
Startup
|
Active
|
Recovery
|
Block Adv
|
Cancel
|
| N/A
|
N/A
|
-
|
-
|
-
|
-
|
-
|
-
|
Universal Big Bang Mode activation. Requires 3 bars and can be done anytime you have control on the ground. Lasts for about 7 seconds. During Big Bang Mode, 5D has much faster startup and more active frames, allowing for an improved defensive use.
|
|
Special Moves
41236A
|
|
| Damage
|
Guard
|
Property
|
Startup
|
Active
|
Recovery
|
Block Adv
|
Cancel
|
| N/A
|
N/A
|
-
|
-
|
-
|
-
|
-
|
-
|
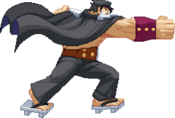
Sanzou performs a command run, which can be cancelled into a few follow-ups. It can also be kara cancelled into throw to give a little more range.
|
|
41236A~A
|
|
| Damage
|
Guard
|
Property
|
Startup
|
Active
|
Recovery
|
Block Adv
|
Cancel
|
| NA
|
NA
|
-
|
-
|
-
|
-
|
-
|
-
|
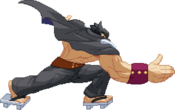
Sanzou hops forward. This isn't great but can be used to brake the command run in longer ranges.
|
|
214B
|
|
| Damage
|
Guard
|
Property
|
Startup
|
Active
|
Recovery
|
Block Adv
|
Cancel
|
| 1300
|
Mid
|
-
|
16
|
-
|
-
|
-1
|
Sp, Su
|
Sanzou does a strong swinging punch. This is a great option with command dash, and can be used in combos off certain cancels. It does a ton of damage but it can kill combos in the corner, making it best in midscreen for a push to the corner.
|
|
214C
|
|
| Damage
|
Guard
|
Property
|
Startup
|
Active
|
Recovery
|
Block Adv
|
Cancel
|
| 1500
|
Mid
|
-
|
30
|
-
|
-
|
-8
|
-
|
A strong straight punch from Sanzou. This is a very good tool in combos, and wallbounces on hit allowing for extra combo potential, as well as being a high damage move in general.
|
|
623C
|
|
| Damage
|
Guard
|
Property
|
Startup
|
Active
|
Recovery
|
Block Adv
|
Cancel
|
| 100
|
High
|
-
|
28
|
-
|
-
|
-5
|
-
|
Sanzou does a groundpound stomp. Groundbounces on hit, but is hard to implement into ongoing combos, making it an inconsistent tool overall.
|
|
22X
|
|
| Version
|
Damage
|
Guard
|
Property
|
Startup
|
Active
|
Recovery
|
Block Adv
|
Cancel
|
| A
|
N/A
|
All
|
-
|
16
|
-
|
-
|
-
|
Su
|
Sanzou slams the ground, and if the opponent is on the ground within a short distance, they will be put in a knockdown state. This is a strong tool to end grounded combos at ranges where 2C would whiff. Strangely, if the opponent is blocking, 22A whiffs entirely.
|
| Version
|
Damage
|
Guard
|
Property
|
Startup
|
Active
|
Recovery
|
Block Adv
|
Cancel
|
| B
|
700
|
All
|
-
|
20
|
-
|
-
|
-19
|
Su
|
This version does damage but you have to be close to the opponent. It's not a very good option since you have to be so close for it, but it does groundbounce, allowing for combos.
|
| Version
|
Damage
|
Guard
|
Property
|
Startup
|
Active
|
Recovery
|
Block Adv
|
Cancel
|
| C
|
700
|
Mid, Unblockable
|
-
|
38
|
-
|
-
|
-19
|
Su
|
This version goes fullscreen, but has a long startup time. This is useful when being zoned out to secure a knockdown and get the chance to approach the opponent. If used up close, this move deals damage and becomes blockable.
|
|
63214A
|
|
| Damage
|
Guard
|
Property
|
Startup
|
Active
|
Recovery
|
Block Adv
|
Cancel
|
| 200
|
Unblockable
|
-
|
25
|
-
|
-
|
-
|
-
|
An unforgivably horrible command grab. It is reactable with how slow it is, it does next to no damage (literally), and it has no range. This is a truly terrible move, and the only positive is that you'll get a full combo if you somehow manage to land it.
|
|
63214C
Ironclad     
(during blockstun)
|
| Damage
|
Guard
|
Property
|
Startup
|
Active
|
Recovery
|
Block Adv
|
Cancel
|
| 300
|
Unblockable
|
-
|
19
|
-
|
-
|
-
|
-
|
A counter done in blockstun. This is a very strong defensive tool as it's meterless and a good way to get the opponent off of you if they're being careless with their pressure.
|
|
B-Power Arts
63214D
|
|
| Damage
|
Guard
|
Property
|
Startup
|
Active
|
Recovery
|
Block Adv
|
Cancel
|
| 700+1200
|
All
|
-
|
6+8
|
-
|
-
|
-12
|
-
|
Sanzou does a groundslam into a hard punch. This is a decent super but suffers from the same problems 22B does in that you have to be basically point blank in order to do anything with it. On hit it wallbounces, allowing for some combo potential.
|
|
41236D
|
|
| Damage
|
Guard
|
Property
|
Startup
|
Active
|
Recovery
|
Block Adv
|
Cancel
|
| 655*5
|
All
|
-
|
23+4
|
-
|
-
|
+30
|
-
|
Sanzou does what is essentially an Aegis Reflector. This is an extremely useful move as it allows you to get some genuine mix on the opponent, which is something Sanzou sorely lacks. Very much worth the meter.
|
|
Big Bang Break
41236ABC
|
|
| Damage
|
Guard
|
Property
|
Startup
|
Active
|
Recovery
|
Block Adv
|
Cancel
|
| 1000+3000
|
All
|
-
|
-
|
-
|
-
|
-
|
-
|
Sanzou does a jumping groundpound, then winds up a massive punch and hits the opponent with it. Good as a combo ender when in Big Bang Mode, especially if you're aiming to kill. Ends Big Bang Mode instantly.
|
|
Combos
Combo Theory
- Combo damage varies from character to character, so all damage numbers come from testing on a full-health Rouga.
- The main goal with Sanzou is to get close enough to the opponent either befor or during the combo to land 2C. If you can get a 2C you're golden, as it opens up his combos significantly
Midscreen
Corner
- 5B > 5C(1) > 6B > 2C > 214C > dl.5B > 5C > 2C > 623C (3360)
- A pretty strong meterless combo, but you have to be point blank for it to work. omit the dl.5B for more consistency, and let both hits of the first 5C hit with some characters, while it won't work for others.
Colors
BBBR Navigation
