Big Bang Beat Revolve/Nakanishi: Difference between revisions
No edit summary |
mNo edit summary |
||
| (46 intermediate revisions by 6 users not shown) | |||
| Line 1: | Line 1: | ||
{{WIP}} | {{WIP}} | ||
{{TOClimit|2}} | {{TOClimit|2}} | ||
[[File:BBBR_Nakanishi_Portrait.png|thumb|right| | [[File:BBBR_Nakanishi_Portrait.png|thumb|right|<center><font size="4"><b>Nakanishi Sisters</b></font><br>'''Estimated Health (After Scaling): 11672'''</center>]] | ||
<center><font size="4"><b>Nakanishi Sisters</b></font | |||
'''Estimated Health (After Scaling): 11672''' < | |||
]] | |||
== Introduction == | ==Introduction== | ||
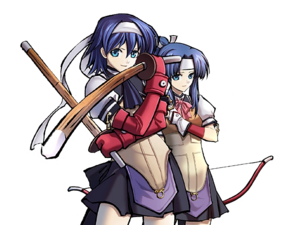
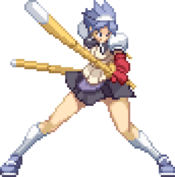
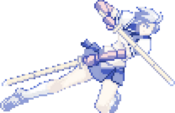
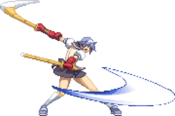
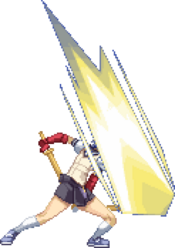
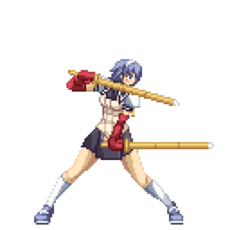
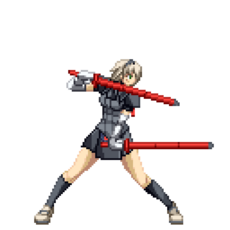
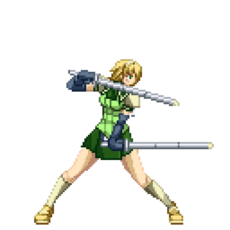
Nakanishi is a puppet character where the ability to control both | '''Nakanishi''' is a puppet character where the ability to control both sisters will be essential to utilizing them well. This is a very difficult character to master, but has some strong options should you get it right. | ||
The Nakanishi sisters are a pair of students that have a strong sense of justice. Annoyed by the way Seijou Academy is being run, they team up with Rouga Zanma in order to fight against Agito of the Dark. Kendou is the more outspoken of the two sisters, and is always looking for a good challenge, while Kyuudou is extremely soft-spoken and hesitant. However, as a team, they are all but unstoppable. | The Nakanishi sisters are a pair of students that have a strong sense of justice. Annoyed by the way Seijou Academy is being run, they team up with Rouga Zanma in order to fight against Agito of the Dark. Kendou is the more outspoken of the two sisters, and is always looking for a good challenge, while Kyuudou is extremely soft-spoken and hesitant. However, as a team, they are all but unstoppable. | ||
== General Strategy == | ==General Strategy== | ||
Using the Nakanishi sisters effectively is much like using Carl Clover from | Using the Nakanishi sisters effectively is much like using Carl Clover from ''BlazBlue'' -- because you're controlling two characters at once, being able to coordinate their movements is key to winning matches. Unlike Carl, Kendou can take care of herself without Kyuudou's help, but like Carl, her overall flexibility and playability will suffer if Kyuudou is not involved in the fight. | ||
Most of the time, Kyuudou's arrows can be used as situational pokes from long range, disrupting an enemy's attacks. That in turn enables Kendou to get in close and do some damage. Especially conducive to this strategy is the fact that Kendou and Kyuudou can use super moves separately, allowing either twin to open up the enemy for an attack from the other one. | Most of the time, Kyuudou's arrows can be used as situational pokes from long range, disrupting an enemy's attacks. That in turn enables Kendou to get in close and do some damage. Especially conducive to this strategy is the fact that Kendou and Kyuudou can use super moves separately, allowing either twin to open up the enemy for an attack from the other one. | ||
| Line 21: | Line 17: | ||
Kendou's supers are usually used in tandem with Kyuudou's due to their poor horizontal range and semi-long startup, though they can be part of a Kendou-only combo if the opponent is relatively close. 22D can be used to stop dash-ins if timed correctly, and 623D is a fairly workable anti-air in its own right. | Kendou's supers are usually used in tandem with Kyuudou's due to their poor horizontal range and semi-long startup, though they can be part of a Kendou-only combo if the opponent is relatively close. 22D can be used to stop dash-ins if timed correctly, and 623D is a fairly workable anti-air in its own right. | ||
== Normal Moves == | ==Normal Moves== | ||
=== Standing Normals === | ===Standing Normals=== | ||
====== <font style="visibility:hidden" size="0">5A</font> ====== | ======<font style="visibility:hidden" size="0">5A</font>====== | ||
{{MoveData | {{MoveData | ||
|image=BBBR_Nakanishi_5A.png | |image=BBBR_Nakanishi_5A.png | ||
|caption= | |caption= | ||
|name=5A | |name=5A | ||
|input={{NotationIcon-BBBR|A}} | |||
|data= | |data= | ||
{{AttackData-BBBR | {{AttackData-BBBR | ||
|damage= | |damage=150 | ||
|guard=Mid | |guard=Mid | ||
|property= | |property= | ||
|startup= | |startup=5 | ||
|active= | |active= | ||
|recovery= | |recovery= | ||
|advBlock= | |advBlock=-5 | ||
|cancel= | |cancel=N, Sp, Su | ||
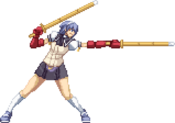
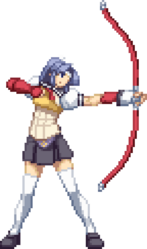
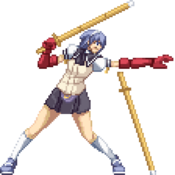
|description= | |description=Quick jab. Range is extremely long for an A normal, going even farther than her 5B, making it an excellent poke. Has use as an anti-air at certain ranges due to being air-unblockable. Frame data on block is significantly worse than her 2A. | ||
}} | }} | ||
}} | }} | ||
====== <font style="visibility:hidden" size="0">5B</font> ====== | ======<font style="visibility:hidden" size="0">5B</font>====== | ||
{{MoveData | {{MoveData | ||
|image=BBBR_Nakanishi_5B.png | |image=BBBR_Nakanishi_5B.png | ||
|caption= | |caption= | ||
|name=5B | |name=5B | ||
|input={{NotationIcon-BBBR|B}} | |||
|data= | |data= | ||
{{AttackData-BBBR | {{AttackData-BBBR | ||
|damage= | |damage=500 | ||
|guard= | |guard=Mid | ||
|property= | |property= | ||
|startup= | |startup=10 | ||
|active= | |active= | ||
|recovery= | |recovery= | ||
|advBlock= | |advBlock=-6 | ||
|cancel=J, N, Sp, Su | |cancel=J, N, Sp, Su | ||
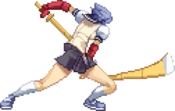
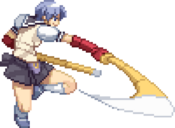
|description= | |description=Horizontal slash. Slower than 5A and has worse range and recovery, so it shouldn't be used as your go-to poke, but it's useful as combo filler. Air-unblockable. | ||
}} | }} | ||
}} | }} | ||
====== <font style="visibility:hidden" size="0">5C</font> ====== | ======<font style="visibility:hidden" size="0">5C</font>====== | ||
{{MoveData | {{MoveData | ||
|image=BBBR_Nakanishi_5C.png | |image=BBBR_Nakanishi_5C.png | ||
|caption= | |caption= | ||
|name=5C | |name=5C | ||
|input={{NotationIcon-BBBR|C}} | |||
|data= | |data= | ||
{{AttackData-BBBR | {{AttackData-BBBR | ||
|damage= | |damage=800 | ||
|guard= | |guard=Mid | ||
|property= | |property= | ||
|startup= | |startup=16 | ||
|active= | |active= | ||
|recovery= | |recovery= | ||
|advBlock=- | |advBlock=-17 | ||
|cancel=J, N, Sp, Su | |cancel=J, N, Sp, Su | ||
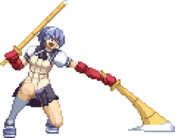
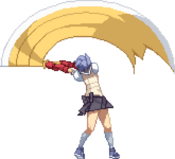
|description= | |description=Kendou steps forward while swinging her sword in a downwards arc. Horizontal range is good, and its vertical range complements its air-unblockable properties nicely. However, its slow speed and horrible recovery if whiffed renders it a tool that requires thoughtful use in neutral. Sends airborne opponents straight downwards, which is useful in some combo routes. | ||
}} | }} | ||
}} | }} | ||
=== Crouching Normals === | ===Crouching Normals=== | ||
====== <font style="visibility:hidden" size="0">2A</font> ====== | ======<font style="visibility:hidden" size="0">2A</font>====== | ||
{{MoveData | {{MoveData | ||
|image=BBBR_Nakanishi_2A.png | |image=BBBR_Nakanishi_2A.png | ||
|caption= | |caption= | ||
|name=2A | |name=2A | ||
|input={{NotationIcon-BBBR|2}}{{NotationIcon-BBBR|A}} | |||
|data= | |data= | ||
{{AttackData-BBBR | {{AttackData-BBBR | ||
|damage= | |damage=100 | ||
|guard=Low | |guard=Low | ||
|property= | |property= | ||
|startup= | |startup=8 | ||
|active= | |active= | ||
|recovery= | |recovery= | ||
|advBlock= | |advBlock=+2 | ||
|cancel=N, Sp, Su | |cancel=N, Sp, Su | ||
|description=A quick | |description=A quick sword swipe at the opponent's ankles. Great range for an A normal, although 5A outclasses it in that department. Useful in the same ways that any fast, low-hitting move is. | ||
}} | }} | ||
}} | }} | ||
====== <font style="visibility:hidden" size="0">2B</font> ====== | ======<font style="visibility:hidden" size="0">2B</font>====== | ||
{{MoveData | {{MoveData | ||
|image=BBBR_Nakanishi_2B.png | |image=BBBR_Nakanishi_2B.png | ||
|caption= | |caption= | ||
|name=2B | |name=2B | ||
|input={{NotationIcon-BBBR|2}}{{NotationIcon-BBBR|B}} | |||
|data= | |data= | ||
{{AttackData-BBBR | {{AttackData-BBBR | ||
|damage= | |damage=600 | ||
|guard= | |guard=Mid | ||
|property= | |property= | ||
|startup= | |startup=8 | ||
|active= | |active= | ||
|recovery= | |recovery= | ||
|advBlock= | |advBlock=-1 | ||
|cancel=J, N, Sp, Su | |cancel=J, N, Sp, Su | ||
|description= | |description=Kendou stabs towards the opponent while crouching. Goes farther than her 5A and is only slightly slower, so it's a great poke. Recovery is notably worse though, so use with caution. Does not hit low, in spite of what the animation might suggest. | ||
}} | }} | ||
}} | }} | ||
====== <font style="visibility:hidden" size="0">2C</font> ====== | ======<font style="visibility:hidden" size="0">2C</font>====== | ||
{{MoveData | {{MoveData | ||
|image=BBBR_Nakanishi_2C.png | |image=BBBR_Nakanishi_2C.png | ||
|caption= | |caption= | ||
|name=2C | |name=2C | ||
|input={{NotationIcon-BBBR|2}}{{NotationIcon-BBBR|C}} | |||
|data= | |data= | ||
{{AttackData-BBBR | {{AttackData-BBBR | ||
|damage= | |damage=750 | ||
|guard= | |guard=Mid | ||
|property= | |property= | ||
|startup= | |startup=14 | ||
|active= | |active= | ||
|recovery= | |recovery= | ||
|advBlock= | |advBlock=-2 | ||
|cancel= | |cancel=Sp, Su | ||
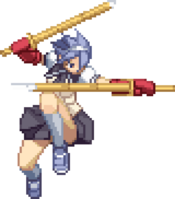
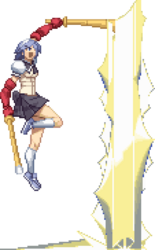
|description= | |description=Kendou swings both swords in an upwards arc. It's air unblockable and has a very tall hitbox, so it's one of your best anti-air options. Will launch the opponent upwards, giving it useful combo potential, but its horizontal hitbox can cause inconsistency at anything but point-blank range. | ||
}} | }} | ||
}} | }} | ||
=== Air Normals === | ===Air Normals=== | ||
====== <font style="visibility:hidden" size="0">jA</font> ====== | ======<font style="visibility:hidden" size="0">jA</font>====== | ||
{{MoveData | {{MoveData | ||
|image=BBBR_Nakanishi_jA.png | |image=BBBR_Nakanishi_jA.png | ||
|caption= | |caption= | ||
|name=jA | |name=jA | ||
|input=jump {{NotationIcon-BBBR|A}} | |||
|data= | |data= | ||
{{AttackData-BBBR | {{AttackData-BBBR | ||
|damage=150 | |damage=150 | ||
|guard=High | |guard=High/Air | ||
|property= | |property= | ||
|startup= | |startup=5 | ||
|active= | |active= | ||
|recovery= | |recovery= | ||
|advBlock= | |advBlock= | ||
|cancel=N, Sp, Su | |cancel=N, Sp, Su | ||
|description= A fast air jab | |description=A fast air jab. Horizontal range is poor and vertical range is nonexistent, so you won't be landing this on a crouching opponent. Only real use is as your fastest air-to-air or in combos. | ||
}} | }} | ||
}} | }} | ||
====== <font style="visibility:hidden" size="0">jB</font> ====== | ======<font style="visibility:hidden" size="0">jB</font>====== | ||
{{MoveData | {{MoveData | ||
|image=BBBR_Nakanishi_jB.png | |image=BBBR_Nakanishi_jB.png | ||
|caption= | |caption= | ||
|name=jB | |name=jB | ||
|input=jump {{NotationIcon-BBBR|B}} | |||
|data= | |data= | ||
{{AttackData-BBBR | {{AttackData-BBBR | ||
|damage= | |damage=500 | ||
|guard=High | |guard=High/Air | ||
|property= | |property= | ||
|startup= | |startup=11 | ||
|active= | |active= | ||
|recovery= | |recovery= | ||
|advBlock= | |advBlock= | ||
|cancel=N, Sp, Su | |cancel=N, Sp, Su | ||
|description= | |description=Horizontal sword swipe in the air. Hitbox is dramatically better than j.A's in all ways, so it's actually functional as a jump-in. Also helps Kendou control the space in front of her when she's airborne. | ||
}} | }} | ||
}} | }} | ||
====== <font style="visibility:hidden" size="0">jC</font> ====== | ======<font style="visibility:hidden" size="0">jC</font>====== | ||
{{MoveData | {{MoveData | ||
|image=BBBR_Nakanishi_jC.png | |image=BBBR_Nakanishi_jC.png | ||
|name=jC | |name=jC | ||
|input=jump {{NotationIcon-BBBR|C}} | |||
|data= | |data= | ||
{{AttackData-BBBR | {{AttackData-BBBR | ||
|damage= | |damage=900 | ||
|guard=High | |guard=High/Air | ||
|property= | |property= | ||
|startup= | |startup=14 | ||
|active= | |active= | ||
|recovery= | |recovery= | ||
|advBlock= | |advBlock= | ||
|cancel= | |cancel=Sp, Su | ||
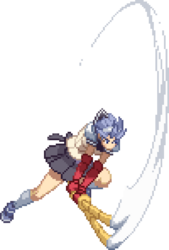
|description= A downward slash | |description=A downward slash with both shinai. Vertical hitbox extends a good range below Kendou, so it's a good jump-in. Has a lot of hitstun and sends airborne opponents straight downwards, so it's good for starting, extending, and ending combos. It's slower than her other air normals, but still very useful. | ||
}} | }} | ||
}} | }} | ||
== | ==Universal Mechanics== | ||
====== <font style="visibility:hidden" size="0"> | ======<font style="visibility:hidden" size="0">5D</font>====== | ||
{{MoveData | {{MoveData | ||
|image= | |image=BBBR_Nakanishi_5D.png | ||
|caption= | |caption= | ||
|name= | |name=Kyuudou: Teihei Shageki | ||
|input={{NotationIcon-BBBR|D}} | |||
|data= | |data= | ||
{{AttackData-BBBR | {{AttackData-BBBR | ||
|damage= | |damage=200 | ||
|guard= | |guard=All | ||
|property= | |property= | ||
|startup= | |startup=34 | ||
|active= | |active= | ||
|recovery= | |recovery= | ||
|advBlock= | |advBlock= | ||
|cancel= | |cancel=NC | ||
|description= | |description=After drawing her bow, Kyuudou fires an arrow horizontally from her current position. The arrow travels about 3/4 of the screen, quickly losing altitude until it hits the ground. Pressing 5D does not cause Kendou to perform any animation, so it can be done any time you aren't in hitstun, blockstun, or knocked down. This move is an integral part of the Nakanishi sisters' kit that helps define their gameplan, since it lets them cover space very effectively, while also allowing for deadly combo extensions with proper execution. | ||
}} | }} | ||
}} | }} | ||
====== <font style="visibility:hidden" size="0"> | ======<font style="visibility:hidden" size="0">2D</font>====== | ||
{{MoveData | {{MoveData | ||
|image= | |image=BBBR_Nakanishi_2D.png | ||
|caption= | |caption= | ||
|name= | |name=Kyuudou: Kyokusha | ||
|input={{NotationIcon-BBBR|2}}{{NotationIcon-BBBR|D}} | |||
|data= | |data= | ||
{{AttackData-BBBR | {{AttackData-BBBR | ||
|damage=300 | |damage=300/800 | ||
|guard= | |guard=All | ||
|property= | |property= | ||
|startup= | |startup=38 | ||
|active= | |active= | ||
|recovery= | |recovery= | ||
|advBlock= | |advBlock= | ||
|cancel= | |cancel= | ||
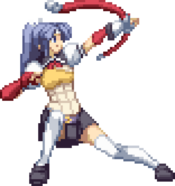
|description= | |description=Kyuudou fires an arrow in an upwards arc, which then comes back down after a brief delay. Has a hitbox both when going up and when falling down, but it'll only ever hit once, and you'll probably never hit anyone with it until after it begins descending. Can be executed in the exact same contexts as her other D moves. Serves as an alternative to 5D that covers more vertical space, but the extremely precise horizontal distance it travels from Kyuudou's position makes it harder to use. If she's near the corner when she shoots, the arrow will always land in the corner instead of off-screen, so it becomes easier to position there. | ||
}} | }} | ||
}} | }} | ||
======<font style="visibility:hidden" size="0">4/6D</font>====== | |||
====== <font style="visibility:hidden" size="0"> | |||
{{MoveData | {{MoveData | ||
|image= | |image=BBBR_Nakanishi_46D.png | ||
|caption= | |caption= | ||
|name= | |name=Kyuudou: Idou Hidari/Migi | ||
|input= | |input={{NotationIcon-BBBR|4}}/{{NotationIcon-BBBR|6}}{{NotationIcon-BBBR|D}} | ||
|data= | |data= | ||
{{AttackData-BBBR | {{AttackData-BBBR | ||
| Line 250: | Line 256: | ||
|recovery= | |recovery= | ||
|advBlock= | |advBlock= | ||
|cancel= | |cancel= | ||
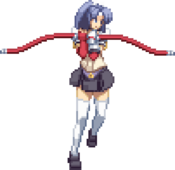
|description= | |description=Kyuudou walks forwards or backwards a set distance depending on the direction held. Her walk speed is faster than Kendou's, but slower than her run speed and much slower than her backdash. Kyuudou will never change her location on the screen except for when this move is performed, so you'll have to use it repeatedly throughout the match in order to get her into a useful position. Can be performed in the same contexts as 5D and 2D, and it can be interrupted with those moves as well. | ||
}} | }} | ||
}} | }} | ||
====== <font style="visibility:hidden" size="0"> | ======<font style="visibility:hidden" size="0">Throw</font>====== | ||
{{MoveData | {{MoveData | ||
|image= | |image=BBBR_Nakanishi_ThrowWhiff.png | ||
|caption= | |caption= | ||
|name= | |name=Throw | ||
|input= | |input={{NotationIcon-BBBR|5}}/{{NotationIcon-BBBR|4}}{{NotationIcon-BBBR|A}}{{NotationIcon-BBBR|B}} | ||
|data= | |data= | ||
{{AttackData-BBBR | {{AttackData-BBBR | ||
|damage= | |damage=1000 | ||
|guard= | |guard=Unblockable | ||
|property= | |property= | ||
|startup= | |startup= | ||
| Line 270: | Line 276: | ||
|recovery= | |recovery= | ||
|advBlock= | |advBlock= | ||
|cancel= | |cancel=NC | ||
|description= | |description=Kendou grabs the opponent and throws them upwards. She can combo off of this meterlessly by linking into 5A, or by having her sister's arrow catch the opponent shortly after she hits them. This results in the Nakanishis' strike-throw pressure being very potent, since the consequences of failing to tech a throw are worse than many other characters. | ||
}} | }} | ||
}} | }} | ||
====== <font style="visibility:hidden" size="0"> | ======<font style="visibility:hidden" size="0">Big Bang Mode</font>====== | ||
{{MoveData | {{MoveData | ||
|image= | |image=BBBR_Nakanishi_BBM.png | ||
|caption= | |caption= | ||
|name= | |name=Big Bang Mode | ||
|input= | |input={{NotationIcon-BBBR|BBM}} | ||
|data= | |data= | ||
{{AttackData-BBBR | {{AttackData-BBBR | ||
|damage= | |damage=N/A | ||
|guard= | |guard=N/A | ||
|property= | |property= | ||
|startup= | |startup= | ||
| Line 290: | Line 296: | ||
|recovery= | |recovery= | ||
|advBlock= | |advBlock= | ||
|cancel= | |cancel= | ||
|description= | |description=Universal Big Bang Mode activation. Requires 3 bars and can be done anytime you have control on the ground. Lasts for about 7 seconds. Some characters receive unique benefits while in BBM, but the Nakanishis do not. | ||
}} | }} | ||
}} | }} | ||
== Special Moves == | ==Special Moves== | ||
====== <font style="visibility:hidden" size="0"> | ======<font style="visibility:hidden" size="0">41236X</font>====== | ||
{{MoveData | {{MoveData | ||
|image= | |image=BBBR_Nakanishi_41236X.png | ||
|caption= | |caption= | ||
|name= | |name=Fumikomi | ||
|input= | |input={{NotationIcon-BBBR|41236}}{{NotationIcon-BBBR|A}}/{{NotationIcon-BBBR|B}} | ||
|data= | |data= | ||
{{AttackData-BBBR | {{AttackData-BBBR | ||
|version=A | |version=A | ||
|damage= | |damage=400 | ||
|guard= | |guard=All | ||
|property= | |property= | ||
|startup= | |startup=5 | ||
|active= | |active= | ||
|recovery= | |recovery= | ||
|advBlock= | |advBlock=-16 | ||
|cancel= | |cancel=Sp, Su | ||
|description= | |description=Kendou performs a shoulder tackle from a crouching position. Can be cancelled into any of her other special moves and supers except for 41236B, allowing for a combo, although if cancelled into too soon they may whiff. This version of the move has faster startup, but travels less distance. Unsafe on block if not cancelled or covered with an arrow from Kyuudou. Not the greatest neutral tool and inflicts notable scaling on combos. Since its 214[C] cancel is an overhead and 236C is a low, you could theoretically use this to get close to the opponent in pressure to threaten high/low mix, but fully charged 214[C] is far too slow for this to actually be useful. | ||
}} | }} | ||
{{AttackData-BBBR | {{AttackData-BBBR | ||
|version= | |version=B | ||
|damage= | |damage=400 | ||
|guard= | |guard=All | ||
|property= | |property= | ||
|startup= | |startup=17 | ||
|active= | |active= | ||
|recovery= | |recovery= | ||
|advBlock= | |advBlock=-20 | ||
|cancel= | |cancel=Sp, Su | ||
|description= | |description=Kendou performs the same attack as 41236A, but with a longer startup and travel distance. Same cancel rules apply. The startup is usually too long to be able to take advantage of its longer range, so it's even more niche than the A version. | ||
}} | }} | ||
}} | }} | ||
====== <font style="visibility:hidden" size="0"> | ======<font style="visibility:hidden" size="0">236C</font>====== | ||
{{MoveData | {{MoveData | ||
|image= | |image=BBBR_Nakanishi_236C.png | ||
|caption= | |caption= | ||
|name= | |name=Nagiharau | ||
|input= | |input={{NotationIcon-BBBR|236}}{{NotationIcon-BBBR|C}} | ||
|data= | |data= | ||
{{AttackData-BBBR | {{AttackData-BBBR | ||
|damage=800 | |||
|damage= | |guard=Low/Air | ||
|guard= | |startup=17 | ||
|startup= | |||
|active= | |active= | ||
|recovery= | |recovery= | ||
|advBlock= | |advBlock=-10 | ||
|cancel=NC | |cancel=NC | ||
|description= | |description=Kendou winds back, and then performs a fierce swing of her shinai at the opponent's legs. It's a little slow, but the horizontal range is quite good, and it's her farthest reaching low. Causes a knockdown and can not be cancelled, although it can technically be comboed off of with a precisely timed Kyuudou arrow. Unsafe on block without being covered by an attack from her sister, but the pushback could make it difficult to punish at farther ranges. Situationally useful. | ||
}} | |||
}} | }} | ||
====== <font style="visibility:hidden" size="0"> | ======<font style="visibility:hidden" size="0">214C</font>====== | ||
{{MoveData | {{MoveData | ||
|image= | |image=BBBR_Nakanishi_214C.png | ||
|caption= | |caption= | ||
|name= | |name=Kyouda | ||
|input= | |input={{NotationIcon-BBBR|214}}{{NotationIcon-BBBR|C}} | ||
|data= | |data= | ||
{{AttackData-BBBR | {{AttackData-BBBR | ||
|version= | |version=C | ||
|damage= | |damage=700 | ||
|guard= | |guard=Mid | ||
|property= | |property= | ||
|startup= | |startup=15 | ||
|active= | |active= | ||
|recovery= | |recovery= | ||
|advBlock= | |advBlock=-16 | ||
|cancel=Su | |cancel=Su | ||
|description= | |description=Kendou winds up and then swings her sword downwards. Causes a knockdown on aerial opponents, so it can be used as a combo ender if you don't have a better option. Horizontal range is mediocre, covering a smaller distance than her 2A does. Air-unblockable but hard to use as an anti-air, and unsafe on block, so it really only exists as a prerequisite for 214{C}. | ||
}} | }} | ||
{{AttackData-BBBR | {{AttackData-BBBR | ||
|version={C} | |||
|version=C | |damage=900 | ||
|damage= | |guard=Mid | ||
|guard= | |property= | ||
|property= | |startup=23 | ||
|startup= | |||
|active= | |active= | ||
|recovery= | |recovery= | ||
|advBlock= | |advBlock=-2 | ||
|cancel= | |cancel=Su | ||
|description= | |description=Partially charged version of 214C. This version will come out if you release C as soon as the circular flash appears by Kendou's hand, which happens quite quickly. It still hits mid like its predecessor, but it does more damage and is safe on block, unlike her other special moves. Causes a groundbounce on aerial opponents, which is useful for combos. | ||
}} | }} | ||
{{AttackData-BBBR | {{AttackData-BBBR | ||
|version=[C] | |||
|version= | |damage=900 | ||
|damage= | |guard=High | ||
|guard= | |||
|property= | |property= | ||
|startup= | |startup=40 | ||
|active= | |active= | ||
|recovery= | |recovery= | ||
|advBlock= | |advBlock=-2 | ||
|cancel= | |cancel=Su | ||
|description= | |description=Fully charged version of 214C. Does the same amount of damage as 214{C}, but is now an overhead. This could be used for high/low mix, but due to the extremely long charge time, you'll never open anyone up with this. Causes a groundbounce on both grounded and aerial opponents, but you won't be comboing into it either. If you do somehow land this, it can be converted into high damage. | ||
}} | }} | ||
}} | }} | ||
====== <font style="visibility:hidden" size="0"> | ======<font style="visibility:hidden" size="0">623C</font>====== | ||
{{MoveData | {{MoveData | ||
|image= | |image=BBBR_Nakanishi_623C.png | ||
|caption= | |caption= | ||
|name= | |name=Noboridou | ||
|input= | |input={{NotationIcon-BBBR|623}}{{NotationIcon-BBBR|C}} | ||
|data= | |data= | ||
{{AttackData-BBBR | {{AttackData-BBBR | ||
|damage=800 | |damage=800 | ||
|guard= | |guard=Mid | ||
|property= | |property= | ||
|startup= | |startup=7 | ||
|active= | |active= | ||
|recovery= | |recovery= | ||
|advBlock= | |advBlock=-26 | ||
|cancel= | |cancel= | ||
|description= | |description=Kendou jumps straight up with her sword extended. A classic DP, featuring air-unblockable properties. However, it isn't invincible, so it's not a great way to escape pressure. Probably her best anti-air option, even though it's highly commital. | ||
}} | }} | ||
}} | }} | ||
====== <font style="visibility:hidden" size="0"> | ==B-Power Arts== | ||
======<font style="visibility:hidden" size="0">22D</font>====== | |||
{{MoveData | {{MoveData | ||
|image= | |image=BBBR_Nakanishi_22D.png | ||
|caption= | |caption= | ||
|name= | |name=Kasanedou | ||
|input= | |input={{NotationIcon-BBBR|22}}{{NotationIcon-BBBR|D}} | ||
|data= | |data= | ||
{{AttackData-BBBR | {{AttackData-BBBR | ||
|damage= | |damage=1400 | ||
|guard= | |guard= | ||
|property= | |property= | ||
|startup= | |startup=8+12 | ||
|active= | |active= | ||
|recovery= | |recovery= | ||
|advBlock= | |advBlock=-2 | ||
|cancel= | |cancel= | ||
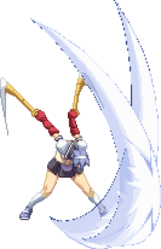
|description= | |description=Kendou swings down both shinai, creating a crossing pair of waves. This move groundbounces on hit, making it both a combo starter and extender, as well as doing a good chunk of damage. Safe on block, but you're probably better off using 41236D to be plus instead of just safe if you're willing to spend meter. Not invincible. | ||
}} | }} | ||
}} | }} | ||
====== <font style="visibility:hidden" size="0"> | ======<font style="visibility:hidden" size="0">623D</font>====== | ||
{{MoveData | {{MoveData | ||
|image= | |image=BBBR_Nakanishi_623C.png | ||
|caption= | |caption= | ||
|name= | |name=Shin Noboridou | ||
|input= | |input={{NotationIcon-BBBR|623}}{{NotationIcon-BBBR|D}} | ||
|data= | |data= | ||
{{AttackData-BBBR | {{AttackData-BBBR | ||
|damage= | |damage=700*3 (1785) | ||
|guard= | |guard=Mid | ||
|property= | |property= | ||
|startup= | |startup=1+6 | ||
|active= | |active= | ||
|recovery= | |recovery= | ||
|advBlock= | |advBlock=-59 | ||
|cancel= | |cancel=NC | ||
|description= | |description=Kendou performs her 623C, and then follows it with an upwards slash and then a downwards slam. The downwards slam knocks down the opponent, but it can whiff if they were too high when the move was performed. Air unblockable, but since it isn't invincible you might as well just use 623C instead. Meter would probably be better spent on one of Kyuudou's supers. | ||
}} | }} | ||
}} | }} | ||
====== <font style="visibility:hidden" size="0"> | ======<font style="visibility:hidden" size="0">41236D</font>====== | ||
{{MoveData | {{MoveData | ||
|image= | |image=BBBR_Nakanishi_5D.png | ||
|caption= | |caption= | ||
|name= | |name=Yaezakura | ||
|input= | |input={{NotationIcon-BBBR|41236}}{{NotationIcon-BBBR|D}} | ||
|data= | |data= | ||
{{AttackData-BBBR | {{AttackData-BBBR | ||
|damage= | |damage=600*5 (2472) | ||
|guard= | |guard=All | ||
|property= | |property= | ||
|startup= | |startup=23 | ||
|active= | |active= | ||
|recovery= | |recovery= | ||
|advBlock= | |advBlock= | ||
|cancel= | |cancel=NC | ||
|description= | |description=Kyuudou fires a powerful arrow straight across the screen. EX version of 5D with faster startup and much higher damage. Also lacks 5D's drop in altitude; this arrow will always go from Kyuudou's position straight to the end of the screen. Can deal up to 5 hits, but this is heavily dependent on range, so you'll usually only see 4. Input is based on the direction Kendou is facing, not Kyuudou. Allows Kendou to become plus on block no matter what she's doing since it doesn't require her to perform an animation, and can be used to extend combos as well. Likely the Nakanishis' best way to spend meter. | ||
}} | }} | ||
}} | }} | ||
====== <font style="visibility:hidden" size="0"> | ======<font style="visibility:hidden" size="0">63214D</font>====== | ||
{{MoveData | {{MoveData | ||
|image= | |image=BBBR_Nakanishi_2D.png | ||
|caption= | |||
|caption= | |name=Kasezakura | ||
|input={{NotationIcon-BBBR|63214}}{{NotationIcon-BBBR|D}} | |||
|name= | |||
|input= | |||
|data= | |data= | ||
{{AttackData-BBBR | {{AttackData-BBBR | ||
| Line 549: | Line 491: | ||
|guard=All | |guard=All | ||
|property= | |property= | ||
|startup= | |startup=30 | ||
|active= | |active= | ||
|recovery= | |recovery= | ||
|advBlock= | |advBlock= | ||
|cancel= | |cancel= | ||
|description= | |description=Kyuudou fires 4 arrows upwards, which then rain down in evenly-spaced locations across the screen. EX version of 2D that lets it control far more space. The opponent can fit within the gaps between the arrows, and it has much more startup time than 41236D, so it's harder to use than Kyuudou's other metered move, but it will still heavily restrict their movement. When Kyuudou is close to the corner, the arrows will stack on top of each other in order to avoid going offscreen, so it's easier to use there. Another super with great utility. | ||
}} | }} | ||
}} | }} | ||
== Big Bang Break == | ==Big Bang Break== | ||
====== <font style="visibility:hidden" size="0">41236ABC</font> ====== | ======<font style="visibility:hidden" size="0">41236ABC</font>====== | ||
{{MoveData | {{MoveData | ||
|image= | |image=BBBR_Nakanishi_236C.png | ||
|name= | |name=Shimai no Kizuna | ||
|input= | |input={{NotationIcon-BBBR|BBB}} | ||
|data= | |data= | ||
{{AttackData-BBBR | {{AttackData-BBBR | ||
| Line 574: | Line 516: | ||
|advBlock= | |advBlock= | ||
|cancel= | |cancel= | ||
|description= | |description=Kendou does a Nagiharau, which starts a sequence of rapid attacks by both sisters if it hits. This is a great combo ender in Big Bang Mode, especially if you're aiming to kill. Can only be used when Kyuudou is free to act, so not immediately after she fires. Startup is not invincible. | ||
}} | }} | ||
}} | }} | ||
:* ''' | ==Combos== | ||
::* | {| class="mw-collapsible mw-collapsed" width="100%" | ||
|+ style="white-space:nowrap; border:1px solid; padding:3px;" |'''Combo Legend''' | |||
|- | |||
|{{ComboLegend-BBBR}} | |||
|} | |||
===<u>Combo Theory</u>=== | |||
:*Combo damage varies from character to character, so all damage numbers come from testing on a full-health Rouga. | |||
:*Kendou is actually quite capable of doing damage on her own, without using Kyuudou. | |||
::*Learn her solo routes first, and then learn how to position Kyuudou and time her attacks to extend them. | |||
:*5C and 214{C} will cause groundbounces on airborne opponents. 3 bounces will force your combo to end. | |||
:*Feel free to add any combos you find here! | |||
===<u>Midscreen, no Kyuudou</u>=== | |||
:* '''5A/2A > 5B > (5C) > 2C > 214{C}, 5B > (5C) > j.B > j.C''' (2634) | |||
::*Simple, meterless combo that does not use Kyuudou. It's better to charge 214{C} for slightly too long than to accidentally get uncharged 214C, as that will end your combo instantly. 2C is prone to whiffing if the opponent is pushed back too far, so skip the first 5C if you start your combo any further than point-blank range. Against many characters such as Ren and Kunagi, you will need to skip the second 5C as well. | |||
===<u>Corner, no Kyuudou</u>=== | |||
:*WIP | |||
===<u>Midscreen, with Kyuudou</u>=== | |||
:*WIP | |||
===<u>Corner, with Kyuudou</u>=== | |||
:*WIP | |||
==Colors== | ==Colors== | ||
{{ColorGallery | filePrefix= | {{ColorGallery | filePrefix=BBBR_Nakanishi_Color_ | colors= | ||
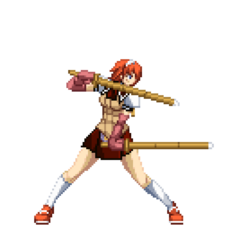
{{ColorGallery/Color|1| text= A Color}} | {{ColorGallery/Color|1| text=A Color}} | ||
{{ColorGallery/Color|2| text= B Color}} | {{ColorGallery/Color|2| text=B Color}} | ||
{{ColorGallery/Color|3| text= C Color}} | {{ColorGallery/Color|3| text=C Color}} | ||
{{ColorGallery/Color|4| text= D Color}} | {{ColorGallery/Color|4| text=D Color}} | ||
}} | }} | ||
== BBBR Navigation == | |||
==BBBR Navigation== | |||
{{Navbox-BBBR}} | {{Navbox-BBBR}} | ||
[[Category:Nakanishi]] | |||
[[Category:Big Bang Beat Revolve]] | [[Category:Big Bang Beat Revolve]] | ||
Revision as of 18:44, 19 June 2024
Under Construction
|
Introduction
Nakanishi is a puppet character where the ability to control both sisters will be essential to utilizing them well. This is a very difficult character to master, but has some strong options should you get it right.
The Nakanishi sisters are a pair of students that have a strong sense of justice. Annoyed by the way Seijou Academy is being run, they team up with Rouga Zanma in order to fight against Agito of the Dark. Kendou is the more outspoken of the two sisters, and is always looking for a good challenge, while Kyuudou is extremely soft-spoken and hesitant. However, as a team, they are all but unstoppable.
General Strategy
Using the Nakanishi sisters effectively is much like using Carl Clover from BlazBlue -- because you're controlling two characters at once, being able to coordinate their movements is key to winning matches. Unlike Carl, Kendou can take care of herself without Kyuudou's help, but like Carl, her overall flexibility and playability will suffer if Kyuudou is not involved in the fight.
Most of the time, Kyuudou's arrows can be used as situational pokes from long range, disrupting an enemy's attacks. That in turn enables Kendou to get in close and do some damage. Especially conducive to this strategy is the fact that Kendou and Kyuudou can use super moves separately, allowing either twin to open up the enemy for an attack from the other one.
Kendou's shinai give her a much longer range for some of her pokes, and once she gets a combo started it's usually child's play to set up for a special, usually 236C or 214C. 41236A/B is also an option if you still need to close the distance, but whatever attack you use after the charge has to be spot on, or the combo will drop and Kendou will be left open.
Kendou's supers are usually used in tandem with Kyuudou's due to their poor horizontal range and semi-long startup, though they can be part of a Kendou-only combo if the opponent is relatively close. 22D can be used to stop dash-ins if timed correctly, and 623D is a fairly workable anti-air in its own right.
Normal Moves
Standing Normals
5A
5A
|
|---|
5B
5B
|
|---|
5C
5C
|
|---|
Crouching Normals
2A
2A
|
|---|
2B
2B
|
|---|
2C
2C
|
|---|
Air Normals
jA
jA
jump |
|---|
jB
jB
jump |
|---|
jC
jC
jump |
|---|
Universal Mechanics
5D
Kyuudou: Teihei Shageki
|
|---|
2D
Kyuudou: Kyokusha
|
|---|
4/6D
Kyuudou: Idou Hidari/Migi
|
|---|
Throw
Throw
|
|---|
Big Bang Mode
Big Bang Mode
|
|---|
Special Moves
41236X
Fumikomi
|
|---|
236C
Nagiharau
|
|---|
214C
Kyouda
|
|---|
623C
Noboridou
|
|---|
B-Power Arts
22D
Kasanedou
|
|---|
623D
Shin Noboridou
|
|---|
41236D
Yaezakura
|
|---|
63214D
Kasezakura
|
|---|
Big Bang Break
41236ABC
Shimai no Kizuna
|
|---|
Combos
| |||||||||||||||||||||||||||||||||||||||||||||
Combo Theory
- Combo damage varies from character to character, so all damage numbers come from testing on a full-health Rouga.
- Kendou is actually quite capable of doing damage on her own, without using Kyuudou.
- Learn her solo routes first, and then learn how to position Kyuudou and time her attacks to extend them.
- 5C and 214{C} will cause groundbounces on airborne opponents. 3 bounces will force your combo to end.
- Feel free to add any combos you find here!
Midscreen, no Kyuudou
- 5A/2A > 5B > (5C) > 2C > 214{C}, 5B > (5C) > j.B > j.C (2634)
- Simple, meterless combo that does not use Kyuudou. It's better to charge 214{C} for slightly too long than to accidentally get uncharged 214C, as that will end your combo instantly. 2C is prone to whiffing if the opponent is pushed back too far, so skip the first 5C if you start your combo any further than point-blank range. Against many characters such as Ren and Kunagi, you will need to skip the second 5C as well.
Corner, no Kyuudou
- WIP
Midscreen, with Kyuudou
- WIP
Corner, with Kyuudou
- WIP
