Big Bang Beat Revolve/Devil: Difference between revisions
(→6B) |
mNo edit summary |
||
| (28 intermediate revisions by 2 users not shown) | |||
| Line 3: | Line 3: | ||
[[File:BBBR_Devil_Portrait.png|thumb|right|<center><font size="4"><b>Devil Daigo</b></font><br>'''Estimated Health (After Scaling): 11886'''</center>]] | [[File:BBBR_Devil_Portrait.png|thumb|right|<center><font size="4"><b>Devil Daigo</b></font><br>'''Estimated Health (After Scaling): 11886'''</center>]] | ||
== Introduction == | ==Introduction== | ||
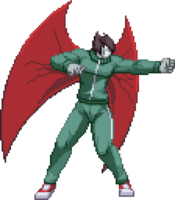
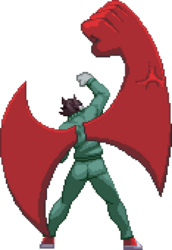
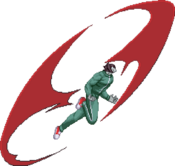
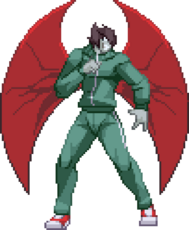
Despite what his resemblance to {{NotationIcon-BBBR|Daigo}} might imply, '''Devil Daigo''' is an air-focused character. Having a unique dash and double jump, several air dashes (along with the ability to brake during them), and space control tools like air projectiles, his options there excel more than anything else. Unfortunately, his damage is not particularly great and he can't get consistent oki, so he doesn't have much going for him. | |||
While stationed in an ice cave, Daigo trips and falls off a cliff, causing his left leg and right arm to break. After being found by an expedition, Daigo's wounds are mysteriously absent, despite his memories of the experience. Some time after these events, Daigo would be reborn as Devil Daigo, gaining new abilities such as his self-named "Daigo Eye". | |||
== General Strategy == | ==General Strategy== | ||
Honestly, this character really can't do much. Your best option is to air stall and bait an anti air from the opponent | Honestly, this character really can't do much. Your best option is to air stall and bait an anti-air from the opponent before going in for a punish. Devil's only move the knocks down is his B-Power Art, which can only be done on the ground, so when you have meter the best plan is to route a ground-based combo so you can get oki and take the rare chance to pressure the opponent. | ||
{{-}} | |||
== Normal Moves == | ==Normal Moves== | ||
=== Standing Normals === | ===Standing Normals=== | ||
====== <font style="visibility:hidden" size="0">5A</font> ====== | ======<font style="visibility:hidden" size="0">5A</font>====== | ||
{{MoveData | {{MoveData | ||
|image=BBBR_Devil_5A.png | |image=BBBR_Devil_5A.png | ||
|caption= | |caption= | ||
|name=5A | |name=5A | ||
|input={{NotationIcon-BBBR|A}} | |||
|data= | |data= | ||
{{AttackData-BBBR | {{AttackData-BBBR | ||
| Line 28: | Line 29: | ||
|advBlock= | |advBlock= | ||
|cancel=J, N, Sp, Su | |cancel=J, N, Sp, Su | ||
|description=A decent fast jab. It's pretty good in pressure but | |description=A decent fast jab. It's pretty good in pressure but its short range doesn't do well for much else. | ||
}} | }} | ||
}} | }} | ||
====== <font style="visibility:hidden" size="0">5B</font> ====== | ======<font style="visibility:hidden" size="0">5B</font>====== | ||
{{MoveData | {{MoveData | ||
|image=BBBR_Devil_5B.png | |image=BBBR_Devil_5B.png | ||
|caption= | |caption= | ||
|name=5B | |name=5B | ||
|input={{NotationIcon-BBBR|B}} | |||
|data= | |data= | ||
{{AttackData-BBBR | {{AttackData-BBBR | ||
| Line 47: | Line 49: | ||
|advBlock= | |advBlock= | ||
|cancel=J, N, Sp, Su | |cancel=J, N, Sp, Su | ||
|description=A decent kick. It's a little stubby but not awful as a poke in close to mid range. | |description=A decent kick. It's a little stubby but not awful as a poke in close-to-mid-range. | ||
}} | }} | ||
}} | }} | ||
====== <font style="visibility:hidden" size="0">5C</font> ====== | ======<font style="visibility:hidden" size="0">5C</font>====== | ||
{{MoveData | {{MoveData | ||
|image=BBBR_Devil_5C.png | |image=BBBR_Devil_5C.png | ||
|caption= | |caption= | ||
|name=5C | |name=5C | ||
|input={{NotationIcon-BBBR|C}} | |||
|data= | |data= | ||
{{AttackData-BBBR | {{AttackData-BBBR | ||
| Line 66: | Line 69: | ||
|advBlock= | |advBlock= | ||
|cancel=J, N, Sp, Su | |cancel=J, N, Sp, Su | ||
|description=Easily Devil's best standing normal. It's a forward moving roundhouse, and it's a pretty great move for neutral due to | |description=Easily Devil's best standing normal. It's a forward moving roundhouse, and it's a pretty great move for neutral due to its far reach. | ||
}} | }} | ||
}} | }} | ||
=== Crouching Normals === | ===Crouching Normals=== | ||
====== <font style="visibility:hidden" size="0">2A</font> ====== | ======<font style="visibility:hidden" size="0">2A</font>====== | ||
{{MoveData | {{MoveData | ||
|image=BBBR_Devil_2A.png | |image=BBBR_Devil_2A.png | ||
|caption= | |caption= | ||
|name=2A | |name=2A | ||
|input={{NotationIcon-BBBR|2}}{{NotationIcon-BBBR|A}} | |||
|data= | |data= | ||
{{AttackData-BBBR | {{AttackData-BBBR | ||
| Line 86: | Line 90: | ||
|advBlock= | |advBlock= | ||
|cancel=N, Sp, Su | |cancel=N, Sp, Su | ||
|description=A fast jab. It has decent range but isn't usually worth | |description=A fast jab. It has decent range but isn't usually worth using above 5A. | ||
}} | }} | ||
}} | }} | ||
====== <font style="visibility:hidden" size="0">2B</font> ====== | ======<font style="visibility:hidden" size="0">2B</font>====== | ||
{{MoveData | {{MoveData | ||
|image=BBBR_Devil_2B.png | |image=BBBR_Devil_2B.png | ||
|caption= | |caption= | ||
|name=2B | |name=2B | ||
|input={{NotationIcon-BBBR|2}}{{NotationIcon-BBBR|B}} | |||
|data= | |data= | ||
{{AttackData-BBBR | {{AttackData-BBBR | ||
| Line 109: | Line 114: | ||
}} | }} | ||
====== <font style="visibility:hidden" size="0">2C</font> ====== | ======<font style="visibility:hidden" size="0">2C</font>====== | ||
{{MoveData | {{MoveData | ||
|image=BBBR_Devil_2C.png | |image=BBBR_Devil_2C.png | ||
|caption= | |caption= | ||
|name=2C | |name=2C | ||
|input={{NotationIcon-BBBR|2}}{{NotationIcon-BBBR|C}} | |||
|data= | |data= | ||
{{AttackData-BBBR | {{AttackData-BBBR | ||
| Line 124: | Line 130: | ||
|advBlock= | |advBlock= | ||
|cancel=N, Sp, Su | |cancel=N, Sp, Su | ||
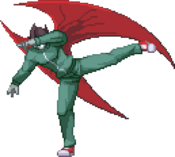
|description=A forward moving uppercut | |description=A forward-moving uppercut. Pretty decent anti-air, but is mainly used in combos as a launcher. | ||
}} | }} | ||
}} | }} | ||
=== Air Normals === | ===Air Normals=== | ||
====== <font style="visibility:hidden" size="0">jA</font> ====== | ======<font style="visibility:hidden" size="0">jA</font>====== | ||
{{MoveData | {{MoveData | ||
|image=BBBR_Devil_jA.png | |image=BBBR_Devil_jA.png | ||
|caption= | |caption= | ||
|name=jA | |name=jA | ||
|input=jump {{NotationIcon-BBBR|A}} | |||
|data= | |data= | ||
{{AttackData-BBBR | {{AttackData-BBBR | ||
| Line 144: | Line 151: | ||
|advBlock= | |advBlock= | ||
|cancel=N, Sp, Su | |cancel=N, Sp, Su | ||
|description= A jumping jab. A pretty good air to air with more damage than it should reasonably have. Definitely worth doing. | |description=A jumping jab. A pretty good air-to-air with more damage than it should reasonably have. Definitely worth doing. | ||
}} | }} | ||
}} | }} | ||
====== <font style="visibility:hidden" size="0">jB</font> ====== | ======<font style="visibility:hidden" size="0">jB</font>====== | ||
{{MoveData | {{MoveData | ||
|image=BBBR_Devil_jB.png | |image=BBBR_Devil_jB.png | ||
|caption= | |caption= | ||
|name=jB | |name=jB | ||
|input=jump {{NotationIcon-BBBR|B}} | |||
|data= | |data= | ||
{{AttackData-BBBR | {{AttackData-BBBR | ||
| Line 163: | Line 171: | ||
|advBlock= | |advBlock= | ||
|cancel=N, Sp, Su | |cancel=N, Sp, Su | ||
|description= An air kick. This is a good air to air and not much else, a pretty standard button with good damage. | |description=An air kick. This is a good air-to-air and not much else, a pretty standard button with good damage. | ||
}} | }} | ||
}} | }} | ||
====== <font style="visibility:hidden" size="0">jC</font> ====== | ======<font style="visibility:hidden" size="0">jC</font>====== | ||
{{MoveData | {{MoveData | ||
|image=BBBR_Devil_jC-1.png | |image=BBBR_Devil_jC-1.png | ||
|caption=1st hit | |||
|image2=BBBR_Devil_jC-2.png | |image2=BBBR_Devil_jC-2.png | ||
|caption2=2nd hit | |caption2=2nd hit | ||
|name=jC | |name=jC | ||
|input=jump {{NotationIcon-BBBR|C}} | |||
|data= | |data= | ||
{{AttackData-BBBR | {{AttackData-BBBR | ||
| Line 184: | Line 193: | ||
|advBlock= | |advBlock= | ||
|cancel=N, Sp, Su | |cancel=N, Sp, Su | ||
|description= A two hit kick. The first hit can only hit the opponent in the air, but the second hit works well as a jump-in. | |description=A two hit kick. The first hit can only hit the opponent in the air, but the second hit works well as a jump-in. | ||
}} | }} | ||
}} | }} | ||
== Command Normals == | ==Command Normals== | ||
======<font style="visibility:hidden" size="0">6B</font>====== | |||
====== <font style="visibility:hidden" size="0">6B</font> ====== | |||
{{MoveData | {{MoveData | ||
|image= | |image=BBBR_Devil_2B.png | ||
|caption= | |caption= | ||
|name= | |name=j6C | ||
|subtitle=Devil Sobat | |||
|input=jump {{NotationIcon-BBBR|6}}{{NotationIcon-BBBR|C}} | |||
|data= | |data= | ||
{{AttackData-BBBR | {{AttackData-BBBR | ||
| Line 205: | Line 215: | ||
|advBlock= | |advBlock= | ||
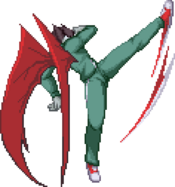
|cancel=N, Sp, Su | |cancel=N, Sp, Su | ||
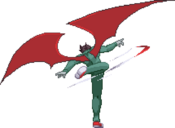
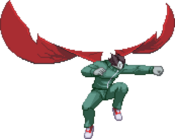
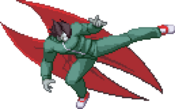
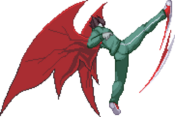
|description=A leap forward followed by a kick. A strong air to air move and a staple in Devil's buttons. | |description=A leap forward followed by a kick. A strong air-to-air move and a staple in Devil's buttons. | ||
}} | }} | ||
}} | }} | ||
== Universal Mechanics == | ==Universal Mechanics== | ||
======<font style="visibility:hidden" size="0">Throw</font>====== | |||
====== <font style="visibility:hidden" size="0">Throw</font> ====== | |||
{{MoveData | {{MoveData | ||
|image=BBBR_Devil_ThrowWhiff.png | |image=BBBR_Devil_ThrowWhiff.png | ||
|caption= | |caption= | ||
|name=Throw | |name=Throw | ||
|input=4 | |input={{NotationIcon-BBBR|5}}/{{NotationIcon-BBBR|4}}{{NotationIcon-BBBR|A}}{{NotationIcon-BBBR|B}} | ||
|data= | |data= | ||
{{AttackData-BBBR | {{AttackData-BBBR | ||
| Line 227: | Line 236: | ||
|advBlock= | |advBlock= | ||
|cancel=NC | |cancel=NC | ||
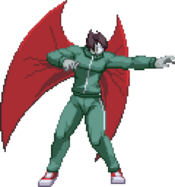
|description=Devil grabs the opponent and brings them into the air to damage them. | |description=Devil grabs the opponent and brings them into the air to damage them. He gets a full combo off of this, making it a strong tool for a character who doesn't get much mix. | ||
}} | }} | ||
}} | }} | ||
====== <font style="visibility:hidden" size="0">Big Bang Mode</font> ====== | ======<font style="visibility:hidden" size="0">Big Bang Mode</font>====== | ||
{{MoveData | {{MoveData | ||
|image=BBBR_Devil_BBM.png | |image=BBBR_Devil_BBM.png | ||
|caption= | |caption= | ||
|name=Big Bang Mode | |name=Big Bang Mode | ||
|input= | |input={{NotationIcon-BBBR|BBM}} | ||
|data= | |data= | ||
{{AttackData-BBBR | {{AttackData-BBBR | ||
| Line 251: | Line 260: | ||
}} | }} | ||
== Special Moves == | ==Special Moves== | ||
====== <font style="visibility:hidden" size="0">236X</font> ====== | ======<font style="visibility:hidden" size="0">236X</font>====== | ||
{{MoveData | {{MoveData | ||
|image=BBBR_Devil_236A.png | |image=BBBR_Devil_236A.png | ||
|caption=A version | |||
|image2=BBBR_Devil_236B.png | |image2=BBBR_Devil_236B.png | ||
|caption2=B/C version | |caption2=B/C version | ||
|image3=BBBR_Devil_j236X.png | |||
|caption3=Air version | |||
|name=Daigo Beam! | |name=Daigo Beam! | ||
|input= | |input={{NotationIcon-BBBR|236}}{{NotationIcon-BBBR|A}}/{{NotationIcon-BBBR|B}}/{{NotationIcon-BBBR|C}}<br>(Air OK) | ||
|data= | |data= | ||
{{AttackData-BBBR | {{AttackData-BBBR | ||
|version=A | |version=A | ||
|damage=700 | |damage=700 | ||
|guard=Mid | |guard=Mid | ||
| Line 271: | Line 282: | ||
|advBlock= | |advBlock= | ||
|cancel= | |cancel= | ||
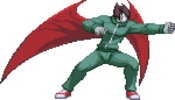
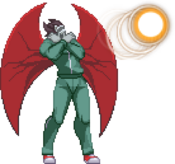
|description= | |description=Devil does a crouching beam. Stops short of fullscreen. It's a pretty decent projectile but nothing special. | ||
}} | }} | ||
{{AttackData-BBBR | {{AttackData-BBBR | ||
|version=B/C | |version=B/C | ||
|damage=700 | |damage=700 | ||
|guard=Mid | |guard=Mid | ||
|property= | |property= | ||
| Line 283: | Line 294: | ||
|advBlock= | |advBlock= | ||
|cancel= | |cancel= | ||
|description=This version | |description=This version fires the beam while standing, and it's not clear what the difference in height does. Stops short of fullscreen. | ||
}} | }} | ||
{{AttackData-BBBR | {{AttackData-BBBR | ||
|version= | |version=jA/B/C | ||
|damage=700 | |damage=700 | ||
|guard=Mid | |guard=Mid | ||
|property= | |property= | ||
|startup= | |startup= | ||
|active= | |active= | ||
|recovery= | |recovery= | ||
|advBlock= | |advBlock= | ||
|cancel= | |cancel= | ||
|description= | |description=Devil does an aerial beam. Stops short of fullscreen. | ||
}} | }} | ||
}} | }} | ||
====== <font style="visibility:hidden" size="0"> | ======<font style="visibility:hidden" size="0">214A</font>====== | ||
{{MoveData | {{MoveData | ||
|image= | |image=BBBR_Devil_214A.png | ||
|caption= | |caption= | ||
|name= | |name=Daigo Voice! | ||
|input= | |input={{NotationIcon-BBBR|214}}{{NotationIcon-BBBR|A}} | ||
|data= | |data= | ||
{{AttackData-BBBR | {{AttackData-BBBR | ||
|damage=800 | |||
|damage= | |||
|guard=Mid | |guard=Mid | ||
|property= | |property= | ||
|startup= | |startup= | ||
|active= | |active= | ||
|recovery= | |recovery= | ||
|advBlock= | |advBlock= | ||
|cancel= | |cancel= | ||
|description= | |description=Devil fires a slow-moving projectile that travels in a wave across the screen. It's a pretty weak projectile, but has some uses in oki. | ||
}} | }} | ||
}} | }} | ||
====== <font style="visibility:hidden" size="0"> | ======<font style="visibility:hidden" size="0">623X</font>====== | ||
{{MoveData | {{MoveData | ||
|image= | |image=BBBR_Devil_623X.png | ||
|caption= | |caption= | ||
|name= | |name=Daigo Wing! | ||
|input= | |input={{NotationIcon-BBBR|623}}{{NotationIcon-BBBR|A}}/{{NotationIcon-BBBR|B}} (Air OK) | ||
|data= | |data= | ||
{{AttackData-BBBR | {{AttackData-BBBR | ||
|version=A | |version=A | ||
|damage= | |damage=200*8 | ||
|guard=All | |guard=All | ||
|property= | |property= | ||
|startup= | |startup= | ||
|active= | |active= | ||
|recovery= | |recovery= | ||
|advBlock= | |advBlock= | ||
|cancel= | |cancel= | ||
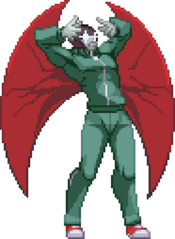
|description= | |description=Devil's standard DP. It has very long range but is air-blockable, making it a lot weaker. This version goes higher and lasts longer. | ||
}} | }} | ||
{{AttackData-BBBR | {{AttackData-BBBR | ||
|version=B | |version=B | ||
|damage=700 | |||
|guard=All | |||
|damage= | |||
|guard= | |||
|property= | |property= | ||
|startup= | |startup= | ||
| Line 480: | Line 358: | ||
|recovery= | |recovery= | ||
|advBlock= | |advBlock= | ||
|cancel= | |cancel= | ||
|description=This | |description=This version only hits once and doesn't travel as high, but it can be comboed after, making it a surprisingly good launcher. | ||
}} | }} | ||
}} | }} | ||
== B-Power Arts == | ==B-Power Arts== | ||
====== <font style="visibility:hidden" size="0"> | ======<font style="visibility:hidden" size="0">236D</font>====== | ||
{{MoveData | {{MoveData | ||
|image= | |image=BBBR_Devil_236D.png | ||
|caption= | |caption= | ||
|name= | |name=DEVIIIIL BEEEEAM<nowiki>!!</nowiki> | ||
|input= | |input={{NotationIcon-BBBR|236}}{{NotationIcon-BBBR|D}} | ||
|data= | |data= | ||
{{AttackData-BBBR | {{AttackData-BBBR | ||
|damage= | |damage=250*10 | ||
|guard=All | |guard=All | ||
|property= | |property= | ||
|startup= | |startup= | ||
|active= | |active= | ||
|recovery= | |recovery= | ||
|advBlock= | |advBlock= | ||
|cancel= | |cancel= | ||
|description= | |description=Devil does a powerful Daigo Beam. This the the only way Devil can secure a knockdown, so it's the best use of meter whenever possible. | ||
}} | }} | ||
}} | }} | ||
== Big Bang Break == | ==Big Bang Break== | ||
====== <font style="visibility:hidden" size="0">41236ABC</font> ====== | ======<font style="visibility:hidden" size="0">41236ABC</font>====== | ||
{{MoveData | {{MoveData | ||
|image= | |image=BBBR_Devil_BBB.png | ||
|name= | |name=Final Daigo Beam! | ||
|input= | |input={{NotationIcon-BBBR|BBB}} | ||
|data= | |data= | ||
{{AttackData-BBBR | {{AttackData-BBBR | ||
|damage= | |damage=4102 | ||
|guard=All | |guard=All | ||
|property= | |property= | ||
| Line 562: | Line 400: | ||
|advBlock= | |advBlock= | ||
|cancel= | |cancel= | ||
|description= | |description=Devil fires a massive Daigo Beam, hitting the opponent many times. Decent as a combo ender when in Big Bang Mode, especially if you're aiming to kill. Ends Big Bang Mode instantly. | ||
}} | }} | ||
}} | }} | ||
== Combos == | ==Combos== | ||
{| class="mw-collapsible mw-collapsed" width="100%" | |||
|+ style="white-space:nowrap; border:1px solid; padding:3px;" |'''Combo Legend''' | |||
|- | |||
|{{ComboLegend-BBBR}} | |||
|} | |||
===<u>Combo Theory</u>=== | ===<u>Combo Theory</u>=== | ||
:*Combo damage varies from character to character, so all damage numbers come from testing on a full-health Rouga. | :*Combo damage varies from character to character, so all damage numbers come from testing on a full-health Rouga. | ||
===<u>Midscreen</u>=== | ===<u>Midscreen</u>=== | ||
:* ''' | ===<u>Corner</u>=== | ||
:*'''5A > 5B >5C > 2C > j6C > 66 > dl.jC(1) > j6C > 66 > dl.jC(1) > 5C > 623B > jC (whiff) > jC > j623B (2615)''' | |||
::*Basic corner combo for Devil. It doesn't give any sort of oki but has decent damage. | |||
::* | |||
:*'''5B > 2B > 5C > 236D > 5C > j6C > 66 > dl.jC(1) > j6C > 66 > dl.jC(1) > 5C > 623B > jC (whiff) > jC > j623B (4182)''' | |||
:* ''' | ::*Pretty good 1 bar damage, but once again Devil gets no oki. | ||
::* | |||
==Colors== | ==Colors== | ||
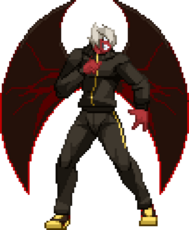
{{ColorGallery | filePrefix= | {{ColorGallery | filePrefix=BBBR_Devil_Color_ | colors= | ||
{{ColorGallery/Color|1| text= A Color}} | {{ColorGallery/Color|1| text=A Color}} | ||
{{ColorGallery/Color|2| text= B Color}} | {{ColorGallery/Color|2| text=B Color}} | ||
{{ColorGallery/Color|3| text= C Color}} | {{ColorGallery/Color|3| text=C Color}} | ||
{{ColorGallery/Color|4| text= D Color}} | {{ColorGallery/Color|4| text=D Color}} | ||
}} | }} | ||
== BBBR Navigation == | ==BBBR Navigation== | ||
{{Navbox-BBBR}} | {{Navbox-BBBR}} | ||
[[Category:Devil Daigo]] | |||
[[Category:Big Bang Beat Revolve]] | [[Category:Big Bang Beat Revolve]] | ||
Revision as of 19:17, 19 June 2024
Under Construction
|
Introduction
Despite what his resemblance to ![]() Daigo might imply, Devil Daigo is an air-focused character. Having a unique dash and double jump, several air dashes (along with the ability to brake during them), and space control tools like air projectiles, his options there excel more than anything else. Unfortunately, his damage is not particularly great and he can't get consistent oki, so he doesn't have much going for him.
Daigo might imply, Devil Daigo is an air-focused character. Having a unique dash and double jump, several air dashes (along with the ability to brake during them), and space control tools like air projectiles, his options there excel more than anything else. Unfortunately, his damage is not particularly great and he can't get consistent oki, so he doesn't have much going for him.
While stationed in an ice cave, Daigo trips and falls off a cliff, causing his left leg and right arm to break. After being found by an expedition, Daigo's wounds are mysteriously absent, despite his memories of the experience. Some time after these events, Daigo would be reborn as Devil Daigo, gaining new abilities such as his self-named "Daigo Eye".
General Strategy
Honestly, this character really can't do much. Your best option is to air stall and bait an anti-air from the opponent before going in for a punish. Devil's only move the knocks down is his B-Power Art, which can only be done on the ground, so when you have meter the best plan is to route a ground-based combo so you can get oki and take the rare chance to pressure the opponent.
Normal Moves
Standing Normals
5A
5A
|
|---|
5B
5B
|
|---|
5C
5C
|
|---|
Crouching Normals
2A
2A
|
|---|
2B
2B
|
|---|
2C
2C
|
|---|
Air Normals
jA
jA
jump |
|---|
jB
jB
jump |
|---|
jC
jC jump 1st hit 1st hit 2nd hit 2nd hit
|
|---|
Command Normals
6B
j6C
Devil Sobat jump |
|---|
Universal Mechanics
Throw
Throw
|
|---|
Big Bang Mode
Big Bang Mode
|
|---|
Special Moves
236X
Daigo Beam! (Air OK) A version A version B/C version B/C version Air version Air version
|
|---|
214A
Daigo Voice!
|
|---|
623X
Daigo Wing!
|
|---|
B-Power Arts
236D
DEVIIIIL BEEEEAM!!
|
|---|
Big Bang Break
41236ABC
Final Daigo Beam!
|
|---|
Combos
| |||||||||||||||||||||||||||||||||||||||||||||
Combo Theory
- Combo damage varies from character to character, so all damage numbers come from testing on a full-health Rouga.
Midscreen
Corner
- 5A > 5B >5C > 2C > j6C > 66 > dl.jC(1) > j6C > 66 > dl.jC(1) > 5C > 623B > jC (whiff) > jC > j623B (2615)
- Basic corner combo for Devil. It doesn't give any sort of oki but has decent damage.
- 5B > 2B > 5C > 236D > 5C > j6C > 66 > dl.jC(1) > j6C > 66 > dl.jC(1) > 5C > 623B > jC (whiff) > jC > j623B (4182)
- Pretty good 1 bar damage, but once again Devil gets no oki.

