Big Bang Beat Revolve/Kunagi: Difference between revisions
(→Corner) |
mNo edit summary |
||
| (12 intermediate revisions by 2 users not shown) | |||
| Line 1: | Line 1: | ||
{{WIP}} | {{WIP}} | ||
{{TOClimit|2}} | {{TOClimit|2}} | ||
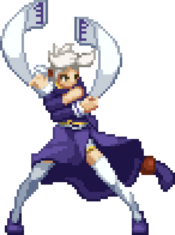
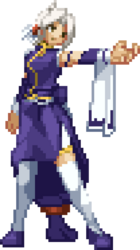
[[File:BBBR_Kunagi_Portrait.png|thumb|right| | [[File:BBBR_Kunagi_Portrait.png|thumb|right|<center><font size="4"><b>Kunagi</b></font><br>'''Estimated Health (After Scaling): 10962'''</center>]] | ||
<center><font size="4"><b>Kunagi</b></font | |||
'''Estimated Health (After Scaling): 10962''' | |||
]] | |||
== Introduction == | ==Introduction== | ||
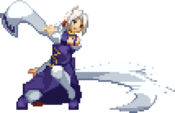
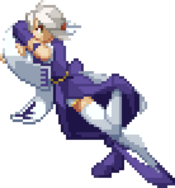
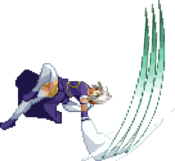
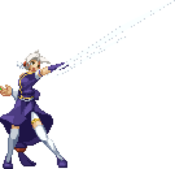
Kunagi is a powerful, well-rounded character with some of the best normals in the game, as well as extremely versatile projectiles that can be used both in the air and on the ground. She can attack from angles that most other characters aren't equipped to deal with, and can be considered to have one of the best neutral games with her high mobility and strong tools for controlling space. | '''Kunagi''' is a powerful, well-rounded character with some of the best normals in the game, as well as extremely versatile projectiles that can be used both in the air and on the ground. She can attack from angles that most other characters aren't equipped to deal with, and can be considered to have one of the best neutral games with her high mobility and strong tools for controlling space. In return, her damage is quite poor, and her offense boils down to basic strike/throw outside of a handful of knowledge checks. | ||
Kunagi Tenrou | Kunagi Tenrou is Rouga Zanma's strong-willed childhood friend and fiancée. She's blunt and direct with everyone, Rouga included, and that contributes to her difficulties in getting along with most people. However, so far as Rouga and her friends are concerned, she has both a soft spot for them and the utmost faith in their abilities. | ||
== General Strategy == | ==General Strategy== | ||
Kunagi's strength is her ability to control the neutral. You'll be using your superior mobility in conjunction with your air fireballs to harass opponents from a safe distance and make it difficult for them to find an opening. Kunagi's tools are excellent for ensuring that you only have to engage the opponent on your own terms. On offense, run strike throw with absurdly fast 5A staggers and various plus-on-block normals including 4C. | Kunagi's strength is her ability to control the neutral. You'll be using your superior mobility in conjunction with your air fireballs to harass opponents from a safe distance and make it difficult for them to find an opening. Kunagi's tools are excellent for ensuring that you only have to engage the opponent on your own terms. On offense, run strike throw with absurdly fast 5A staggers and various plus-on-block normals including 4C. | ||
== Normal Moves == | ==Normal Moves== | ||
=== Standing Normals === | ===Standing Normals=== | ||
====== <font style="visibility:hidden" size="0">5A</font> ====== | ======<font style="visibility:hidden" size="0">5A</font>====== | ||
{{MoveData | {{MoveData | ||
|image=BBBR_Kunagi_5A.png | |image=BBBR_Kunagi_5A.png | ||
|caption= | |caption= | ||
|name=5A | |name=5A | ||
|input={{NotationIcon-BBBR|A}} | |||
|data= | |data= | ||
{{AttackData-BBBR | {{AttackData-BBBR | ||
| Line 35: | Line 33: | ||
}} | }} | ||
====== <font style="visibility:hidden" size="0">5B</font> ====== | ======<font style="visibility:hidden" size="0">5B</font>====== | ||
{{MoveData | {{MoveData | ||
|image=BBBR_Kunagi_5B.png | |image=BBBR_Kunagi_5B.png | ||
|caption= | |caption= | ||
|name=5B | |name=5B | ||
|input={{NotationIcon-BBBR|B}} | |||
|data= | |data= | ||
{{AttackData-BBBR | {{AttackData-BBBR | ||
| Line 54: | Line 53: | ||
}} | }} | ||
====== <font style="visibility:hidden" size="0">5C</font> ====== | ======<font style="visibility:hidden" size="0">5C</font>====== | ||
{{MoveData | {{MoveData | ||
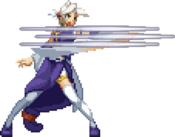
|image=BBBR_Kunagi_5C_1.png | |image=BBBR_Kunagi_5C_1.png | ||
|caption=1st hit | |||
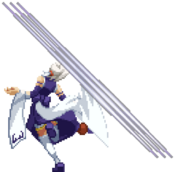
|image2=BBBR_Kunagi_5C_2.png | |image2=BBBR_Kunagi_5C_2.png | ||
|caption2=2nd hit | |caption2=2nd hit | ||
|name=5C | |name=5C | ||
|input={{NotationIcon-BBBR|C}} | |||
|data= | |data= | ||
{{AttackData-BBBR | {{AttackData-BBBR | ||
| Line 72: | Line 72: | ||
|advBlock=-4 | |advBlock=-4 | ||
|cancel=J, N, Sp, Su | |cancel=J, N, Sp, Su | ||
|description=Kunagi spins and slashes two times | |description=Kunagi spins and slashes two times. Can be cancelled in between the slashes. The second hit launches the opponent on counter hit, though chances of actually counterhitting with the second hit are very low. | ||
}} | }} | ||
}} | }} | ||
=== Crouching Normals === | ===Crouching Normals=== | ||
====== <font style="visibility:hidden" size="0">2A</font> ====== | ======<font style="visibility:hidden" size="0">2A</font>====== | ||
{{MoveData | {{MoveData | ||
|image=BBBR_Kunagi_2A.png | |image=BBBR_Kunagi_2A.png | ||
|caption= | |caption= | ||
|name=2A | |name=2A | ||
|input={{NotationIcon-BBBR|2}}{{NotationIcon-BBBR|A}} | |||
|data= | |data= | ||
{{AttackData-BBBR | {{AttackData-BBBR | ||
| Line 96: | Line 97: | ||
}} | }} | ||
====== <font style="visibility:hidden" size="0">2B</font> ====== | ======<font style="visibility:hidden" size="0">2B</font>====== | ||
{{MoveData | {{MoveData | ||
|image=BBBR_Kunagi_2B.png | |image=BBBR_Kunagi_2B.png | ||
|caption= | |caption= | ||
|name=2B | |name=2B | ||
|input={{NotationIcon-BBBR|2}}{{NotationIcon-BBBR|B}} | |||
|data= | |data= | ||
{{AttackData-BBBR | {{AttackData-BBBR | ||
| Line 115: | Line 117: | ||
}} | }} | ||
====== <font style="visibility:hidden" size="0">2C</font> ====== | ======<font style="visibility:hidden" size="0">2C</font>====== | ||
{{MoveData | {{MoveData | ||
|image=BBBR_Kunagi_2C.png | |image=BBBR_Kunagi_2C.png | ||
|caption= | |caption= | ||
|name=2C | |name=2C | ||
|input={{NotationIcon-BBBR|2}}{{NotationIcon-BBBR|C}} | |||
|data= | |data= | ||
{{AttackData-BBBR | {{AttackData-BBBR | ||
| Line 134: | Line 137: | ||
}} | }} | ||
=== Air Normals === | ===Air Normals=== | ||
====== <font style="visibility:hidden" size="0">jA</font> ====== | ======<font style="visibility:hidden" size="0">jA</font>====== | ||
{{MoveData | {{MoveData | ||
|image=BBBR_Kunagi_jA.png | |image=BBBR_Kunagi_jA.png | ||
|caption= | |caption= | ||
|name=jA | |name=jA | ||
|input=jump {{NotationIcon-BBBR|A}} | |||
|data= | |data= | ||
{{AttackData-BBBR | {{AttackData-BBBR | ||
| Line 154: | Line 158: | ||
}} | }} | ||
====== <font style="visibility:hidden" size="0">jB</font> ====== | ======<font style="visibility:hidden" size="0">jB</font>====== | ||
{{MoveData | {{MoveData | ||
|image=BBBR_Kunagi_jB.png | |image=BBBR_Kunagi_jB.png | ||
|caption= | |caption= | ||
|name=jB | |name=jB | ||
|input=jump {{NotationIcon-BBBR|B}} | |||
|data= | |data= | ||
{{AttackData-BBBR | {{AttackData-BBBR | ||
| Line 173: | Line 178: | ||
}} | }} | ||
====== <font style="visibility:hidden" size="0">jC</font> ====== | ======<font style="visibility:hidden" size="0">jC</font>====== | ||
{{MoveData | {{MoveData | ||
|image=BBBR_Kunagi_jC.png | |image=BBBR_Kunagi_jC.png | ||
|caption= | |caption= | ||
|name=jC | |name=jC | ||
|input=jump {{NotationIcon-BBBR|C}} | |||
|data= | |data= | ||
{{AttackData-BBBR | {{AttackData-BBBR | ||
| Line 192: | Line 198: | ||
}} | }} | ||
== Command Normals == | ==Command Normals== | ||
====== <font style="visibility:hidden" size="0">6A</font> ====== | ======<font style="visibility:hidden" size="0">6A</font>====== | ||
{{MoveData | {{MoveData | ||
|image=BBBR_Kunagi_6A.png | |image=BBBR_Kunagi_6A.png | ||
|caption= | |caption= | ||
|name=Aoki Tsume: Sora | |name=6A | ||
|input= | |subtitle=Aoki Tsume: Sora | ||
|input={{NotationIcon-BBBR|6}}{{NotationIcon-BBBR|A}} | |||
|data= | |data= | ||
{{AttackData-BBBR | {{AttackData-BBBR | ||
| Line 213: | Line 220: | ||
}} | }} | ||
====== <font style="visibility:hidden" size="0">4B</font> ====== | ======<font style="visibility:hidden" size="0">4B</font>====== | ||
{{MoveData | {{MoveData | ||
|image=BBBR_Kunagi_4B.png | |image=BBBR_Kunagi_4B.png | ||
|caption= | |caption= | ||
|name=Aoki Tsume: Kabuto Wari | |name=4B | ||
|input= | |subtitle=Aoki Tsume: Kabuto Wari | ||
|input={{NotationIcon-BBBR|4}}{{NotationIcon-BBBR|B}} | |||
|data= | |data= | ||
{{AttackData-BBBR | {{AttackData-BBBR | ||
| Line 229: | Line 237: | ||
|advBlock=+10 | |advBlock=+10 | ||
|cancel=Sp, Su | |cancel=Sp, Su | ||
|description=Kunagi hops backwards while slashing diagonally downward. Bounces the opponent on hit if | |description=Kunagi hops backwards while slashing diagonally downward. Bounces the opponent on hit if they're airborne or on counter hit. | ||
}} | }} | ||
}} | }} | ||
====== <font style="visibility:hidden" size="0">4C</font> ====== | ======<font style="visibility:hidden" size="0">4C</font>====== | ||
{{MoveData | {{MoveData | ||
|image=BBBR_Kunagi_4C.png | |image=BBBR_Kunagi_4C.png | ||
|caption= | |caption= | ||
|name=Aoki Tsume: Tora | |name=4C | ||
|input= | |subtitle=Aoki Tsume: Tora | ||
|input={{NotationIcon-BBBR|4}}{{NotationIcon-BBBR|C}} | |||
|data= | |data= | ||
{{AttackData-BBBR | {{AttackData-BBBR | ||
| Line 249: | Line 258: | ||
|advBlock=+2 | |advBlock=+2 | ||
|cancel=J, N, Sp, Su | |cancel=J, N, Sp, Su | ||
|description=Kunagi spins and slashes horizontally. | |description=Kunagi spins and slashes horizontally. Launches the opponent on counter hit. | ||
}} | }} | ||
}} | }} | ||
== Universal Mechanics == | ==Universal Mechanics== | ||
====== <font style="visibility:hidden" size="0">5D</font> ====== | ======<font style="visibility:hidden" size="0">5D</font>====== | ||
{{MoveData | {{MoveData | ||
|image=BBBR_Kunagi_BBM.png | |image=BBBR_Kunagi_BBM.png | ||
|caption= | |caption= | ||
|name=Aoki Chikara: Shuuchuu | |name=Aoki Chikara: Shuuchuu | ||
|input= | |input={{NotationIcon-BBBR|D}} | ||
|data= | |data= | ||
{{AttackData-BBBR | {{AttackData-BBBR | ||
| Line 274: | Line 283: | ||
}} | }} | ||
====== <font style="visibility:hidden" size="0">Throw</font> ====== | ======<font style="visibility:hidden" size="0">Throw</font>====== | ||
{{MoveData | {{MoveData | ||
|image=BBBR_Kunagi_ThrowWhiff.png | |image=BBBR_Kunagi_ThrowWhiff.png | ||
|caption= | |caption= | ||
|name=Throw | |name=Throw | ||
|input=4 | |input={{NotationIcon-BBBR|5}}/{{NotationIcon-BBBR|4}}{{NotationIcon-BBBR|A}}{{NotationIcon-BBBR|B}} | ||
|data= | |data= | ||
{{AttackData-BBBR | {{AttackData-BBBR | ||
| Line 294: | Line 303: | ||
}} | }} | ||
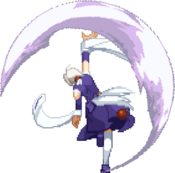
====== <font style="visibility:hidden" size="0">Big Bang Mode</font> ====== | ======<font style="visibility:hidden" size="0">Big Bang Mode</font>====== | ||
{{MoveData | {{MoveData | ||
|image=BBBR_Kunagi_BBM.png | |image=BBBR_Kunagi_BBM.png | ||
|caption= | |caption= | ||
|name=Big Bang Mode | |name=Big Bang Mode | ||
|input= | |input={{NotationIcon-BBBR|BBM}} | ||
|data= | |data= | ||
{{AttackData-BBBR | {{AttackData-BBBR | ||
|damage=N/A | |damage=N/A | ||
|guard= | |guard=N/A | ||
|property= | |property= | ||
|startup= | |startup= | ||
| Line 314: | Line 323: | ||
}} | }} | ||
== Special Moves == | ==Special Moves== | ||
====== <font style="visibility:hidden" size="0">236X</font> ====== | ======<font style="visibility:hidden" size="0">236X</font>====== | ||
{{MoveData | {{MoveData | ||
|image=BBBR_Kunagi_236X.png | |image=BBBR_Kunagi_236X.png | ||
|caption= | |caption= | ||
|name=Kirisaku Mono | |name=Kirisaku Mono | ||
|input= | |input={{NotationIcon-BBBR|236}}{{NotationIcon-BBBR|A}}/{{NotationIcon-BBBR|B}} | ||
|data= | |data= | ||
{{AttackData-BBBR | {{AttackData-BBBR | ||
| Line 335: | Line 344: | ||
}} | }} | ||
{{AttackData-BBBR | {{AttackData-BBBR | ||
|version=B | |version=B | ||
|damage=500 | |damage=500 | ||
| Line 349: | Line 357: | ||
}} | }} | ||
====== <font style="visibility:hidden" size="0">j236X</font> ====== | ======<font style="visibility:hidden" size="0">j236X</font>====== | ||
{{MoveData | {{MoveData | ||
|image=BBBR_Kunagi_j236X.png | |image=BBBR_Kunagi_j236X.png | ||
|caption= | |caption= | ||
|name=Kirisaku Mono (Air) | |name=Kirisaku Mono (Air) | ||
|input= | |input=jump {{NotationIcon-BBBR|236}}{{NotationIcon-BBBR|A}}/{{NotationIcon-BBBR|B}} | ||
|data= | |data= | ||
{{AttackData-BBBR | {{AttackData-BBBR | ||
| Line 369: | Line 377: | ||
}} | }} | ||
{{AttackData-BBBR | {{AttackData-BBBR | ||
|version=B | |version=B | ||
|damage=500 | |damage=500 | ||
| Line 383: | Line 390: | ||
}} | }} | ||
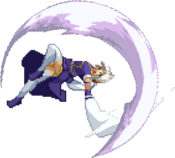
====== <font style="visibility:hidden" size="0">623X</font> ====== | ======<font style="visibility:hidden" size="0">623X</font>====== | ||
{{MoveData | {{MoveData | ||
|image=BBBR_Kunagi_623X.png | |image=BBBR_Kunagi_623X.png | ||
|caption= | |caption= | ||
|name=Goumagetsu | |name=Goumagetsu | ||
|input= | |input={{NotationIcon-BBBR|623}}{{NotationIcon-BBBR|A}}/{{NotationIcon-BBBR|B}} | ||
|data= | |data= | ||
{{AttackData-BBBR | {{AttackData-BBBR | ||
| Line 403: | Line 410: | ||
}} | }} | ||
{{AttackData-BBBR | {{AttackData-BBBR | ||
|version=B | |version=B | ||
|damage=765 | |damage=765 | ||
| Line 413: | Line 419: | ||
|advBlock=-31 | |advBlock=-31 | ||
|cancel=NC | |cancel=NC | ||
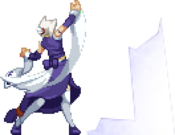
|description=Kunagi jumps into the air with a slash, encircling herself with a crescent. This version is invincible and gives hard knockdown on | |description=Kunagi jumps into the air with a slash, encircling herself with a crescent. This version is invincible and gives hard knockdown on counter hit. | ||
}} | }} | ||
}} | }} | ||
====== <font style="visibility:hidden" size="0">j623X</font> ====== | ======<font style="visibility:hidden" size="0">j623X</font>====== | ||
{{MoveData | {{MoveData | ||
|image=BBBR_Kunagi_623X.png | |image=BBBR_Kunagi_623X.png | ||
|caption= | |caption= | ||
|name=Goumagetsu (Air) | |name=Goumagetsu (Air) | ||
|input= | |input=jump {{NotationIcon-BBBR|623}}{{NotationIcon-BBBR|A}}/{{NotationIcon-BBBR|B}} | ||
|data= | |data= | ||
{{AttackData-BBBR | {{AttackData-BBBR | ||
|damage=600 | |damage=600 | ||
|guard=All | |guard=All | ||
| Line 438: | Line 443: | ||
}} | }} | ||
====== <font style="visibility:hidden" size="0">214X</font> ====== | ======<font style="visibility:hidden" size="0">214X</font>====== | ||
{{MoveData | {{MoveData | ||
|image=BBBR_Kunagi_214A.png | |image=BBBR_Kunagi_214A.png | ||
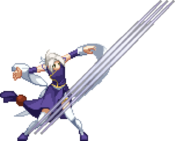
|caption=A version | |||
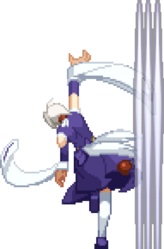
|image2=BBBR_Kunagi_214B.png | |image2=BBBR_Kunagi_214B.png | ||
|caption2=B version | |||
|caption2= | |||
|name=Aoki Kage: Sensou | |name=Aoki Kage: Sensou | ||
|input= | |input={{NotationIcon-BBBR|214}}{{NotationIcon-BBBR|A}}/{{NotationIcon-BBBR|B}} | ||
|data= | |data= | ||
{{AttackData-BBBR | {{AttackData-BBBR | ||
|version=A | |version=A | ||
|damage=600 | |damage=600 | ||
| Line 461: | Line 465: | ||
}} | }} | ||
{{AttackData-BBBR | {{AttackData-BBBR | ||
|version=B | |version=B | ||
|damage=600 | |damage=600 | ||
| Line 475: | Line 478: | ||
}} | }} | ||
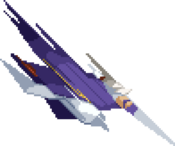
====== <font style="visibility:hidden" size="0">421X</font> ====== | ======<font style="visibility:hidden" size="0">421X</font>====== | ||
{{MoveData | {{MoveData | ||
|image=BBBR_Kunagi_421X.png | |image=BBBR_Kunagi_421X.png | ||
|caption= | |caption=Leap | ||
|image2=BBBR_Kunagi_421AC.png | |||
|caption2=Follow-up | |||
|name=Hishou | |name=Hishou | ||
|input= | |input={{NotationIcon-BBBR|421}}{{NotationIcon-BBBR|A}}/{{NotationIcon-BBBR|B}}(~{{NotationIcon-BBBR|C}}) | ||
|data= | |data= | ||
{{AttackData-BBBR | {{AttackData-BBBR | ||
|version=421A/B | |||
|damage=N/A | |damage=N/A | ||
|guard= | |guard= | ||
| Line 493: | Line 499: | ||
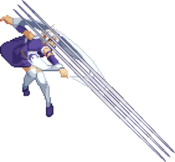
|description=Kunagi leaps forward (A) or backward (B). Can be cancelled into a follow-up with C. | |description=Kunagi leaps forward (A) or backward (B). Can be cancelled into a follow-up with C. | ||
}} | }} | ||
{{AttackData-BBBR | {{AttackData-BBBR | ||
|version=...~C | |||
|damage=800 | |damage=800 | ||
|guard=High/Air | |guard=High/Air | ||
| Line 511: | Line 509: | ||
|advBlock= | |advBlock= | ||
|cancel=Sp, Su | |cancel=Sp, Su | ||
|description=Kunagi performs a large crescent slash. | |description=Kunagi performs a large crescent slash. Groundbounces airborne opponents. | ||
}} | }} | ||
}} | }} | ||
====== <font style="visibility:hidden" size="0">22X</font> ====== | ======<font style="visibility:hidden" size="0">22X</font>====== | ||
{{MoveData | {{MoveData | ||
|image=BBBR_Kunagi_22A.png | |image=BBBR_Kunagi_22A.png | ||
|caption=A version | |||
|image2=BBBR_Kunagi_22B.png | |image2=BBBR_Kunagi_22B.png | ||
|caption2=B version | |||
|image3=BBBR_Kunagi_22C.png | |image3=BBBR_Kunagi_22C.png | ||
|caption3=C version | |||
|caption3= | |||
|name=Aoki Kage: Shinsoku | |name=Aoki Kage: Shinsoku | ||
|input= | |input={{NotationIcon-BBBR|22}}{{NotationIcon-BBBR|A}}/{{NotationIcon-BBBR|B}}/{{NotationIcon-BBBR|C}} | ||
|data= | |data= | ||
{{AttackData-BBBR | {{AttackData-BBBR | ||
| Line 539: | Line 537: | ||
}} | }} | ||
{{AttackData-BBBR | {{AttackData-BBBR | ||
|version=B | |version=B | ||
|damage=N/A | |damage=N/A | ||
| Line 549: | Line 546: | ||
|advBlock= | |advBlock= | ||
|cancel= | |cancel= | ||
|description=Kunagi teleports to the ground directly behind the opponent. | |description=Kunagi teleports to the ground directly behind the opponent. Has a recovery period after landing. | ||
}} | }} | ||
{{AttackData-BBBR | {{AttackData-BBBR | ||
|version=C | |version=C | ||
|damage=N/A | |damage=N/A | ||
| Line 562: | Line 558: | ||
|advBlock= | |advBlock= | ||
|cancel= | |cancel= | ||
|description=Kunagi teleports to the ground roughly 1/3 screen distance away from the opponent. | |description=Kunagi teleports to the ground roughly 1/3 screen distance away from the opponent. Has a recovery period after landing. | ||
}} | }} | ||
}} | }} | ||
====== <font style="visibility:hidden" size="0">j22X</font> ====== | ======<font style="visibility:hidden" size="0">j22X</font>====== | ||
{{MoveData | {{MoveData | ||
|image=BBBR_Kunagi_j22X.png | |image=BBBR_Kunagi_j22X.png | ||
|caption=A/B versions | |||
|image2=BBBR_Kunagi_j22C.png | |image2=BBBR_Kunagi_j22C.png | ||
|caption2=C version | |||
|caption2= | |||
|name=Aoki Kage: Shinsoku | |name=Aoki Kage: Shinsoku | ||
|input= | |input=jump {{NotationIcon-BBBR|22}}{{NotationIcon-BBBR|A}}/{{NotationIcon-BBBR|B}}/{{NotationIcon-BBBR|C}} | ||
|data= | |data= | ||
{{AttackData-BBBR | {{AttackData-BBBR | ||
|version=A | |version=A | ||
|damage=N/A | |damage=N/A | ||
|guard= | |guard=N/A | ||
|property= | |property= | ||
|startup= | |startup= | ||
| Line 588: | Line 584: | ||
}} | }} | ||
{{AttackData-BBBR | {{AttackData-BBBR | ||
|version=B | |version=B | ||
|damage=N/A | |damage=N/A | ||
|guard= | |guard=N/A | ||
|property= | |property= | ||
|startup= | |startup= | ||
| Line 601: | Line 596: | ||
}} | }} | ||
{{AttackData-BBBR | {{AttackData-BBBR | ||
|version=C | |version=C | ||
|damage=300 | |damage=300 | ||
| Line 615: | Line 609: | ||
}} | }} | ||
== B-Power Arts == | ==B-Power Arts== | ||
====== <font style="visibility:hidden" size="0">623D</font> ====== | ======<font style="visibility:hidden" size="0">623D</font>====== | ||
{{MoveData | {{MoveData | ||
|image=BBBR_Kunagi_623X.png | |image=BBBR_Kunagi_623X.png | ||
|caption= | |caption= | ||
|name=Goumagetsu: Shingetsu | |name=Goumagetsu: Shingetsu | ||
|input= | |input={{NotationIcon-BBBR|623}}{{NotationIcon-BBBR|D}} | ||
|data= | |data= | ||
{{AttackData-BBBR | {{AttackData-BBBR | ||
| Line 636: | Line 630: | ||
}} | }} | ||
====== <font style="visibility:hidden" size="0">63214D</font> ====== | ======<font style="visibility:hidden" size="0">63214D</font>====== | ||
{{MoveData | {{MoveData | ||
|image=BBBR_Kunagi_63214D.png | |image=BBBR_Kunagi_63214D.png | ||
|caption=Slashes | |||
|image2=BBBR_Kunagi_4C.png | |image2=BBBR_Kunagi_4C.png | ||
|caption2=Finisher | |caption2=Finisher | ||
|name=Aoki Tsume: Oni | |name=Aoki Tsume: Oni | ||
|input= | |input={{NotationIcon-BBBR|63214}}{{NotationIcon-BBBR|D}} | ||
|data= | |data= | ||
{{AttackData-BBBR | {{AttackData-BBBR | ||
| Line 658: | Line 652: | ||
}} | }} | ||
====== <font style="visibility:hidden" size="0">j.623D</font> ====== | ======<font style="visibility:hidden" size="0">j.623D</font>====== | ||
{{MoveData | {{MoveData | ||
|image=BBBR_Kunagi_623X.png | |image=BBBR_Kunagi_623X.png | ||
|caption= | |caption= | ||
|name=Goumagetsu: Shingetsu (Air) | |name=Goumagetsu: Shingetsu (Air) | ||
|input= | |input=jump {{NotationIcon-BBBR|623}}{{NotationIcon-BBBR|D}} | ||
|data= | |data= | ||
{{AttackData-BBBR | {{AttackData-BBBR | ||
| Line 678: | Line 672: | ||
}} | }} | ||
== Big Bang Break == | ==Big Bang Break== | ||
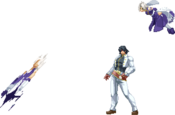
====== <font style="visibility:hidden" size="0">41236ABC</font> ====== | ======<font style="visibility:hidden" size="0">41236ABC</font>====== | ||
{{MoveData | {{MoveData | ||
|image=BBBR_Kunagi_421AC.png | |image=BBBR_Kunagi_421AC.png | ||
|name=Shuntensatsu | |name=Shuntensatsu | ||
|input= | |input={{NotationIcon-BBBR|BBB}} | ||
|data= | |data= | ||
{{AttackData-BBBR | {{AttackData-BBBR | ||
| Line 694: | Line 688: | ||
|advBlock=+4 | |advBlock=+4 | ||
|cancel=NC | |cancel=NC | ||
|description=Kunagi teleports above and behind the opponent, attacking with a large crescent slash from above. On hit, it continues into a barrage of aerial dashing attacks ending with a hard knockdown. | |description=Kunagi teleports above and behind the opponent, attacking with a large crescent slash from above. On hit, it continues into a barrage of aerial dashing attacks ending with a hard knockdown. Good as a combo ender when in Big Bang Mode, especially if you're aiming to kill. Ends Big Bang Mode instantly. | ||
}} | }} | ||
}} | }} | ||
== Combos == | ==Combos== | ||
{| class="mw-collapsible mw-collapsed" width="100%" | |||
|+ style="white-space:nowrap; border:1px solid; padding:3px;" |'''Combo Legend''' | |||
|- | |||
|{{ComboLegend-BBBR}} | |||
|} | |||
===<u>Combo Theory</u>=== | ===<u>Combo Theory</u>=== | ||
:*Combo damage varies from character to character, so all damage numbers come from testing on a full-health Rouga. | :*Combo damage varies from character to character, so all damage numbers come from testing on a full-health Rouga. | ||
| Line 719: | Line 718: | ||
::* A metered combo that does slightly less damage in exchange for a hard knockdown. | ::* A metered combo that does slightly less damage in exchange for a hard knockdown. | ||
:* '''5/2A > 5B > (5C) > 2C > 4C > 236B, dl 5C(1) > 236B, | :* '''5/2A > 5B > (5C) > 2C > 4C > 236B, dl 5C(1) > 236B, 5C(1) > j.C > j.236B > 6A > 421A~C > dl j.236A > 4C > 236B, dl 5C(1) > 236B > 63214C, 6A > 421A~C > j.22C''' (3637) | ||
::* Optimized version of the above combo using 236B, 5C(1) routing. | ::* Optimized version of the above combo using 236B, 5C(1) routing. | ||
| Line 725: | Line 724: | ||
::* Resource dump BBM combo. Doesn't have to start in the corner, just need to be there by the first 63214D. | ::* Resource dump BBM combo. Doesn't have to start in the corner, just need to be there by the first 63214D. | ||
:* '''5/2A > 5B > (5C) > 2C > 4C > 236B, dl 5C(1) > 236B, 5C(1) > j.C > j.236B 6A > 421A~C > dl j.236A > 4C > 236B, dl 5C(1) > 236B, 5C(1) > j.C > j.236B > 6A > 421A~C > dl j.236A > 4C > 236B, dl 5C(1) > 236B > ABC > dl 63214D, 63214D, 63214D, 6A > 41236ABC''' (5938) | :* '''5/2A > 5B > (5C) > 2C > 4C > 236B, dl 5C(1) > 236B, 5C(1) > j.C > j.236B > 6A > 421A~C > dl j.236A > 4C > 236B, dl 5C(1) > 236B, 5C(1) > j.C > j.236B > 6A > 421A~C > dl j.236A > 4C > 236B, dl 5C(1) > 236B > ABC > dl 63214D, 63214D, 63214D, 6A > 41236ABC''' (5938) | ||
::* Optimized version of the above combo using 236B, 5C(1) routing. | ::* Optimized version of the above combo using 236B, 5C(1) routing. | ||
==Colors== | ==Colors== | ||
{{ColorGallery | filePrefix= | {{ColorGallery | filePrefix=BBBR_Kunagi_Color_ | colors= | ||
{{ColorGallery/Color|1| text= A Color}} | {{ColorGallery/Color|1| text=A Color}} | ||
{{ColorGallery/Color|2| text= B Color}} | {{ColorGallery/Color|2| text=B Color}} | ||
{{ColorGallery/Color|3| text= C Color}} | {{ColorGallery/Color|3| text=C Color}} | ||
{{ColorGallery/Color|4| text= D Color}} | {{ColorGallery/Color|4| text=D Color}} | ||
}} | }} | ||
== BBBR Navigation == | |||
==BBBR Navigation== | |||
{{Navbox-BBBR}} | {{Navbox-BBBR}} | ||
[[Category:Kunagi]] | |||
[[Category:Big Bang Beat Revolve]] | [[Category:Big Bang Beat Revolve]] | ||
Revision as of 09:55, 23 June 2024
Under Construction
|
Introduction
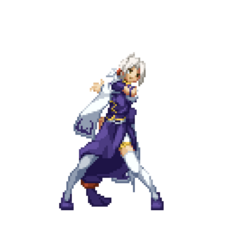
Kunagi is a powerful, well-rounded character with some of the best normals in the game, as well as extremely versatile projectiles that can be used both in the air and on the ground. She can attack from angles that most other characters aren't equipped to deal with, and can be considered to have one of the best neutral games with her high mobility and strong tools for controlling space. In return, her damage is quite poor, and her offense boils down to basic strike/throw outside of a handful of knowledge checks.
Kunagi Tenrou is Rouga Zanma's strong-willed childhood friend and fiancée. She's blunt and direct with everyone, Rouga included, and that contributes to her difficulties in getting along with most people. However, so far as Rouga and her friends are concerned, she has both a soft spot for them and the utmost faith in their abilities.
General Strategy
Kunagi's strength is her ability to control the neutral. You'll be using your superior mobility in conjunction with your air fireballs to harass opponents from a safe distance and make it difficult for them to find an opening. Kunagi's tools are excellent for ensuring that you only have to engage the opponent on your own terms. On offense, run strike throw with absurdly fast 5A staggers and various plus-on-block normals including 4C.
Normal Moves
Standing Normals
5A
5A
|
|---|
5B
5B
|
|---|
5C
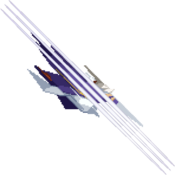
5C 1st hit 1st hit 2nd hit 2nd hit
|
|---|
Crouching Normals
2A
2A
|
|---|
2B
2B
|
|---|
2C
2C
|
|---|
Air Normals
jA
jA
jump |
|---|
jB
jB
jump |
|---|
jC
jC
jump |
|---|
Command Normals
6A
6A
Aoki Tsume: Sora |
|---|
4B
4B
Aoki Tsume: Kabuto Wari |
|---|
4C
4C
Aoki Tsume: Tora |
|---|
Universal Mechanics
5D
Aoki Chikara: Shuuchuu
|
|---|
Throw
Throw
|
|---|
Big Bang Mode
Big Bang Mode
|
|---|
Special Moves
236X
Kirisaku Mono
|
|---|
j236X
Kirisaku Mono (Air)
jump |
|---|
623X
Goumagetsu
|
|---|
j623X
Goumagetsu (Air)
jump |
|---|
214X
Aoki Kage: Sensou A version A version B version B version
|
|---|
421X
Hishou Leap Leap Follow-up Follow-up
|
|---|
22X
Aoki Kage: Shinsoku A version A version B version B version C version C version
|
|---|
j22X
Aoki Kage: Shinsoku jump A/B versions A/B versions C version C version
|
|---|
B-Power Arts
623D
Goumagetsu: Shingetsu
|
|---|
63214D
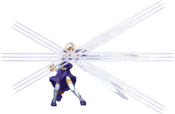
Aoki Tsume: Oni Slashes Slashes Finisher Finisher
|
|---|
j.623D
Goumagetsu: Shingetsu (Air)
jump |
|---|
Big Bang Break
41236ABC
Shuntensatsu
|
|---|
Combos
| |||||||||||||||||||||||||||||||||||||||||||||
Combo Theory
- Combo damage varies from character to character, so all damage numbers come from testing on a full-health Rouga.
Midscreen
- 5/2A > 5B > (5C) > 2C > 4C > 236B, 6A > 421A~C > dl j.236A > 4C > j.C(1) > j.236B > 6A > 421A~C > j.22C (2513)
- This is your standard meterless BnB, giving you a strong knockdown anywhere on screen.
- 5/2A > 5B > (5C) > 2C > 4C > 236B, 6A > 421A~C > dl j.236A > 4C > j.C(1) > j.236b > 6A > 421A~C > dl j.236A > 4C > j.C > j.623B > j.623D (3120)
- This is a metered version of the above combo that sacrifices okizeme for roughly 600 more damage. Only suggest using this for guaranteeing a KO.
- 5/2A > 5B > (5C) > 2C > 4C > 236B, dl 5C(1) > 236B, 5C(1) > j.C > j.236B 6A > 421A~C > dl j.236A > 4C > 236B, dl 5C(1) > 236B, 5C(1) > j.C > j.236B > 6A > 421A~C > j.22C (2932)
- This is your meterless optimal. Very precise and prone to dropping if the delay on 236B, dl 5C(1) isn't perfect.
- 5/2A > 5B > (5C) > 2C > 4C > 236B, dl 5C(1) > 236B, 5C(1) > j.C > j.236B 6A > 421A~C > dl j.236A > 4C > 236B, dl 5C(1) > 236B, 5C(1) > j.C > j.236B > 6A > 421A~C > dl j.236A > 4C > 236B, dl 5C(1) > 236B, 5C(1) > j.C > j.623B > j.623D (3508)
- The above combo but with a metered ender.
Corner
- 5/2A > 5B > (5C) > 2C > 4C > 63214D, 6A > 421A~C > dl j.236A > 4C > j.C(1) > j.236b > 6A > 421A~C > j.22C (2962)
- A metered combo that does slightly less damage in exchange for a hard knockdown.
- 5/2A > 5B > (5C) > 2C > 4C > 236B, dl 5C(1) > 236B, 5C(1) > j.C > j.236B > 6A > 421A~C > dl j.236A > 4C > 236B, dl 5C(1) > 236B > 63214C, 6A > 421A~C > j.22C (3637)
- Optimized version of the above combo using 236B, 5C(1) routing.
- 5/2A > 5B > (5C) > 2C > 4C > j.C(1) > j.236B > 6A > 421A~C > dl j.236A > 4C > j.C(1) > j.236b > 6A > 421A~C > dl j.236A > 4C > ABC > dl 63214D, 63214D, 63214D, 6A > 41236ABC (5220)
- Resource dump BBM combo. Doesn't have to start in the corner, just need to be there by the first 63214D.
- 5/2A > 5B > (5C) > 2C > 4C > 236B, dl 5C(1) > 236B, 5C(1) > j.C > j.236B > 6A > 421A~C > dl j.236A > 4C > 236B, dl 5C(1) > 236B, 5C(1) > j.C > j.236B > 6A > 421A~C > dl j.236A > 4C > 236B, dl 5C(1) > 236B > ABC > dl 63214D, 63214D, 63214D, 6A > 41236ABC (5938)
- Optimized version of the above combo using 236B, 5C(1) routing.

