Big Bang Beat Revolve/Manbou: Difference between revisions
(→6B) |
No edit summary |
||
| (21 intermediate revisions by 3 users not shown) | |||
| Line 1: | Line 1: | ||
{{WIP}} | {{WIP}} | ||
[[File:BBBR_Manbou_Portrait.png|thumb|right|<center><font size="4"><b>Manbou</b></font><br>'''Estimated Health (After Scaling): 10000'''</center>]] | |||
{{TOClimit|2}} | {{TOClimit|2}} | ||
==Introduction== | |||
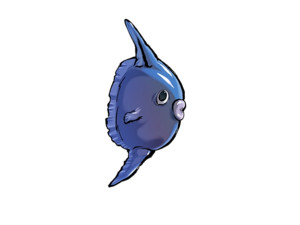
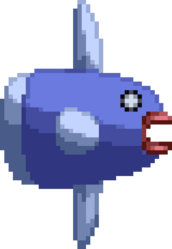
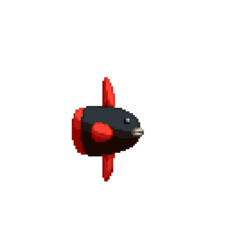
While in possession of a rather odd toolkit, '''Manbou''' is surprisingly strong for a presumed joke character. Manbou has good normals, some interesting moves, and a lot of ways to control space. Playing this character may take some getting used to, but with one of the best BBMs in the game, you'll be drowning your opponent in no time. | |||
''' | |||
' | |||
== | ===Lore=== | ||
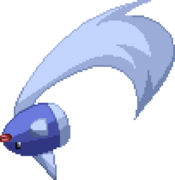
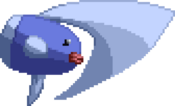
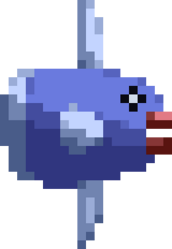
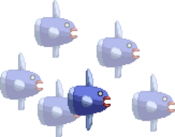
Manbou is | Manbou is based on a generic enemy that shows up in ''Big Bang Age''. The enemy that the playable Manbou is based on doesn't have a consistent name, but in ''Big Bang Beat -Revolve-'', it simply uses the Japanese name of the mola mola (ocean sunfish), which it resembles. | ||
Manbou | ==General Strategy== | ||
Manbou has a lot of great normals and command normals to play with, as well as various spacing tools. Mid-range is where Manbou gets the most usage out of its specials, so the general strategy is to secure a knockdown in mid-to-long range, then start pressure with Manbou's pretty good buttons. | |||
==Normal Moves== | |||
===Standing Normals=== | |||
======<font style="visibility:hidden" size="0">5A</font>====== | |||
== Normal Moves == | |||
=== Standing Normals === | |||
====== <font style="visibility:hidden" size="0">5A</font> ====== | |||
{{MoveData | {{MoveData | ||
|image=BBBR_Manbou_5A.png | |image=BBBR_Manbou_5A.png | ||
|caption= | |caption= | ||
|name=5A | |name=5A | ||
|input={{NotationIcon-BBBR|A}} | |||
|data= | |data= | ||
{{AttackData-BBBR | {{AttackData-BBBR | ||
| Line 27: | Line 24: | ||
|guard=Ground | |guard=Ground | ||
|property= | |property= | ||
|startup= | |startup=8 | ||
|active= | |active= | ||
|recovery= | |recovery= | ||
|advBlock= | |advBlock=-1 | ||
|cancel=J, N, Sp, Su | |cancel=J, N, Sp, Su | ||
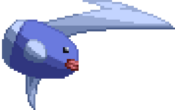
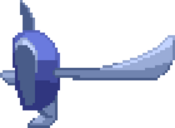
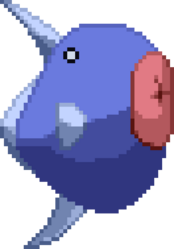
|description=Standard jab. It's quick, has a decent hitbox, and is air unblockable. Pretty decent range, making for a good quick poke | |description=Standard jab. It's quick, has a decent hitbox, and is air unblockable. Pretty decent range, making for a good quick poke | ||
| Line 36: | Line 33: | ||
}} | }} | ||
====== <font style="visibility:hidden" size="0">5B</font> ====== | ======<font style="visibility:hidden" size="0">5B</font>====== | ||
{{MoveData | {{MoveData | ||
|image=BBBR_Manbou_5B.png | |image=BBBR_Manbou_5B.png | ||
|caption= | |caption= | ||
|name=5B | |name=5B | ||
|input={{NotationIcon-BBBR|B}} | |||
|data= | |data= | ||
{{AttackData-BBBR | {{AttackData-BBBR | ||
| Line 46: | Line 44: | ||
|guard=Mid | |guard=Mid | ||
|property= | |property= | ||
|startup= | |startup=10 | ||
|active= | |active= | ||
|recovery= | |recovery= | ||
|advBlock= | |advBlock=-9 | ||
|cancel=J, N, Sp, Su | |cancel=J, N, Sp, Su | ||
|description=A reasonably fast poke from Manbou's fin. Good in neutral, although it is a little slower than one might like, but it also moves you forward. | |description=A reasonably fast poke from Manbou's fin. Good in neutral, although it is a little slower than one might like, but it also moves you forward. | ||
| Line 55: | Line 53: | ||
}} | }} | ||
====== <font style="visibility:hidden" size="0">5C</font> ====== | ======<font style="visibility:hidden" size="0">5C</font>====== | ||
{{MoveData | {{MoveData | ||
|image=BBBR_Manbou_5C.png | |image=BBBR_Manbou_5C.png | ||
|caption= | |caption= | ||
|name=5C | |name=5C | ||
|input={{NotationIcon-BBBR|C}} | |||
|data= | |data= | ||
{{AttackData-BBBR | {{AttackData-BBBR | ||
| Line 66: | Line 65: | ||
|guard=All | |guard=All | ||
|property= | |property= | ||
|startup= | |startup=10 | ||
|active= | |active= | ||
|recovery= | |recovery= | ||
|advBlock=- | |advBlock=-4 | ||
|cancel=J, N, Sp, Su | |cancel=J, N, Sp, Su | ||
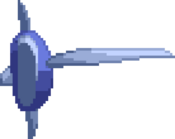
|description=A downwards fin swing that hits twice. This is easily Manbou's best normal, and you can use it to bully your opponent whether it be in combo or catching a mash. | |description=A downwards fin swing that hits twice. This is easily Manbou's best normal, and you can use it to bully your opponent whether it be in combo or catching a mash. | ||
| Line 75: | Line 74: | ||
}} | }} | ||
=== Crouching Normals === | ===Crouching Normals=== | ||
====== <font style="visibility:hidden" size="0">2A</font> ====== | ======<font style="visibility:hidden" size="0">2A</font>====== | ||
{{MoveData | {{MoveData | ||
|image=BBBR_Manbou_2A.png | |image=BBBR_Manbou_2A.png | ||
|caption= | |caption= | ||
|name=2A | |name=2A | ||
|input={{NotationIcon-BBBR|2}}{{NotationIcon-BBBR|A}} | |||
|data= | |data= | ||
{{AttackData-BBBR | {{AttackData-BBBR | ||
| Line 86: | Line 86: | ||
|guard=Low | |guard=Low | ||
|property= | |property= | ||
|startup= | |startup=8 | ||
|active= | |active= | ||
|recovery= | |recovery= | ||
|advBlock= | |advBlock=+2 | ||
|cancel=N, Sp, Su | |cancel=N, Sp, Su | ||
|description=A quick low poke. Has decent range for a low poke and is the only true low in Manbou's normals, so it's good for catching standing opponents. | |description=A quick low poke. Has decent range for a low poke and is the only true low in Manbou's normals, so it's good for catching standing opponents. | ||
| Line 95: | Line 95: | ||
}} | }} | ||
====== <font style="visibility:hidden" size="0">2B</font> ====== | ======<font style="visibility:hidden" size="0">2B</font>====== | ||
{{MoveData | {{MoveData | ||
|image=BBBR_Manbou_2B.png | |image=BBBR_Manbou_2B.png | ||
|caption= | |caption= | ||
|name=2B | |name=2B | ||
|input={{NotationIcon-BBBR|2}}{{NotationIcon-BBBR|B}} | |||
|data= | |data= | ||
{{AttackData-BBBR | {{AttackData-BBBR | ||
| Line 105: | Line 106: | ||
|guard=All | |guard=All | ||
|property= | |property= | ||
|startup= | |startup=7 | ||
|active= | |active= | ||
|recovery= | |recovery= | ||
|advBlock= | |advBlock=+9 | ||
|cancel=J, N, Sp, Su | |cancel=J, N, Sp, Su | ||
|description=Manbou does a poke similar to its 5B. It looks like it should be low, but it hits mid, and it's not a great button outside of poking while avoiding a higher attack. | |description=Manbou does a poke similar to its 5B. It looks like it should be low, but it hits mid, and it's not a great button outside of poking while avoiding a higher attack. | ||
| Line 114: | Line 115: | ||
}} | }} | ||
====== <font style="visibility:hidden" size="0">2C</font> ====== | ======<font style="visibility:hidden" size="0">2C</font>====== | ||
{{MoveData | {{MoveData | ||
|image=BBBR_Manbou_2C.png | |image=BBBR_Manbou_2C.png | ||
|caption= | |caption= | ||
|name=2C | |name=2C | ||
|input={{NotationIcon-BBBR|2}}{{NotationIcon-BBBR|C}} | |||
|data= | |data= | ||
{{AttackData-BBBR | {{AttackData-BBBR | ||
| Line 124: | Line 126: | ||
|guard=All | |guard=All | ||
|property= | |property= | ||
|startup= | |startup=11 | ||
|active= | |active= | ||
|recovery= | |recovery= | ||
|advBlock= | |advBlock=+4 | ||
|cancel=N, Sp, Su | |cancel=N, Sp, Su | ||
|description=A large swipe from Manbou's fin. This is another mid, but it's a strong tool, especially for combos. | |description=A large swipe from Manbou's fin. This is another mid, but it's a strong tool, especially for combos. | ||
| Line 133: | Line 135: | ||
}} | }} | ||
=== Air Normals === | ===Air Normals=== | ||
====== <font style="visibility:hidden" size="0">jA</font> ====== | ======<font style="visibility:hidden" size="0">jA</font>====== | ||
{{MoveData | {{MoveData | ||
|image=BBBR_Manbou_5A.png | |image=BBBR_Manbou_5A.png | ||
|caption= | |caption= | ||
|name=jA | |name=jA | ||
|input=jump {{NotationIcon-BBBR|A}} | |||
|data= | |data= | ||
{{AttackData-BBBR | {{AttackData-BBBR | ||
| Line 144: | Line 147: | ||
|guard=High | |guard=High | ||
|property= | |property= | ||
|startup= | |startup=8 | ||
|active= | |active= | ||
|recovery= | |recovery= | ||
|advBlock= | |advBlock= | ||
|cancel=N, Sp, Su | |cancel=N, Sp, Su | ||
|description= Shares the same animation as Manbou's 5A, and has similar properties. Not a very useful button overall. | |description=Shares the same animation as Manbou's 5A, and has similar properties. Not a very useful button overall. | ||
}} | }} | ||
}} | }} | ||
====== <font style="visibility:hidden" size="0">jB</font> ====== | ======<font style="visibility:hidden" size="0">jB</font>====== | ||
{{MoveData | {{MoveData | ||
|image=BBBR_Manbou_5B.png | |image=BBBR_Manbou_5B.png | ||
|caption= | |caption= | ||
|name=jB | |name=jB | ||
|input=jump {{NotationIcon-BBBR|B}} | |||
|data= | |data= | ||
{{AttackData-BBBR | {{AttackData-BBBR | ||
| Line 163: | Line 167: | ||
|guard=High | |guard=High | ||
|property= | |property= | ||
|startup= | |startup=10 | ||
|active= | |active= | ||
|recovery= | |recovery= | ||
|advBlock= | |advBlock= | ||
|cancel=N, Sp, Su | |cancel=N, Sp, Su | ||
|description= | |description=Uses the same animation as Manbou's 5B. It also maintains the property of moving you forward, which allows this to be a pretty decent air stall to trip up your opponent's anti-air game. | ||
}} | }} | ||
}} | }} | ||
====== <font style="visibility:hidden" size="0">jC</font> ====== | ======<font style="visibility:hidden" size="0">jC</font>====== | ||
{{MoveData | {{MoveData | ||
|image=BBBR_Manbou_5C.png | |image=BBBR_Manbou_5C.png | ||
|caption= | |||
|name=jC | |name=jC | ||
|input=jump {{NotationIcon-BBBR|C}} | |||
|data= | |data= | ||
{{AttackData-BBBR | {{AttackData-BBBR | ||
| Line 181: | Line 187: | ||
|guard=High | |guard=High | ||
|property= | |property= | ||
|startup= | |startup=10 | ||
|active= | |active= | ||
|recovery= | |recovery= | ||
|advBlock= | |advBlock= | ||
|cancel=N, Sp, Su | |cancel=N, Sp, Su | ||
|description= | |description=Emulates the appearance of Manbou's 5C. This is a great jump-in button, if a bit slow. Like the other air normals, this one keeps a lot of the properties of its grounded counterpart. | ||
}} | }} | ||
}} | }} | ||
== Command Normals == | ==Command Normals== | ||
====== <font style="visibility:hidden" size="0">6A</font> ====== | ======<font style="visibility:hidden" size="0">6A</font>====== | ||
{{MoveData | {{MoveData | ||
|image=BBBR_Manbou_6A.png | |image=BBBR_Manbou_6A.png | ||
|caption= | |caption= | ||
|name=6A | |name=6A | ||
|subtitle=Dorsal Fin Blade | |||
|input={{NotationIcon-BBBR|6}}{{NotationIcon-BBBR|A}} | |||
|data= | |data= | ||
{{AttackData-BBBR | {{AttackData-BBBR | ||
| Line 201: | Line 209: | ||
|guard=Mid | |guard=Mid | ||
|property= | |property= | ||
|startup= | |startup=18 | ||
|active= | |active= | ||
|recovery= | |recovery= | ||
|advBlock= | |advBlock=-6 | ||
|cancel=J, N, Sp, Su | |cancel=J, N, Sp, Su | ||
|description=Good damage is about all this command normal has going for it. Overall it's a rather slow button | |description=Good damage is about all this command normal has going for it. Overall, it's a rather slow button that also has deceptive range, needing to be surprisingly close for it to even hit. | ||
}} | }} | ||
}} | }} | ||
====== <font style="visibility:hidden" size="0">6B</font> ====== | ======<font style="visibility:hidden" size="0">6B</font>====== | ||
{{MoveData | {{MoveData | ||
|image=BBBR_Manbou_6B.png | |image=BBBR_Manbou_6B.png | ||
|caption= | |caption= | ||
|name=6B | |name=6B | ||
|subtitle=Slip | |||
|input={{NotationIcon-BBBR|}}{{NotationIcon-BBBR|}} | |||
|data= | |data= | ||
{{AttackData-BBBR | {{AttackData-BBBR | ||
| Line 220: | Line 230: | ||
|guard=Low | |guard=Low | ||
|property= | |property= | ||
|startup= | |startup=22 | ||
|active= | |active= | ||
|recovery= | |recovery= | ||
|advBlock= | |advBlock=-12 | ||
|cancel=N, Sp, Su | |cancel=N, Sp, Su | ||
|description=Manbou goes flat and slides. This is a pretty decent slide to trip up your opponent, and the startup can avoid some moves the opponent throws out. However, the long recovery time means you should be careful when using it. | |description=Manbou goes flat and slides. This is a pretty decent slide to trip up your opponent, and the startup can avoid some moves the opponent throws out. However, the long recovery time means you should be careful when using it. The low profile is very belligerent, allowing it to even anti-air if Manbou reads it. | ||
}} | }} | ||
}} | }} | ||
== Universal Mechanics == | ==Universal Mechanics== | ||
====== <font style="visibility:hidden" size="0"> | ======<font style="visibility:hidden" size="0">5/2D</font>====== | ||
{{MoveData | {{MoveData | ||
|image= | |image=BBBR_Manbou_Child.png | ||
|name=Egg Lay | |||
|name= | |input={{NotationIcon-BBBR|5}}/{{NotationIcon-BBBR|2}}{{NotationIcon-BBBR|D}} | ||
|input= | |||
|data= | |data= | ||
{{AttackData-BBBR | {{AttackData-BBBR | ||
|damage= | |version=5D | ||
|guard= | |subtitle=Egg Lay (Ground) | ||
|damage=400 | |||
|guard=Mid | |||
|property= | |||
|startup= | |||
|active= | |||
|recovery= | |||
|advBlock= | |||
|cancel= | |||
|description=Manbou drops an egg that hatches into a small Manbou, who shoots a drop of water horizontally. This works similarly to Manbou's own special, but having it be a separate entity allows for pressure and setup potential, making it fairly strong. | |||
}} | |||
{{AttackData-BBBR | |||
|version=2D | |||
|subtitle=Egg Lay (Air) | |||
|damage=400 | |||
|guard=Mid | |||
|property= | |property= | ||
|startup= | |startup= | ||
| Line 245: | Line 269: | ||
|recovery= | |recovery= | ||
|advBlock= | |advBlock= | ||
|cancel= | |cancel= | ||
|description= | |description=Essentially the same, only the water drop is shot upwards instead. This can be useful for setups or just to make your opponent squirm a bit. | ||
}} | }} | ||
}} | }} | ||
====== <font style="visibility:hidden" size="0">Throw</font> ====== | ======<font style="visibility:hidden" size="0">Throw</font>====== | ||
{{MoveData | {{MoveData | ||
|image= | |image=BBBR_Manbou_ThrowWhiff.png | ||
|caption= | |caption= | ||
|name=Throw | |name=Throw | ||
|input=4 | |input={{NotationIcon-BBBR|5}}/{{NotationIcon-BBBR|4}}{{NotationIcon-BBBR|A}}{{NotationIcon-BBBR|B}} | ||
|data= | |data= | ||
{{AttackData-BBBR | {{AttackData-BBBR | ||
|damage= | |damage=700 | ||
|guard=Unblockable | |guard=Unblockable | ||
|property= | |property= | ||
| Line 266: | Line 290: | ||
|advBlock= | |advBlock= | ||
|cancel=NC | |cancel=NC | ||
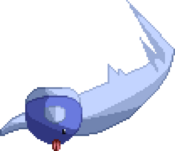
|description= | |description=Manbou makes a surprised face and the opponent just kinda... gets grabbed? It's good for mixing block-happy opponents. | ||
}} | }} | ||
}} | }} | ||
====== <font style="visibility:hidden" size="0">Big Bang Mode</font> ====== | ======<font style="visibility:hidden" size="0">Big Bang Mode</font>====== | ||
{{MoveData | {{MoveData | ||
|image= | |image=BBBR_Manbou_ThrowWhiff.png | ||
|caption= | |caption=They love reusing sprites with this fish... | ||
|name=Big Bang Mode | |name=Big Bang Mode | ||
|input= | |input={{NotationIcon-BBBR|BBM}} | ||
|data= | |data= | ||
{{AttackData-BBBR | {{AttackData-BBBR | ||
| Line 286: | Line 310: | ||
|advBlock= | |advBlock= | ||
|cancel= | |cancel= | ||
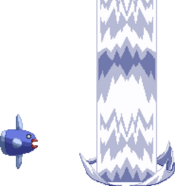
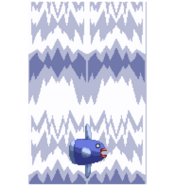
|description=Universal Big Bang Mode activation. Requires 3 bars and can be done anytime you have control on the ground. Lasts for about 7 seconds. | |description=Universal Big Bang Mode activation. Requires 3 bars and can be done anytime you have control on the ground. Lasts for about 7 seconds. During Big Bang Mode, Manbou fills the stage with water, slowing the opponent down. This allows for combos not previously possible and makes it one of the strongest BBMs in the game. | ||
}} | }} | ||
}} | }} | ||
== Special Moves == | ==Special Moves== | ||
====== <font style="visibility:hidden" size="0"> | ======<font style="visibility:hidden" size="0">236X</font>====== | ||
{{MoveData | {{MoveData | ||
|image= | |image=BBBR_Manbou_236A.png | ||
|caption= | |caption= | ||
|name= | |name=Water Gun | ||
|input= | |input={{NotationIcon-BBBR|236}}{{NotationIcon-BBBR|A}}/{{NotationIcon-BBBR|B}}/{{NotationIcon-BBBR|C}} | ||
|data= | |data= | ||
{{AttackData-BBBR | {{AttackData-BBBR | ||
|damage= | |version=A | ||
|damage=600 | |||
|guard=Mid | |guard=Mid | ||
|property= | |property= | ||
|startup= | |startup=26 | ||
|active= | |active= | ||
|recovery= | |recovery= | ||
|advBlock= | |advBlock=-5 | ||
|cancel=J, Su | |cancel=J, Su | ||
|description= | |description=Manbou puffs up and shoots a water drop horizontally. This can be a strong poke tool. | ||
}} | }} | ||
{{AttackData-BBBR | {{AttackData-BBBR | ||
|version=B | |version=B | ||
|damage= | |damage=600 | ||
|guard=Mid | |guard=Mid | ||
|property= | |property= | ||
|startup= | |startup=26 | ||
|active= | |active= | ||
|recovery= | |recovery= | ||
|advBlock= | |advBlock=-5 | ||
|cancel=Su | |cancel=J, Su | ||
|description= | |description=Manbou puffs up and shoots a water drop slightly upwards. This can be used as a setup or to trip up the opponent. | ||
}} | }} | ||
{{AttackData-BBBR | {{AttackData-BBBR | ||
|version=C | |version=C | ||
|damage= | |damage=600 | ||
|guard= | |guard=Mid | ||
|property= | |property= | ||
|startup= | |startup=26 | ||
|active= | |active= | ||
|recovery= | |recovery= | ||
|advBlock= | |advBlock=-5 | ||
|cancel= | |cancel=J, Su | ||
|description= | |description=Manbou puffs up and shoots a water drop upwards. This is the highest arc, and can trip up the opponent if they're not watching for it, as well as allow you to keep them blocking. | ||
}} | }} | ||
}} | }} | ||
====== <font style="visibility:hidden" size="0"> | ======<font style="visibility:hidden" size="0">214X</font>====== | ||
{{MoveData | {{MoveData | ||
|image= | |image=BBBR_Manbou_214X.png | ||
|caption= | |caption= | ||
|name= | |name=Waterspout | ||
|input= | |input={{NotationIcon-BBBR|214}}{{NotationIcon-BBBR|A}}/{{NotationIcon-BBBR|B}}/{{NotationIcon-BBBR|C}} | ||
|data= | |data= | ||
{{AttackData-BBBR | {{AttackData-BBBR | ||
|version=A | |version=A | ||
|damage= | |damage=400 | ||
|guard= | |guard=Mid | ||
|property= | |property= | ||
|startup= | |startup=20 | ||
|active= | |active= | ||
|recovery= | |recovery= | ||
|advBlock= | |advBlock=-3 | ||
|cancel= | |cancel=NC | ||
|description= | |description=Manbou creates a column of water right next to it. Useful anti-air tool potentially, as well as a way to get out of sticky situations. | ||
}} | }} | ||
{{AttackData-BBBR | {{AttackData-BBBR | ||
|header=no | |header=no | ||
|version= | |version=B | ||
|damage= | |damage=400 | ||
|guard= | |guard=Mid | ||
|property= | |property= | ||
|startup= | |startup=26 | ||
|active= | |active= | ||
|recovery= | |recovery= | ||
|advBlock= | |advBlock=+3 | ||
|cancel=NC | |cancel=NC | ||
|description= | |description=Manbou creates a column of water a little further away. Also an useful anti-air, and a good way to check an opponent's approach. | ||
}} | }} | ||
{{AttackData-BBBR | {{AttackData-BBBR | ||
| | |header=no | ||
|version=C | |||
| | |damage=400 | ||
|damage=400 | |||
|guard=Mid | |guard=Mid | ||
|property= | |property= | ||
|startup= | |startup=26 | ||
|active= | |active= | ||
|recovery= | |recovery= | ||
|advBlock= | |advBlock=+3 | ||
|cancel= | |cancel=NC | ||
|description= | |description=Manbou creates a column of water far away from it. A good way to keep your opponent on their toes, no matter where they are. | ||
}} | }} | ||
}} | }} | ||
====== <font style="visibility:hidden" size="0"> | ==B-Power Arts== | ||
======<font style="visibility:hidden" size="0">214D</font>====== | |||
{{MoveData | {{MoveData | ||
|image= | |image=BBBR_Manbou_214D.png | ||
|caption= | |caption= | ||
|name= | |name=Grand Waterspout | ||
|input= | |input={{NotationIcon-BBBR|214}}{{NotationIcon-BBBR|D}} | ||
|data= | |data= | ||
{{AttackData-BBBR | {{AttackData-BBBR | ||
|damage= | |damage=2080 | ||
|guard=Mid | |guard=Mid | ||
|property= | |property= | ||
|startup= | |startup=5+21 | ||
|active= | |active= | ||
|recovery= | |recovery= | ||
|advBlock= | |advBlock=+56 | ||
|cancel=NC | |cancel=NC | ||
|description= | |description=Manbou creats a water column around itself. Pretty good but far from Manbou's best use of meter. It can still be used as a solid get-off-me tool, though. | ||
}} | }} | ||
}} | }} | ||
== Big Bang Break == | ==Big Bang Break== | ||
====== <font style="visibility:hidden" size="0">41236ABC</font> ====== | ======<font style="visibility:hidden" size="0">41236ABC</font>====== | ||
{{MoveData | {{MoveData | ||
|image= | |image=BBBR_Manbou_BBB.png | ||
|name= | |name=Manbou and His Friends | ||
|input= | |input={{NotationIcon-BBBR|BBB}} | ||
|data= | |data= | ||
{{AttackData-BBBR | {{AttackData-BBBR | ||
|damage= | |damage=3825 | ||
|guard=Mid | |guard=Mid | ||
|property= | |property= | ||
| Line 610: | Line 443: | ||
|recovery= | |recovery= | ||
|advBlock= | |advBlock= | ||
|cancel= | |cancel=NC | ||
|description= | |description=Manbou traps the opponent in a bubble and summons a school of other Manbou, ending with a giant Manbou crashing into the opponent. Good as a combo ender when in Big Bang Mode, especially if you're aiming to kill. Ends Big Bang Mode instantly. | ||
}} | }} | ||
}} | }} | ||
== Combos == | ==Combos== | ||
{| class="mw-collapsible mw-collapsed" width="100%" | |||
|+ style="white-space:nowrap; border:1px solid; padding:3px;" |'''Combo Legend''' | |||
|- | |||
|{{ComboLegend-BBBR}} | |||
|} | |||
===<u>Combo Theory</u>=== | ===<u>Combo Theory</u>=== | ||
:*Combo damage varies from character to character, so all damage numbers come from testing on a full-health Rouga. | :*Combo damage varies from character to character, so all damage numbers come from testing on a full-health Rouga. | ||
===<u>Midscreen</u>=== | ===<u>Midscreen</u>=== | ||
===<u>Corner</u>=== | ===<u>Corner</u>=== | ||
==Colors== | ==Colors== | ||
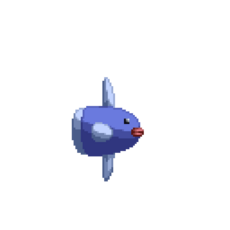
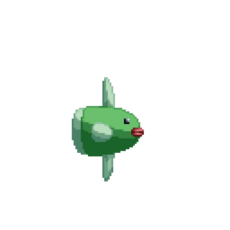
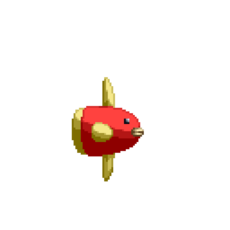
{{ColorGallery | filePrefix= | {{ColorGallery | filePrefix=BBBR_Manbou_Color_ | colors= | ||
{{ColorGallery/Color|1| text= A Color}} | {{ColorGallery/Color|1| text=A Color}} | ||
{{ColorGallery/Color|2| text= B Color}} | {{ColorGallery/Color|2| text=B Color}} | ||
{{ColorGallery/Color|3| text= C Color}} | {{ColorGallery/Color|3| text=C Color}} | ||
{{ColorGallery/Color|4| text= D Color}} | {{ColorGallery/Color|4| text=D Color}} | ||
}} | }} | ||
== BBBR Navigation == | |||
==BBBR Navigation== | |||
{{Navbox-BBBR}} | {{Navbox-BBBR}} | ||
[[Category:Manbou]] | |||
[[Category:Big Bang Beat Revolve]] | [[Category:Big Bang Beat Revolve]] | ||
Latest revision as of 09:52, 27 June 2024
Under Construction
|
Introduction
While in possession of a rather odd toolkit, Manbou is surprisingly strong for a presumed joke character. Manbou has good normals, some interesting moves, and a lot of ways to control space. Playing this character may take some getting used to, but with one of the best BBMs in the game, you'll be drowning your opponent in no time.
Lore
Manbou is based on a generic enemy that shows up in Big Bang Age. The enemy that the playable Manbou is based on doesn't have a consistent name, but in Big Bang Beat -Revolve-, it simply uses the Japanese name of the mola mola (ocean sunfish), which it resembles.
General Strategy
Manbou has a lot of great normals and command normals to play with, as well as various spacing tools. Mid-range is where Manbou gets the most usage out of its specials, so the general strategy is to secure a knockdown in mid-to-long range, then start pressure with Manbou's pretty good buttons.
Normal Moves
Standing Normals
5A
5A
|
|---|
5B
5B
|
|---|
5C
5C
|
|---|
Crouching Normals
2A
2A
|
|---|
2B
2B
|
|---|
2C
2C
|
|---|
Air Normals
jA
jA
jump |
|---|
jB
jB
jump |
|---|
jC
jC
jump |
|---|
Command Normals
6A
6A
Dorsal Fin Blade |
|---|
6B
6B
Slip |
|---|
Universal Mechanics
5/2D
Egg Lay
|
|---|
Throw
Throw
|
|---|
Big Bang Mode
Big Bang Mode They love reusing sprites with this fish... They love reusing sprites with this fish...
|
|---|
Special Moves
236X
Water Gun
|
|---|
214X
Waterspout
|
|---|
B-Power Arts
214D
Grand Waterspout
|
|---|
Big Bang Break
41236ABC
Manbou and His Friends
|
|---|
Combos
| |||||||||||||||||||||||||||||||||||||||||||||
Combo Theory
- Combo damage varies from character to character, so all damage numbers come from testing on a full-health Rouga.
