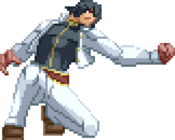
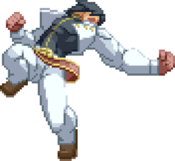
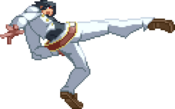
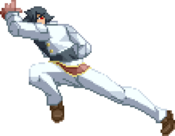
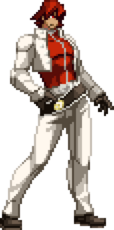
Big Bang Beat Revolve/Rouga: Difference between revisions
(→jC) |
No edit summary |
||
| (69 intermediate revisions by 3 users not shown) | |||
| Line 1: | Line 1: | ||
{{WIP}} | {{WIP}} | ||
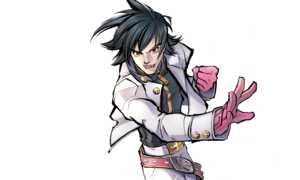
[[File:BBBR_Rouga_Portrait.png|thumb|right|<center><font size="4"><b>Rouga</b></font><br>'''Estimated Health (After Scaling): 11764'''</center>]] | |||
{{TOClimit|2}} | {{TOClimit|2}} | ||
==Introduction== | |||
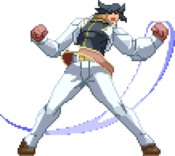
'''Rouga''' is an in-your-face rushdown character with a myriad of strong tools to keep your opponent locked down and guessing. One of the easier characters to get started with, he's a demon who can keep the pressure up indefinitely. | |||
''' | |||
== | ===Lore=== | ||
Rouga is | Rouga Zanma is a man with a strong sense of justice who enjoys a good fight. He seeks to dominate the entire nation with his group, the Wolf Fang Brigade, and bring the wild Special Students of Japan under control. Rouga is old friends with Kunagi Tenrou, and cares quite a bit for her, although that does not seem to stop him from showing affection towards other women as well, such as the Nakanishi sisters and Senna Kyoudou. | ||
==General Strategy== | |||
== General Strategy == | |||
Rouga can cause the opponent to go into a recovery state in many ways to allow him to get in. 236C send a fireball along the ground that will launch the opponent into the air and can allow you to get in. It only travels about 5/6ths screen distance though, so if you're at full screen you're not getting anything off of this unless your opponent moves forward. Unfortunately you cannot boost cancel this move, so keep that in mind. | Rouga can cause the opponent to go into a recovery state in many ways to allow him to get in. 236C send a fireball along the ground that will launch the opponent into the air and can allow you to get in. It only travels about 5/6ths screen distance though, so if you're at full screen you're not getting anything off of this unless your opponent moves forward. Unfortunately you cannot boost cancel this move, so keep that in mind. | ||
| Line 19: | Line 17: | ||
41236C is Rouga's empty slide that moves you in, but doesn't attack. Only do this to move in after C normals, because anything weaker will put you at a disadvantage and get you punished. It should also be noted that 41236A is special cancelable, so you can use it as mix up to trick your enemy if they try to punish it. Generally if you want to move in after a pressure string, you should boost because it's much safer and will allow you to get true block strings on your opponent. 41236C can be used in mixup for throw attempts if your opponent is expecting the kick, but use it sparingly because it's not safe. | 41236C is Rouga's empty slide that moves you in, but doesn't attack. Only do this to move in after C normals, because anything weaker will put you at a disadvantage and get you punished. It should also be noted that 41236A is special cancelable, so you can use it as mix up to trick your enemy if they try to punish it. Generally if you want to move in after a pressure string, you should boost because it's much safer and will allow you to get true block strings on your opponent. 41236C can be used in mixup for throw attempts if your opponent is expecting the kick, but use it sparingly because it's not safe. | ||
== Normal Moves == | ==Normal Moves== | ||
=== Standing Normals === | ===Standing Normals=== | ||
====== <font style="visibility:hidden" size="0">5A</font> ====== | ======<font style="visibility:hidden" size="0">5A</font>====== | ||
{{MoveData | {{MoveData | ||
|image=BBBR_Rouga_5A.png | |image=BBBR_Rouga_5A.png | ||
|caption= | |caption= | ||
|name=5A | |name=5A | ||
|input={{NotationIcon-BBBR|A}} | |||
|data= | |data= | ||
{{AttackData-BBBR | {{AttackData-BBBR | ||
|damage=150 | |damage=150 | ||
|guard= | |guard=All | ||
|property= | |property= | ||
|startup= | |startup=7 | ||
|active= | |active= | ||
|recovery= | |recovery= | ||
|advBlock= | |advBlock=+4 | ||
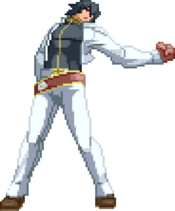
|cancel=J, N, Sp, Su | |cancel=J, N, Sp, Su | ||
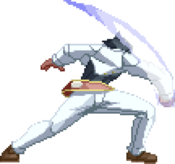
|description=A solid standard jab. It's air unblockable, but it whiffs on crouching opponents so keep that in mind when using this button. | |description=A solid standard jab. It's air-unblockable, but it whiffs on crouching opponents so keep that in mind when using this button. | ||
}} | }} | ||
}} | }} | ||
====== <font style="visibility:hidden" size="0">5B</font> ====== | ======<font style="visibility:hidden" size="0">5B</font>====== | ||
{{MoveData | {{MoveData | ||
|image=BBBR_Rouga_5B.png | |image=BBBR_Rouga_5B.png | ||
|caption= | |caption= | ||
|name=5B | |name=5B | ||
|input={{NotationIcon-BBBR|B}} | |||
|data= | |data= | ||
{{AttackData-BBBR | {{AttackData-BBBR | ||
|damage=400 | |damage=400 | ||
|guard= | |guard=All | ||
|property= | |property= | ||
|startup= | |startup=9 | ||
|active= | |active= | ||
|recovery= | |recovery= | ||
|advBlock= | |advBlock=-6 | ||
|cancel=J, N, Sp, Su | |cancel=J, N, Sp, Su | ||
|description=This is also air unblockable, and has a great startup as well as good range. One of Rouga's best normals. | |description=This is also air-unblockable, and has a great startup as well as good range. One of Rouga's best normals. | ||
}} | }} | ||
}} | }} | ||
====== <font style="visibility:hidden" size="0">5C</font> ====== | ======<font style="visibility:hidden" size="0">5C</font>====== | ||
{{MoveData | {{MoveData | ||
|image=BBBR_Rouga_5C.png | |image=BBBR_Rouga_5C.png | ||
|caption= | |caption= | ||
|name=5C | |name=5C | ||
|input={{NotationIcon-BBBR|C}} | |||
|data= | |data= | ||
{{AttackData-BBBR | {{AttackData-BBBR | ||
| Line 69: | Line 70: | ||
|guard=Mid | |guard=Mid | ||
|property= | |property= | ||
|startup= | |startup=11 | ||
|active= | |active= | ||
|recovery= | |recovery= | ||
|advBlock=- | |advBlock=-10 | ||
|cancel=J, N, Sp, Su | |cancel=J, N, Sp, Su | ||
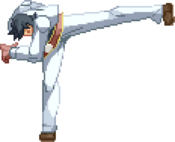
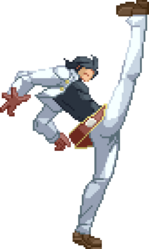
|description=A strong forward kick. Has amazing range and hitstun, but is held back by | |description=A strong forward kick. Has amazing range and hitstun, but is held back by its slow startup, making it mostly useful in combos. | ||
}} | }} | ||
}} | }} | ||
=== Crouching Normals === | ===Crouching Normals=== | ||
====== <font style="visibility:hidden" size="0">2A</font> ====== | ======<font style="visibility:hidden" size="0">2A</font>====== | ||
{{MoveData | {{MoveData | ||
|image=BBBR_Rouga_2A.png | |image=BBBR_Rouga_2A.png | ||
|caption= | |caption= | ||
|name=2A | |name=2A | ||
|input={{NotationIcon-BBBR|2}}{{NotationIcon-BBBR|A}} | |||
|data= | |data= | ||
{{AttackData-BBBR | {{AttackData-BBBR | ||
| Line 89: | Line 91: | ||
|guard=Mid | |guard=Mid | ||
|property= | |property= | ||
|startup= | |startup=7 | ||
|active= | |active= | ||
|recovery= | |recovery= | ||
|advBlock= | |advBlock=-2 | ||
|cancel=N, Sp, Su | |cancel=N, Sp, Su | ||
|description=A fast low jab. | |description=A fast low jab. Oddly enough, this is a mid, although you can cancel it into his two actual low normals. | ||
}} | }} | ||
}} | }} | ||
====== <font style="visibility:hidden" size="0">2B</font> ====== | ======<font style="visibility:hidden" size="0">2B</font>====== | ||
{{MoveData | {{MoveData | ||
|image=BBBR_Rouga_2B.png | |image=BBBR_Rouga_2B.png | ||
|caption= | |caption= | ||
|name=2B | |name=2B | ||
|input={{NotationIcon-BBBR|2}}{{NotationIcon-BBBR|B}} | |||
|data= | |data= | ||
{{AttackData-BBBR | {{AttackData-BBBR | ||
| Line 108: | Line 111: | ||
|guard=Low | |guard=Low | ||
|property= | |property= | ||
|startup= | |startup=9 | ||
|active= | |active= | ||
|recovery= | |recovery= | ||
|advBlock= | |advBlock=+1 | ||
|cancel=J, N, Sp, Su | |cancel=J, N, Sp, Su | ||
|description=A fast low kick. Probably Rouga's best crouching normal, it has speed and range, as well as being a low. This is a fantastic low poke to catch your opponent off guard. | |description=A fast low kick. Probably Rouga's best crouching normal, it has speed and range, as well as being a low. This is a fantastic low poke to catch your opponent off-guard. | ||
}} | }} | ||
}} | }} | ||
====== <font style="visibility:hidden" size="0">2C</font> ====== | ======<font style="visibility:hidden" size="0">2C</font>====== | ||
{{MoveData | {{MoveData | ||
|image=BBBR_Rouga_2C.png | |image=BBBR_Rouga_2C.png | ||
|caption= | |caption= | ||
|name=2C | |name=2C | ||
|input={{NotationIcon-BBBR|2}}{{NotationIcon-BBBR|C}} | |||
|data= | |data= | ||
{{AttackData-BBBR | {{AttackData-BBBR | ||
| Line 127: | Line 131: | ||
|guard=Low | |guard=Low | ||
|property= | |property= | ||
|startup= | |startup=9 | ||
|active= | |active= | ||
|recovery= | |recovery= | ||
|advBlock= | |advBlock=-8 | ||
|cancel=N, Sp, Su | |cancel=N, Sp, Su | ||
|description=A sweeping kick. This is a decent move, but like all the C normals it's slow, so use careful. It's best used when chained into. | |description=A sweeping kick. This is a decent move, but like all the C normals it's slow, so use careful. It's best used when chained into. | ||
| Line 136: | Line 140: | ||
}} | }} | ||
=== Air Normals === | ===Air Normals=== | ||
====== <font style="visibility:hidden" size="0">jA</font> ====== | ======<font style="visibility:hidden" size="0">jA</font>====== | ||
{{MoveData | {{MoveData | ||
|image=BBBR_Rouga_jA.png | |image=BBBR_Rouga_jA.png | ||
|caption= | |caption= | ||
|name=jA | |name=jA | ||
|input=jump {{NotationIcon-BBBR|A}} | |||
|data= | |data= | ||
{{AttackData-BBBR | {{AttackData-BBBR | ||
| Line 147: | Line 152: | ||
|guard=High | |guard=High | ||
|property= | |property= | ||
|startup= | |startup=6 | ||
|active= | |active= | ||
|recovery= | |recovery= | ||
|advBlock= | |advBlock= | ||
|cancel=N, Sp, Su | |cancel=N, Sp, Su | ||
|description= A fast air jab. This button is best used as an air-to-air, as it doesn't have much combo potential and is an unreliable jump-in. | |description=A fast air jab. This button is best used as an air-to-air, as it doesn't have much combo potential and is an unreliable jump-in. | ||
}} | }} | ||
}} | }} | ||
====== <font style="visibility:hidden" size="0">jB</font> ====== | ======<font style="visibility:hidden" size="0">jB</font>====== | ||
{{MoveData | {{MoveData | ||
|image=BBBR_Rouga_jB.png | |image=BBBR_Rouga_jB.png | ||
|caption= | |caption= | ||
|name=jB | |name=jB | ||
|input=jump {{NotationIcon-BBBR|B}} | |||
|data= | |data= | ||
{{AttackData-BBBR | {{AttackData-BBBR | ||
| Line 166: | Line 172: | ||
|guard=High | |guard=High | ||
|property= | |property= | ||
|startup= | |startup=8 | ||
|active= | |active= | ||
|recovery= | |recovery= | ||
|advBlock= | |advBlock= | ||
|cancel=N, Sp, Su | |cancel=N, Sp, Su | ||
|description= A long reaching air kick. Another good air-to-air since it goes completely horizontal, and does decent damage. | |description=A long reaching air kick. Another good air-to-air since it goes completely horizontal, and does decent damage. | ||
}} | }} | ||
}} | }} | ||
====== <font style="visibility:hidden" size="0">jC</font> ====== | ======<font style="visibility:hidden" size="0">jC</font>====== | ||
{{MoveData | {{MoveData | ||
|image=BBBR_Rouga_jC.png | |image=BBBR_Rouga_jC.png | ||
|name=jC | |name=jC | ||
|input=jump {{NotationIcon-BBBR|C}} | |||
|data= | |data= | ||
{{AttackData-BBBR | {{AttackData-BBBR | ||
| Line 184: | Line 191: | ||
|guard=High | |guard=High | ||
|property= | |property= | ||
|startup= | |startup=11 | ||
|active= | |active= | ||
|recovery= | |recovery= | ||
|advBlock= | |advBlock= | ||
|cancel=N, Sp, Su | |cancel=N, Sp, Su | ||
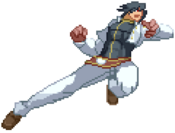
|description= A kick aimed diagonally downwards. Easily Rouga's best jump-in, and it has an insane amount of hitstun meaning you can pretty much land and do whatever combo you want after a deep jump-in. | |description=A kick aimed diagonally downwards. Easily Rouga's best jump-in, and it has an insane amount of hitstun meaning you can pretty much land and do whatever combo you want after a deep jump-in. | ||
}} | }} | ||
}} | }} | ||
== Command Normals == | ==Command Normals== | ||
====== <font style="visibility:hidden" size="0">6A</font> ====== | ======<font style="visibility:hidden" size="0">6A</font>====== | ||
{{MoveData | {{MoveData | ||
|image= | |image=BBBR_Rouga_6A.png | ||
|caption= | |caption= | ||
|name=6A | |name=6A | ||
|subtitle=High Kick | |||
|input={{NotationIcon-BBBR|6}}{{NotationIcon-BBBR|A}} | |||
|data= | |data= | ||
{{AttackData-BBBR | {{AttackData-BBBR | ||
| Line 204: | Line 213: | ||
|guard=Mid | |guard=Mid | ||
|property= | |property= | ||
|startup= | |startup=10 | ||
|active= | |active= | ||
|recovery= | |recovery= | ||
|advBlock= | |advBlock=-6 | ||
|cancel=J, N, Sp, Su | |cancel=J, N, Sp, Su | ||
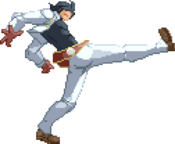
|description=A | |description=A high kick. This is a pretty solid launcher, as it can easily be chained into and is both jump- and special-cancelable on its own right. | ||
}} | }} | ||
}} | }} | ||
====== <font style="visibility:hidden" size="0">6B</font> ====== | ======<font style="visibility:hidden" size="0">6B</font>====== | ||
{{MoveData | {{MoveData | ||
|image= | |image=BBBR_Rouga_6B.png | ||
|caption= | |caption= | ||
|name=6B | |name=6B | ||
|subtitle=Roll Kick | |||
|input={{NotationIcon-BBBR|6}}{{NotationIcon-BBBR|B}} | |||
|data= | |data= | ||
{{AttackData-BBBR | {{AttackData-BBBR | ||
|damage= | |damage=600 | ||
|guard= | |guard=High | ||
|property= | |property= | ||
|startup= | |startup=26 | ||
|active= | |active= | ||
|recovery= | |recovery= | ||
|advBlock= | |advBlock=-3 | ||
|cancel=N, Sp, Su | |cancel=N, Sp, Su | ||
|description= | |description=An overhead spinning kick. This move is too slow to combo from anything besides a 6A juggle. It's not a great tool, but you can catch your opponent with it occasionally. | ||
}} | }} | ||
}} | }} | ||
== Universal Mechanics == | ==Universal Mechanics== | ||
====== <font style="visibility:hidden" size="0">5D</font> ====== | ======<font style="visibility:hidden" size="0">5D</font>====== | ||
{{MoveData | {{MoveData | ||
|image= | |image=BBBR_Rouga_5D.png | ||
|caption= | |caption= | ||
|name= | |name=B-Dash | ||
|input= | |input={{NotationIcon-BBBR|D}} | ||
|data= | |data= | ||
{{AttackData-BBBR | {{AttackData-BBBR | ||
| Line 248: | Line 259: | ||
|recovery= | |recovery= | ||
|advBlock= | |advBlock= | ||
|cancel= | |cancel=N,Sp,Su | ||
|description= | |description=Rouga performs a quick dash forward. This doesn't do any damage, but it can be cancelled out of and into pretty much anything, making it amazing for both pressure and combos. It requires 1 bar of Rouga's {{NotationIcon-BBBR|RougaStock}} '''stock gauge''', located above his B-Power meter. This is an amazing tool for a rushdown, although it does add significant scaling to combos. | ||
}} | }} | ||
}} | }} | ||
====== <font style="visibility:hidden" size="0">Throw</font> ====== | ======<font style="visibility:hidden" size="0">Throw</font>====== | ||
{{MoveData | {{MoveData | ||
|image= | |image=BBBR_Rouga_5A.png | ||
|caption= | |caption= | ||
|name=Throw | |name=Throw | ||
|input=4 | |input={{NotationIcon-BBBR|5}}/{{NotationIcon-BBBR|4}}{{NotationIcon-BBBR|A}}{{NotationIcon-BBBR|B}} | ||
|data= | |data= | ||
{{AttackData-BBBR | {{AttackData-BBBR | ||
|damage= | |damage=1100 | ||
|guard=Unblockable | |guard=Unblockable | ||
|property= | |property= | ||
| Line 269: | Line 280: | ||
|advBlock= | |advBlock= | ||
|cancel=NC | |cancel=NC | ||
|description= | |description=Rouga grabs the opponent and punches them to the ground. Always a good option to trip up blocking opponents. | ||
}} | }} | ||
}} | }} | ||
====== <font style="visibility:hidden" size="0">Big Bang Mode</font> ====== | ======<font style="visibility:hidden" size="0">Big Bang Mode</font>====== | ||
{{MoveData | {{MoveData | ||
|image= | |image=BBBR_Rouga_BBM.png | ||
|caption= | |caption= | ||
|name=Big Bang Mode | |name=Big Bang Mode | ||
|input= | |input={{NotationIcon-BBBR|BBM}} | ||
|data= | |data= | ||
{{AttackData-BBBR | {{AttackData-BBBR | ||
| Line 289: | Line 300: | ||
|advBlock= | |advBlock= | ||
|cancel= | |cancel= | ||
|description=Universal Big Bang Mode activation. Requires 3 bars and can be done anytime you have control on the ground. Lasts for about 7 seconds. | |description=Universal Big Bang Mode activation. Requires 3 bars and can be done anytime you have control on the ground. Lasts for about 7 seconds. During Big Bang Mode, Rouga gains {{NotationIcon-BBBR|RougaStock}} '''infinite stocks''', allowing him to use B-Dash whenever he wants, which is pretty strong. | ||
}} | }} | ||
}} | }} | ||
== Special Moves == | ==Special Moves== | ||
====== <font style="visibility:hidden" size="0"> | ======<font style="visibility:hidden" size="0">236X</font>====== | ||
{{MoveData | {{MoveData | ||
|image= | |image=BBBR_Rouga_236X.png | ||
|caption= | |image2=BBBR_Rouga_236C.png | ||
|name= | |caption=A/B versions | ||
|input= | |caption2=C version | ||
|name=Napalm | |||
|input={{NotationIcon-BBBR|236}}{{NotationIcon-BBBR|A}}/{{NotationIcon-BBBR|B}}/{{NotationIcon-BBBR|C}} | |||
|data= | |data= | ||
{{AttackData-BBBR | {{AttackData-BBBR | ||
|damage= | |version=A | ||
|damage=1000 | |||
|guard=Mid | |||
|property= | |||
|startup=10 | |||
|active= | |||
|recovery= | |||
|advBlock=-8 | |||
|cancel=J, Su | |||
|description=Rouga slams his palm into the ground and summons a burst of energy. This version comes out immediately and combos from any ground normal. | |||
}} | |||
{{AttackData-BBBR | |||
|version=B | |||
|damage=700 | |||
|guard=Mid | |||
|property= | |||
|startup=44 | |||
|active= | |||
|recovery= | |||
|advBlock=+25 | |||
|cancel=J, Su | |||
|description=This version of the move has a delay, making it a useful setup in pressure. | |||
}} | |||
{{AttackData-BBBR | |||
|version=C | |||
|damage=1000 | |||
|guard=Mid | |guard=Mid | ||
|property= | |property= | ||
|startup= | |startup=18 | ||
|active= | |active= | ||
|recovery= | |recovery= | ||
|advBlock= | |advBlock=-2 | ||
|cancel=J, Su | |cancel=J, Su | ||
|description= | |description=This version travels across the ground and bursts when close to the opponent. A good projectile tool for longer ranges. | ||
}} | }} | ||
}} | }} | ||
====== <font style="visibility:hidden" size="0"> | ======<font style="visibility:hidden" size="0">214A</font>====== | ||
{{MoveData | {{MoveData | ||
|image= | |image=BBBR_Rouga_214A.png | ||
|caption= | |caption= | ||
|name= | |name=Blow | ||
|input= | |input={{NotationIcon-BBBR|214}}{{NotationIcon-BBBR|A}} | ||
|data= | |data= | ||
{{AttackData-BBBR | {{AttackData-BBBR | ||
|version= | |version=214A | ||
|damage= | |damage=500 | ||
|guard=Mid | |guard=Mid | ||
|property=Invincible | |property=Invincible | ||
|startup= | |startup=13 | ||
|active= | |active= | ||
|recovery= | |recovery= | ||
|advBlock= | |advBlock=-4 | ||
|cancel=NC | |cancel=NC | ||
|description= | |description=Rouga performs a strong gut punch. This move can cancel into 214B and C on hit or block, making it a very useful pressure tool, as well as a strong combo tool. | ||
}} | }} | ||
{{AttackData-BBBR | {{AttackData-BBBR | ||
|version=214[A] | |||
|version= | |damage=700 | ||
|damage= | |||
|guard=Mid | |guard=Mid | ||
|property=Invincible | |property=Invincible | ||
|startup= | |startup=29 | ||
|active= | |active= | ||
|recovery= | |recovery= | ||
|advBlock= | |advBlock=-3 | ||
|cancel=NC | |cancel=NC | ||
|description= | |description=This version launches the opponent but has an incredibly long startup. | ||
}} | }} | ||
}} | }} | ||
====== <font style="visibility:hidden" size="0"> | ======<font style="visibility:hidden" size="0">214B</font>====== | ||
{{MoveData | {{MoveData | ||
|image= | |image=BBBR_Rouga_214B.png | ||
|caption= | |caption= | ||
|name= | |name=Knuckle | ||
|input= | |input={{NotationIcon-BBBR|214}}{{NotationIcon-BBBR|B}} | ||
|data= | |data= | ||
{{AttackData-BBBR | {{AttackData-BBBR | ||
|version= | |version=214B | ||
|damage= | |damage=450 | ||
|guard= | |guard=Mid | ||
|property= | |property= | ||
|startup= | |startup=12 | ||
|active= | |active= | ||
|recovery= | |recovery= | ||
|advBlock= | |advBlock=+2 | ||
|cancel=Su | |cancel=Sp, Su | ||
|description= | |description=Rouga does a downward punch. Similar properties to 214A, and it can cancel into 214C on hit or block as well. Strong pressure tool, just like 214A. | ||
}} | }} | ||
{{AttackData-BBBR | {{AttackData-BBBR | ||
|header=no | |header=no | ||
|version= | |version=214[B] | ||
|damage= | |damage=650 | ||
|guard= | |guard=Mid | ||
|property= | |property= | ||
|startup= | |startup=31 | ||
|active= | |active= | ||
|recovery= | |recovery= | ||
|advBlock= | |advBlock=-2 | ||
|cancel=NC | |cancel=NC | ||
|description= | |description=Fully charged, this move is an overhead and causes a groundbounce if it lands, allowing for a combo. This can be a pretty solid oki tool. | ||
}} | }} | ||
}} | }} | ||
====== <font style="visibility:hidden" size="0"> | ======<font style="visibility:hidden" size="0">214C</font>====== | ||
{{MoveData | {{MoveData | ||
|image= | |image=BBBR_Rouga_214C.png | ||
|caption= | |caption= | ||
|name= | |name=Fang | ||
|input= | |input={{NotationIcon-BBBR|214}}{{NotationIcon-BBBR|C}} | ||
|data= | |data= | ||
{{AttackData-BBBR | {{AttackData-BBBR | ||
|damage= | |version=214C | ||
|guard= | |damage=200~700 | ||
|guard=Mid | |||
|property= | |||
|startup=14 | |||
|active= | |||
|recovery= | |||
|advBlock=-8 | |||
|cancel=Su | |||
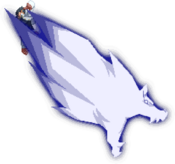
|description=Rouga performs a straight punch, unleashing an energy blast that travels halfscreen. Deals the most damage from up close, where it also becomes air-unblockable and causes blowback. It can be canceled into some of his B-Power Arts. | |||
}} | |||
{{AttackData-BBBR | |||
|version=214[C] | |||
|damage=550~1200 | |||
|guard=Mid | |||
|property= | |property= | ||
|startup= | |startup=34 | ||
|active= | |active= | ||
|recovery= | |recovery= | ||
|advBlock= | |advBlock=-4 | ||
|cancel= | |cancel=Su | ||
|description= | |description=This version does significantly more damage and causes a slide effect from up close, allowing for different setups. | ||
}} | }} | ||
}} | }} | ||
====== <font style="visibility:hidden" size="0"> | ======<font style="visibility:hidden" size="0">j214X</font>====== | ||
{{MoveData | {{MoveData | ||
|image= | |image=BBBR_Rouga_j214X.png | ||
|caption= | |caption= | ||
|name= | |name=Shoot | ||
|input= | |input=jump {{NotationIcon-BBBR|214}}{{NotationIcon-BBBR|A}}/{{NotationIcon-BBBR|B}} | ||
|data= | |data= | ||
{{AttackData-BBBR | {{AttackData-BBBR | ||
|version=A | |||
|damage=800 | |damage=800 | ||
|guard=All | |guard=All | ||
|property= | |property= | ||
|startup= | |startup=14 | ||
|active= | |active= | ||
|recovery= | |recovery= | ||
|advBlock= | |advBlock=-1 | ||
|cancel=Sp, Su | |cancel=Sp, Su | ||
|description= | |description=Rouga does a divekick. This version comes out immediately, but is not an overhead, so no mix there. Pretty decent divekick otherwise, good for controlling space. | ||
}} | }} | ||
{{AttackData-BBBR | {{AttackData-BBBR | ||
|damage= | |version=B | ||
|guard=High | |damage=700 | ||
|guard=High | |||
|property= | |property= | ||
|startup= | |startup=25 | ||
|active= | |active= | ||
|recovery= | |recovery= | ||
|advBlock= | |advBlock=0 | ||
|cancel=Su | |cancel=Sp, Su | ||
|description= | |description=This version has a delay, but is an overhead. Generally this is too slow to do much, but you'll occasionally catch an opponent with it. | ||
}} | }} | ||
}} | }} | ||
====== <font style="visibility:hidden" size="0"> | ======<font style="visibility:hidden" size="0">623A</font>====== | ||
{{MoveData | {{MoveData | ||
|image= | |image=BBBR_Rouga_623A.png | ||
|caption= | |caption= | ||
|name= | |name=Dunk | ||
|input= | |input={{NotationIcon-BBBR|623}}{{NotationIcon-BBBR|A}} | ||
|data= | |data= | ||
{{AttackData-BBBR | {{AttackData-BBBR | ||
|damage=800 | |damage=800 | ||
|guard= | |guard=Unblockable | ||
|property= | |property= | ||
|startup= | |startup=10 | ||
|active= | |active= | ||
|recovery= | |recovery= | ||
|advBlock= | |advBlock= | ||
|cancel=Su | |cancel=Su | ||
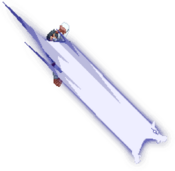
|description= | |description=Rouga leaps into the air and grabs the opponent if he touches them. This can be cancelled from any normal, and is a pretty good (if funny) anti-air, as well as a pretty decent combo ender. | ||
}} | }} | ||
}} | }} | ||
====== <font style="visibility:hidden" size="0"> | ======<font style="visibility:hidden" size="0">41236X</font>====== | ||
{{MoveData | {{MoveData | ||
|image= | |image=BBBR_Rouga_41236X.png | ||
|name=Slide | |||
|name= | |input={{NotationIcon-BBBR|41236}}<br>{{NotationIcon-BBBR|A}}/{{NotationIcon-BBBR|B}}/{{NotationIcon-BBBR|C}} | ||
|input= | |||
|data= | |data= | ||
{{AttackData-BBBR | {{AttackData-BBBR | ||
|damage= | |version=A | ||
|damage=800 | |||
|guard=Mid | |guard=Mid | ||
|property= | |property= | ||
|startup= | |startup=11 | ||
|active= | |active= | ||
|recovery= | |recovery= | ||
|advBlock= | |advBlock=+1 | ||
|cancel=Su | |cancel=Sp, Su | ||
|description= | |description=Rouga moves forward and does a high kick. This version moves forward the least, but is pretty useful as combo filler. | ||
}} | }} | ||
{{AttackData-BBBR | {{AttackData-BBBR | ||
|damage= | |version=B | ||
|guard= | |damage=800 | ||
|guard=Mid | |||
|property= | |property= | ||
|startup= | |startup=20 | ||
|active= | |active= | ||
|recovery= | |recovery= | ||
|advBlock= | |advBlock=-3 | ||
|cancel=Su | |cancel=Su | ||
|description= | |description=This version moves farther but has less combo potential. It can still combo from C normals, however. | ||
}} | }} | ||
{{AttackData-BBBR | {{AttackData-BBBR | ||
|version=C | |||
|damage=N/A | |damage=N/A | ||
|guard=N/A | |guard=N/A | ||
| Line 533: | Line 544: | ||
|recovery= | |recovery= | ||
|advBlock= | |advBlock= | ||
|cancel= | |cancel=NC | ||
|description= | |description=This is a feint more than anything, as Rouga doesn't actually attack. Overall not a great button since it can't cancel. | ||
}} | }} | ||
}} | }} | ||
====== <font style="visibility:hidden" size="0"> | ==B-Power Arts== | ||
======<font style="visibility:hidden" size="0">214D</font>====== | |||
{{MoveData | {{MoveData | ||
|image= | |image=BBBR_Rouga_214C.png | ||
|caption= | |caption= | ||
|name= | |name=Wild Fang | ||
|input= | |input={{NotationIcon-BBBR|214}}{{NotationIcon-BBBR|D}} | ||
|data= | |data= | ||
{{AttackData-BBBR | {{AttackData-BBBR | ||
|damage= | |damage=1500~1600 | ||
|guard= | |guard=All | ||
|property= | |property= | ||
|startup= | |startup=7+3 | ||
|active= | |active= | ||
|recovery= | |recovery= | ||
|advBlock= | |advBlock=0 | ||
|cancel= | |cancel= | ||
|description= | |description=Rouga does a powered up Fang. Deals a little more damage when hitting from further away. This is a fantastic tool but especially good as a 1-meter combo ender. | ||
}} | }} | ||
}} | }} | ||
====== <font style="visibility:hidden" size="0"> | ======<font style="visibility:hidden" size="0">j214D</font>====== | ||
{{MoveData | {{MoveData | ||
|image= | |image=BBBR_Rouga_j214D.png | ||
|caption= | |caption= | ||
|name= | |name=Wild Shoot | ||
|input= | |input=jump {{NotationIcon-BBBR|214}}{{NotationIcon-BBBR|D}} | ||
|data= | |data= | ||
{{AttackData-BBBR | {{AttackData-BBBR | ||
|damage= | |version=j214D | ||
|guard= | |subtitle=Wild Shoot | ||
|property= | |damage=1400 | ||
|startup= | |guard=Mid | ||
|property= | |||
|startup=12+2 | |||
|active= | |active= | ||
|recovery= | |recovery= | ||
|advBlock= | |advBlock=+12 | ||
|cancel=NC | |cancel=NC | ||
|description= | |description=Rouga does a powered up Shoot. This is a great divekick and can be TKed for what is basically an instant overhead. | ||
}} | }} | ||
{{AttackData-BBBR | {{AttackData-BBBR | ||
|damage= | |version=...~22D | ||
|guard= | |subtitle=Wolf Shoot Chase | ||
|property= | |damage=1400 | ||
|startup= | |guard=High | ||
|property= | |||
|startup=10+0 | |||
|active= | |active= | ||
|recovery= | |recovery= | ||
|advBlock= | |advBlock=+8 | ||
|cancel=NC | |cancel=NC | ||
|description= | |description=A follow-up where Rouga continues with a powered up version of 6B. This is essentially another divekick after the first (though it covers much more horizontal range), and is useful to squeeze out some extra damage or catch an opponent who blocks j214D. | ||
}} | }} | ||
}} | }} | ||
== Big Bang Break == | ==Big Bang Break== | ||
====== <font style="visibility:hidden" size="0">41236ABC</font> ====== | ======<font style="visibility:hidden" size="0">41236ABC</font>====== | ||
{{MoveData | {{MoveData | ||
|image= | |image=BBBR_Rouga_5D.png | ||
|name= | |name=Wolf Fang | ||
|input= | |input={{NotationIcon-BBBR|BBB}} | ||
|data= | |data= | ||
{{AttackData-BBBR | {{AttackData-BBBR | ||
|damage= | |damage=3895 | ||
|guard= | |guard=All | ||
|property= | |property= | ||
|startup= | |startup= | ||
| Line 614: | Line 621: | ||
|advBlock= | |advBlock= | ||
|cancel= | |cancel= | ||
|description= | |description=Rouga does a B-Dash forwards. If it hits, he charges up a massive punch that passes through the opponent. Good as a combo ender when in Big Bang Mode, especially if you're aiming to kill. Ends Big Bang Mode instantly. | ||
}} | }} | ||
}} | }} | ||
== Combos == | ==Combos== | ||
{| class="mw-collapsible mw-collapsed" width="100%" | |||
|+ style="white-space:nowrap; border:1px solid; padding:3px;" |'''Combo Legend''' | |||
|- | |||
|{{ComboLegend-BBBR}} | |||
|} | |||
===<u>Combo Theory</u>=== | ===<u>Combo Theory</u>=== | ||
:*Combo damage varies from character to character, so all damage numbers come from testing on a full-health Rouga. | :*Combo damage varies from character to character, so all damage numbers come from testing on a full-health Rouga. | ||
===<u>Midscreen</u>=== | ===<u>Midscreen</u>=== | ||
:* ''' | :* '''5B > 5C > 2C xx 214A xx 214B > 5B xx 214A xx dl.214B > 2C > 6A > dl.5C > j.B xx Boost > j.A > j.B xx j.214A''' (3747) | ||
::* | ::* A very strong meterless midscreen combo, for all intents and purposes Rouga's BNB. It will always send the opponent to the corner, and give you oki on the knockdown. | ||
:* '''6B xx j.214A xx Boost > dl.j.B > 214A xx dl.214B > 5B xx 214A xx dl.214B > 2C > 6A > dl.5C > 6A xx dl.623A''' (2961) | |||
::* Good midscreen confirm off Rouga's overhead. | |||
:* ''' | :* '''5B > 5C xx 2147D > dl.5C xx 214B > 2C xx 214A xx 214B > 2C > 6A > dl.5C > 6A xx dl.623A''' (5183) | ||
::* | ::* A very damaging combo midscreen that uses 1 meter. Just solid all around. | ||
===<u>Corner</u>=== | ===<u>Corner</u>=== | ||
:* ''' | :* '''6B xx j.214A > 5C xx 214A xx dl.214B > 5B xx 214A xx dl.214B > 2C > 6A > dl.5C > 6A xx dl.623A''' (3589) | ||
::* | ::* Meterless corner combo for Rouga. This character has more damage than practically anyone else in the game, and this is a great example. | ||
==Colors== | ==Colors== | ||
{{ColorGallery | filePrefix= | {{ColorGallery | filePrefix=BBBR_Rouga_Color_ | colors= | ||
{{ColorGallery/Color|1| text= A Color}} | {{ColorGallery/Color|1| text=A Color}} | ||
{{ColorGallery/Color|2| text= B Color}} | {{ColorGallery/Color|2| text=B Color}} | ||
{{ColorGallery/Color|3| text= C Color}} | {{ColorGallery/Color|3| text=C Color}} | ||
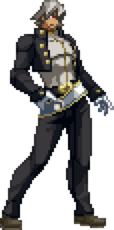
{{ColorGallery/Color|4| text= D Color}} | {{ColorGallery/Color|4| text=D Color}} | ||
}} | }} | ||
== BBBR Navigation == | |||
==BBBR Navigation== | |||
{{Navbox-BBBR}} | {{Navbox-BBBR}} | ||
[[Category:Rouga]] | |||
[[Category:Big Bang Beat Revolve]] | [[Category:Big Bang Beat Revolve]] | ||
Latest revision as of 09:54, 27 June 2024
Under Construction
|
Introduction
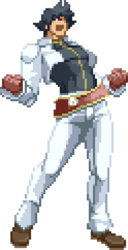
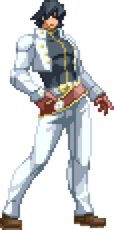
Rouga is an in-your-face rushdown character with a myriad of strong tools to keep your opponent locked down and guessing. One of the easier characters to get started with, he's a demon who can keep the pressure up indefinitely.
Lore
Rouga Zanma is a man with a strong sense of justice who enjoys a good fight. He seeks to dominate the entire nation with his group, the Wolf Fang Brigade, and bring the wild Special Students of Japan under control. Rouga is old friends with Kunagi Tenrou, and cares quite a bit for her, although that does not seem to stop him from showing affection towards other women as well, such as the Nakanishi sisters and Senna Kyoudou.
General Strategy
Rouga can cause the opponent to go into a recovery state in many ways to allow him to get in. 236C send a fireball along the ground that will launch the opponent into the air and can allow you to get in. It only travels about 5/6ths screen distance though, so if you're at full screen you're not getting anything off of this unless your opponent moves forward. Unfortunately you cannot boost cancel this move, so keep that in mind.
Once you get in you have some tools you can mix up with. Instant air dashes can make for effective combo starters if you can land the hit, but just jumping at your opponent is a good way to get killed, so watch yourself. 6B is a pretty decent overhead that you can cancel into j.214A (this does not hit overhead, however) and get some solid damage off of it. It has some slow startup, so it's best to chain into it from a 5B or 2B. If you go into the j.214A and your opponent blocks it, boost to make it safe and then follow up with ANOTHER jumping overhead (you're still in the air from the j.214A, so any normal you do will be the jumping version after the boost), which can give you a full combo if not blocked or continued pressure if it is.
Rouga only has 2 lows, 2B and 2C, so it's advised to start pressure strings with 2B > 5C instead of an A normal. You have slightly less time to react to hits, but you get a better high low. Max range 2C can be followed up with 214A and you can almost freestyle after that. Going into 214B is a smart choice for the juggle afterwards, but there are other options.
41236C is Rouga's empty slide that moves you in, but doesn't attack. Only do this to move in after C normals, because anything weaker will put you at a disadvantage and get you punished. It should also be noted that 41236A is special cancelable, so you can use it as mix up to trick your enemy if they try to punish it. Generally if you want to move in after a pressure string, you should boost because it's much safer and will allow you to get true block strings on your opponent. 41236C can be used in mixup for throw attempts if your opponent is expecting the kick, but use it sparingly because it's not safe.
Normal Moves
Standing Normals
5A
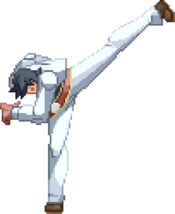
5A
|
|---|
5B
5B
|
|---|
5C
5C
|
|---|
Crouching Normals
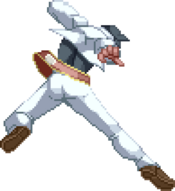
2A
2A
|
|---|
2B
2B
|
|---|
2C
2C
|
|---|
Air Normals
jA
jA
jump |
|---|
jB
jB
jump |
|---|
jC
jC
jump |
|---|
Command Normals
6A
6A
High Kick |
|---|
6B
6B
Roll Kick |
|---|
Universal Mechanics
5D
B-Dash
|
|---|
Throw
Throw
|
|---|
Big Bang Mode
Big Bang Mode
|
|---|
Special Moves
236X
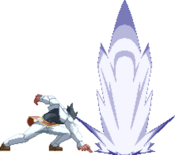
Napalm A/B versions A/B versions C version C version
|
|---|
214A
Blow
|
|---|
214B
Knuckle
|
|---|
214C
Fang
|
|---|
j214X
Shoot
jump |
|---|
623A
Dunk
|
|---|
41236X
Slide
|
|---|
B-Power Arts
214D
Wild Fang
|
|---|
j214D
Wild Shoot
jump |
|---|
Big Bang Break
41236ABC
Wolf Fang
|
|---|
Combos
| |||||||||||||||||||||||||||||||||||||||||||||
Combo Theory
- Combo damage varies from character to character, so all damage numbers come from testing on a full-health Rouga.
Midscreen
- 5B > 5C > 2C xx 214A xx 214B > 5B xx 214A xx dl.214B > 2C > 6A > dl.5C > j.B xx Boost > j.A > j.B xx j.214A (3747)
- A very strong meterless midscreen combo, for all intents and purposes Rouga's BNB. It will always send the opponent to the corner, and give you oki on the knockdown.
- 6B xx j.214A xx Boost > dl.j.B > 214A xx dl.214B > 5B xx 214A xx dl.214B > 2C > 6A > dl.5C > 6A xx dl.623A (2961)
- Good midscreen confirm off Rouga's overhead.
- 5B > 5C xx 2147D > dl.5C xx 214B > 2C xx 214A xx 214B > 2C > 6A > dl.5C > 6A xx dl.623A (5183)
- A very damaging combo midscreen that uses 1 meter. Just solid all around.
Corner
- 6B xx j.214A > 5C xx 214A xx dl.214B > 5B xx 214A xx dl.214B > 2C > 6A > dl.5C > 6A xx dl.623A (3589)
- Meterless corner combo for Rouga. This character has more damage than practically anyone else in the game, and this is a great example.
