Windjammers/Hiromi Mita: Difference between revisions
No edit summary |
WarpWhistle (talk | contribs) m (Removed part of notable player box that talks about how active a player is, as we're all pretty inactive these days.) |
||
| (23 intermediate revisions by 2 users not shown) | |||
| Line 1: | Line 1: | ||
[[File: | [[File:WJ_MitaStats.png|right|]] | ||
[[File:WJ_MitaChart.png|300px|thumb|right|<center><font size="2">'''Shot Speed Decay'''</font></center>]] | |||
Hiromi Mita (commonly referred to only as "Mita") is a Windjammer hailing from Japan. From her original sport of tennis she brings a wrist flick like no other and a serious amount of foot speed. If only Tennis taught her how to dive. | |||
Hiromi Mita (commonly referred to only as "Mita") is a | |||
==Gameplay== | ==Gameplay== | ||
Mita | Mita is the fastest walking character with the slowest throws, so she spends a lot of time trying to move around the court looking for opportunities to attack her opponent's zones. She's benefits the most out of the roster from the comeback mechanics of the expanded supersonic window, so never count her out of any set until it's over. Her tiny hitbox makes it very easy for discs to miss her, however, so truly she is a high risk, high reward character. | ||
''' | '''[https://www.youtube.com/watch?v=OAO-XFtp6Bs Mita Gameplay Sample]''' | ||
{{StrengthsAndWeaknesses | |||
{{ | | intro = Mita is one of the most complex characters in the game and takes dedication to play at a high level. | ||
| | | pros = | ||
* Fastest walking speed in the game | |||
* Pronounced Curve shots that allow unique setups among the cast | |||
* Super Custom is hard to react to up or down and has unique interactions with walls/bumpers. | |||
* Reversal and super sonic timings are more lenient compared to larger characters | |||
|cons = | |||
* Slowest normal throws in game | |||
* Light as feather, gets hard pushback | |||
* Longest Stun Time, can cause far discs to be uncatchable | |||
* Miserable Dash | |||
* Smallest Hitboxes in the game | |||
* Her curves from the back tend to go center, and in turn, straight into the opponent's hands. | |||
| tablewidth = 80 | |||
| | |||
| | |||
}} | }} | ||
== | ==Character Properties== | ||
{{ | {{MoveData | ||
|image= | |image=WJ MitaNeutral.png | ||
|caption= | |caption=27x31 Pixels | ||
|name= | |name=Neutral Hitbox | ||
|data= | |data= | ||
{{AttackData-WJ | |||
| | |description= Mita's standing Hitbox is the smallest in the game, and that hitbox extends higher than expected, leaving her foot out and making it easy for the disc to slide past her even when it looks like it shouldn't. | ||
}} | |||
}} | |||
}} | }} | ||
{{MoveData | |||
|image=WJ MitaBlock.png | |||
{{ | |caption=27x31 Pixels | ||
|image= | |name=Blocking Hitbox | ||
|caption= | |||
|name= | |||
|data= | |data= | ||
{{AttackData-WJ | |||
|description= Mita's block is the same as her standing hitbox, even as she moves back. Aside from the edge of her feet, this hitbox reflects a lot better on the animation being performed. | |||
}} | |||
|description= | |||
}} | |||
}} | }} | ||
{{ | {{MoveData | ||
|image= | |image=WJ MitaVBlock.png | ||
|caption= | |caption=27x31 Pixels | ||
|name= | |name=Vertical Blocking Hitbox | ||
|data= | |data= | ||
{{AttackData-WJ | |||
|description= Mita's Vertical block is the same as her standing hitbox. Her sliding blocks gain no changes due to her hitboxes remaining the same, so while it's unfortunate her hitboxes are so small, at least they're consistent. | |||
}} | |||
|description= | |||
}} | |||
}} | }} | ||
{{ | {{MoveData | ||
|image= | |image=WJ MitaCharge.png | ||
|caption= | |caption=27x31 Pixels | ||
|name= | |name=Charging Hitbox | ||
|data= | |data= | ||
{{AttackData-WJ | |||
|description= Mita's Charge is the exact same size as the rest of her standard hitboxes. While this may seem redundant to put here, this actually is a positive as she is one of the 3 members of the roster that immune to infamous "Miller Glitch", at least without bumpers getting involved. | |||
}} | |||
|description= | |||
}} | }} | ||
{{MoveData | |||
{{ | |image=WJ MitaDash.png | ||
|image= | |caption=55x23 Pixels | ||
|caption= | |name=Dash Hitbox | ||
|name= | |||
|data= | |data= | ||
{{AttackData-WJ | |||
| | |description= Mita's dash is the smallest dash hitbox in the game. Leading with her legs, she barely slides forward at all and without the extension of her hand she struggles to get anything. She cannot long dash, and relies on stringing together quick bursts and running to get to discs. Holding long dash will cause her to break very suddenly. With her hitbox being so thin and reacting so poorly to supers, due to her being so light, she wants to be in dashing position as little as humanly possible. | ||
}} | |||
}} | |||
}} | }} | ||
{{ | {{MoveData | ||
|image= | |image=WJ MitaDiagoDash.png | ||
|caption= | |caption=Please Measure | ||
|name= | |name=Diagonal Dash Hitbox | ||
|data= | |data= | ||
{{AttackData-WJ | |||
|description= Mita's diagonal Dash is awful and horrible and takes up barely any space. | |||
}} | |||
|description= | |||
}} | |||
}} | }} | ||
{{ | ==Character Curves== | ||
|image= | Click the "Toggle Hitboxes" button to see the character in action. | ||
{{MoveData | |||
|image=WJ_Mita147C.png | |||
|hitbox=WJ_Mita147.gif | |||
|imageSize=304x224px | |||
|caption= | |caption= | ||
|name= | |name=147 (Mirror of 741) | ||
|data= | |data= | ||
{{AttackData-WJ | |||
| | |description= Mita's 147 shoots at a pretty steep angle away from throw, contrasting many of her other curves which develop more gradually from one another. From center on smaller stages, this curve doesn't do much that her 8a or 2a doesn't, but with more room to develop, this shot has room to get around the map very steeply. This curve shines at the net, where it can really get around opponents in bad positioning. When used as a normal shot it can be readable, but as a super sonic it's hard to react to, as few other shots in the game move around in the way this shot does. | ||
}} | |||
}} | |||
}} | }} | ||
{{ | {{MoveData | ||
|image= | |image=WJ_Mita478C.png | ||
|hitbox=WJ_Mita478.gif | |||
|imageSize=304x224px | |||
|caption= | |caption= | ||
|name= | |name=478 (Mirror of 412) | ||
|data= | |data= | ||
{{AttackData-WJ | |||
|description= A curve with a lot of subtlety for being as wide as it is. The 478 is a great mixup tool, as it looks to behave like the 9a or 3a shot before curving back. While opponents tend to be able to catch it just from returning to neutral positions, it's easy to catch someone overextending or misinterpreting where the shot is going, making it one of Mita's better tool from backline. | |||
}} | |||
|description=A | |||
}} | }} | ||
{{MoveData | |||
{{ | |image=WJ_Mita789C.png | ||
|image= | |hitbox=WJ_Mita789.gif | ||
|imageSize=304x224px | |||
|caption= | |caption= | ||
|name= | |name=789 (Mirror of 123) | ||
|data= | |data= | ||
{{AttackData-WJ | |||
| | |description= Mita's 789 develops pretty steeply after the throw and can be used near midstage to hit corners reliably. It developing so late makes it a great tool for targeting bumpers at specific positions, or for steep wall rebounds when used farther from the wall. From backline, it tends to go directly to center, but not exactly so it's pretty good at catching an opponent out of position, especially against a smaller character. | ||
}} | |||
}} | |||
}} | }} | ||
{{MoveData | |||
|image=WJ_Mita896C.png | |||
{{ | |hitbox=WJ_Mita896.gif | ||
| | |imageSize=304x224px | ||
| | |||
| | |||
|caption= | |caption= | ||
|name=896/214 (Mirror of 236/874) | |||
|data= | |data= | ||
{{AttackData-WJ | |||
| | |description= As with all double inputted curves, this is the most common one you will see. It's similar to 789 but developing a lot faster and without any movement in the opposite direction. As this can really dip low if used away from the wall, it leaves a wide net for an opponent to catch, similar to a 7a or a 1a, but when used with bumpers or from near front court, this can be used to hit 5 zones on Concrete or Tiled effectively. | ||
}} | |||
}} | }} | ||
{{MoveData | |||
{{ | |image=WJ_Mita963C.png | ||
| | |hitbox=WJ_Mita963.gif | ||
| | |imageSize=304x224px | ||
| | |||
|caption= | |caption= | ||
|name=963(Mirror of 369) | |||
|data= | |data= | ||
{{AttackData-WJ | |||
| | |description= Continuing the pattern, the 963 is a bit steeper than the last curve. From serve point it behaves a lot like 8a or 2a thrown from a higher position, so this gives you another angle in your toolbox to throw around your opponent without having to move. | ||
}} | |||
}} | }} | ||
{{MoveData | |||
{{ | |image=WJ_Mita632C.png | ||
| | |hitbox=WJ_Mita632.gif | ||
| | |imageSize=304x224px | ||
| | |||
|caption= | |caption= | ||
|name=632 (Mirror of 698) | |||
|data= | |data= | ||
{{AttackData-WJ | |||
|description= Even more steep, this curve is rather situational, as it gives your opponent a lot of chances to catch it when thrown from backline. It's great to hit bumpers near front or to catch your opponent when both of you are up near the net. | |||
}} | |||
|description= | |||
}} | }} | ||
{{MoveData | |||
{{ | |image=WJ_Mita321C.png | ||
| | |hitbox=WJ_Mita321.gif | ||
| | |imageSize=304x224px | ||
| | |||
|caption= | |caption= | ||
|name=321 (Mirror of 987) | |||
|data= | |data= | ||
{{AttackData-WJ | |||
| | |description= One of the most sharp curves in the game, the 321 is almost too goofy to use. If thrown near the top of the screen, this shot will curve back past where thrown before bouncing back. This can lead to some really out there bumper setups near the front of the net, but generally, this shot's biggest utility is to waste time by throwing it slow, as it eats up even more clock than a 7a or 1a. | ||
}} | |||
}} | |||
}} | }} | ||
{{ | ==Custom Super== | ||
| | {{MoveData | ||
| | |image=WJ_MitaCustomC.png | ||
| | |hitbox=WJ_MitaCustom.gif | ||
|imageSize=304x224px | |||
|caption= | |caption= | ||
|name=Lightning Wave | |||
|data= | |data= | ||
{{AttackData-WJ | |||
| | |description= Lightning Wave moves in a sine-wave pattern, dodging around opponents directly in front of it, but returning about to center when thrown from tee. It has a good ammount of pushback and interacts strangely with walls depending on when it hits in the arc, sometimes staying down, and sometimes hyper extending after a single wave. With bumpers, this super can be sent back towards Mita for a wave before returning back, and can even flatten out completely straight in rare instances. Generally a very strong choice that is only held back by its predictable patterns in center and Mita's inability to charge it often off a popup. | ||
}} | |||
}} | }} | ||
==General Strategy== | |||
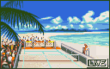
[[File:WJ_Mita.png|300px|right|thumb|<center><font size="3">'''Official Art'''</font></center>]] | |||
=== | Mita's slow normal throw speed and curves that develop sharp leave you with a character that doesn't feel comfortable in the back due to an inability to raise an effective offense, and her inability to slide great and tiny hitboxes make her tough to play up front. However, if you can learn to work with Slide-Dashes and her high walking speed to get to the disc, Mita shines near the middle to front of stage, where her curves have the most room to develop. Her 147 especially can throw opponents off guard with its steep upwards angle, and her toolkit of progressively steeper shots from 478 to 321 can get around opponents in any position. | ||
Getting to discs quickly also allows Mita's wider supersonic window to allow her to really put pressure on an opponent that won't have much time to react to her, especially when she's trailing behind, where the window can get as massive as a quarter of a second if you're seriously trailing. Mita on her backfoot is arguably most dangerous, as her curves in combination with her supersonics can be extremely difficult to get around. Just be wary that from backcourt she lacks a lot of great tools to deal with offensive pressure. Rely on proper back dashing to recover stuff that gets past you and get ready to move around the court a lot. | |||
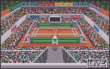
===Favorable Stages=== | |||
== | Smaller stages tend to favor Mita as they allow her to have less court to defend, which allows her to move up to the front more comfortably. Larger courts tend to make covering with back dashes a lot more difficult and will force Mita to play more back than she wants to. Bumper stages can be used in combination with her curves to setup absurdly nasty angles, especially with her supercustoms, but the defense problems shine even harder there. | ||
== Notable Players == | |||
{| class="wikitable" | |||
!width="95"| Tag | |||
!width="105"| Favorite Stage | |||
!width="125"|Location | |||
!Contact | |||
!Notes | |||
!Gameplay | |||
|- | |||
|Nintango | |||
|Beach | |||
|East Coast, USA | |||
|https://twitter.com/nintang0 | |||
|Only Active Mita main in United States | |||
|[https://youtu.be/iPP_UR7CNZo?t=8532 Link] | |||
|- | |||
|DonYann | |||
|Beach | |||
|Paris, France | |||
|https://twitter.com/DonYann2X | |||
|Creator of French Windjammers Wiki | |||
|[https://youtu.be/OpNQkGodiNo?t=386 Link] | |||
|} | |||
{{Navbox-WJ}} | {{Navbox-WJ}} | ||
Latest revision as of 21:56, 17 January 2024


Hiromi Mita (commonly referred to only as "Mita") is a Windjammer hailing from Japan. From her original sport of tennis she brings a wrist flick like no other and a serious amount of foot speed. If only Tennis taught her how to dive.
Gameplay
Mita is the fastest walking character with the slowest throws, so she spends a lot of time trying to move around the court looking for opportunities to attack her opponent's zones. She's benefits the most out of the roster from the comeback mechanics of the expanded supersonic window, so never count her out of any set until it's over. Her tiny hitbox makes it very easy for discs to miss her, however, so truly she is a high risk, high reward character.
| Mita is one of the most complex characters in the game and takes dedication to play at a high level. | |
| Pros | Cons |
|
|
Character Properties
Neutral Hitbox  27x31 Pixels 27x31 Pixels
|
|---|
Blocking Hitbox 27x31 Pixels 27x31 Pixels
|
|---|
Vertical Blocking Hitbox 27x31 Pixels 27x31 Pixels
|
|---|
Charging Hitbox 27x31 Pixels 27x31 Pixels
|
|---|
Dash Hitbox 55x23 Pixels 55x23 Pixels
|
|---|
Diagonal Dash Hitbox Please Measure Please Measure
|
|---|
Character Curves
Click the "Toggle Hitboxes" button to see the character in action.
147 (Mirror of 741)   |
|
|---|---|
Toggle Hitboxes Toggle Hitboxes
|
478 (Mirror of 412)   |
|
|---|---|
Toggle Hitboxes Toggle Hitboxes
|
789 (Mirror of 123)   |
|
|---|---|
Toggle Hitboxes Toggle Hitboxes
|
896/214 (Mirror of 236/874)   |
|
|---|---|
Toggle Hitboxes Toggle Hitboxes
|
963(Mirror of 369)   |
|
|---|---|
Toggle Hitboxes Toggle Hitboxes
|
632 (Mirror of 698)   |
|
|---|---|
Toggle Hitboxes Toggle Hitboxes
|
321 (Mirror of 987)   |
|
|---|---|
Toggle Hitboxes Toggle Hitboxes
|
Custom Super
Lightning Wave
|
|
|---|---|
Toggle Hitboxes Toggle Hitboxes
|
General Strategy

Mita's slow normal throw speed and curves that develop sharp leave you with a character that doesn't feel comfortable in the back due to an inability to raise an effective offense, and her inability to slide great and tiny hitboxes make her tough to play up front. However, if you can learn to work with Slide-Dashes and her high walking speed to get to the disc, Mita shines near the middle to front of stage, where her curves have the most room to develop. Her 147 especially can throw opponents off guard with its steep upwards angle, and her toolkit of progressively steeper shots from 478 to 321 can get around opponents in any position. Getting to discs quickly also allows Mita's wider supersonic window to allow her to really put pressure on an opponent that won't have much time to react to her, especially when she's trailing behind, where the window can get as massive as a quarter of a second if you're seriously trailing. Mita on her backfoot is arguably most dangerous, as her curves in combination with her supersonics can be extremely difficult to get around. Just be wary that from backcourt she lacks a lot of great tools to deal with offensive pressure. Rely on proper back dashing to recover stuff that gets past you and get ready to move around the court a lot.
Favorable Stages
Smaller stages tend to favor Mita as they allow her to have less court to defend, which allows her to move up to the front more comfortably. Larger courts tend to make covering with back dashes a lot more difficult and will force Mita to play more back than she wants to. Bumper stages can be used in combination with her curves to setup absurdly nasty angles, especially with her supercustoms, but the defense problems shine even harder there.
Notable Players
| Tag | Favorite Stage | Location | Contact | Notes | Gameplay |
|---|---|---|---|---|---|
| Nintango | Beach | East Coast, USA | https://twitter.com/nintang0 | Only Active Mita main in United States | Link |
| DonYann | Beach | Paris, France | https://twitter.com/DonYann2X | Creator of French Windjammers Wiki | Link |


