Big Bang Beat Revolve/M. Heita: Difference between revisions
(Created page with "{{WIP}} {{TOClimit|2}} thumb|right| <center><font size="4"><b>Mecha Heita</b></font></center><br> '''Estimated Health (After Scaling): 11974''' == Introduction == Mecha Heita is a tricky character with a lot of odd attacks. He has a lot of projectile options to space the opponent out with, as well as some decent pressure and oki tools. He's not a complicated character, but he can be an interesting robot when you get the hang of him....") |
No edit summary |
||
| (48 intermediate revisions by 3 users not shown) | |||
| Line 1: | Line 1: | ||
{{WIP}} | {{WIP}} | ||
[[File:BBBR_MHeita_Portrait.png|thumb|right|<center><font size="4"><b>Mecha Heita</b></font><br>'''Estimated Health (After Scaling): 11974'''</center>]] | |||
{{TOClimit|2}} | {{TOClimit|2}} | ||
==Introduction== | |||
A variant of {{NotationIcon-BBBR|Heita}} with a more mechanical spin, '''Mecha Heita''' is a tricky character with a lot of odd attacks. He has a lot of projectile options to space the opponent out with, as well as some decent pressure and oki tools. He's not a complicated character, but can be an interesting robot when you get the hang of him. | |||
''' | |||
== | ===Lore=== | ||
Mecha Heita is a | Mecha Heita is a robot who serves the group called Holy Flame. Created by Jeanne and Jaudeau, president and right-hand man of the organization respectively, he is part of the latter's plan to sow chaos through his own creation: the Black Wolf Brigade, a facsimile of the Wolf Fang Brigade. | ||
== General Strategy == | ==General Strategy== | ||
Mecha Heita is hit and run type character. His fast step dash | Mecha Heita is a hit-and-run-type character. His fast step dash, combined with strong specials and buttons for up close make him a menace, but once the opponent starts getting the hang of it, he can back off and use his projectile tools to keep the opponent right where he wants them, before securing a chance at more up close damage. | ||
== Normal Moves == | ==Normal Moves== | ||
=== Standing Normals === | ===Standing Normals=== | ||
====== <font style="visibility:hidden" size="0">5A</font> ====== | ======<font style="visibility:hidden" size="0">5A</font>====== | ||
{{MoveData | {{MoveData | ||
|image= | |image=BBBR_MHeita_5A.png | ||
|caption= | |caption= | ||
|name=5A | |name=5A | ||
|input={{NotationIcon-BBBR|A}} | |||
|data= | |data= | ||
{{AttackData-BBBR | {{AttackData-BBBR | ||
| Line 24: | Line 24: | ||
|guard=Mid | |guard=Mid | ||
|property= | |property= | ||
|startup= | |startup=5 | ||
|active= | |active= | ||
|recovery= | |recovery= | ||
|advBlock=+3 | |advBlock=+3 | ||
|cancel=J, N, Sp, Su | |cancel=J, N, Sp, Su | ||
|description=Standard jab. | |description=Standard jab. Decent range, fairly quick, and a good button overall. Pretty similar to Heita's 5A, but does more damage. | ||
}} | }} | ||
}} | }} | ||
====== <font style="visibility:hidden" size="0">5B</font> ====== | ======<font style="visibility:hidden" size="0">5B</font>====== | ||
{{MoveData | {{MoveData | ||
|image= | |image=BBBR_MHeita_5B.png | ||
|caption= | |caption= | ||
|name=5B | |name=5B | ||
|input={{NotationIcon-BBBR|B}} | |||
|data= | |data= | ||
{{AttackData-BBBR | {{AttackData-BBBR | ||
|damage= | |damage=300 | ||
|guard=All | |guard=All | ||
|property= | |property= | ||
|startup= | |startup=11 | ||
|active= | |active= | ||
|recovery= | |recovery= | ||
|advBlock=0 | |advBlock=0 | ||
|cancel=J, N, Sp, Su | |cancel=J, N, Sp, Su | ||
|description= | |description=A fairly fast jab down. decent range but nothing spectacular, as is true with most of his moves, although it works in combos. The same as Heita's, aside from less damage. | ||
}} | }} | ||
}} | }} | ||
====== <font style="visibility:hidden" size="0">5C</font> ====== | ======<font style="visibility:hidden" size="0">5C</font>====== | ||
{{MoveData | {{MoveData | ||
|image= | |image=BBBR_MHeita_5C.png | ||
|caption= | |caption= | ||
|name=5C | |name=5C | ||
|input={{NotationIcon-BBBR|C}} | |||
|data= | |data= | ||
{{AttackData-BBBR | {{AttackData-BBBR | ||
|damage=600 | |||
|damage= | |||
|guard=All | |guard=All | ||
|property= | |property= | ||
|startup= | |startup=8 | ||
|active= | |active= | ||
|recovery= | |recovery= | ||
|advBlock=-5 | |advBlock=-5 | ||
|cancel=J, N, Sp, Su | |cancel=J, N, Sp, Su | ||
|description= | |description=A powerful kick from Mecha Heita. It's once again just a pretty average normal, but it can be pretty strong in combos. This is again the same as Heita's, aside from less damage. | ||
}} | }} | ||
}} | }} | ||
=== Crouching Normals === | ===Crouching Normals=== | ||
====== <font style="visibility:hidden" size="0">2A</font> ====== | ======<font style="visibility:hidden" size="0">2A</font>====== | ||
{{MoveData | {{MoveData | ||
|image= | |image=BBBR_MHeita_2A.png | ||
|caption= | |caption= | ||
|name=2A | |name=2A | ||
|input={{NotationIcon-BBBR|2}}{{NotationIcon-BBBR|A}} | |||
|data= | |data= | ||
{{AttackData-BBBR | {{AttackData-BBBR | ||
|damage= | |damage=100 | ||
|guard=Low | |guard=Low | ||
|property= | |property= | ||
|startup= | |startup=6 | ||
|active= | |active= | ||
|recovery= | |recovery= | ||
|advBlock=+ | |advBlock=+2 | ||
|cancel=N, Sp, Su | |cancel=N, Sp, Su | ||
|description=A | |description=A low jab similar to his standing jab. A pretty decent low, can stuff some of the opponent's buttons. This is literally the same as Heita's 2A. | ||
}} | }} | ||
}} | }} | ||
====== <font style="visibility:hidden" size="0">2B</font> ====== | ======<font style="visibility:hidden" size="0">2B</font>====== | ||
{{MoveData | {{MoveData | ||
|image= | |image=BBBR_MHeita_2B.png | ||
|caption= | |caption= | ||
|name=2B | |name=2B | ||
|input={{NotationIcon-BBBR|2}}{{NotationIcon-BBBR|B}} | |||
|data= | |data= | ||
{{AttackData-BBBR | {{AttackData-BBBR | ||
|damage= | |damage=400 | ||
|guard= | |guard=Low | ||
|property= | |property= | ||
|startup= | |startup=6 | ||
|active= | |active= | ||
|recovery= | |recovery= | ||
|advBlock=- | |advBlock=-2 | ||
|cancel=J, N, Sp, Su | |cancel=J, N, Sp, Su | ||
|description= | |description=Mecha Heita performs a low kick. This is deceptively short, but it's still a pretty good low poke, definitely something to consider. Once again, this is the exact same as Heita's version. | ||
}} | }} | ||
}} | }} | ||
====== <font style="visibility:hidden" size="0">2C</font> ====== | ======<font style="visibility:hidden" size="0">2C</font>====== | ||
{{MoveData | {{MoveData | ||
|image= | |image=BBBR_MHeita_2C.png | ||
|caption= | |caption= | ||
|name=2C | |name=2C | ||
|input={{NotationIcon-BBBR|2}}{{NotationIcon-BBBR|C}} | |||
|data= | |data= | ||
{{AttackData-BBBR | {{AttackData-BBBR | ||
|damage= | |damage=600 | ||
|guard= | |guard=Mid | ||
|property= | |property= | ||
|startup= | |startup=10 | ||
|active= | |active= | ||
|recovery= | |recovery= | ||
|advBlock=- | |advBlock=-4 | ||
|cancel=N, Sp, Su | |cancel=N, Sp, Su | ||
|description=A | |description=A pretty standard uppercut. Its air unblockable status makes it a very good anti air when you don't want to commit to a DP, and it's an all around great normal. This is the same as Heita's, aside from less damage. | ||
}} | }} | ||
}} | }} | ||
=== Air Normals === | ===Air Normals=== | ||
====== <font style="visibility:hidden" size="0">jA</font> ====== | ======<font style="visibility:hidden" size="0">jA</font>====== | ||
{{MoveData | {{MoveData | ||
|image= | |image=BBBR_MHeita_jA.png | ||
|caption= | |caption= | ||
|name=jA | |name=jA | ||
|input=jump {{NotationIcon-BBBR|A}} | |||
|data= | |data= | ||
{{AttackData-BBBR | {{AttackData-BBBR | ||
| Line 153: | Line 146: | ||
|guard=High | |guard=High | ||
|property= | |property= | ||
|startup= | |startup=5 | ||
|active= | |active= | ||
|recovery= | |recovery= | ||
|advBlock= | |advBlock= | ||
|cancel=N, Sp, Su | |cancel=N, Sp, Su | ||
|description= | |description=A solid jumping kick. It's a decent jump-in button, but it is a bit slow for an A normal. The same as Heita's. | ||
}} | }} | ||
}} | }} | ||
====== <font style="visibility:hidden" size="0">jB</font> ====== | ======<font style="visibility:hidden" size="0">jB</font>====== | ||
{{MoveData | {{MoveData | ||
|image= | |image=BBBR_MHeita_jB.png | ||
|caption= | |caption= | ||
|name=jB | |name=jB | ||
|input=jump {{NotationIcon-BBBR|B}} | |||
|data= | |data= | ||
{{AttackData-BBBR | {{AttackData-BBBR | ||
| Line 172: | Line 166: | ||
|guard=High | |guard=High | ||
|property= | |property= | ||
|startup= | |startup=10 | ||
|active= | |active= | ||
|recovery= | |recovery= | ||
|advBlock= | |advBlock= | ||
|cancel=N, Sp, Su | |cancel=N, Sp, Su | ||
|description= | |description=Mecha Heita does an upward swipe. This move has almost no utility outside of combos, but to be fair, it is good combo filler. The same as Heita's. | ||
}} | }} | ||
}} | }} | ||
====== <font style="visibility:hidden" size="0">jC</font> ====== | ======<font style="visibility:hidden" size="0">jC</font>====== | ||
{{MoveData | {{MoveData | ||
|image= | |image=BBBR_MHeita_jC.png | ||
|name=jC | |name=jC | ||
|input=jump {{NotationIcon-BBBR|C}} | |||
|data= | |data= | ||
{{AttackData-BBBR | {{AttackData-BBBR | ||
|damage= | |damage=600 | ||
|guard=High | |guard=High | ||
|property= | |property= | ||
|startup= | |startup=11 | ||
|active= | |active= | ||
|recovery= | |recovery= | ||
|advBlock= | |advBlock= | ||
|cancel=N, Sp, Su | |cancel=N, Sp, Su | ||
|description= | |description=Mecha Heita makes a downward swing. Another awkward hitbox to try to hit someone on the ground with. It is a decent air-to-air, but it's probably the weakest of his air normals. The same as Heita's. | ||
}} | }} | ||
}} | }} | ||
== Command Normals == | ==Command Normals== | ||
====== <font style="visibility:hidden" size="0">6A</font> ====== | ======<font style="visibility:hidden" size="0">6A</font>====== | ||
{{MoveData | {{MoveData | ||
|image= | |image=BBBR_MHeita_6A.png | ||
|caption= | |caption= | ||
|name=6A | |name=6A | ||
|subtitle=ROUNDHOUSE KICK | |||
|input={{NotationIcon-BBBR|6}}{{NotationIcon-BBBR|A}} | |||
|data= | |data= | ||
{{AttackData-BBBR | {{AttackData-BBBR | ||
|version=6A | |||
|damage=700 | |damage=700 | ||
|guard=Mid | |guard=Mid | ||
|property= | |property= | ||
|startup= | |startup=15 | ||
|active= | |active= | ||
|recovery= | |recovery= | ||
|advBlock= | |advBlock=+3 | ||
|cancel=J, N, Sp, Su | |cancel=J, N, Sp, Su | ||
|description= | |description=Mecha Heita does a kick up. This can launch the opponent, but it's not a high. It's pretty mediocre as far as command normals go. The same as Heita's. | ||
}} | }} | ||
{{AttackData-BBBR | {{AttackData-BBBR | ||
|damage= | |version=6[A] | ||
|damage=800 | |||
|guard=Mid | |guard=Mid | ||
|property= | |property= | ||
|startup= | |startup=29 | ||
|active= | |active= | ||
|recovery= | |recovery= | ||
|advBlock=- | |advBlock=-5 | ||
|cancel=N, Sp, Su | |cancel=J, N, Sp, Su | ||
|description= | |description=Now this is different. Mecha Heita has a charge version with knocks the opponent down and allows for combos after. A pretty useful tool, although the charge can take a while. | ||
}} | }} | ||
}} | }} | ||
== Universal Mechanics == | ==Universal Mechanics== | ||
====== <font style="visibility:hidden" size="0"> | ======<font style="visibility:hidden" size="0">Throw</font>====== | ||
{{MoveData | {{MoveData | ||
|image= | |image=BBBR_MHeita_5A.png | ||
|caption= | |caption= | ||
|name=Throw | |name=Throw | ||
|input=4 | |input={{NotationIcon-BBBR|5}}/{{NotationIcon-BBBR|4}}{{NotationIcon-BBBR|A}}{{NotationIcon-BBBR|B}} | ||
|data= | |data= | ||
{{AttackData-BBBR | {{AttackData-BBBR | ||
|damage= | |damage=1100 | ||
|guard=Unblockable | |guard=Unblockable | ||
|property= | |property= | ||
| Line 278: | Line 246: | ||
|advBlock= | |advBlock= | ||
|cancel=NC | |cancel=NC | ||
|description= | |description=Mecha Heita grabs the opponent and throws them to the ground. This is the same as Heita's grab with a little more damage. | ||
}} | }} | ||
}} | }} | ||
====== <font style="visibility:hidden" size="0">Big Bang Mode</font> ====== | ======<font style="visibility:hidden" size="0">Big Bang Mode</font>====== | ||
{{MoveData | {{MoveData | ||
|image= | |image=BBBR_MHeita_BBM.png | ||
|caption= | |caption= | ||
|name=Big Bang Mode | |name=Big Bang Mode | ||
|input= | |input={{NotationIcon-BBBR|BBM}} | ||
|data= | |data= | ||
{{AttackData-BBBR | {{AttackData-BBBR | ||
| Line 298: | Line 266: | ||
|advBlock= | |advBlock= | ||
|cancel= | |cancel= | ||
|description=Universal Big Bang Mode activation. Requires 3 bars and can be done anytime you have control on the ground. Lasts for about 7 seconds. | |description=Universal Big Bang Mode activation. Requires 3 bars and can be done anytime you have control on the ground. Lasts for about 7 seconds. During Big Bang Mode, Mecha Heita gains a massive boost to his walk, dash, and air dash speeds, which is very powerful but very dangerous unless you have a good grasp of the new speed. | ||
}} | }} | ||
}} | }} | ||
== Special Moves == | ==Special Moves== | ||
====== <font style="visibility:hidden" size="0">236A</font> ====== | ======<font style="visibility:hidden" size="0">236A</font>====== | ||
{{MoveData | {{MoveData | ||
|image= | |image=BBBR_MHeita_214A.png | ||
|caption= | |caption= | ||
|name= | |name=Heita Vulcan | ||
|input= | |input={{NotationIcon-BBBR|214}}{{NotationIcon-BBBR|A}} | ||
|data= | |data= | ||
{{AttackData-BBBR | {{AttackData-BBBR | ||
|damage=200* | |damage=200*4 (646) | ||
|guard= | |guard=All | ||
|property= | |property= | ||
|startup= | |startup=14 | ||
|active= | |active= | ||
|recovery= | |recovery= | ||
|advBlock=- | |advBlock=-42 | ||
|cancel= | |cancel= | ||
|description= | |description=Mecha Heita fires a series of bullets from his arm. This hits 4 times and is pretty terrible, as it is so minus that a lot of characters can fullscreen punish it. | ||
}} | }} | ||
}} | }} | ||
====== <font style="visibility:hidden" size="0"> | ======<font style="visibility:hidden" size="0">236C</font>====== | ||
{{MoveData | {{MoveData | ||
|image= | |image=BBBR_MHeita_236C.png | ||
|caption= | |caption= | ||
|name= | |name=Heita Missile | ||
|input= | |input={{NotationIcon-BBBR|236}}{{NotationIcon-BBBR|C}} | ||
|data= | |data= | ||
{{AttackData-BBBR | {{AttackData-BBBR | ||
|damage=400 (High Missile)<br>600 (Low Missile) | |||
|guard=All | |||
|damage= | |||
|guard= | |||
|property= | |property= | ||
|startup= | |startup=24 | ||
|active= | |active= | ||
|recovery= | |recovery= | ||
|advBlock= | |advBlock=+6 | ||
|cancel= | |cancel= | ||
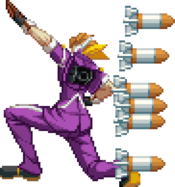
|description= | |description=Mecha Heita poses and launches two missiles out of his back, one going up high and the other going low. These have a pretty fast recovery, making them good mid-to-long range options to control space and keep the opponent blocking. | ||
}} | }} | ||
}} | }} | ||
====== <font style="visibility:hidden" size="0"> | ======<font style="visibility:hidden" size="0">623C</font>====== | ||
{{MoveData | {{MoveData | ||
|image= | |image=BBBR_MHeita_623C.png | ||
|caption= | |caption= | ||
|name= | |name=Heita Copter | ||
|input= | |input={{NotationIcon-BBBR|623}}{{NotationIcon-BBBR|C}} (Air OK) | ||
|data= | |data= | ||
{{AttackData-BBBR | {{AttackData-BBBR | ||
|damage=300+150*8 | |||
|damage= | |||
|guard=All | |guard=All | ||
|property= | |property= | ||
|startup= | |startup=9 | ||
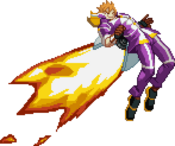
|active= | |active= | ||
|recovery= | |recovery= | ||
|advBlock= | |advBlock=-17 | ||
|cancel= | |cancel= | ||
|description= | |description=Mecha Heita's basic DP. It's a pretty good DP overall, and decent as a combo ender although you don't get a knockdown. The first hit does the most damage but in total there are 9 hits. | ||
}} | }} | ||
}} | }} | ||
====== <font style="visibility:hidden" size="0"> | ======<font style="visibility:hidden" size="0">421C</font>====== | ||
{{MoveData | {{MoveData | ||
|image= | |image=BBBR_MHeita_421C.png | ||
|caption= | |caption= | ||
|name= | |name=Heita Collider | ||
|input= | |input={{NotationIcon-BBBR|421}}{{NotationIcon-BBBR|C}} | ||
|data= | |data= | ||
{{AttackData-BBBR | {{AttackData-BBBR | ||
|damage= | |damage=200*N | ||
|guard= | |guard=All | ||
|property= | |property= | ||
|startup= | |startup=15 | ||
|active= | |active= | ||
|recovery= | |recovery= | ||
|advBlock= | |advBlock=+13 | ||
|cancel= | |cancel= | ||
|description= | |description=Mecha Heita strikes a pose and surrounds himself in an electric field. This can be held indefinitely, and does 200 damage each time it hits. It's not great but it does force the opponent to disjoint, so it has decent utility. | ||
}} | }} | ||
}} | }} | ||
====== <font style="visibility:hidden" size="0"> | ======<font style="visibility:hidden" size="0">41236A</font>====== | ||
{{MoveData | {{MoveData | ||
|image= | |image=BBBR_MHeita_41236A.png | ||
|caption= | |caption= | ||
|name= | |name=Heita Boost | ||
|input= | |input={{NotationIcon-BBBR|41236}}{{NotationIcon-BBBR|A}}<br>(Air OK) | ||
|data= | |data= | ||
{{AttackData-BBBR | {{AttackData-BBBR | ||
|damage= | |version=Ground | ||
|damage=700 | |||
|guard=All | |guard=All | ||
|property= | |property= | ||
|startup=14 | |startup=14 | ||
|active= | |active= | ||
|recovery= | |recovery= | ||
|advBlock=- | |advBlock=-27 | ||
|cancel= | |cancel= | ||
|description= | |description=Mecha Heita jets into the air. Oddly enough this is his best launcher, and allows for the start of rejump combos. It's not amazing but it has decent utility. | ||
}} | }} | ||
{{AttackData-BBBR | {{AttackData-BBBR | ||
|version=Air | |||
|damage=700 | |damage=700 | ||
|guard=All | |guard=All | ||
|property= | |property= | ||
|startup= | |startup=14 | ||
|active= | |active= | ||
|recovery= | |recovery= | ||
|advBlock= | |advBlock=-27 | ||
|cancel= | |cancel= | ||
|description= | |description=Mecha Heita jets downwards. His flight path is altered by his momentum, so he can actually fly upwards when used for a super jump. | ||
}} | }} | ||
}} | }} | ||
== B-Power Arts == | ==B-Power Arts== | ||
====== <font style="visibility:hidden" size="0"> | ======<font style="visibility:hidden" size="0">236D</font>====== | ||
{{MoveData | {{MoveData | ||
|image= | |image=BBBR_MHeita_236D.png | ||
|caption= | |caption= | ||
|name= | |name=Full Fire! | ||
|input= | |input={{NotationIcon-BBBR|236}}{{NotationIcon-BBBR|D}} | ||
|data= | |data= | ||
{{AttackData-BBBR | {{AttackData-BBBR | ||
|damage= | |damage=500*6 | ||
|guard= | |guard=All | ||
|property= | |property= | ||
|startup= | |startup=10+0 | ||
|active= | |active= | ||
|recovery= | |recovery= | ||
|advBlock= | |advBlock=+16 | ||
|cancel= | |cancel= | ||
|description= | |description=Mecha Heita launches 6 missiles from his back. This is the easiest way to rack up damage, and in Big Bang Mode you can easily build 6k combos with this as the damage base. | ||
}} | }} | ||
}} | }} | ||
====== <font style="visibility:hidden" size="0"> | ==Big Bang Break== | ||
======<font style="visibility:hidden" size="0">41236ABC</font>====== | |||
{{MoveData | {{MoveData | ||
|image= | |image=BBBR_MHeita_41236A.png | ||
|name=Bomber Attack! | |||
|name= | |input={{NotationIcon-BBBR|BBB}} | ||
|input= | |||
|data= | |data= | ||
{{AttackData-BBBR | {{AttackData-BBBR | ||
|damage= | |damage=6020 | ||
|guard=All | |||
|guard=All | |||
|property= | |property= | ||
|startup= | |startup= | ||
| Line 623: | Line 421: | ||
|advBlock= | |advBlock= | ||
|cancel= | |cancel= | ||
|description= | |description=Mecha Heita does a Heita Boost. If it lands, he launches into the air and explodes himself and the opponent. Good as a combo ender when in Big Bang Mode, but beware: '''''landing this move kills Mecha Heita, so be sure you're killing when using this!''''' | ||
}} | }} | ||
}} | }} | ||
== Combos == | ==Combos== | ||
{| class="mw-collapsible mw-collapsed" width="100%" | |||
|+ style="white-space:nowrap; border:1px solid; padding:3px;" |'''Combo Legend''' | |||
|- | |||
|{{ComboLegend-BBBR}} | |||
|} | |||
===<u>Combo Theory</u>=== | ===<u>Combo Theory</u>=== | ||
:*Combo damage varies from character to character, so all damage numbers come from testing on a full-health Rouga. | :*Combo damage varies from character to character, so all damage numbers come from testing on a full-health Rouga. | ||
| Line 636: | Line 439: | ||
==Colors== | ==Colors== | ||
{{ColorGallery | filePrefix= | {{ColorGallery | filePrefix=BBBR_MHeita_Color_ | colors= | ||
{{ColorGallery/Color|1| text= A Color}} | {{ColorGallery/Color|1| text=A Color}} | ||
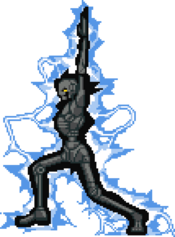
{{ColorGallery/Color|2| text= B Color}} | {{ColorGallery/Color|2| text=B Color}} | ||
{{ColorGallery/Color|3| text= C Color}} | {{ColorGallery/Color|3| text=C Color}} | ||
{{ColorGallery/Color|4| text= D Color}} | {{ColorGallery/Color|4| text=D Color}} | ||
}} | }} | ||
== BBBR Navigation == | |||
==BBBR Navigation== | |||
{{Navbox-BBBR}} | {{Navbox-BBBR}} | ||
[[Category:Mecha Heita]] | |||
[[Category:Big Bang Beat Revolve]] | [[Category:Big Bang Beat Revolve]] | ||
Latest revision as of 09:52, 27 June 2024
Under Construction
|
Introduction
A variant of ![]() Heita with a more mechanical spin, Mecha Heita is a tricky character with a lot of odd attacks. He has a lot of projectile options to space the opponent out with, as well as some decent pressure and oki tools. He's not a complicated character, but can be an interesting robot when you get the hang of him.
Heita with a more mechanical spin, Mecha Heita is a tricky character with a lot of odd attacks. He has a lot of projectile options to space the opponent out with, as well as some decent pressure and oki tools. He's not a complicated character, but can be an interesting robot when you get the hang of him.
Lore
Mecha Heita is a robot who serves the group called Holy Flame. Created by Jeanne and Jaudeau, president and right-hand man of the organization respectively, he is part of the latter's plan to sow chaos through his own creation: the Black Wolf Brigade, a facsimile of the Wolf Fang Brigade.
General Strategy
Mecha Heita is a hit-and-run-type character. His fast step dash, combined with strong specials and buttons for up close make him a menace, but once the opponent starts getting the hang of it, he can back off and use his projectile tools to keep the opponent right where he wants them, before securing a chance at more up close damage.
Normal Moves
Standing Normals
5A
5A
|
|---|
5B
5B
|
|---|
5C
5C
|
|---|
Crouching Normals
2A
2A
|
|---|
2B
2B
|
|---|
2C
2C
|
|---|
Air Normals
jA
jA
jump |
|---|
jB
jB
jump |
|---|
jC
jC
jump |
|---|
Command Normals
6A
6A
ROUNDHOUSE KICK |
|---|
Universal Mechanics
Throw
Throw
|
|---|
Big Bang Mode
Big Bang Mode
|
|---|
Special Moves
236A
Heita Vulcan
|
|---|
236C
Heita Missile
|
|---|
623C
Heita Copter
|
|---|
421C
Heita Collider
|
|---|
41236A
Heita Boost
(Air OK) |
|---|
B-Power Arts
236D
Full Fire!
|
|---|
Big Bang Break
41236ABC
Bomber Attack!
|
|---|
Combos
| |||||||||||||||||||||||||||||||||||||||||||||
Combo Theory
- Combo damage varies from character to character, so all damage numbers come from testing on a full-health Rouga.

