Big Bang Beat Revolve/Sanzou: Difference between revisions
No edit summary |
No edit summary |
||
| (3 intermediate revisions by the same user not shown) | |||
| Line 1: | Line 1: | ||
{{WIP}} | {{WIP}} | ||
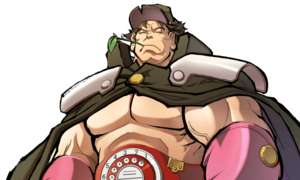
[[File:BBBR_Sanzou_Portrait.png|thumb|right|<center><font size="4"><b>Sanzou</b></font><br>'''Estimated Health (After Scaling): 13234'''</center>]] | |||
{{TOClimit|2}} | {{TOClimit|2}} | ||
==Introduction== | |||
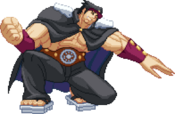
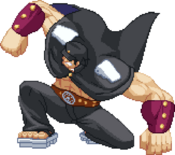
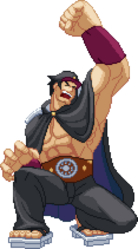
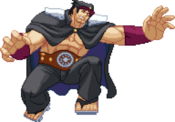
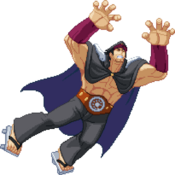
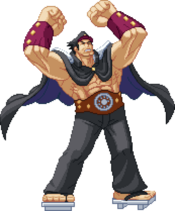
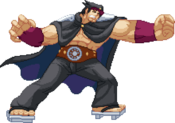
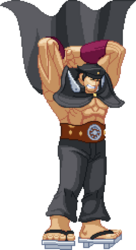
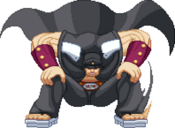
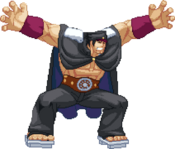
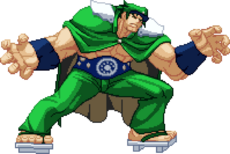
'''Sanzou''' is the token grappler, but he is also one of the worst characters in the game. With a reactable command grab, inconsistent damage, and slow movement, you have to work very hard to get what you want with him. | |||
== | ===Lore=== | ||
Sanzou Kongoumaru is the head supporter and gang geader of Tokyo's Sensouji Academy. His fighting power is so great he's called "the Iron Wall of Kongoumaru". Except, he is extremely weak when it comes to his sister Aya. His buckle is a mobile phone. | |||
==General Strategy== | |||
== General Strategy == | |||
This character is fairly undeveloped because of his weak abilities, but the gameplan is that of a standard grappler. His command grab isn't great but his normal throw can be used for some mix, and his Aegis Reflector super can be used for some crazy stuff. Overall the goal is to get in close, and use the command grab to set up combos and try to squeeze out as much damage while you're in as possible. | This character is fairly undeveloped because of his weak abilities, but the gameplan is that of a standard grappler. His command grab isn't great but his normal throw can be used for some mix, and his Aegis Reflector super can be used for some crazy stuff. Overall the goal is to get in close, and use the command grab to set up combos and try to squeeze out as much damage while you're in as possible. | ||
== Normal Moves == | ==Normal Moves== | ||
=== Standing Normals === | ===Standing Normals=== | ||
====== <font style="visibility:hidden" size="0">5A</font> ====== | ======<font style="visibility:hidden" size="0">5A</font>====== | ||
{{MoveData | {{MoveData | ||
|image=BBBR_Sanzou_5A.png | |image=BBBR_Sanzou_5A.png | ||
| Line 33: | Line 33: | ||
}} | }} | ||
====== <font style="visibility:hidden" size="0">5B</font> ====== | ======<font style="visibility:hidden" size="0">5B</font>====== | ||
{{MoveData | {{MoveData | ||
|image=BBBR_Sanzou_5B.png | |image=BBBR_Sanzou_5B.png | ||
| Line 53: | Line 53: | ||
}} | }} | ||
====== <font style="visibility:hidden" size="0">5C</font> ====== | ======<font style="visibility:hidden" size="0">5C</font>====== | ||
{{MoveData | {{MoveData | ||
|image=BBBR_Sanzou_5C.png | |image=BBBR_Sanzou_5C.png | ||
| Line 73: | Line 73: | ||
}} | }} | ||
=== Crouching Normals === | ===Crouching Normals=== | ||
====== <font style="visibility:hidden" size="0">2A</font> ====== | ======<font style="visibility:hidden" size="0">2A</font>====== | ||
{{MoveData | {{MoveData | ||
|image=BBBR_Sanzou_2A.png | |image=BBBR_Sanzou_2A.png | ||
| Line 94: | Line 94: | ||
}} | }} | ||
====== <font style="visibility:hidden" size="0">2B</font> ====== | ======<font style="visibility:hidden" size="0">2B</font>====== | ||
{{MoveData | {{MoveData | ||
|image=BBBR_Sanzou_2B.png | |image=BBBR_Sanzou_2B.png | ||
| Line 114: | Line 114: | ||
}} | }} | ||
====== <font style="visibility:hidden" size="0">2C</font> ====== | ======<font style="visibility:hidden" size="0">2C</font>====== | ||
{{MoveData | {{MoveData | ||
|image=BBBR_Sanzou_2C.png | |image=BBBR_Sanzou_2C.png | ||
| Line 134: | Line 134: | ||
}} | }} | ||
=== Air Normals === | ===Air Normals=== | ||
====== <font style="visibility:hidden" size="0">jA</font> ====== | ======<font style="visibility:hidden" size="0">jA</font>====== | ||
{{MoveData | {{MoveData | ||
|image=BBBR_Sanzou_jA.png | |image=BBBR_Sanzou_jA.png | ||
| Line 151: | Line 151: | ||
|advBlock= | |advBlock= | ||
|cancel=N, Sp, Su | |cancel=N, Sp, Su | ||
|description= A solid air jab. This is best used as an air-to-air due to its good amount of range. | |description=A solid air jab. This is best used as an air-to-air due to its good amount of range. | ||
}} | }} | ||
}} | }} | ||
====== <font style="visibility:hidden" size="0">jB</font> ====== | ======<font style="visibility:hidden" size="0">jB</font>====== | ||
{{MoveData | {{MoveData | ||
|image=BBBR_Sanzou_jB.png | |image=BBBR_Sanzou_jB.png | ||
| Line 171: | Line 171: | ||
|advBlock= | |advBlock= | ||
|cancel=N, Sp, Su | |cancel=N, Sp, Su | ||
|description= A bellyflop. This is a decent jump-in with some combo potential, but it's a pretty weak button overall. | |description=A bellyflop. This is a decent jump-in with some combo potential, but it's a pretty weak button overall. | ||
}} | }} | ||
}} | }} | ||
====== <font style="visibility:hidden" size="0">jC</font> ====== | ======<font style="visibility:hidden" size="0">jC</font>====== | ||
{{MoveData | {{MoveData | ||
|image=BBBR_Sanzou_jC.png | |image=BBBR_Sanzou_jC.png | ||
| Line 190: | Line 190: | ||
|advBlock= | |advBlock= | ||
|cancel=N, Sp, Su | |cancel=N, Sp, Su | ||
|description= Easily Sanzou's best air normal. Long range, good hitbox, it's got everything you would want from an air normal. | |description=Easily Sanzou's best air normal. Long range, good hitbox, it's got everything you would want from an air normal. | ||
}} | }} | ||
}} | }} | ||
== Command Normals == | ==Command Normals== | ||
====== <font style="visibility:hidden" size="0">6B</font> ====== | ======<font style="visibility:hidden" size="0">6B</font>====== | ||
{{MoveData | {{MoveData | ||
|image=BBBR_Sanzou_6B.png | |image=BBBR_Sanzou_6B.png | ||
| Line 216: | Line 216: | ||
}} | }} | ||
== Universal Mechanics == | ==Universal Mechanics== | ||
====== <font style="visibility:hidden" size="0">5D</font> ====== | ======<font style="visibility:hidden" size="0">5D</font>====== | ||
{{MoveData | {{MoveData | ||
|image=BBBR_Sanzou_5D.png | |image=BBBR_Sanzou_5D.png | ||
| Line 237: | Line 237: | ||
}} | }} | ||
====== <font style="visibility:hidden" size="0">Throw</font> ====== | ======<font style="visibility:hidden" size="0">Throw</font>====== | ||
{{MoveData | {{MoveData | ||
|image=BBBR_Sanzou_6B.png | |image=BBBR_Sanzou_6B.png | ||
| Line 257: | Line 257: | ||
}} | }} | ||
====== <font style="visibility:hidden" size="0">Big Bang Mode</font> ====== | ======<font style="visibility:hidden" size="0">Big Bang Mode</font>====== | ||
{{MoveData | {{MoveData | ||
|image=BBBR_Sanzou_BBM.png | |image=BBBR_Sanzou_BBM.png | ||
| Line 277: | Line 277: | ||
}} | }} | ||
== Special Moves == | ==Special Moves== | ||
====== <font style="visibility:hidden" size="0">41236A</font> ====== | ======<font style="visibility:hidden" size="0">41236A</font>====== | ||
{{MoveData | {{MoveData | ||
|image=BBBR_Sanzou_41236A.png | |image=BBBR_Sanzou_41236A.png | ||
| Line 297: | Line 297: | ||
}} | }} | ||
====== <font style="visibility:hidden" size="0">41236A~A</font> ====== | ======<font style="visibility:hidden" size="0">41236A~A</font>====== | ||
{{MoveData | {{MoveData | ||
|image=BBBR_Sanzou_41236AA.png | |image=BBBR_Sanzou_41236AA.png | ||
| Line 317: | Line 317: | ||
}} | }} | ||
====== <font style="visibility:hidden" size="0">214B</font> ====== | ======<font style="visibility:hidden" size="0">214B</font>====== | ||
{{MoveData | {{MoveData | ||
|image=BBBR_Sanzou_41236AB.png | |image=BBBR_Sanzou_41236AB.png | ||
| Line 337: | Line 337: | ||
}} | }} | ||
====== <font style="visibility:hidden" size="0">214C</font> ====== | ======<font style="visibility:hidden" size="0">214C</font>====== | ||
{{MoveData | {{MoveData | ||
|image=BBBR_Sanzou_214C.png | |image=BBBR_Sanzou_214C.png | ||
| Line 357: | Line 357: | ||
}} | }} | ||
====== <font style="visibility:hidden" size="0">623C</font> ====== | ======<font style="visibility:hidden" size="0">623C</font>====== | ||
{{MoveData | {{MoveData | ||
|image=BBBR_Sanzou_623C.png | |image=BBBR_Sanzou_623C.png | ||
| Line 377: | Line 377: | ||
}} | }} | ||
====== <font style="visibility:hidden" size="0">22X</font> ====== | ======<font style="visibility:hidden" size="0">22X</font>====== | ||
{{MoveData | {{MoveData | ||
|image=BBBR_Sanzou_22X.png | |image=BBBR_Sanzou_22X.png | ||
| Line 422: | Line 422: | ||
}} | }} | ||
====== <font style="visibility:hidden" size="0">63214A</font> ====== | ======<font style="visibility:hidden" size="0">63214A</font>====== | ||
{{MoveData | {{MoveData | ||
|image=BBBR_Sanzou_63214A.png | |image=BBBR_Sanzou_63214A.png | ||
| Line 441: | Line 441: | ||
}} | }} | ||
====== <font style="visibility:hidden" size="0">63214C</font> ====== | ======<font style="visibility:hidden" size="0">63214C</font>====== | ||
{{MoveData | {{MoveData | ||
|image=BBBR_Sanzou_63214C.png | |image=BBBR_Sanzou_63214C.png | ||
| Line 460: | Line 460: | ||
}} | }} | ||
== B-Power Arts == | ==B-Power Arts== | ||
====== <font style="visibility:hidden" size="0">63214D</font> ====== | ======<font style="visibility:hidden" size="0">63214D</font>====== | ||
{{MoveData | {{MoveData | ||
|image=BBBR_Sanzou_22X.png | |image=BBBR_Sanzou_22X.png | ||
| Line 481: | Line 481: | ||
}} | }} | ||
====== <font style="visibility:hidden" size="0">41236D</font> ====== | ======<font style="visibility:hidden" size="0">41236D</font>====== | ||
{{MoveData | {{MoveData | ||
|image=BBBR_Sanzou_63214C.png | |image=BBBR_Sanzou_63214C.png | ||
| Line 501: | Line 501: | ||
}} | }} | ||
== Big Bang Break == | ==Big Bang Break== | ||
====== <font style="visibility:hidden" size="0">41236ABC</font> ====== | ======<font style="visibility:hidden" size="0">41236ABC</font>====== | ||
{{MoveData | {{MoveData | ||
|image=BBBR_Sanzou_623C.png | |image=BBBR_Sanzou_623C.png | ||
| Line 521: | Line 521: | ||
}} | }} | ||
== Combos == | ==Combos== | ||
{| class="mw-collapsible mw-collapsed" width="100%" | |||
|+ style="white-space:nowrap; border:1px solid; padding:3px;" |'''Combo Legend''' | |||
|- | |||
|{{ComboLegend-BBBR}} | |||
|} | |||
===<u>Combo Theory</u>=== | ===<u>Combo Theory</u>=== | ||
:*Combo damage varies from character to character, so all damage numbers come from testing on a full-health Rouga. | :*Combo damage varies from character to character, so all damage numbers come from testing on a full-health Rouga. | ||
| Line 533: | Line 538: | ||
==Colors== | ==Colors== | ||
{{ColorGallery | filePrefix=BBBR_Sanzou_Color_ | colors= | {{ColorGallery | filePrefix=BBBR_Sanzou_Color_ | colors= | ||
{{ColorGallery/Color|1| text= A Color}} | {{ColorGallery/Color|1| text=A Color}} | ||
{{ColorGallery/Color|2| text= B Color}} | {{ColorGallery/Color|2| text=B Color}} | ||
{{ColorGallery/Color|3| text= C Color}} | {{ColorGallery/Color|3| text=C Color}} | ||
{{ColorGallery/Color|4| text= D Color}} | {{ColorGallery/Color|4| text=D Color}} | ||
}} | }} | ||
== BBBR Navigation == | ==BBBR Navigation== | ||
{{Navbox-BBBR}} | {{Navbox-BBBR}} | ||
[[Category:Sanzou]] | |||
[[Category:Big Bang Beat Revolve]] | [[Category:Big Bang Beat Revolve]] | ||
Latest revision as of 09:55, 27 June 2024
Under Construction
|
Introduction
Sanzou is the token grappler, but he is also one of the worst characters in the game. With a reactable command grab, inconsistent damage, and slow movement, you have to work very hard to get what you want with him.
Lore
Sanzou Kongoumaru is the head supporter and gang geader of Tokyo's Sensouji Academy. His fighting power is so great he's called "the Iron Wall of Kongoumaru". Except, he is extremely weak when it comes to his sister Aya. His buckle is a mobile phone.
General Strategy
This character is fairly undeveloped because of his weak abilities, but the gameplan is that of a standard grappler. His command grab isn't great but his normal throw can be used for some mix, and his Aegis Reflector super can be used for some crazy stuff. Overall the goal is to get in close, and use the command grab to set up combos and try to squeeze out as much damage while you're in as possible.
Normal Moves
Standing Normals
5A
5A
|
|---|
5B
5B
|
|---|
5C
5C
|
|---|
Crouching Normals
2A
2A
|
|---|
2B
2B
|
|---|
2C
2C
|
|---|
Air Normals
jA
jA
jump |
|---|
jB
jB
jump |
|---|
jC
jC
jump |
|---|
Command Normals
6B
6B
Tile Breaker |
|---|
Universal Mechanics
5D
Steel Guard
|
|---|
Throw
Throw
|
|---|
Big Bang Mode
Big Bang Mode
|
|---|
Special Moves
41236A
Endurance
|
|---|
41236A~A
Step Forward
|
|---|
214B
Purging
~ |
|---|
214C
Iron Fist
|
|---|
623C
Iron Stomp
|
|---|
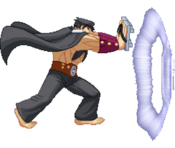
22X
Rumble
|
|---|
63214A
Bedrock Reverse
|
|---|
63214C
Ironclad
(during blockstun) |
|---|
B-Power Arts
63214D
Super Iron Fist
|
|---|
41236D
Super Ironclad
|
|---|
Big Bang Break
41236ABC
Crushing Fist
|
|---|
Combos
| |||||||||||||||||||||||||||||||||||||||||||||
Combo Theory
- Combo damage varies from character to character, so all damage numbers come from testing on a full-health Rouga.
- The main goal with Sanzou is to get close enough to the opponent either befor or during the combo to land 2C. If you can get a 2C you're golden, as it opens up his combos significantly
Midscreen
Corner
- 5B > 5C(1) > 6B > 2C > 214C > dl.5B > 5C > 2C > 623C (3360)
- A pretty strong meterless combo, but you have to be point blank for it to work. omit the dl.5B for more consistency, and let both hits of the first 5C hit with some characters, while it won't work for others.
