Big Bang Beat Revolve/Devil: Difference between revisions
Jump to navigation
Jump to search

(→236X) |
|||
| Line 310: | Line 310: | ||
}} | }} | ||
====== <font style="visibility:hidden" size="0"> | ====== <font style="visibility:hidden" size="0">623X</font> ====== | ||
{{MoveData | {{MoveData | ||
|image=BBBR_Devil_623X.png | |image=BBBR_Devil_623X.png | ||
|caption= | |caption= | ||
|name=Daigo Wing! | |name=Daigo Wing! | ||
|input=623A/B | |input=(j)623A/B | ||
|data= | |data= | ||
{{AttackData-BBBR | {{AttackData-BBBR | ||
| Line 340: | Line 340: | ||
|cancel= | |cancel= | ||
|description=This version only hits once and doesn't travel as high, but it can be comboed after, making it a surprisingly good launcher. | |description=This version only hits once and doesn't travel as high, but it can be comboed after, making it a surprisingly good launcher. | ||
}} | }} | ||
}} | }} | ||
Revision as of 19:57, 9 June 2024
 |
Under Construction
|

Introduction
This character doesn't have much going for him, but most of his options are based in the air. Devil excels in the air more than anything else.
This is Daigo's powered up form (although you wouldn't guess it from his strength in this game).
General Strategy
Honestly, this character really can't do much. Your best option is to air stall and bait an anti air from the opponent, before going in for a punish. Daigo's only move the knocks down is his Super, which can only be done on the ground, so when you have meter the best plan is to route a ground based combo so you can get oki and get the rare chance to pressure the opponent.
Normal Moves
Standing Normals
5A
5A  |
|---|
5B
5B  |
|---|
5C
5C  |
|---|
Crouching Normals
2A
2A  |
|---|
2B
2B  |
|---|
2C
2C  |
|---|
Air Normals
jA
jA  |
|---|
jB
jB  |
|---|
jC
jC  1st hit 1st hit  2nd hit 2nd hit
|
|---|
Command Normals
6B
6C (air) |
|---|
Universal Mechanics
Throw
Throw 4/5AB  |
|---|
Big Bang Mode
Big Bang Mode ABC  |
|---|
Special Moves
236X
Daigo Beam! (j)236A/B/C A version A version B/C version B/C version Air version Air version
|
|---|
214A
Daigo Voice! 214A  |
|---|
623X
Daigo Wing! (j)623A/B  |
|---|
B-Power Arts
214D
Wild Fang 214D |
|---|
j214D
Wild Shoot j214D  |
|---|
j214D~22D
Wolf Shoot Chase j214D~22D |
|---|
Big Bang Break
41236ABC
Wolf Fang 41236ABC  |
|---|
Combos
Combo Theory
- Combo damage varies from character to character, so all damage numbers come from testing on a full-health Rouga.
Midscreen
- 5B > 5C > 2C xx 214A xx 214B > 5B xx 214A xx dl.214B > 2C > 6A > dl.5C > j.B xx Boost > j.A > j.B xx j.214A (3747)
- A very strong meterless midscreen combo, for all intents and purposes Rouga's BNB. It will always send the opponent to the corner, and give you oki on the knockdown.
- 6B xx j.214A xx Boost > dl.j.B > 214A xx dl.214B > 5B xx 214A xx dl.214B > 2C > 6A > dl.5C > 6A xx *623A (2961)
- Good midscreen confirm off Rouga's overhead.
- 5B > 5C xx 2147D > *5C xx 214B > 2C xx 214A xx 214B > 2C > 6A > dl.5C > 6A xx *623A (5183)
- A very damaging combo midscreen that uses 1 meter. Just solid all around.
Corner
- 6B xx j.214A > 5C xx 214A xx dl.214B > 5B xx 214A xx dl.214B > 2C > 6A > dl.5C > 6A xx dl.623A (3589)
- Meterless corner combo for Rouga. This character has more damage than practically anyone else in the game, and this is a great example.
Colors
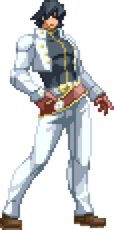
A Color

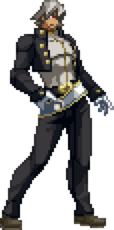
B Color

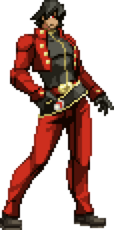
C Color

D Color
