
Heita Kick  |
| |||||||||||||||||||||||||
|---|---|---|---|---|---|---|---|---|---|---|---|---|---|---|---|---|---|---|---|---|---|---|---|---|---|---|
Big Bang Beat Revolve/Heita: Difference between revisions
Jump to navigation
Jump to search


No edit summary |
No edit summary |
||
| Line 18: | Line 18: | ||
|caption= | |caption= | ||
|name=5A | |name=5A | ||
|input={{NotationIcon-BBBR|A}} | |||
|data= | |data= | ||
{{AttackData-BBBR | {{AttackData-BBBR | ||
| Line 37: | Line 38: | ||
|caption= | |caption= | ||
|name=5B | |name=5B | ||
|input={{NotationIcon-BBBR|B}} | |||
|data= | |data= | ||
{{AttackData-BBBR | {{AttackData-BBBR | ||
| Line 56: | Line 58: | ||
|caption= | |caption= | ||
|name=5C | |name=5C | ||
|input={{NotationIcon-BBBR|C}} | |||
|data= | |data= | ||
{{AttackData-BBBR | {{AttackData-BBBR | ||
| Line 76: | Line 79: | ||
|caption= | |caption= | ||
|name=2A | |name=2A | ||
|input={{NotationIcon-BBBR|2}}{{NotationIcon-BBBR|A}} | |||
|data= | |data= | ||
{{AttackData-BBBR | {{AttackData-BBBR | ||
| Line 95: | Line 99: | ||
|caption= | |caption= | ||
|name=2B | |name=2B | ||
|input={{NotationIcon-BBBR|2}}{{NotationIcon-BBBR|B}} | |||
|data= | |data= | ||
{{AttackData-BBBR | {{AttackData-BBBR | ||
| Line 114: | Line 119: | ||
|caption= | |caption= | ||
|name=2C | |name=2C | ||
|input={{NotationIcon-BBBR|2}}{{NotationIcon-BBBR|C}} | |||
|data= | |data= | ||
{{AttackData-BBBR | {{AttackData-BBBR | ||
| Line 134: | Line 140: | ||
|caption= | |caption= | ||
|name=jA | |name=jA | ||
|input=jump {{NotationIcon-BBBR|A}} | |||
|data= | |data= | ||
{{AttackData-BBBR | {{AttackData-BBBR | ||
| Line 153: | Line 160: | ||
|caption= | |caption= | ||
|name=jB | |name=jB | ||
|input=jump {{NotationIcon-BBBR|B}} | |||
|data= | |data= | ||
{{AttackData-BBBR | {{AttackData-BBBR | ||
| Line 171: | Line 179: | ||
|image=BBBR_Heita_jC.png | |image=BBBR_Heita_jC.png | ||
|name=jC | |name=jC | ||
|input=jump {{NotationIcon-BBBR|C}} | |||
|data= | |data= | ||
{{AttackData-BBBR | {{AttackData-BBBR | ||
| Line 191: | Line 200: | ||
|caption= | |caption= | ||
|name=6A | |name=6A | ||
|subtitle=Roundhouse Kick | |||
|input={{NotationIcon-BBBR|6}}{{NotationIcon-BBBR|A}} | |||
|data= | |data= | ||
{{AttackData-BBBR | {{AttackData-BBBR | ||
| Line 211: | Line 222: | ||
|caption= | |caption= | ||
|name=Aim to be a Man! | |name=Aim to be a Man! | ||
|input= | |input={{NotationIcon-BBBR|D}} | ||
|data= | |data= | ||
{{AttackData-BBBR | {{AttackData-BBBR | ||
| Line 231: | Line 242: | ||
|caption= | |caption= | ||
|name=Throw | |name=Throw | ||
|input=5/ | |input={{NotationIcon-BBBR|5}}/{{NotationIcon-BBBR|4}}{{NotationIcon-BBBR|A}}{{NotationIcon-BBBR|B}} | ||
|data= | |data= | ||
{{AttackData-BBBR | {{AttackData-BBBR | ||
| Line 251: | Line 262: | ||
|caption= | |caption= | ||
|name=Big Bang Mode | |name=Big Bang Mode | ||
|input= | |input={{NotationIcon-BBBR|A}}{{NotationIcon-BBBR|B}}{{NotationIcon-BBBR|C}} | ||
|data= | |data= | ||
{{AttackData-BBBR | {{AttackData-BBBR | ||
| Line 262: | Line 273: | ||
|advBlock= | |advBlock= | ||
|cancel= | |cancel= | ||
|description=Universal Big Bang Mode activation. Requires 3 bars and can be done anytime you have control on the ground. Lasts for about 7 seconds | |description=Universal Big Bang Mode activation. Requires 3 bars and can be done anytime you have control on the ground. Lasts for about 7 seconds. Heita has indisputably the best Big Bang Mode in the game, only compounded by his D skill, which gives him more time to be in this state (adding an extra 7 seconds per {{NotationIcon-BBBR|HeitaStar}} '''Star'''). While in Big Bang Mode, Heita becomes Super Heita, an install which buffs most of his specials and supers. This is essentially his win condition, and if you have enough Star stocks, you basically win. | ||
}} | }} | ||
}} | }} | ||
| Line 272: | Line 283: | ||
|caption= | |caption= | ||
|name=Otoko no Tamashii | |name=Otoko no Tamashii | ||
|input= | |input={{NotationIcon-BBBR|2}}{{NotationIcon-BBBR|3}}{{NotationIcon-BBBR|6}}{{NotationIcon-BBBR|A}} | ||
|data= | |data= | ||
{{AttackData-BBBR | {{AttackData-BBBR | ||
| Line 293: | Line 304: | ||
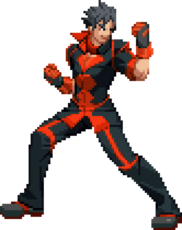
|image=BBBR_Heita_214A.png | |image=BBBR_Heita_214A.png | ||
|name=Heita Kick | |name=Heita Kick | ||
|input= | |input={{NotationIcon-BBBR|2}}{{NotationIcon-BBBR|1}}{{NotationIcon-BBBR|4}}{{NotationIcon-BBBR|A}} | ||
|data= | |data= | ||
{{AttackData-BBBR | {{AttackData-BBBR | ||
| Line 303: | Line 314: | ||
|advBlock= | |advBlock= | ||
|cancel=NC | |cancel=NC | ||
|description=Heita strikes a pose and does a flying kick. This isn't the best move since it can't be cancelled | |description=Heita strikes a pose and does a flying kick. This isn't the best move since it can't be cancelled and the recovery isn't great, but it can catch the opponent unawares. | ||
}} | }} | ||
}} | }} | ||
| Line 310: | Line 321: | ||
|image=BBBR_Heita_214A-2.png | |image=BBBR_Heita_214A-2.png | ||
|caption= | |caption= | ||
|name=Heita Kick | |name=Heita Kick | ||
|input= | |input={{NotationIcon-BBBR|2}}{{NotationIcon-BBBR|1}}{{NotationIcon-BBBR|4}}{{NotationIcon-BBBR|A}} | ||
|data= | |data= | ||
{{AttackData-BBBR | {{AttackData-BBBR | ||
| Line 333: | Line 344: | ||
|caption= | |caption= | ||
|name=Heita Shoot | |name=Heita Shoot | ||
|input= | |input=jump {{NotationIcon-BBBR|2}}{{NotationIcon-BBBR|1}}{{NotationIcon-BBBR|4}}{{NotationIcon-BBBR|A}} | ||
|data= | |data= | ||
{{AttackData-BBBR | {{AttackData-BBBR | ||
| Line 352: | Line 363: | ||
|caption= | |caption= | ||
|name=Heita Shoot | |name=Heita Shoot | ||
|input= | |input=jump {{NotationIcon-BBBR|2}}{{NotationIcon-BBBR|1}}{{NotationIcon-BBBR|4}}{{NotationIcon-BBBR|A}} | ||
|data= | |data= | ||
{{AttackData-BBBR | {{AttackData-BBBR | ||
| Line 375: | Line 386: | ||
|caption= | |caption= | ||
|name=Otoko no Knuckle | |name=Otoko no Knuckle | ||
|input= | |input={{NotationIcon-BBBR|4}}{{NotationIcon-BBBR|1}}{{NotationIcon-BBBR|2}}{{NotationIcon-BBBR|3}}{{NotationIcon-BBBR|6}}{{NotationIcon-BBBR|C}} | ||
|data= | |data= | ||
{{AttackData-BBBR | {{AttackData-BBBR | ||
|damage=500 | |damage=500 | ||
|guard=Mid | |guard=Mid | ||
|property= | |property=Invincible (Projectile) | ||
|startup= | |startup= | ||
|active= | |active= | ||
| Line 386: | Line 397: | ||
|advBlock= | |advBlock= | ||
|cancel=Su | |cancel=Su | ||
|description=Heita performs a dashing straight punch. It's super cancellable and has projectile invulnerability, and will wallbounce opponents that are in the air. | |description=Heita performs a dashing straight punch. It's super-cancellable and has projectile invulnerability, and will wallbounce opponents that are in the air. | ||
}} | }} | ||
}} | }} | ||
| Line 393: | Line 404: | ||
|image=BBBR_Heita_41236C-2.png | |image=BBBR_Heita_41236C-2.png | ||
|caption= | |caption= | ||
|name=Otoko no Knuckle | |name=Otoko no Knuckle | ||
|input= | |input={{NotationIcon-BBBR|4}}{{NotationIcon-BBBR|1}}{{NotationIcon-BBBR|2}}{{NotationIcon-BBBR|3}}{{NotationIcon-BBBR|6}}{{NotationIcon-BBBR|C}} | ||
|data= | |data= | ||
{{AttackData-BBBR | {{AttackData-BBBR | ||
| Line 405: | Line 416: | ||
|advBlock= | |advBlock= | ||
|cancel=Su | |cancel=Su | ||
|description=This version is a lot faster and stronger, and allows for better combo routes too. All around this is the standard Super Heita special. | |description=This version is a lot faster and stronger, and allows for better combo routes too. All around, this is the standard Super Heita special. | ||
}} | }} | ||
}} | }} | ||
| Line 416: | Line 427: | ||
|image=BBBR_Heita_623C.png | |image=BBBR_Heita_623C.png | ||
|name=Otoko Taikuu | |name=Otoko Taikuu | ||
|input= | |input={{NotationIcon-BBBR|6}}{{NotationIcon-BBBR|2}}{{NotationIcon-BBBR|3}}{{NotationIcon-BBBR|C}} (Air OK) | ||
|data= | |data= | ||
{{AttackData-BBBR | {{AttackData-BBBR | ||
| Line 427: | Line 438: | ||
|advBlock= | |advBlock= | ||
|cancel= | |cancel= | ||
|description=Heita does a rising uppercut. This is a pretty standard DP with all the positives and drawbacks. Its slow recovery means | |description=Heita does a rising uppercut. This is a pretty standard DP with all the positives and drawbacks. Its slow recovery means you'll get blown up if you're wrong, but conversely it's a great tool to stuff an opponent's air approach. | ||
}} | }} | ||
}} | }} | ||
| Line 434: | Line 445: | ||
|image=BBBR_Heita_623C-2.png | |image=BBBR_Heita_623C-2.png | ||
|name=Otoko Taikuu | |name=Otoko Taikuu | ||
|input= | |input={{NotationIcon-BBBR|6}}{{NotationIcon-BBBR|2}}{{NotationIcon-BBBR|3}}{{NotationIcon-BBBR|C}} | ||
|data= | |data= | ||
{{AttackData-BBBR | {{AttackData-BBBR | ||
| Line 445: | Line 456: | ||
|advBlock= | |advBlock= | ||
|cancel= | |cancel= | ||
|description=This DP goes more diagonally, making it a stronger option for anti airing. It also does significantly more damage and is a lot faster, making it not remarkably better, but a solid upgrade. | |description=This DP goes more diagonally, making it a stronger option for anti-airing. It also does significantly more damage and is a lot faster, making it not remarkably better, but a solid upgrade. | ||
}} | }} | ||
}} | }} | ||
| Line 455: | Line 466: | ||
{{MoveData | {{MoveData | ||
|image=BBBR_Heita_63214C1.png | |image=BBBR_Heita_63214C1.png | ||
|caption=1st kick | |||
|image2=BBBR_Heita_6A.png | |image2=BBBR_Heita_6A.png | ||
|caption2=2nd kick | |caption2=2nd kick | ||
|name=Zinnai-ryuu Nidan Mawashi | |name=Zinnai-ryuu Nidan Mawashi | ||
|input= | |input={{NotationIcon-BBBR|6}}{{NotationIcon-BBBR|3}}{{NotationIcon-BBBR|2}}{{NotationIcon-BBBR|1}}{{NotationIcon-BBBR|4}}{{NotationIcon-BBBR|C}} | ||
|data= | |data= | ||
{{AttackData-BBBR | {{AttackData-BBBR | ||
|damage= | |damage=500*2 | ||
|guard= | |guard=Mid | ||
|property= | |property= | ||
|startup= | |startup= | ||
| Line 476: | Line 487: | ||
{{MoveData | {{MoveData | ||
|image=BBBR_Heita_63214C-21.png | |image=BBBR_Heita_63214C-21.png | ||
|caption=1st kick | |||
|image2=BBBR_Heita_63214C-22.png | |image2=BBBR_Heita_63214C-22.png | ||
|caption2=2nd kick | |caption2=2nd kick | ||
|name=Zinnai-ryuu Nidan Mawashi | |name=Zinnai-ryuu Nidan Mawashi | ||
|input= | |input={{NotationIcon-BBBR|6}}{{NotationIcon-BBBR|3}}{{NotationIcon-BBBR|2}}{{NotationIcon-BBBR|1}}{{NotationIcon-BBBR|4}}{{NotationIcon-BBBR|C}} | ||
|data= | |data= | ||
{{AttackData-BBBR | {{AttackData-BBBR | ||
|damage= | |damage=700*2 | ||
|guard= | |guard=Mid | ||
|property= | |property= | ||
|startup= | |startup= | ||
| Line 501: | Line 512: | ||
|caption= | |caption= | ||
|name=Konjou Hashire | |name=Konjou Hashire | ||
|input= | |input={{NotationIcon-BBBR|6}}{{NotationIcon-BBBR|3}}{{NotationIcon-BBBR|2}}{{NotationIcon-BBBR|1}}{{NotationIcon-BBBR|4}}{{NotationIcon-BBBR|A}} | ||
|data= | |data= | ||
{{AttackData-BBBR | {{AttackData-BBBR | ||
|damage= | |damage=N/A | ||
|guard= | |guard=N/A | ||
|property= | |property=Armor (1 Hit) | ||
|startup= | |startup= | ||
|active= | |active= | ||
| Line 512: | Line 523: | ||
|advBlock= | |advBlock= | ||
|cancel= | |cancel= | ||
|description=Heita does a command run, | |description=Heita does a command run, having access to several follow-ups. A is a backdash, B is Otoko Taikuu, C is Otoko Knuckle, and AB is throw. This is a very strong approach tool as Heita gets one hit of armor, so the opponent can easily get punished for trying to stop him if they aren't looking for it. Once Heita closes in with the move, it's basically a guessing game from the opponent as to what follow-up he'll do. | ||
}} | }} | ||
}} | }} | ||
| Line 521: | Line 532: | ||
|image=BBBR_Heita_214A.png | |image=BBBR_Heita_214A.png | ||
|caption= | |caption= | ||
|name=HEITA KIIICK | |name=HEITA KIIICK<nowiki>!!</nowiki> | ||
|input= | |input={{NotationIcon-BBBR|2}}{{NotationIcon-BBBR|1}}{{NotationIcon-BBBR|4}}{{NotationIcon-BBBR|D}} | ||
|data= | |data= | ||
{{AttackData-BBBR | {{AttackData-BBBR | ||
| Line 533: | Line 544: | ||
|advBlock= | |advBlock= | ||
|cancel= | |cancel= | ||
|description=Heita performs a longer ranged Heita Kick. With enough meter and proper timing, Heita can combo into j.214D afterwards. | |description=Heita performs a longer-ranged Heita Kick. With enough meter and proper timing, Heita can combo into j.214D afterwards. | ||
}} | }} | ||
}} | }} | ||
====== <font style="visibility:hidden" size="0"> | ====== <font style="visibility:hidden" size="0">j214D</font> ====== | ||
{{MoveData | {{MoveData | ||
|image=BBBR_Heita_j214A.png | |image=BBBR_Heita_j214A.png | ||
|caption= | |caption= | ||
|name=Zinnai-ryuu Tenkuukyaku | |name=Zinnai-ryuu Tenkuukyaku | ||
|input= | |input=jump {{NotationIcon-BBBR|2}}{{NotationIcon-BBBR|1}}{{NotationIcon-BBBR|4}}{{NotationIcon-BBBR|D}} | ||
|data= | |data= | ||
{{AttackData-BBBR | {{AttackData-BBBR | ||
| Line 564: | Line 575: | ||
|caption= | |caption= | ||
|name=Zinnai-ryuu Rising Dragon | |name=Zinnai-ryuu Rising Dragon | ||
|input= | |input={{NotationIcon-BBBR|6}}{{NotationIcon-BBBR|2}}{{NotationIcon-BBBR|3}}{{NotationIcon-BBBR|D}} | ||
|data= | |data= | ||
{{AttackData-BBBR | {{AttackData-BBBR | ||
| Line 583: | Line 594: | ||
|caption= | |caption= | ||
|name=Zinnai-ryuu Rising Dragon | |name=Zinnai-ryuu Rising Dragon | ||
|input= | |input={{NotationIcon-BBBR|6}}{{NotationIcon-BBBR|2}}{{NotationIcon-BBBR|3}}{{NotationIcon-BBBR|D}} | ||
|data= | |data= | ||
{{AttackData-BBBR | {{AttackData-BBBR | ||
|damage= | |damage=2482 | ||
|guard=All, High/Air | |guard=All, High/Air | ||
|property=Invincible | |property=Invincible | ||
| Line 604: | Line 615: | ||
|image=BBBR_Heita_BBM.png | |image=BBBR_Heita_BBM.png | ||
|name=Decade Knuckle | |name=Decade Knuckle | ||
|input= | |input={{NotationIcon-BBBR|4}}{{NotationIcon-BBBR|1}}{{NotationIcon-BBBR|2}}{{NotationIcon-BBBR|3}}{{NotationIcon-BBBR|6}}{{NotationIcon-BBBR|A}}{{NotationIcon-BBBR|B}}{{NotationIcon-BBBR|C}} | ||
|data= | |data= | ||
{{AttackData-BBBR | {{AttackData-BBBR | ||
Revision as of 23:37, 11 June 2024
 |
Under Construction
|
Introduction
Heita is a rushdown-style shoto, the Ken to Rouga's Ryu if you will. Having options for all situations but excelling at bullying his way in and keeping the pressure up, Heita forces the opponent into difficult situations. He can take a bit to get used to, but he's a force to be reckoned with in most situations once you do.
As "a man aiming to be a man" and one of the students seeking to fight against Agito of the Dark's reign of terror, Heita Zinnai is one of the first students to join Rouga Zanma, becoming one of the Wolf Fang Brigade's founding members. Heita is excitable and determined to become stronger, and to win the heart of his and Rouga's class representative, Sanae Hibiki. His overall weakness makes it difficult for him to win in most fights he finds himself in; however, his determination to see his goal through is practically unmatched, and he will get up no matter how many times he's knocked down.
General Strategy
Heita is a strong character, but he takes some time to learn how to play effectively. His normals have average range, but he can go into combos as quickly as anyone else in the cast once he confirms a hit. His fireball has pretty bad recovery, but is OK for stopping an enemy cold at a moderate distance. 63214A is surprisingly one of Heita's best moves when used appropriately, as it has 1-hit autoguard to let him get in close. Once he's there, his options are based entirely on the situation, but are generally flexible enough for him to do something good.
Normal Moves
Standing Normals
5A
5A  |
|---|
5B
5B  |
|---|
5C
5C  |
|---|
Crouching Normals
2A
2A  |
|---|
2B
2B  |
|---|
2C
2C  |
|---|
Air Normals
jA
jA jump  |
|---|
jB
jB jump  |
|---|
jC
jC jump  |
|---|
Command Normals
6A
6A Roundhouse Kick  |
|---|
Universal Mechanics
5D
Aim to be a Man!  |
|---|
Throw
Throw  |
|---|
Big Bang Mode
Big Bang Mode  |
|---|
Special Moves
236A
Otoko no Tamashii  |
|---|
214A
Heita Kick |
|---|
Heita Kick  |
|---|
j214A
Heita Shoot jump  |
|---|
Heita Shoot jump  |
|---|
41236C
Otoko no Knuckle  |
|---|
Otoko no Knuckle  |
|---|
623C
Otoko Taikuu  |
|---|
Otoko Taikuu  |
|---|
63214C
Zinnai-ryuu Nidan Mawashi  1st kick 1st kick 2nd kick 2nd kick
|
|---|
Zinnai-ryuu Nidan Mawashi  1st kick 1st kick  2nd kick 2nd kick
|
|---|
63214A
Konjou Hashire  |
|---|
B-Power Arts
214D
HEITA KIIICK!! |
|---|
j214D
Zinnai-ryuu Tenkuukyaku jump |
|---|
623D
Zinnai-ryuu Rising Dragon |
|---|
Zinnai-ryuu Rising Dragon |
|---|
Big Bang Break
41236ABC
Decade Knuckle |
|---|
Combos
Combo Theory
- Combo damage varies from character to character, so all damage numbers come from testing on a full-health Rouga.
- Generally, you can do any normals you want before going into the 2C > 214C sequence, as long as you don't push them back too far.
- 214C will cause a groundbounce on an aerial opponent, and 623C/j.623C will cause a groundbounce and then a wallbounce regardless of how they hit the opponent.
- Bouncing the opponent 3 times will force your combo to end, so you can only do 214C twice in the standard loop.
- This is also why 623C is a poor combo component, because if there's too many bounces the second hit won't land, and it can't be super-canceled.
Midscreen
- 5/2A > 5B > (5C) > 2C > 214C, 2C > 214C, 2C > 214AA (2112)
- This is your standard universal knockdown combo that gives okizeme opportunities. 5C can whiff if you're too far from the opponent, so omit it accordingly. If you're instead extremely close and fighting a large enough character, you can fit in a bonus 6A for 2311 damage. You'll probably be using this one the most midscreen.
- 5/2A > 5B > (5C) > 2C > 214C, 2C > 214C, 2C > 214A, 5B > 5C (jump cancel) j.B > j.C > j.623B > j.623D (2882)
- This is an iteration of the above combo that costs 1 bar and sacrifices okizeme for roughly 600~900 more damage. Only suggest using this for guaranteeing a KO. If you're having trouble landing the second 5B, you can instead go into 214AA > j.623B > j.623D for an incredibly minor damage loss.
Corner
- 5/2A > 5B > (5C) > 2C > 214AB, 2A > 214C, 2C > 214AA > j.623B > j.623D (3201)
- High-damage combo for when your opponent is close to the corner. The 2A link after 214AB is difficult at first and only possible if you land very close to the opponent (which is why this only works in the corner), but it gets easier if you focus on trying to 2A as soon as Senna touches the ground. Costs 1 bar, but you can omit the j.623B and j.623D to still get 2448 damage and a better knockdown.
- 623C/j.623C > j.B > j.C > j.623B > j.623D (2105)
- Followup to landing a raw 623C. Spends one bar and gives no oki, so only use if it'll kill.
- 5/2A > 5B > (5C) > 2C > 214AB, 2A > 214C, 2C > 214AA > j.623B > land > ABC > combo drops, opponent techs > 41236ABC (7587)
- A gimmicky reset for 3 bars that takes advantage of 41236ABC's air-unblockable properties to land it outside of a combo, and therefore have it be completely unscaled. This loses to your opponent not teching or delaying their tech significantly, but if you catch someone with it they're pretty much dead. It's a fake option, but an option nonetheless.
Colors
A Color

B Color

C Color

D Color
