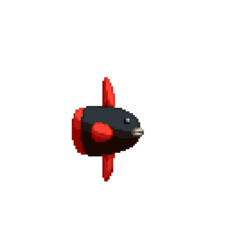
Big Bang Beat Revolve/Manbou: Difference between revisions
No edit summary |
mNo edit summary |
||
| Line 3: | Line 3: | ||
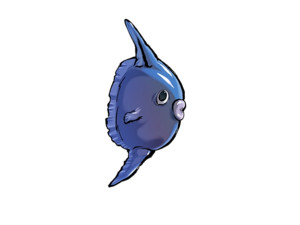
[[File:BBBR_Manbou_Portrait.png|thumb|right|<center><font size="4"><b>Manbou</b></font><br>'''Estimated Health (After Scaling): 10000'''</center>]] | [[File:BBBR_Manbou_Portrait.png|thumb|right|<center><font size="4"><b>Manbou</b></font><br>'''Estimated Health (After Scaling): 10000'''</center>]] | ||
== Introduction == | ==Introduction== | ||
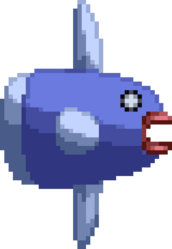
'''Manbou''' is an odd character, but surprisingly strong for a presumed joke character. Manbou has good normals, some interesting moves, and a lot of ways to control space. Playing this character may take some getting used to, but with on of the best BBMs in the game, you'll be drowning your opponent in no time. | '''Manbou''' is an odd character, but surprisingly strong for a presumed joke character. Manbou has good normals, some interesting moves, and a lot of ways to control space. Playing this character may take some getting used to, but with on of the best BBMs in the game, you'll be drowning your opponent in no time. | ||
Manbou is based on a generic enemy that shows up in Daibanchou. The enemy that the playable Manbou is based on doesn't have a consistent name, but in Big Bang Beat Revolve simply uses the Japanese name of the mola mola or ocean sunfish, which is the type of fish that it resembles. | Manbou is based on a generic enemy that shows up in Daibanchou. The enemy that the playable Manbou is based on doesn't have a consistent name, but in Big Bang Beat Revolve simply uses the Japanese name of the mola mola or ocean sunfish, which is the type of fish that it resembles. | ||
== General Strategy == | ==General Strategy== | ||
Manbou has a lot of great normals and command normals to play with, as well as various spacing tools. Mid-range is where Manbou gets the most usage out of its specials, so the general strategy is to secure a knockdown in mid to long range, then start pressure with Manbou's pretty good buttons. | Manbou has a lot of great normals and command normals to play with, as well as various spacing tools. Mid-range is where Manbou gets the most usage out of its specials, so the general strategy is to secure a knockdown in mid to long range, then start pressure with Manbou's pretty good buttons. | ||
== Normal Moves == | ==Normal Moves== | ||
=== Standing Normals === | ===Standing Normals=== | ||
====== <font style="visibility:hidden" size="0">5A</font> ====== | ======<font style="visibility:hidden" size="0">5A</font>====== | ||
{{MoveData | {{MoveData | ||
|image=BBBR_Manbou_5A.png | |image=BBBR_Manbou_5A.png | ||
| Line 33: | Line 33: | ||
}} | }} | ||
====== <font style="visibility:hidden" size="0">5B</font> ====== | ======<font style="visibility:hidden" size="0">5B</font>====== | ||
{{MoveData | {{MoveData | ||
|image=BBBR_Manbou_5B.png | |image=BBBR_Manbou_5B.png | ||
| Line 53: | Line 53: | ||
}} | }} | ||
====== <font style="visibility:hidden" size="0">5C</font> ====== | ======<font style="visibility:hidden" size="0">5C</font>====== | ||
{{MoveData | {{MoveData | ||
|image=BBBR_Manbou_5C.png | |image=BBBR_Manbou_5C.png | ||
| Line 74: | Line 74: | ||
}} | }} | ||
=== Crouching Normals === | ===Crouching Normals=== | ||
====== <font style="visibility:hidden" size="0">2A</font> ====== | ======<font style="visibility:hidden" size="0">2A</font>====== | ||
{{MoveData | {{MoveData | ||
|image=BBBR_Manbou_2A.png | |image=BBBR_Manbou_2A.png | ||
| Line 95: | Line 95: | ||
}} | }} | ||
====== <font style="visibility:hidden" size="0">2B</font> ====== | ======<font style="visibility:hidden" size="0">2B</font>====== | ||
{{MoveData | {{MoveData | ||
|image=BBBR_Manbou_2B.png | |image=BBBR_Manbou_2B.png | ||
| Line 115: | Line 115: | ||
}} | }} | ||
====== <font style="visibility:hidden" size="0">2C</font> ====== | ======<font style="visibility:hidden" size="0">2C</font>====== | ||
{{MoveData | {{MoveData | ||
|image=BBBR_Manbou_2C.png | |image=BBBR_Manbou_2C.png | ||
| Line 135: | Line 135: | ||
}} | }} | ||
=== Air Normals === | ===Air Normals=== | ||
====== <font style="visibility:hidden" size="0">jA</font> ====== | ======<font style="visibility:hidden" size="0">jA</font>====== | ||
{{MoveData | {{MoveData | ||
|image=BBBR_Manbou_5A.png | |image=BBBR_Manbou_5A.png | ||
| Line 156: | Line 156: | ||
}} | }} | ||
====== <font style="visibility:hidden" size="0">jB</font> ====== | ======<font style="visibility:hidden" size="0">jB</font>====== | ||
{{MoveData | {{MoveData | ||
|image=BBBR_Manbou_5B.png | |image=BBBR_Manbou_5B.png | ||
| Line 176: | Line 176: | ||
}} | }} | ||
====== <font style="visibility:hidden" size="0">jC</font> ====== | ======<font style="visibility:hidden" size="0">jC</font>====== | ||
{{MoveData | {{MoveData | ||
|image=BBBR_Manbou_5C.png | |image=BBBR_Manbou_5C.png | ||
| Line 196: | Line 196: | ||
}} | }} | ||
== Command Normals == | ==Command Normals== | ||
====== <font style="visibility:hidden" size="0">6A</font> ====== | ======<font style="visibility:hidden" size="0">6A</font>====== | ||
{{MoveData | {{MoveData | ||
|image=BBBR_Manbou_6A.png | |image=BBBR_Manbou_6A.png | ||
| Line 218: | Line 218: | ||
}} | }} | ||
====== <font style="visibility:hidden" size="0">6B</font> ====== | ======<font style="visibility:hidden" size="0">6B</font>====== | ||
{{MoveData | {{MoveData | ||
|image=BBBR_Manbou_6B.png | |image=BBBR_Manbou_6B.png | ||
| Line 239: | Line 239: | ||
}} | }} | ||
== Universal Mechanics == | ==Universal Mechanics== | ||
====== <font style="visibility:hidden" size="0">5/2D</font> ====== | ======<font style="visibility:hidden" size="0">5/2D</font>====== | ||
{{MoveData | {{MoveData | ||
|image=BBBR_Manbou_Child.png | |image=BBBR_Manbou_Child.png | ||
| Line 274: | Line 274: | ||
}} | }} | ||
====== <font style="visibility:hidden" size="0">Throw</font> ====== | ======<font style="visibility:hidden" size="0">Throw</font>====== | ||
{{MoveData | {{MoveData | ||
|image=BBBR_Manbou_ThrowWhiff.png | |image=BBBR_Manbou_ThrowWhiff.png | ||
| Line 294: | Line 294: | ||
}} | }} | ||
====== <font style="visibility:hidden" size="0">Big Bang Mode</font> ====== | ======<font style="visibility:hidden" size="0">Big Bang Mode</font>====== | ||
{{MoveData | {{MoveData | ||
|image=BBBR_Manbou_ThrowWhiff.png | |image=BBBR_Manbou_ThrowWhiff.png | ||
| Line 314: | Line 314: | ||
}} | }} | ||
== Special Moves == | ==Special Moves== | ||
====== <font style="visibility:hidden" size="0">236X</font> ====== | ======<font style="visibility:hidden" size="0">236X</font>====== | ||
{{MoveData | {{MoveData | ||
|image=BBBR_Manbou_236A.png | |image=BBBR_Manbou_236A.png | ||
| Line 360: | Line 360: | ||
}} | }} | ||
====== <font style="visibility:hidden" size="0">214X</font> ====== | ======<font style="visibility:hidden" size="0">214X</font>====== | ||
{{MoveData | {{MoveData | ||
|image=BBBR_Manbou_214X.png | |image=BBBR_Manbou_214X.png | ||
| Line 407: | Line 407: | ||
}} | }} | ||
== B-Power Arts == | ==B-Power Arts== | ||
====== <font style="visibility:hidden" size="0">214D</font> ====== | ======<font style="visibility:hidden" size="0">214D</font>====== | ||
{{MoveData | {{MoveData | ||
|image=BBBR_Manbou_214D.png | |image=BBBR_Manbou_214D.png | ||
| Line 428: | Line 428: | ||
}} | }} | ||
== Big Bang Break == | ==Big Bang Break== | ||
====== <font style="visibility:hidden" size="0">41236ABC</font> ====== | ======<font style="visibility:hidden" size="0">41236ABC</font>====== | ||
{{MoveData | {{MoveData | ||
|image=BBBR_Manbou_BBB.png | |image=BBBR_Manbou_BBB.png | ||
| Line 448: | Line 448: | ||
}} | }} | ||
== Combos == | ==Combos== | ||
{| class="mw-collapsible mw-collapsed" width="100%" | {| class="mw-collapsible mw-collapsed" width="100%" | ||
|+ style="white-space:nowrap; border:1px solid; padding:3px;" |'''Combo Legend''' | |+ style="white-space:nowrap; border:1px solid; padding:3px;" |'''Combo Legend''' | ||
| Line 463: | Line 463: | ||
==Colors== | ==Colors== | ||
{{ColorGallery | filePrefix=BBBR_Manbou_Color_ | colors= | {{ColorGallery | filePrefix=BBBR_Manbou_Color_ | colors= | ||
{{ColorGallery/Color|1| text= A Color}} | {{ColorGallery/Color|1| text=A Color}} | ||
{{ColorGallery/Color|2| text= B Color}} | {{ColorGallery/Color|2| text=B Color}} | ||
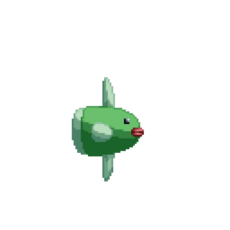
{{ColorGallery/Color|3| text= C Color}} | {{ColorGallery/Color|3| text=C Color}} | ||
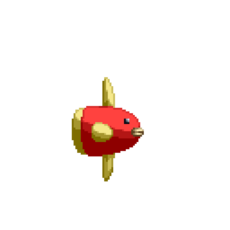
{{ColorGallery/Color|4| text= D Color}} | {{ColorGallery/Color|4| text=D Color}} | ||
}} | }} | ||
== BBBR Navigation == | ==BBBR Navigation== | ||
{{Navbox-BBBR}} | {{Navbox-BBBR}} | ||
[[Category:Manbou]] | |||
[[Category:Big Bang Beat Revolve]] | [[Category:Big Bang Beat Revolve]] | ||
Revision as of 14:58, 19 June 2024
Under Construction
|
Introduction
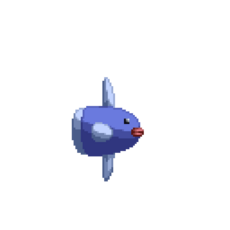
Manbou is an odd character, but surprisingly strong for a presumed joke character. Manbou has good normals, some interesting moves, and a lot of ways to control space. Playing this character may take some getting used to, but with on of the best BBMs in the game, you'll be drowning your opponent in no time.
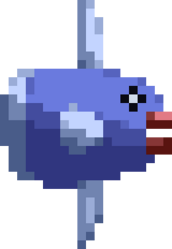
Manbou is based on a generic enemy that shows up in Daibanchou. The enemy that the playable Manbou is based on doesn't have a consistent name, but in Big Bang Beat Revolve simply uses the Japanese name of the mola mola or ocean sunfish, which is the type of fish that it resembles.
General Strategy
Manbou has a lot of great normals and command normals to play with, as well as various spacing tools. Mid-range is where Manbou gets the most usage out of its specials, so the general strategy is to secure a knockdown in mid to long range, then start pressure with Manbou's pretty good buttons.
Normal Moves
Standing Normals
5A
5A
|
|---|
5B
5B
|
|---|
5C
5C
|
|---|
Crouching Normals
2A
2A
|
|---|
2B
2B
|
|---|
2C
2C
|
|---|
Air Normals
jA
jA
jump |
|---|
jB
jB
jump |
|---|
jC
jC
jump |
|---|
Command Normals
6A
6A
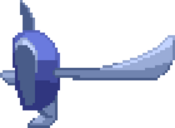
Dorsal Fin Blade |
|---|
6B
6B
Slip |
|---|
Universal Mechanics
5/2D
Egg Lay
|
|---|
Throw
Throw
|
|---|
Big Bang Mode
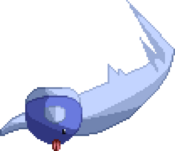
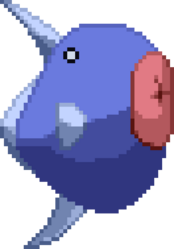
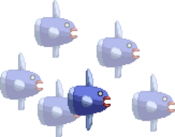
Big Bang Mode They love reusing sprites with this fish... They love reusing sprites with this fish...
|
|---|
Special Moves
236X
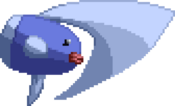
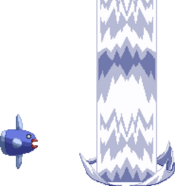
Water Gun
|
|---|
214X
Waterspout
|
|---|
B-Power Arts
214D
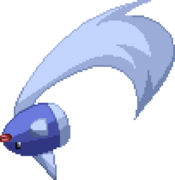
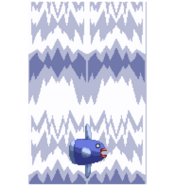
Grand Waterspout
|
|---|
Big Bang Break
41236ABC
Manbou and His Friends
|
|---|
Combos
| |||||||||||||||||||||||||||||||||||||||||||||
Combo Theory
- Combo damage varies from character to character, so all damage numbers come from testing on a full-health Rouga.
