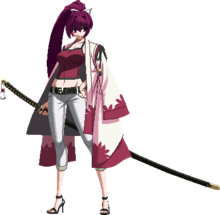
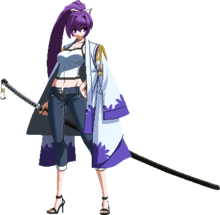
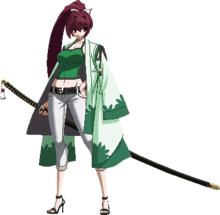
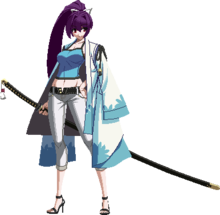
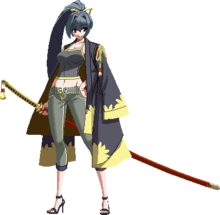
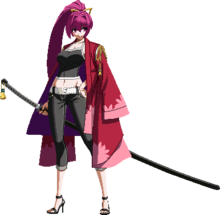
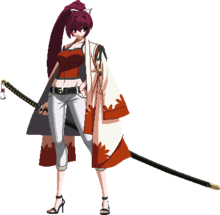
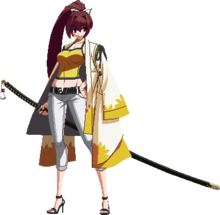
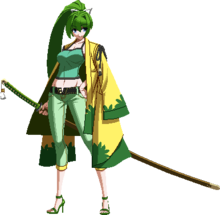
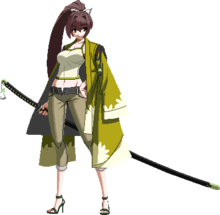
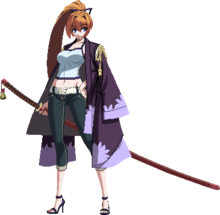
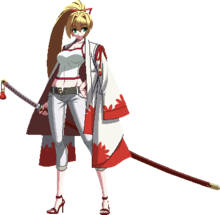
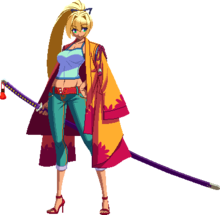
Under Night In-Birth/UNIEL/Yuzuriha
Introduction
yada yada yada yada
Story
Unique Trait/Health
Yuzuriha has a stance system that relies on her holding down buttons while inputting or after inputting commands for specific moves. These moves are marked in the movelist below with ★'s next to their name.
You enter stances by default when you use these moves, and you can stay in the stance by holding down any button when performing the move.
The buttons that Yuzuriha has available for use while she is in her stance are displayed as three icons, or stance marks, right under her lifebar. They will appear when she is using a move that enters a stance, and they follow these color rules:
- Black: The button is unavailable for use. This happens after a button has been pressed during a stance.
- Blue: The button is available for use.
- Pink: The button is being held down. This happens both when Yuzuriha is holding down a button for a stance and when she executes a move that leads into a stance.
More information on the actions Yuzuriha can perform in her stance are available in the Special Moves section in the movelist below.
Health: 9,800
Gameplay
Yuzuriha's comfortable somewhere between close and mid-range; most of her combo potential is in close quarters, but leaving space between her and the opponent lets her use her tools a little better. She doesn't excel at rushdown per se, but space control and mind games; good Yuzurihas will display flexible use of her normals and specials to punish the opponent's poor decision making and capitalize on that. Her teleports are useful for confusing the opponent after using her stance-related normals and specials, while the specials themselves are excellent for helping her buy time to position herself--or positioning herself better when they hit.
Yuzuriha's weaknesses, though, are serious. While she does control space well, her attacks have noticeable recovery time, so misreading the opponent's action or position can be a ticket for her to get punished. When she's put on the defensive, her answers are mostly blocking well, attempting to use her 4B, or using a Vorpal-state Guard Thrust to push the opponent away, as her sole reversal-worthy move will eat up all of her meter. These two factors mean that she will have to pick her counterattacks very carefully against opponents that can overwhelm her with superior attack or movement speed, or opponents that can punish her own mistakes from a distance.
Move List
Normal Moves
| 5A |
|---|
| 2A |
|---|
| 5B |
|---|
| 2B |
|---|
| 5C |
|---|
| 2C |
|---|
| j.A |
|---|
| j.B |
|---|
| j.C |
|---|
Command Normals
| Soutsuki Ittou-Ryuu Battoujutsu Ichi no Kata: Kiri ★ 「双月一刀流抜刀術壱之型:桐」 6A/B/C (air ok) |
|---|
| 4B |
|---|
| 4C |
|---|
| j.2C |
|---|
| j.2[C] |
|---|
Universal Mechanics
| Force Function ★ B+C |
|---|
| Force Function (charged) [B+C] |
|---|
| Throw A+D |
|---|
Dash Normals
| 66B |
|---|
| 66C |
|---|
Special Moves
{{UNIEL-Move
|name=Soutsuki Ittou-Ryuu Battoujutsu Ni no Kata: Saki
「双月一刀流抜刀術弐之型:咲」
★
|input=236X
j.236X
|image=
|caption=
|data=
! Version
! height="25px" |Damage
! Startup
! Active
! Recovery
! Frame Adv
! Cancels
! Guard/Shield
! Hitbox
|-
! A
| height="25px"| x
| x
| x
| x
| x
| x
| x
| -
|-
| colspan="10" style="text-align: left; vertical-align:top;" |
On the ground, this is a high-angle slash, similar to 6A. When 236A is used in midair, the slash is angled downward instead, similar to 6C. Both versions cause a launch on hit.
|-
! Version
! height="25px" |Damage
! Startup
! Active
! Recovery
! Frame Adv
! Cancels
! Guard/Shield
! Hitbox
|-
! B
| height="25px"| x
| x
| x
| x
| x
| x
| x
| -
|-
| colspan="10" style="text-align: left; vertical-align:top;" |
A mid angle slash, similar to 6B. Both versions cause a wallbounce on hit.
|-
! Version
! height="25px" |Damage
! Startup
! Active
! Recovery
! Frame Adv
! Cancels
! Guard/Shield
! Hitbox
|-
! EX
| height="25px"| x
| x
| x
| x
| x
| x
| x
| -
|-
| colspan="10" style="text-align: left; vertical-align:top;" |
Three sharp slashes, with a fourth hit of damage after Yuzuriha sheathes her sword. You can cancel into other stance attacks after the first slash.
|-
! Version
! height="25px" |Damage
! Startup
! Active
! Recovery
! Frame Adv
! Cancels
! Guard/Shield
! Hitbox
|-
! j.A
| height="25px"| x
| x
| x
| x
| x
| x
| x
| -
|-
| colspan="10" style="text-align: left; vertical-align:top;" |
fluff
|-
! Version
! height="25px" |Damage
! Startup
! Active
! Recovery
! Frame Adv
! Cancels
! Guard/Shield
! Hitbox
|-
! j.B
| height="25px"| x
| x
| x
| x
| x
| x
| x
| -
|-
| colspan="10" style="text-align: left; vertical-align:top;" |
fluff ! Version ! height="25px" |Damage ! Startup ! Active ! Recovery ! Frame Adv ! Cancels ! Guard/Shield ! Hitbox |- ! j.EX | height="25px"| x | x | x | x | x | x | x | - |- | colspan="10" style="text-align: left; vertical-align:top;" |
fluff
|-
|-
| Soutsuki Ittou-ryuu Igai Ryuka! Hae Ichirin 「双月一刀流以下略!八重一輪」 ★ 214X Air O.K. |
|---|
| Kocchi da yo! 「こっちだよー!」 ★ 412X Air O.K. |
|---|
| Iki Seishin no Mae 「威気静心之構 」 X Air O.K. |
|---|
| Togiri 「跡切」 D While in Iki Seishin no Mae |
|---|
| Seipu 「瀞歩」 6/4 While in Iki Seishin no Mae |
|---|
| Ishi 「移徙」 66/44 Air O.K. While in Iki Seishin no Mae |
|---|
| Fuuetsu 「風越」 7/8/9 While in Iki Seishin no Mae |
|---|
| Ryuuran 「流漣」 22 Air O.K. While in Iki Seishin no Mae |
|---|
Infinite Worths
| Soutsuki Ittou-Ryuu Ougi: Kashou 「双月一刀流奥義: 華生」 41236D |
|---|
Infinite Worths EXS
| Soutsuki Ittou-Ryuu Battoujutsu Zero no Kata Hi-ougi: Inochi Kurenai 「双月一刀流抜刀術零之型秘奥義: 命紅」 A+B+C+D |
|---|
Combos
Using 7/8/9D
Some of Yuzuriha's more challenging combos will utilize her 7/8/9 jump from her stances, with the use of the D button to cancel the stance so she can use her air normals after the peak of the jump. Rather than press the direction, then press D at the peak of her jump, it is often easier to combine the two motions or pre-buffer them. There are a few ways to do this:
- As the stance move hits, press the direction and the D button at the same time.
- As the move starts up, hold the direction you want to jump in, then press D once the move hits.
If you do this successfully, the circle that indicates the end of the stance should appear where Yuzuriha jumps from, or during the middle of her jump, and not at the end of her jump when she's hovering in the air. Even with the cancel, the timing for the normals is still a little tricky, so don't mash it out. Practice something as simple as 236A 8D (insert normal here) if you need to improve your timing.
Using j.2[C]
Combos which utilize j.2[C] are sensitive to the openings of the combo. Based on opener, your opponent may be able to tech before j.2[C] connects. Please keep the following in mind when confirming into 236A 9D j.2[C]. The routes listed below will guarantee that 236A j.2[C] connects. 236A j.2[C] will NOT connect off of any combo that begins with assault or throw.
- 5A opener
- 5C/4C/2C
- 2A, 2C (Note: replacing 2C with 5C or 4C does not work.)
- 2B
- 2A opener
- 5C/4C/2C
- 2B, 5C/4C/2C
- 5A, 5C/4C/2C
- 2A, 2B
- j.A opener
- 5A, 5C
- 5A, 5C, 2C
- 5A, 5C, 4C, 2C
- 5B opener
- 2B, 5C, 4C
- 2B, 5C, 4C, 2C
- 2A, 2B, 5C, 4C, 2C
- 2A, 5A, 2B, 5C, 4C, 2C
- 2B opener
- 5B, 5C (4C or 2C)
- 5C (4C or 2C)
- j.B opener
- 5A, 5C
- 5A, 5C, 4C or 2C
- 5A, 5C, 4C, 2C
- 4B opener
- 2C
- 4C, 2C
- 66B
- 5C opener
- 4C, 2C
- 5B, 4C, 2C
- 2B, 5B, 4C, 2C
- 2A, 2B, 5B, 4C, 2C
- 2C opener
- Straight into 236A
- 4C opener
- Straight into 236A
- j.C opener
- 5A, 5C
- 5A, 5C, 4C or 2C
- 5A, 5C, 4C, 2C
Midscreen Starter
Beginner
- 2A, 2B, 2C, 4C, 5C, j.B, j.C, j.6B~5C, 214A
- A simple midscreen combo that ends with a 214A to put you near the opponent; if done in the corner, you wind up slightly under them, but since the 214A is techable, you don't want to get mash-happy or you might eat a move when they recover and land.
Intermediate
- 5A, 5C, 236A, 9D, j.2[C], 4C, 2C, (4B), 236BA (slide C), 214B (or 214C with 100% or more EXS), D, 66C, j.421A, D,
Damage: 3148 w/Vorpal http://youtu.be/MsbtwwQi7hk?t=5m45s
- 5A, 5C, 236A, 9D, j.2[C], 4C, 2C, (4B), 236A, 421C, j.214B, D, 66C, j.421A, D
Damage: 3056 w/Vorpal http://youtu.be/MsbtwwQi7hk?t=5m52s
- 5A, 5C, 236A, 9D, j.2[C], 66C (hold C), delay j.236A, j.214A, D, 66B (slide C), 236ABA, 214CD
Damage: 3969 w/Vorpal 100% http://youtu.be/MsbtwwQi7hk?t=5m59s
- 236B, (reset stance) 236B, delay, j.214BD, 2C, 4C, j.B, j.2C, j.C, D, 66B (slide C), ABA ,214CD
Damage: 4027 w/Vorpal 100% http://youtu.be/MsbtwwQi7hk?t=6m36s
- 4B (non CH), 236B, 236A, 9D, j.2[C], 66C (hold C), delay j.236A, j.214A, 66B (slide C), 236ABA, j.214CD
- 4B (CH), 2C, 236A, 9D, j.2[C], 66C (hold C), j.236A, j.214A, 66B (slide C), 236ABA, 214CD
- j.236A, j.236B, j.214B+D, 2C, 4C, j.B, j.2C, j.C (hold C), 66B, 236B, 236A, 236B
- Assault j.2C, 5B, 5C, 2C, 236A (shift C), 8, j.236B, j.214B~D, delay 66C (hold C), j.236A, j.236B, j.236A
Damage: 2593, no Vorpal
Corner Starter
Intermediate
Note #1: If the opponent techs after the 66C ender they are forced to ground-tech; all 66C enders may be replaced with 66B to allow the opponent to air-tech after the combo.
Note #2: vs. Chaos only-- 4C, 2C does not connect in corner, use 2B 2C instead.
- 5A, 5C, 236A, 9D, j.2[C], 4C, 2C (hold C), 236B, 236A, 214B, D, 66C, j.421C, D
Damage: 3194 w/Vorpal http://youtu.be/MsbtwwQi7hk?t=6m50s
- 5A, 5C, 236A, 9D, j.2[C], 4C, 2C (hold C), 236BAB, 214BD, 66C, j.421C, D
Damage: 3247 w/Vorpal http://youtu.be/MsbtwwQi7hk?t=6m59s
- 5C, 2C, 236A, 9D, j.2[C], 4C, 2C (hold C), 236B, 236A, 236B, 214B+D, 66C, (j.421A or j.421C)
Damage: 3487, Hits: 19
- 5A, 5C, 2C, 236A, 236B, 7, late j.C, 66C, j.236A, choose from following enders
- j.214A+D, 66C, (j.421A or j.421C)
Damage: 3089 w/ Vorpal, Hits: 15 - j.236C, j.214B~D, 66C, (j.421A or j.421C)
Damage: 3540 w/ Vorpal, Hits: 20
- j.214A+D, 66C, (j.421A or j.421C)
- 2C, 5C, j.B, j.2C, j.C (hold C), 66B, 236A, 236B, 421A~D, 66C, j.236A, choose from following enders
- j.236C, j.214B~D, 66C, (j.421A or j.421C)
Damage: 3890 w/ Vorpal, Hits: 22 - j.214B~D, 66C, (j.421A or j.421C)
Damage: 3419 w/ Vorpal, Hits: 18
- j.236C, j.214B~D, 66C, (j.421A or j.421C)
- Assault j.2C, 5A, 5C, 236B, 8D, j.2[C], 4C, 2C (hold C), 236B, 236A, 214B~D, 66C
Damage: 2529, no Vorpal
Throw Starter
Intermediate
- 4C, 2C, 236B (slide A), 421C, j.236B, j.214B~D, 66C, j.421A~D
Damage: 1657 w/Vorpal http://youtu.be/MsbtwwQi7hk?t=6m28s
- (After corner throw only) 5C, 236B~8D, j.2[C], 4C, 2C (hold C), 236B, 236A, 214B~D, 66C, j.421C~D
Damage: 1876 w/Vorpal http://youtu.be/MsbtwwQi7hk?t=7m7s- Note for 2C that you will want to hold C until you have completed 214B~D.
- (After corner throw only) 4C, 2C (hold C), 236A, 236B, 421A~D, 66C, j.236A (hold A), j.236C delay j.214B~D, 66C, j.421C~D
Damage: 2333 w/Vorpal 100% http://youtu.be/MsbtwwQi7hk?t=7m15s- Note for 2C that you will want to hold C until you have completed 421A~D. Similarly, for j.236A, you will want to hold A until you have completed j.214B~D.
Setups
Corner
- ~66C, 421A combo ender [Places opponent in corner.]
- Ex. Mixup #1: Late j.214B (meaty B-ichirin) on hit, able to confirm to full bnb with 2B link
- ~236B 7 combo ender [Places opponent 1 character length from corner.]
- Ex. Mixup #1: ~236B~[A] 7 421B 421C
- Teleport to air-corner, teleport to ground on original side
- Ex. Mixup #2: ~236B 7~D j.2[C]
- Meaty j.2[C] against tech.
- Ex. Mixup #3: ~236B 7~D (late) j.2[C] Throw
- j.2[C] does not hit.
- Ex. Mixup #1: ~236B~[A] 7 421B 421C
- ~236B 7D j.2[C] [Places opponent 3 character lengths from corner.]
- Able to Veil-Off afterwards for guaranteed GRD Break and safe activation.
- Ex. Mixup #1: 9 j.6[A] j.44D
- Jumps over opponent, air-stance backdash back to original side.
- Ex. Mixup#2: 7 6D j.421A j.421C j.623B
- Low assault jump over opponent, teleport to original side in air, teleport to corner on ground, teleport to original side on ground.
Midscreen
- ~j.2[C] combo ender
- Ex. Mixup #1: 7 j.6D 421A
- Following knockdown, jump backwards, assault forward to other side, A kocchi back to original side.
Note: Despite being on the other side of the opponent after the assault, A kocchi input is still as if you were on original side.
- Following knockdown, jump backwards, assault forward to other side, A kocchi back to original side.
- Ex. Mixup #1: 7 j.6D 421A
- ~236A block string ender
- Ex. Mixup #1: (hold A) 421C j.C 214B~D
- Teleport to air on opposite side, stance air C, B ichirin back to original side
- Ex. Mixup #1: (hold A) 421C j.C 214B~D
- 66B combo ender
- Ex. Mixup #1: (hold A) 421B 421B C 236B+D
- Teleport to opposite side, teleport to original side, C stance poke, B battou
- Ex. Mixup #1: (hold A) 421B 421B C 236B+D
- Full screen, neutral, not in corner
- Ex. Mixup #1: j.421C (hold A) 8 j.421C~D
- Teleport to ground opposite side, stance jump, teleport to ground original side. Useful against charge (i.e., Vatista).
- Ex. Mixup #1: j.421C (hold A) 8 j.421C~D
Colors
| Chaenomeles Sinensis | Siberian Iris | Betula Grossa | Water Drips | Successful Black |
|---|---|---|---|---|
| Globe Amaranth | Snow Drop | Autumn Flower | Gold Rush | Cluster Amaryllis |
| Cherry blossom | Dandelion | Underwater Sun | Shrine Maiden | Four Leaves |
| Dies Irae | Golden Done | Twig Palm | Ghiaccio Luce | Heliconiaceae |
