 |
Under Construction
- This page is a work in progress.
- Please be patient and check back later for additional changes.
|

Kojirou Estimated Health (After Scaling): ??? Guts Rating: ??? Introduction
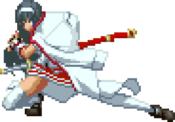
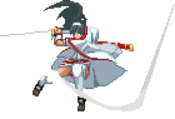
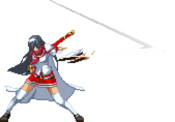
An alternate version of Senna, possessed by the ghost Kojirou. This form of the character has much fewer special moves and loses her ability to heal herself, in exchange for access to Kojirou's ghost, which tracks the opponent and can be detonated for pressure and combo extensions. Senna's body retains all of her original self's excellent normals, letting her run a very similar and very strong poke-focused gameplan. Additionally, one of her new special moves allows her to perform a lightning-fast overhead in the same vein as Baiken's infamous TK-Youzansen from the Guilty Gear series, which, alongisde her throw, can be comboed off of with proper use of the ghost. This makes Kojirou's version of Senna have better and more deadly mixups overall, but dealing with the finicky nature of his slow-moving ghost requires much higher situational awareness.
General Strategy
WIP
Normal Moves
All of Kojirou's normals, except for 6A, are the exact same as Senna's.
Standing Normals
5A
5A
|
| Damage
|
Guard
|
Property
|
Startup
|
Active
|
Recovery
|
Block Adv
|
Cancel
|
| 150
|
Mid
|
-
|
-
|
-
|
-
|
-
|
J, N, Sp, Su
|
Standard jab. It's quick, has a decent hitbox, and is air unblockable. Will combo into 5B, 2B, or 2C if cancelled as soon as possible.
|
|
5B
5B
|
| Damage
|
Guard
|
Property
|
Startup
|
Active
|
Recovery
|
Block Adv
|
Cancel
|
| 550
|
All
|
-
|
-
|
-
|
-
|
-
|
J, N, Sp, Su
|
Fast sword slash. Allows Senna to cover a very solid amount of space in front of her very quickly, with low recovery if whiffed. A character-defining great poke.
|
|
5C
5C
|
| Version
|
Damage
|
Guard
|
Property
|
Startup
|
Active
|
Recovery
|
Block Adv
|
Cancel
|
| 5C
|
800
|
All
|
-
|
-
|
-
|
-
|
-
|
J, N, Sp, Su
|
Powerful downwards slash. Startup and recovery are notably worse than 5B's, meaning this should only be used within combos or as a guaranteed punish. It looks like it'd be a good anti-air, but it's air blockable and has poor untech time even on counter hit against airborne opponents.
|
| Version
|
Damage
|
Guard
|
Property
|
Startup
|
Active
|
Recovery
|
Block Adv
|
Cancel
|
| 5[C]
|
800*2(1046)
|
Mid
|
-
|
-
|
-
|
-
|
-
|
J, N, Sp, Su
|
Charged version of 5C. Hits twice and does a bit more damage. This version is air unblockable, but its slow speed means you'll have a hard time using it as an anti-air (or anywhere else).
|
|
Crouching Normals
2A
2A
|
| Damage
|
Guard
|
Property
|
Startup
|
Active
|
Recovery
|
Block Adv
|
Cancel
|
| 110
|
Low
|
-
|
-
|
-
|
-
|
-
|
N, Sp, Su
|
A quick low kick. Horizontal range is a bit better than 5A's, and it can start combos the same way. A good button for high-low mixups or mashing out of pressure.
|
|
2B
2B
|
| Damage
|
Guard
|
Property
|
Startup
|
Active
|
Recovery
|
Block Adv
|
Cancel
|
| 450
|
All
|
-
|
-
|
-
|
-
|
-
|
J, N, Sp, Su
|
Senna slides forward and slams the end of her sheathe into the opponent's knees. Despite how it looks, it hits mid, and can be blocked in the air too. Could potentially be used to get closer to throw range during a blockstring in order to do strike-throw mix with delay cancel 2C, but its forward movement isn't good enough to make that a go-to option, and it might whiff if used after 5B. You should probably just press 5B instead.
|
|
2C
2C
|
| Damage
|
Guard
|
Property
|
Startup
|
Active
|
Recovery
|
Block Adv
|
Cancel
|
| 700
|
Low/Air
|
-
|
-
|
-
|
-
|
-
|
N, Sp, Su
|
A long-range, low sword sweep. Goes even farther than 5B, can't be blocked standing, and is still pretty fast, making it another great poke. However, it has significant recovery on whiff and a short vertical hitbox, so it must be used carefully. An integral part of Senna's combos.
|
|
Air Normals
jA
jA
|
| Damage
|
Guard
|
Property
|
Startup
|
Active
|
Recovery
|
Block Adv
|
Cancel
|
| 150
|
High
|
-
|
-
|
-
|
-
|
-
|
N, Sp, Su
|
Quick, downwards kick from the air. Hitbox is pretty large. Covers a pretty good angle even when done out of an instant air dash, so it's useful for high-low mixups.
|
|
jB
jB
|
| Damage
|
Guard
|
Property
|
Startup
|
Active
|
Recovery
|
Block Adv
|
Cancel
|
| 400
|
High
|
-
|
-
|
-
|
-
|
-
|
N, Sp, Su
|
Fast horizontal slash in the air. A suitable airborne counterpart to 5B that's great at controlling the space in front of Senna. It recovers so fast that if you whiff it early enough, you actually have enough time to do a second one before you hit the ground. Can be cancelled into jA, not just jC. Vertical hitbox leaves something to be desired, but it's still a great part of Senna's kit.
|
|
jC
jC 1st hit 1st hit 2nd hit 2nd hit
|
| Damage
|
Guard
|
Property
|
Startup
|
Active
|
Recovery
|
Block Adv
|
Cancel
|
| 300*2 (445)
|
High
|
-
|
-
|
-
|
-
|
-
|
N, Sp, Su
|
Senna swings her sword upwards and then downwards quickly. Hits twice, covering a good amount of space close to and below her. It's a great jump-in because of the angle it covers, and it has a large amount of active frames due to consisting of two separate slashes. Can be cancelled into jA or jB, which is unusual for a C normal.
|
|
Command Normals
6A
6A Different from Senna's version Different from Senna's version
|
| Damage
|
Guard
|
Property
|
Startup
|
Active
|
Recovery
|
Block Adv
|
Cancel
|
| 400*2(646)
|
Mid
|
-
|
-
|
-
|
-
|
-
|
N, Sp, Su
|
A quick upwards slash, followed by the same horizontal stab as Senna's 6A. This is Kojirou's only normal that differs from Senna's version, and it trades her original 6A's speed and aerial knockdown for a groundbounce that forms a vital part of his combos. Very high reward anti-air, and still a decent poke, although you should probably just push 5B in neutral if your opponent's on the ground.
|
|
6B
6B
|
| Damage
|
Guard
|
Property
|
Startup
|
Active
|
Recovery
|
Block Adv
|
Cancel
|
| 300
|
Mid
|
-
|
-
|
-
|
-
|
-
|
N, Sp, Su
|
Senna does a small hop forward and then kicks upwards. Can be cancelled into from 5A, 2A, 5B, and 2C, but it's too slow to combo from any of them. Has low crush properties. The forward movement and hitbox are both better than 2B's, so it'd be a better choice for the same delay-cancel 2C strike-throw mix, but that still isn't the most reliable strategy. Situationally useful.
|
|
Universal Mechanics
5D
5D
5D Kojirou's "following" state Kojirou's "following" state After 5D is pressed After 5D is pressed Interrupted during 5D Interrupted during 5D
|
| Damage
|
Guard
|
Property
|
Startup
|
Active
|
Recovery
|
Block Adv
|
Cancel
|
| 1000
|
All
|
-
|
-
|
-
|
-
|
-
|
NC
|
At all times during a match, Kojirou's ghost will slowly float towards the opponent, with the intention of staying right on top of them. He will only move horizontally, not vertically, and is rather slow. When 5D is pressed, after a brief delay Kojirou will inflate his head and laugh at the opponent, before exploding at his current location and disappearing. This explosion deals damage and groundbounces the opponent, allowing for a combo. Pressing 5D has no animation for Senna's body, meaning the ghost can be activated any time she's not in hitstun, blockstun, or knocked down. If Senna's body is hit prior to Kojirou exploding, he will fail to do the attack and disappear. Regardless of if Kojirou is successful in performing his attack, he will reappear in the location he was last at after about 2 seconds, and will be unable to attack again until the blue flame icon above your B-Power meter is full (about 3 seconds after his disappearance). 5D can be used in order to maintain pressure, or in order to convert into combos in situations where it would otherwise be impossible, such as after a throw or j.623X. However, Kojirou's slow movement speed and mediocre hitbox can make these things quite difficult, requiring great situational awareness to use effectively. The other move that uses Kojirou is 22D, which is dramatically easier to use and generally better, at the cost of 1 bar of meter. Note that 22D can not be performed if the blue flame is not full, so be careful when using 5D.
|
|
Throw
Throw
4/6AB
|
| Damage
|
Guard
|
Property
|
Startup
|
Active
|
Recovery
|
Block Adv
|
Cancel
|
| 1000
|
Unblockable
|
-
|
-
|
-
|
-
|
-
|
NC
|
Senna grabs the opponent, kicks off of them, and then performs her original version's 214A~A slash. If 5D is pressed shortly before throwing the opponent, and the opponent enters Kojirou's hitbox during the explosion, you can convert into a combo for very solid damage. However, the timing between when 5D is pressed and when the throw needs to connect is very strict, so you need to be absolutely certain that your throw will work before you even do it in order to take advantage of this. Additionally, Kojirou needs to be at the perfect spot to intercept the opponent while they're being thrown, which is difficult due to his meandering travel speed. Alternatively, you can use 22D after Senna slashes the opponent during the throw, which costs 1 bar, but leads to better damage and does not require any real spacing or preemptive timing.
|
|
Big Bang Mode
Big Bang Mode
ABC
|
| Damage
|
Guard
|
Property
|
Startup
|
Active
|
Recovery
|
Block Adv
|
Cancel
|
| N/A
|
N/A
|
-
|
-
|
-
|
-
|
-
|
-
|
Universal Big Bang Mode activation. Requires 3 bars and can be done anytime you have control on the ground. Lasts for about 7 seconds. In addition to the normal BBM benefits of unlimited B-Power gauge and access to Big Bang Break, Kojirou's blue flame icon that represents his attack cooldown will recover dramatically faster. This allows him to initiate his attack approximately one second after his previous one comes out, instead of 3 seconds afterwards. 22D does not use this trigger the blue flame cooldown in the same way and is thus unaffected, but unlimited super meter means that it can be used very frequently as well.
|
|
Special Moves
j623X
j623A/B/C
|
| Damage
|
Guard
|
Property
|
Startup
|
Active
|
Recovery
|
Block Adv
|
Cancel
|
| 900
|
High/Air
|
-
|
-
|
-
|
-
|
-
|
Su
|
One of the possessed Senna's two special moves. A large, spinning overhead that can only be done while airborne. If done as close to the ground as possible (TK'd), this move comes out at a speed that's impossible to react to, meaning at almost any time during your pressure your opponent needs to be guessing whether or not you're going to do it. This results in extremely potent high-low mixups, especially since Kojirou's ghost can combo off of this move if 5D is used preemptively or 22D is cancelled into, leading into high damage. Recovers in the air regardless of if it hit or not, allowing for another attack to be done before hitting the ground, so you can push j.B to stay safe and force your opponent to block another overhead, or combo without even using the ghost if you're in the corner. All three buttons result in the same version of this absurdly good move.
|
|
214C
214C 2 hits 2 hits
|
| Damage
|
Guard
|
Property
|
Startup
|
Active
|
Recovery
|
Block Adv
|
Cancel
|
| 500, 800 (1156)
|
All, High/Air
|
-
|
-
|
-
|
-
|
-
|
Su
|
The possessed Senna's other special move. Her body leaps into the air, quickly performing a cut below her, and then an overhead slash. The first hit can be blocked any way, resulting in the second hit being extremely telegraphed, so you won't be opening anyone up with this that has any matchup experience. Instead, this move serves as a solid combo ender, granting a good knockdown.
|
|
B-Power Arts
22D
22D
|
| Damage
|
Guard
|
Property
|
Startup
|
Active
|
Recovery
|
Block Adv
|
Cancel
|
| 1300
|
All
|
-
|
-
|
-
|
-
|
-
|
-
|
After spending 1 bar of meter, Kojirou's ghost poses and then moves forward quickly, performing a slash that launches the opponent upwards. Travels about 2/3rds of the screen from Kojirou's current position in the direction he's facing. After the attack is complete, regardless of if it hit, Kojirou will be unable to act for about a second, but he will not disappear like when 5D is used and will instead resume floating from his new position. Comes out almost instantly after the super flash. Allows for conversions off of almost any hit, including throws and special moves, into high-damage combos, and can be used to extend combos as well. Also has a notable amount of blockstun, granting plus frames. A move that greatly benefits every aspect of this character in every situation.
|
|
Big Bang Break
41236ABC
Setsu Gekka
41236ABC
|
| Damage
|
Guard
|
Property
|
Startup
|
Active
|
Recovery
|
Block Adv
|
Cancel
|
| 5121
|
Mid
|
-
|
-
|
-
|
-
|
-
|
-
|
The same as the regular Senna's Big Bang Break. Senna executes her normal self's Gekka. If it connects, she disappears and slashes the enemy multiple times. When she lands and sheathes her sword, the enemy is cut by one final slash. Good as a combo ender when in Big Bang mode, especially if you're aiming to kill. Ends Big Bang Mode instantly. A properly timed 5D during this move will allow you to combo off of it, leading to even higher damage.
|
|
Combo Theory
- Combo damage varies from character to character, so all damage numbers come from testing on a full-health Rouga.
- Generally, you can do any normals you want before going into the 2C > 214C sequence, as long as you don't push them back too far.
- 214C will cause a groundbounce on an aerial opponent, and 623C/j.623C will cause a groundbounce and then a wallbounce regardless of how they hit the opponent.
- Bouncing the opponent 3 times will force your combo to end, so you can only do 214C twice in the standard loop.
- This is also why 623C is a poor combo component, because if there's too many bounces the second hit won't land, and it can't be super cancelled.
Universal
- 5/2A > 5B > (5C) > 2C > 214C, 2C > 214C, 2C > 214AA (2112)
- This is your standard universal knockdown combo that gives okizeme opportunities. 5C can whiff if you're too far from the opponent, so omit it accordingly. If you're instead extremely close and fighting a large enough character, you can fit in a bonus 6A for 2311 damage. You'll probably be using this one the most midscreen.
- 5/2A > 5B > (5C) > 2C > 214C, 2C > 214C, 2C > 214A, 5B > 5C (jump cancel) j.B > j.C > j.623B > j.623D (2882)
- This is an iteration of the above combo that costs 1 bar and sacrifices okizeme for roughly 600~900 more damage. Only suggest using this for guaranteeing a KO. If you're having trouble landing the second 5B, you can instead go into 214AA > j.623B > j.623D for an incredibly minor damage loss.
Corner
- 5/2A > 5B > (5C) > 2C > 214AB, 2A > 214C, 2C > 214AA > j.623B > j.623D (3201)
- High-damage combo for when your opponent is close to the corner. The 2A link after 214AB is difficult at first and only possible if you land very close to the opponent (which is why this only works in the corner), but it gets easier if you focus on trying to 2A as soon as Senna touches the ground. Costs 1 bar, but you can omit the j.623B and j.623D to still get 2448 damage and a better knockdown.
- 623C/j.623C > j.B > j.C > j.623B > j.623D (2105)
- Followup to landing a raw 623C. Spends one bar and gives no oki, so only use if it'll kill.
- 5/2A > 5B > (5C) > 2C > 214AB, 2A > 214C, 2C > 214AA > j.623B > land > ABC > combo drops, opponent techs > 41236ABC (7587)
- A gimmicky reset for 3 bars that takes advantage of 41236ABC's air unblockable properties to land it outside of a combo, and therefore have it be completely unscaled. This loses to your opponent not teching or delaying their tech significantly, but if you catch someone with it they're pretty much dead. It's a fake option, but an option nonetheless.
Colors
BBBR Navigation


