 |
Under Construction
- This page is a work in progress.
- Please be patient and check back later for additional changes.
|

Hanny
Estimated Health (After Scaling): 10000 Introduction
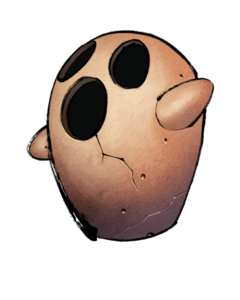
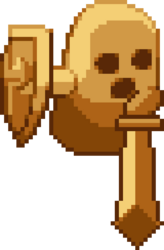
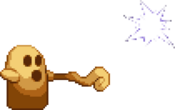
Hanny is a stance character who utilizes a  wand for long range and a
  sword for close range. Getting the hang of stance switching can be difficult, but this character has a lot to help you, especially in the height department.
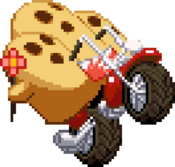
In Big Bang Age, Hanny is one of countless Haniwa Soldiers who form part of the Haniwa Cult.
General Strategy
The essential thing to learn as Hanny is how to effectively switch between your stances. In wand stance, Hanny has access to a few long range tools, but most notably his 5C becomes a projectile, which is just incredible. In sword stance, Hanny has access to a lot of strong pressure tools that are good for up close. Hanny works best when you zone the opponent, secure a knockdown, and then use a combination of wand stance's traps and sword stance's pressure to keep the opponent locked down until you can combo.
Normal Moves
Standing Normals
5A
5A 
|
| Damage
|
Guard
|
Property
|
Startup
|
Active
|
Recovery
|
Block Adv
|
Cancel
|
| 150
|
Mid
|
-
|
-
|
-
|
-
|
-
|
J, N, Sp, Su
|
A very short range shield bash. Most of the time not worth it unless you're very close.
|
|
5A 
|
| Damage
|
Guard
|
Property
|
Startup
|
Active
|
Recovery
|
Block Adv
|
Cancel
|
| 130
|
Mid
|
-
|
-
|
-
|
-
|
-
|
J, N, Sp, Su
|
A pretty good forward moving jab. It has solid range and is an all around good close poke.
|
|
5B
5B 
|
| Damage
|
Guard
|
Property
|
Startup
|
Active
|
Recovery
|
Block Adv
|
Cancel
|
| 370
|
Low
|
-
|
-
|
-
|
-
|
-
|
J, N, Sp, Su
|
A low sword swing. it doesn't make a lot of sense to be a low but it will be one of your most used buttons, it's a fantastic poke.
|
|
5B 
|
| Damage
|
Guard
|
Property
|
Startup
|
Active
|
Recovery
|
Block Adv
|
Cancel
|
| 200*3
|
Mid
|
-
|
-
|
-
|
-
|
-
|
J, N, Sp, Su
|
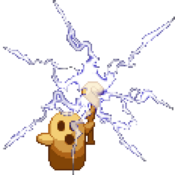
Hanny shoots lightning from the wand. This can hit up to 3 times depending how close you are to the opponent and is pretty good as a big button.
|
|
5C
5C 
|
| Damage
|
Guard
|
Property
|
Startup
|
Active
|
Recovery
|
Block Adv
|
Cancel
|
| 500
|
Low
|
-
|
-
|
-
|
-
|
-
|
J, N, Sp, Su
|
Another low sword slash. This has more range than 5B but is also slower, s its usage is less often than 5B. Still a pretty good button.
|
|
5C 
|
| Damage
|
Guard
|
Property
|
Startup
|
Active
|
Recovery
|
Block Adv
|
Cancel
|
| 300
|
Mid
|
-
|
-
|
-
|
-
|
-
|
J, N, Sp, Su
|
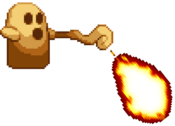
One of Hanny's best tools, it's a projectile that travels fullscreen. Being pretty fast and only requiring one button, this is your best long range tool, period.
|
|
Crouching Normals
2A
2A 
|
| Damage
|
Guard
|
Property
|
Startup
|
Active
|
Recovery
|
Block Adv
|
Cancel
|
| 160
|
Mid
|
-
|
-
|
-
|
-
|
-
|
N, Sp, Su
|
A punch with no range. This is pretty much useless as it's not a low and doesn't have any notable range.
|
|
2B
2B 
|
| Damage
|
Guard
|
Property
|
Startup
|
Active
|
Recovery
|
Block Adv
|
Cancel
|
| 300
|
All
|
-
|
-
|
-
|
-
|
-
|
J, N, Sp, Su
|
Hanny does a forward moving headbutt. Since this is a universal button, it's a great option for a forward-moving poke in mid-to-close range.
|
|
2C
2C 
|
| Damage
|
Guard
|
Property
|
Startup
|
Active
|
Recovery
|
Block Adv
|
Cancel
|
| 700
|
Low/Air
|
-
|
11
|
-
|
-
|
-27
|
N, Sp, Su
|
Hanny jumps in an arcing flip. This hits twice and is a pretty decent universal normal.
|
|
Air Normals
jA
jA jump jump 
|
| Damage
|
Guard
|
Property
|
Startup
|
Active
|
Recovery
|
Block Adv
|
Cancel
|
| 150
|
High
|
-
|
-
|
-
|
-
|
-
|
-
|
An aerial shield bash. This isn't a great button, but it does exist.
|
|
jA jump jump 
|
| Damage
|
Guard
|
Property
|
Startup
|
Active
|
Recovery
|
Block Adv
|
Cancel
|
| 130
|
High
|
-
|
-
|
-
|
-
|
-
|
-
|
A sort of air uppercut. It has no range but is a decent situational air-to-air.
|
|
jB
jB jump jump 
|
| Damage
|
Guard
|
Property
|
Startup
|
Active
|
Recovery
|
Block Adv
|
Cancel
|
| 370
|
High
|
-
|
-
|
-
|
-
|
-
|
-
|
An aerial sword slash. This is a pretty good air-to-air, as well as a decent jump in (although it's not active for long).
|
|
jB jump jump 
|
| Damage
|
Guard
|
Property
|
Startup
|
Active
|
Recovery
|
Block Adv
|
Cancel
|
| 200
|
High
|
-
|
-
|
-
|
-
|
-
|
-
|
A pretty good jump in tool, and basically an aerial version of Hanny's 5B that only hits once.
|
|
5C
jC jump jump 
|
| Damage
|
Guard
|
Property
|
Startup
|
Active
|
Recovery
|
Block Adv
|
Cancel
|
| 400
|
High
|
-
|
-
|
-
|
-
|
-
|
-
|
Hanny does a spin and then slams down with his sword. This move is slow and doesn't cross up, making it not a great button, with only situational uses.
|
|
jC jump jump 
|
| Damage
|
Guard
|
Property
|
Startup
|
Active
|
Recovery
|
Block Adv
|
Cancel
|
| 300
|
All
|
-
|
-
|
-
|
-
|
-
|
-
|
Hanny has an air projectile, similar to Akuma. It's not fantastic but when combined with Wand 5C it can help create a wall of projectiles the opponent has to get through.
|
|
Command Normals
6A
6AOur Noisy Race 
|
| Damage
|
Guard
|
Property
|
Startup
|
Active
|
Recovery
|
Block Adv
|
Cancel
|
| 600
|
Mid
|
-
|
-
|
-
|
-
|
-
|
-
|
A launcher and a pretty good anti air. It's air-unblockable, and has a pretty good hitbox too, making it all around a very useful command normal.
|
|
6B
6BHorse Back Kick 
|
| Damage
|
Guard
|
Property
|
Startup
|
Active
|
Recovery
|
Block Adv
|
Cancel
|
| 1100
|
Mid
|
-
|
-
|
-
|
-
|
-
|
-
|
Hanny turns into a horse, runs up, and kicks the opponent. Its high damage is offset by its horribly long startup. Not really worth using in any situation.
|
|
Universal Mechanics
5D
Weapon Switch Sword Stance Sword Stance Wand Stance Wand Stance
|
| Damage
|
Guard
|
Property
|
Startup
|
Active
|
Recovery
|
Block Adv
|
Cancel
|
| N/A
|
N/A
|
-
|
-
|
-
|
-
|
-
|
NC
|
This is Hanny's stance change, and you'll get very used to doing this.  Sword Stance is for up close and personal fighting, while Sword Stance is for up close and personal fighting, while  Wand Stance is better for zoning and setups. Wand Stance is better for zoning and setups.
|
|
Throw
|
|
| Damage
|
Guard
|
Property
|
Startup
|
Active
|
Recovery
|
Block Adv
|
Cancel
|
| 1000
|
Unblockable
|
-
|
-
|
-
|
-
|
-
|
NC
|
Hanny grabs the opponent and causes a knockdown. Pretty standard as far as throws go.
|
|
Big Bang Mode
|
|
| Damage
|
Guard
|
Property
|
Startup
|
Active
|
Recovery
|
Block Adv
|
Cancel
|
| N/A
|
N/A
|
-
|
-
|
-
|
-
|
-
|
-
|
Universal Big Bang Mode activation. Requires 3 bars and can be done anytime you have control on the ground. Lasts for about 7 seconds.
|
|
Special Moves
S214C
Double Spin Slash     (Air OK) (Air OK)
|
| Version
|
Damage
|
Guard
|
Property
|
Startup
|
Active
|
Recovery
|
Block Adv
|
Cancel
|
| Ground
|
400*2
|
High, Low
|
-
|
-
|
-
|
-
|
-
|
Su
|
Hanny does a fiery flip that hits twice. Hanny takes a step back beforehand, making it good for avoiding attacks.
|
| Version
|
Damage
|
Guard
|
Property
|
Startup
|
Active
|
Recovery
|
Block Adv
|
Cancel
|
| Air
|
400*2
|
High, All
|
-
|
-
|
-
|
-
|
-
|
Su
|
Unlike the ground version, the second hit can be blocked while standing. In return, Hanny comes down immediately, which grants more favorable framedata.
|
|
623C
|
|
| Damage
|
Guard
|
Property
|
Startup
|
Active
|
Recovery
|
Block Adv
|
Cancel
|
| 800
|
All
|
-
|
-
|
-
|
-
|
-
|
-
|
A standard uppercut. This makes a good anti-air, as well as being the best meterless combo ender in Sword Stance.
|
|
W214C
|
|
| Damage
|
Guard
|
Property
|
Startup
|
Active
|
Recovery
|
Block Adv
|
Cancel
|
| 900
|
All
|
-
|
-
|
-
|
-
|
-
|
-
|
Hanny places a sunspot on the ground. This trap will stay even after switching stances, making it a great oki option or a way to defend yourself.
|
|
236C
|
|
| Damage
|
Guard
|
Property
|
Startup
|
Active
|
Recovery
|
Block Adv
|
Cancel
|
| 20
|
All
|
-
|
-
|
-
|
-
|
-
|
U
|
Hanny sends out an orb of lightning that puts the opponent in huge hitstun if it lands. If you do it on the ground, it has the most atrocious recovery of all time. Great in the air, however.
|
|
63214A
|
|
| Damage
|
Guard
|
Property
|
Startup
|
Active
|
Recovery
|
Block Adv
|
Cancel
|
| N/A
|
N/A
|
-
|
-
|
-
|
-
|
-
|
N, U, Sp, Su
|
A command run backwards. Can be canceled into other moves after about 1/3 of the total distance. Beyond gimmicky blockstrings and disengaging, literally ever other option Hanny has for moving back is better.
|
|
B-Power Arts
41236D
|
|
| Damage
|
Guard
|
Property
|
Startup
|
Active
|
Recovery
|
Block Adv
|
Cancel
|
| 300*5
|
All
|
-
|
-
|
-
|
-
|
-
|
-
|
Hanny shoots a projectile beam from his mouth. This is a decent damage dealing super, not great but not awful.
|
|
Big Bang Break
41236ABC
|
|
| Damage
|
Guard
|
Property
|
Startup
|
Active
|
Recovery
|
Block Adv
|
Cancel
|
| 3675
|
All
|
-
|
-
|
-
|
-
|
-
|
-
|
Hanny summons a giant Hanny, who lands on the opponent and shoots beams from its eyes. Good as a combo ender when in Big Bang Mode, especially if you're aiming to kill. Ends Big Bang Mode instantly.
|
|
Combos
Combo Legend
Numpad Notation
|
|
=
|
|
=
|
|
|
|
|
| up-back |
up |
up-forward
|
| back |
neutral |
forward
|
| down-back |
down |
down-forward
|
|
- Light Attack:

- Medium Attack:

- Heavy Attack:

- Special:

|
- Micro Dash = 66
 
- j = Jump
 / /  / / 
- Dash Jump = 669 jX
  
- jc = Jump Cancel
- dl. = Delay
- w. = Whiff
- xx = Special Cancel
- X = Any Attack Button
- [X] = Hold
- ]X[ = Release
- TK = Tiger Knee
- (N) = Multi-hit move hits only N times
- SKD = Sliding Knockdown
- HKD = Hard Knockdown
- BBM = Big Bang Mode
- BBB = Big Bang Break
|
Character Abbrevations
|
|
Combo Theory
- Combo damage varies from character to character, so all damage numbers come from testing on a full-health Rouga.
Midscreen
Corner
Colors
BBBR Navigation
![]() wand for long range and a
wand for long range and a ![]() sword for close range. Getting the hang of stance switching can be difficult, but this character has a lot to help you, especially in the height department.
sword for close range. Getting the hang of stance switching can be difficult, but this character has a lot to help you, especially in the height department.
