Bleach Dark Souls/System
On this page, information about how the game works will be explained/summarized to give viewers a better understanding of what BDS2 entails. For more in-depth info, you can head here
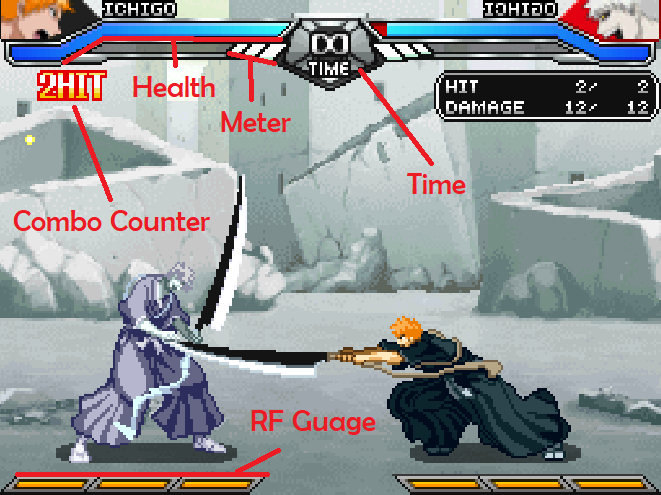
HUD INFORMATION
HEALTH AND DEFENSE
Bleach DS's health system is very similar to most other FG's. Keep getting hit and it'll deplete to 0. You can also gain chip damage when hit by certain moves (usually specials) on block, but chip cannot kill you. Player with the most health wins. IF there is a tie in health points, it will be considered a draw and the match will end.
SPECIALS AND SUPERS
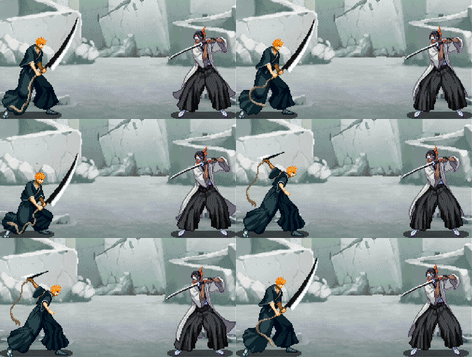
Special attacks and Supers can be done by inputting a specific motion then pressing an attack button. Specials can be done at any point, while Supers require 1-3 meters to do. Most Specials/Supers consist of 236, 623, 41236 and 22 motions. (Notation) Example: Ichigo's 236L.
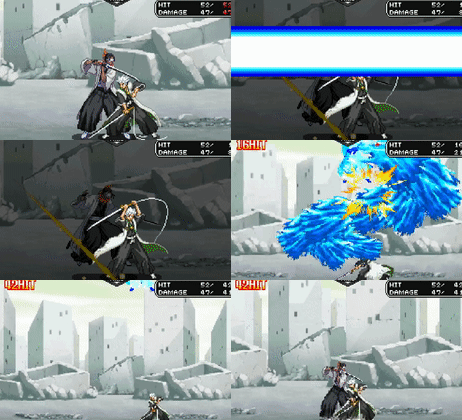
or Hitsugaya's 236236H
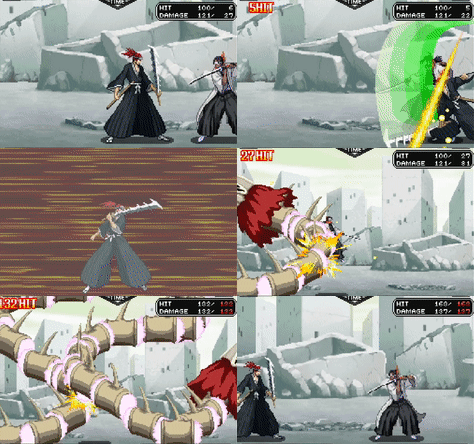
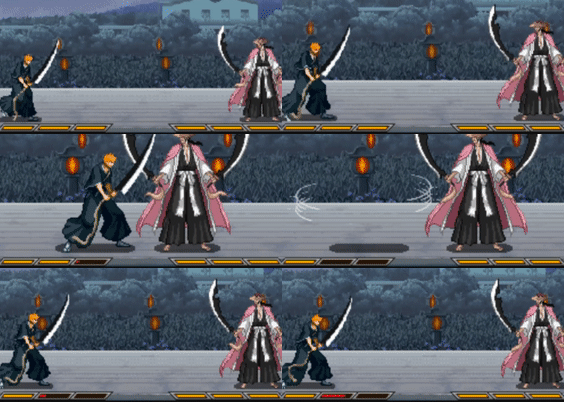
Specials and Supers can be done in reverse to output the same special backwards. Example: Renji's 641236H being done in reverse (463214H) within a combo, in order for it to hit.
If the Heavy version of a Special is done, it will result in the EX, or in this game's terms, 'RF' version of the Special. This will take both an FS bar and RF bar from your RF/FS Guage but only requires an RF Bar. (see RF/FS Gauge section). This will usually either increase the damage or speed/framedata of the special. Example: Hollow Ichigo's 236H (RF)
Some specials however, are RF only or RFO. In that they cannot be used without the requirement of an RF bar. Eg. Byakuya's 41236x.
METER
In this game, the maximum amount of meter that can be acquired is THREE (3) Bars and it is used for SUPERS and DAMAGE CANCELS
Supers
Level 1 Supers, usually being SuAs and SuBs require one (1) bar of meter. While Level 3 Supers, which can be SuB's or SuC's require three (3) bars of meter. Example: Renji's Level 3, which was previously shown in the Specials and Supers Sub-section.
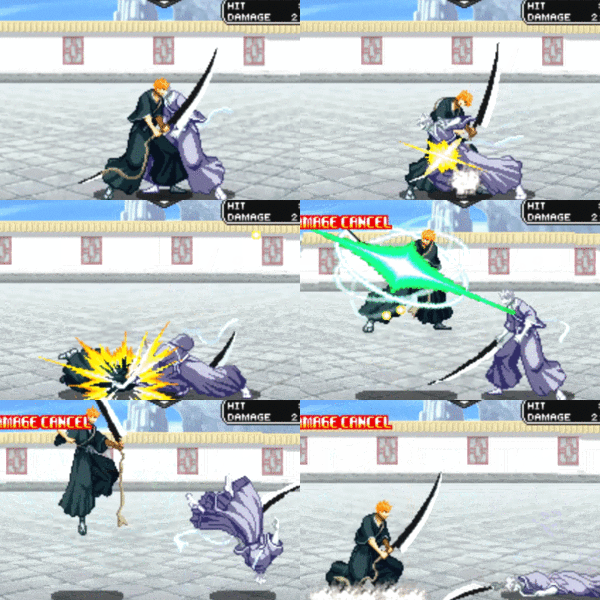
Bursts/Damage Cancels
Bursts or Damage Cancels require 1 meter. They are used to exit combos, pushing the enemy off of you with a discharge of spiritual pressure. You are invincible for an extremely short period of time after bursting, enough for you to be able block again. However, they have very limited range, and flash steps are immune to them.
FLASH STEPS
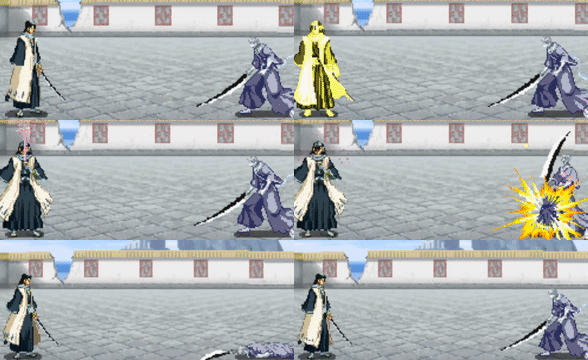
Flash Steps function as teleports and at the same time roman cancels. They're used to extend combos, better movement, mixups and evasions when blocking. All normals can be cancelled into a flash step on hit or on block. An example of a Flash Step:
MOST flash steps have an incy bit of recovery and can be easily punished by meaties.
MOST flash steps can be cancelled by normals.
MOST flash steps are also immune to normals but aren't immune to EX moves. Every flash step has a different range and speed, so make sure to learn them all as they can affect your neutral and combos to a pretty large extent.
RF/FS GAUGE
The RF/FS gauge is used for RF Specials and Flash Steps. RF Specials use one (1) RF bar and one (1) FS Bar but only require an RF bar to be done. Flash Steps use one (1) FS Bar.
When you use an FS bar, it will recover quickly if you are standing, crouching, walking or running on the floor. If you are attacking, or in the air, its speed will be reduced greatly.
FS bars will only recover if the RF bar its within is filled. RF bars increase extremely slowly and unlike FS bars, the speed cannot be altered via a change in state.
BLOCKING
This game uses the general low, mid and high mechanic seen in most FGs.
Low attacks eg. 2L must be blocked low. (1)
Mid attacks eg. 5M can be blocked low or high.(1 or 4)
High attacks or overheads eg. JH must be blocked high. (4)
There is also the G button, which works similarly.
5G to block Mids and Highs
2G to block Mids and Lows.
The G button however, will save you from crossups and allows for other technical abilities. Its con is that its force you to be stationary.
Every attack can be blocked in the air however all blocks are susceptible to grabs.
GRABS
Grabs can be done on the air and on the floor and are used to punish blocking attempts. The universal grab input is attack+attack. Characters have a specific amount of grab invincibility on block, on hit and on wakeup, making tick grabs difficult and inefficient. Every character has a different grab (most of the time in terms of frame data and damage) however they can come in many forms, whether it be a launch, knockdown, wallbounce, multihit (Like ken's grab in 3S) or no grab.
DASHES AND JUMPS
Every character in the game has the ability to dash as well as air dash twice before losing the ability to as well as double jump. Doing an air-dash does not disable the ability to do another jump nor vice versa. You can cancel both a dash and air dash with any attack, jump or the G button.
If you hold 6 after a dash, you will run.
HIT STATES
There are three different types of states an opponent can be in after getting hit:
- Hitstun - Pretty self-explanatory
- Launch - Simply airborne hitstun. Will eventually wither and they can move in the air again.
- Launch > HKD - Are vulnerable while rising but will eventually fall in an invincible state and hit the floor. (Kon and Ririn are exceptions)
- Spike HKD - Is spiked to the floor and completely invulnerable. Usually after a J.H on an airborne opponent.
- Wallbounce - The opponent zoom's across the screen, hits the wall and falls down. Is completely vulnerable until a few frames after hitting the wall.
RESTANDS
Before an opponent hits the floor after wallbouncing, they can be hit a frame before they hit the floor and restood. Meaning, they will stand again and be put it regular hitstun.
GUARD CANCELS
Guard cancels can be done on block to avoid and escape pressure and to punish attacks. There are two types of guard cancels.
- Guard Step (Flash Step) - Will do a flash-step in whatever direction you please/is possible. Takes an FS bar from your FS/RF Gauge.
- Special Guard Cancel. (Special Motion + Attack) - Will do whatever Special move you please for free.
CANCELS
Normals cancel into each other on block and on hit universally using the zig-zag magic series. This being:
5L > 2L > 5M > 2M > 5H > 2M
In the air, normals can chain together via the regular magic series. This being:
J.L > J.M > J.H
MOST lights are self-cancellable.
All normals can be cancelled into a flash step, special or super.
90% of launchers are jump-cancellable.
Most Specials are super-cancellable as long as they aren't airborne or projectiles, but there are exceptions.
WAKEUP OPTIONS
When knocked down, you have the ability to:
- Do nothing: Fastest wakeup but no positional advantage.
- Hold left: Isn't as fast, an invincible hop to the left.
- Hold right: Isn't as fast, an invincible hop to the right.
EXTRA INFO
Rounds: All matches are 1 round.
Super cutscenes can be skipped by pressing START.
Lines and Cards: Aren't used and can be disabled when creating a room.
Touchscreen Shortcuts: Can be used but is not necessary and can actually be detrimental.

