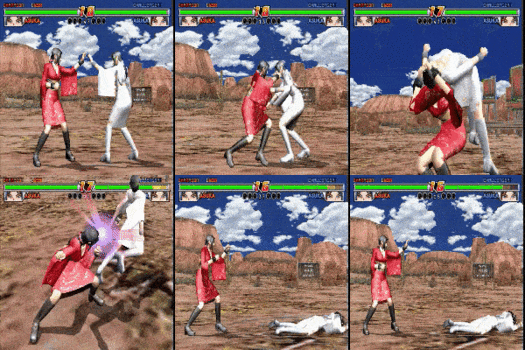
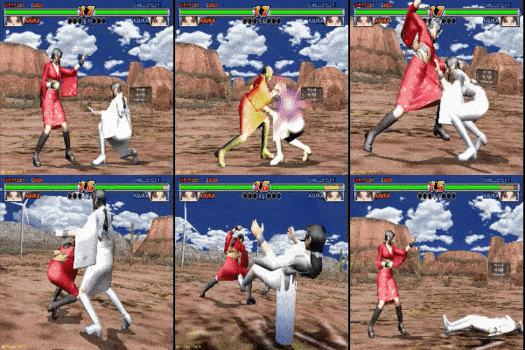
| Asuka
|
|
|
| Full name |
Asuka
|
| Health |
318
|
| Play-style |
Footsies/Counterpoking
|
| Weight |
Lightweight (4/12)
|
| B/W/H |
87/59/85
|
Introduction
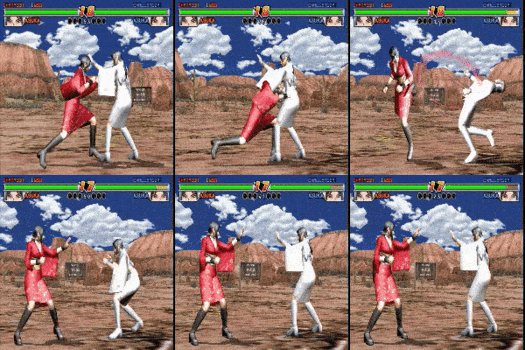
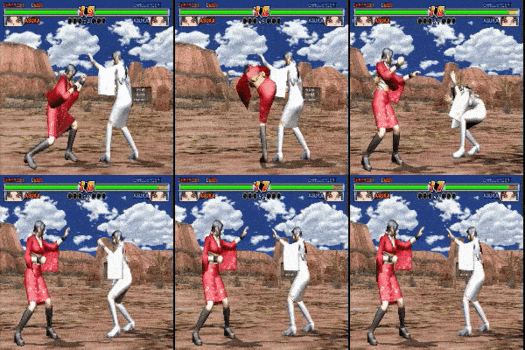
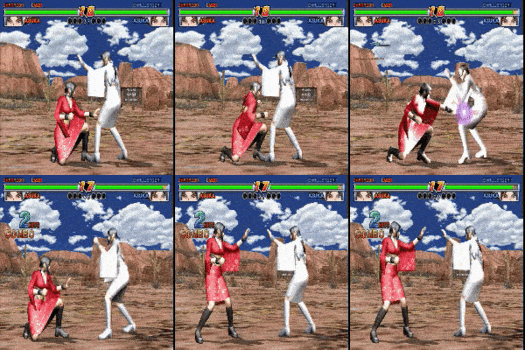
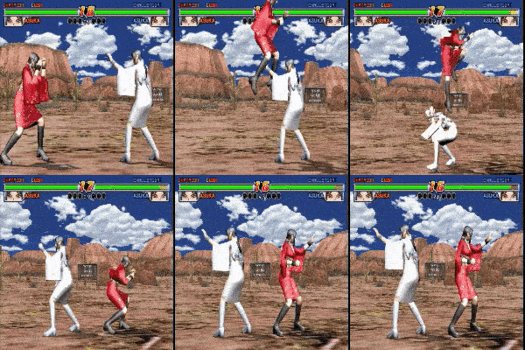
Counterhits in Jingi Storm can be extremely threatening, and never is this more true than with Asuka. She may not have the greatest combo game, but her ability to delete massive chunks of the opponent's life bar in single hits is to be respected and feared.
Playstyle
 Asuka is a high-execution neutral monster who can decimate her foes in mere seconds with high-damage counter hits. Asuka is a high-execution neutral monster who can decimate her foes in mere seconds with high-damage counter hits.
|
| Strengths |
Weaknesses
|
- COUNTER: Asuka's attacks gain incredible properties on counter hit, giving immense damage and even launches when her offense is timed properly.
- Mids for Days: None possess a greater selection of mids than Asuka. Whether you need speed, damage, range, or guard breaks, she can do it all and terrify the opponent into never risking a duck.
- Dodge/Punish: Asuka's thin character model makes her sidestep stronger than average, and many of her attacks also have built-in evasion. Once she's evaded an attack, she can strike back with 623P, a quick launcher that will catch nearly anything on whiff.
|
- Perfectionist: Asuka is aguably the most difficult character in the game. She requires confident knowledge of your opponent's habits to be played to the best of her strengths, and her attacks contain unusual and precise inputs. Dexterous hands are a must when it comes to her.
- Subpar Combos: Without counterhits, Asuka's juggles tend to deal some of the lowest average damage in the game. This leaves her with little incentive to launch due to the omnipresent threat of Atemi.
- Linear: Asuka's offense is very straightforward, in a literal sense. She is highly vulnerable to sidesteps, and can be punished easily to great effect with her low weight.
|
Attacks
PP normal normal 6pp 6pp 6pk 6pk
|
| Input
|
Damage
|
Startup
|
Active
|
Recovery
|
Guard
|
Break
|
On Hit
|
On Block
|
| P
|
-
|
-
|
-
|
-
|
-
|
-
|
-
|
-
|
| Input
|
Damage
|
Startup
|
Active
|
Recovery
|
Guard
|
Break
|
On Hit
|
On Block
|
| PP
|
-
|
-
|
-
|
-
|
-
|
-
|
-
|
-
|
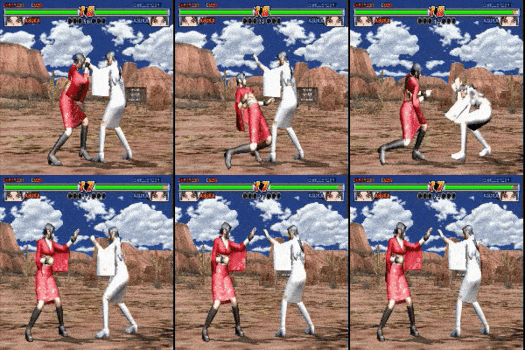
Unremarkable high sting, PK is a wee bit better.
|
| Input
|
Damage
|
Startup
|
Active
|
Recovery
|
Guard
|
Break
|
On Hit
|
On Block
|
| P6P
|
-
|
-
|
-
|
-
|
-
|
-
|
-
|
-
|
Mid extension, extremely fast and good for checking opponents who like to duck jabs.
|
| Input
|
Damage
|
Startup
|
Active
|
Recovery
|
Guard
|
Break
|
On Hit
|
On Block
|
| P6PP
|
-
|
-
|
-
|
-
|
-
|
-
|
-
|
-
|
A high elbow, gives a counterhit launch.
|
| Input
|
Damage
|
Startup
|
Active
|
Recovery
|
Guard
|
Break
|
On Hit
|
On Block
|
| P6PK
|
-
|
-
|
-
|
-
|
-
|
-
|
-
|
-
|
Low ender, somewhat slow and low damage, not much utility.
|
|
P421P214P
|
| Input
|
Damage
|
Startup
|
Active
|
Recovery
|
Guard
|
Break
|
On Hit
|
On Block
|
| P421P
|
-
|
-
|
-
|
-
|
-
|
-
|
-
|
-
|
| Input
|
Damage
|
Startup
|
Active
|
Recovery
|
Guard
|
Break
|
On Hit
|
On Block
|
| P421P214P
|
-
|
-
|
-
|
-
|
-
|
-
|
-
|
-
|
Very difficult to input. Naturally comboing 3-hit string that sends the opponent fullscreen, yellow guard break on third hit but high recovery means no followups are possible. Theoretically a great tool but the input holds it back significantly.
|
|
PK
|
| Input
|
Damage
|
Startup
|
Active
|
Recovery
|
Guard
|
Break
|
On Hit
|
On Block
|
| PK
|
-
|
-
|
-
|
-
|
-
|
-
|
-
|
-
|
Quick string with good damage, good frame advantage.
|
|
6PPP normal normal k ender k ender
|
| Input
|
Damage
|
Startup
|
Active
|
Recovery
|
Guard
|
Break
|
On Hit
|
On Block
|
| 6P
|
-
|
-
|
-
|
-
|
-
|
-
|
-
|
-
|
Extremely fast middle jab.
|
| Input
|
Damage
|
Startup
|
Active
|
Recovery
|
Guard
|
Break
|
On Hit
|
On Block
|
| 6PP
|
-
|
-
|
-
|
-
|
-
|
-
|
-
|
-
|
Second jab, forces the opponent into a small mixup with this string's two enders. Good for closing out rounds.
|
| Input
|
Damage
|
Startup
|
Active
|
Recovery
|
Guard
|
Break
|
On Hit
|
On Block
|
| 6PPP
|
-
|
-
|
-
|
-
|
-
|
-
|
-
|
-
|
Low ender with middling reward. Minus on hit, though not unsafe.
|
| Input
|
Damage
|
Startup
|
Active
|
Recovery
|
Guard
|
Break
|
On Hit
|
On Block
|
| 6PPK
|
-
|
-
|
-
|
-
|
-
|
-
|
-
|
-
|
Excellent mid to compliment the 6PPP low ender.
|
|
623P
|
| Input
|
Damage
|
Startup
|
Active
|
Recovery
|
Guard
|
Break
|
On Hit
|
On Block
|
| 623P
|
-
|
-
|
-
|
-
|
-
|
-
|
-
|
-
|
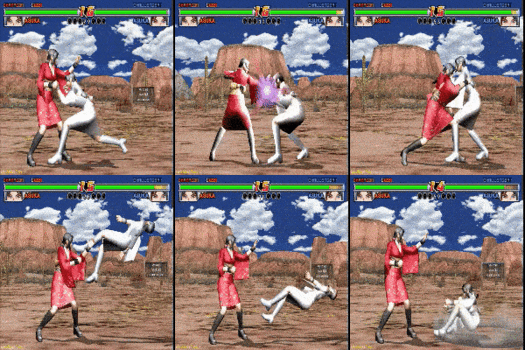
Super quick high launcher, good for checking opponents pressing buttons. Deals massive damage on counter-hit.
|
|
66P
|
| Input
|
Damage
|
Startup
|
Active
|
Recovery
|
Guard
|
Break
|
On Hit
|
On Block
|
| 66P
|
-
|
-
|
-
|
-
|
-
|
-
|
-
|
-
|
High frame advantage on block and hit, a valuable approach and pressure tool, can encourage the opponent to duck into Asuka's strong mids.
|
|
4P
|
| Input
|
Damage
|
Startup
|
Active
|
Recovery
|
Guard
|
Break
|
On Hit
|
On Block
|
| 4P
|
-
|
-
|
-
|
-
|
-
|
-
|
-
|
-
|
Low damage mid with near instant high crush properties. Not usually worth using as Asuka can often get much higher damage options, but good for interrupting strings.
|
|
421P6
|
| Input
|
Damage
|
Startup
|
Active
|
Recovery
|
Guard
|
Break
|
On Hit
|
On Block
|
| 421P
|
-
|
-
|
-
|
-
|
-
|
-
|
-
|
-
|
Asuka performs a lightning-fast Tetsuzanko shoulder attack. Incredible frametrap tool to fish for counter-hits, massive damage if you can land a counter-hit. Unsafe on block though, so be careful.
|
| Input
|
Damage
|
Startup
|
Active
|
Recovery
|
Guard
|
Break
|
On Hit
|
On Block
|
| 421P6
|
-
|
-
|
-
|
-
|
-
|
-
|
-
|
-
|
Makes Asuka perform a unique stepdash after 421P. Allows her to combo into 2K or 93P for a tiny bit of extra damage.
|
|
3P
|
| Input
|
Damage
|
Startup
|
Active
|
Recovery
|
Guard
|
Break
|
On Hit
|
On Block
|
| 3P
|
-
|
-
|
-
|
-
|
-
|
-
|
-
|
-
|
Generic 3p, use as combo filler or a counter-hit launcher.
|
|
31P
|
| Input
|
Damage
|
Startup
|
Active
|
Recovery
|
Guard
|
Break
|
On Hit
|
On Block
|
| 31P
|
-
|
-
|
-
|
-
|
-
|
-
|
-
|
-
|
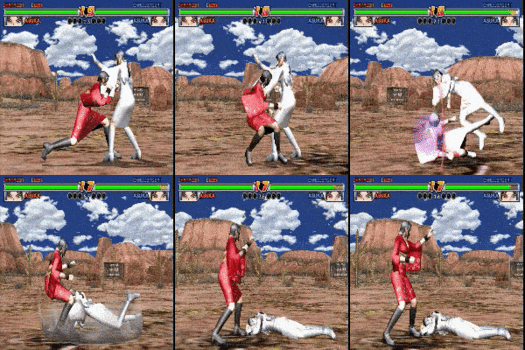
Evasive red guard break with no follow ups. High damage, knocks down, and sends fullscreen on counter-hit. Gets the same OTG followups as 421P6.
|
|
1PP
|
| Input
|
Damage
|
Startup
|
Active
|
Recovery
|
Guard
|
Break
|
On Hit
|
On Block
|
| 1P
|
-
|
-
|
-
|
-
|
-
|
-
|
-
|
-
|
A strange retreating mid punch. Not much use on its own.
|
| Input
|
Damage
|
Startup
|
Active
|
Recovery
|
Guard
|
Break
|
On Hit
|
On Block
|
| 1PP
|
-
|
-
|
-
|
-
|
-
|
-
|
-
|
-
|
Surprisingly, gives a launch on normal hit. Allows a full conversion into 6KK.
|
|
93P
|
| Input
|
Damage
|
Startup
|
Active
|
Recovery
|
Guard
|
Break
|
On Hit
|
On Block
|
| 93P
|
-
|
-
|
-
|
-
|
-
|
-
|
-
|
-
|
Asuka's Yo-Yo, hits otg and has decent range. High recovery, opening you up to be punished at close range. Can sometimes miss the initial animation and hit opponent on the way back.
|
|
Sidestep P
|
| Input
|
Damage
|
Startup
|
Active
|
Recovery
|
Guard
|
Break
|
On Hit
|
On Block
|
| Sidestep P
|
-
|
-
|
-
|
-
|
-
|
-
|
-
|
-
|
A unique sidestep p which hits a bit quicker than average. Gives a somewhat low launch, but still enough for Asuka's basic routes.
|
|
Running P
|
| Input
|
Damage
|
Startup
|
Active
|
Recovery
|
Guard
|
Break
|
On Hit
|
On Block
|
| Running P
|
-
|
-
|
-
|
-
|
-
|
-
|
-
|
-
|
Generic running slide. Unremarkable, but good to have.
|
|
K
|
| Input
|
Damage
|
Startup
|
Active
|
Recovery
|
Guard
|
Break
|
On Hit
|
On Block
|
| K
|
-
|
-
|
-
|
-
|
-
|
-
|
-
|
-
|
Huge range, low recovery and startup, and easily spammable. Hits high, despite appearances.
|
|
6KK
|
| Input
|
Damage
|
Startup
|
Active
|
Recovery
|
Guard
|
Break
|
On Hit
|
On Block
|
| 6K
|
-
|
-
|
-
|
-
|
-
|
-
|
-
|
-
|
A middle knee. Long range, but minus on hit and Asuka generally has better options.
|
| Input
|
Damage
|
Startup
|
Active
|
Recovery
|
Guard
|
Break
|
On Hit
|
On Block
|
| 6KK
|
-
|
-
|
-
|
-
|
-
|
-
|
-
|
-
|
Long-range kick string, good for juggles but doesn't combo on normal hit and should generally be avoided in neutral.
|
|
66K
|
| Input
|
Damage
|
Startup
|
Active
|
Recovery
|
Guard
|
Break
|
On Hit
|
On Block
|
| 66K
|
-
|
-
|
-
|
-
|
-
|
-
|
-
|
-
|
Yellow guard break. A large and fairly quick roundhouse kick. Hits mid and has good range, and gives a 623P launch on successful guard break. Generally a great tool for opening up your opponent.
|
|
2KPK normal normal low ender low ender
|
| Input
|
Damage
|
Startup
|
Active
|
Recovery
|
Guard
|
Break
|
On Hit
|
On Block
|
| 2K
|
-
|
-
|
-
|
-
|
-
|
-
|
-
|
-
|
Very quick, unseeable low poke.
|
| Input
|
Damage
|
Startup
|
Active
|
Recovery
|
Guard
|
Break
|
On Hit
|
On Block
|
| 2KP
|
-
|
-
|
-
|
-
|
-
|
-
|
-
|
-
|
Mid ender, gives a tiny launch on normal hit. A cheeky bit of grounded mix and a useful combo tool, especially for lighter characters. Has a slight stagger animation on block, leaving Asuka unsafe.
|
| Input
|
Damage
|
Startup
|
Active
|
Recovery
|
Guard
|
Break
|
On Hit
|
On Block
|
| 2KPK
|
-
|
-
|
-
|
-
|
-
|
-
|
-
|
-
|
Middle kick ender. Will not come out on block, decent damage on hit.
|
| Input
|
Damage
|
Startup
|
Active
|
Recovery
|
Guard
|
Break
|
On Hit
|
On Block
|
| 2KK
|
-
|
-
|
-
|
-
|
-
|
-
|
-
|
-
|
Low ender, your opponent will likely be more wary of 2KP so you can chip them away with this.
|
|
3K
|
| Input
|
Damage
|
Startup
|
Active
|
Recovery
|
Guard
|
Break
|
On Hit
|
On Block
|
| 3K
|
-
|
-
|
-
|
-
|
-
|
-
|
-
|
-
|
One of Asuka's best normals. Mid poke with good range, damage, and barely any startup or recovery. High damage on counter-hit too.
|
|
1KK normal normal 5k ender 5k ender
|
| Input
|
Damage
|
Startup
|
Active
|
Recovery
|
Guard
|
Break
|
On Hit
|
On Block
|
| 1K
|
-
|
-
|
-
|
-
|
-
|
-
|
-
|
-
|
Low stomp, mostly useful for OTGs.
|
| Input
|
Damage
|
Startup
|
Active
|
Recovery
|
Guard
|
Break
|
On Hit
|
On Block
|
| 1KK
|
-
|
-
|
-
|
-
|
-
|
-
|
-
|
-
|
Good OTG string, hard to avoid once knocked down.
|
| Input
|
Damage
|
Startup
|
Active
|
Recovery
|
Guard
|
Break
|
On Hit
|
On Block
|
| 1K5K
|
-
|
-
|
-
|
-
|
-
|
-
|
-
|
-
|
Mid ender, launches fullscreen on counterhit. Interestingly, this will only combo when it hits the opponent crouching.
|
|
9K
|
| Input
|
Damage
|
Startup
|
Active
|
Recovery
|
Guard
|
Break
|
On Hit
|
On Block
|
| 9K
|
-
|
-
|
-
|
-
|
-
|
-
|
-
|
-
|
Slightly worse version of Ryuya's 9k, good for closing distance and chasing backroll.
|
|
Sidestep K
|
| Input
|
Damage
|
Startup
|
Active
|
Recovery
|
Guard
|
Break
|
On Hit
|
On Block
|
| Sidestep K
|
-
|
-
|
-
|
-
|
-
|
-
|
-
|
-
|
A launching knee which ducks highs during its startup. Use as a slightly slower but more consistent alternative to Sidestep P.
|
|
Running K
|
| Input
|
Damage
|
Startup
|
Active
|
Recovery
|
Guard
|
Break
|
On Hit
|
On Block
|
| Running K
|
-
|
-
|
-
|
-
|
-
|
-
|
-
|
-
|
Running P's mid counterpart. No knockdown, but plus on hit and safe on block so a solid tool all around.
|
|
6P+K
|
| Input
|
Damage
|
Startup
|
Active
|
Recovery
|
Guard
|
Break
|
On Hit
|
On Block
|
| 6P+K
|
-
|
-
|
-
|
-
|
-
|
-
|
-
|
-
|
Quick mid poke with massive reach, and is + on hit. Good move all around.
|
|
2K+G
|
| Input
|
Damage
|
Startup
|
Active
|
Recovery
|
Guard
|
Break
|
On Hit
|
On Block
|
| 2K+G
|
-
|
-
|
-
|
-
|
-
|
-
|
-
|
-
|
Slower than average snake edge, unique audio queue makes it fairly reactable.
|
|
Crouching Attacks
Crouching PP
|
| Input
|
Damage
|
Startup
|
Active
|
Recovery
|
Guard
|
Break
|
On Hit
|
On Block
|
| Crouching P
|
-
|
-
|
-
|
-
|
-
|
-
|
-
|
-
|
| Input
|
Damage
|
Startup
|
Active
|
Recovery
|
Guard
|
Break
|
On Hit
|
On Block
|
| Crouching PP
|
-
|
-
|
-
|
-
|
-
|
-
|
-
|
-
|
Really laggy 2-hit dick jab, unfortunately she doesn't get generic dick jab. Never use this.
|
|
Aerial Attacks
Air 2K
|
| Input
|
Damage
|
Startup
|
Active
|
Recovery
|
Guard
|
Break
|
On Hit
|
On Block
|
| Air 2K
|
-
|
-
|
-
|
-
|
-
|
-
|
-
|
-
|
Generic girl stomp, combos into itself. Not much use.
|
|
Throws
P+G
|
| Input
|
Damage
|
Startup
|
Active
|
Recovery
|
Guard
|
Break
|
On Hit
|
On Block
|
| P+G
|
-
|
-
|
-
|
-
|
-
|
-
|
-
|
-
|
|
|
|
3P+G
|
| Input
|
Damage
|
Startup
|
Active
|
Recovery
|
Guard
|
Break
|
On Hit
|
On Block
|
| 3P+G
|
-
|
-
|
-
|
-
|
-
|
-
|
-
|
-
|
|
|
|
66P+G
|
| Input
|
Damage
|
Startup
|
Active
|
Recovery
|
Guard
|
Break
|
On Hit
|
On Block
|
| 66P+G
|
-
|
-
|
-
|
-
|
-
|
-
|
-
|
-
|
No reason to use P+G over this, since it gives better oki and damage.
|
|
Super Attacks
41236 P+K P+K P+K
|
| Input
|
Damage
|
Startup
|
Active
|
Recovery
|
Guard
|
Break
|
On Hit
|
On Block
|
| 41236 P+K
|
-
|
-
|
-
|
-
|
-
|
-
|
-
|
-
|
| Input
|
Damage
|
Startup
|
Active
|
Recovery
|
Guard
|
Break
|
On Hit
|
On Block
|
| 41236 P+K P+K
|
-
|
-
|
-
|
-
|
-
|
-
|
-
|
-
|
| Input
|
Damage
|
Startup
|
Active
|
Recovery
|
Guard
|
Break
|
On Hit
|
On Block
|
| 41236 P+K P+K P+K
|
-
|
-
|
-
|
-
|
-
|
-
|
-
|
-
|
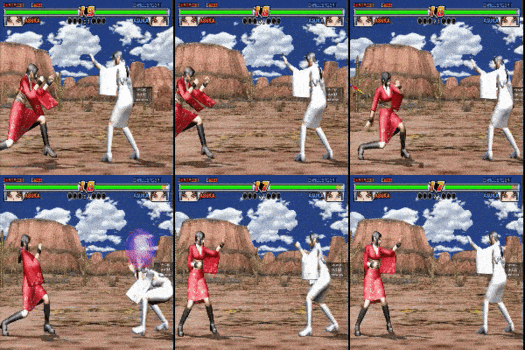
Last two projectiles combo into eachother, and give enough advantage for 623p to link.
|
|


