| Fenrir
|
|
|
| Full name |
Fenrir
|
| Health |
299
|
| Play-style |
Setplay
|
| Weight |
Super Lightweight (1/12)
|
| B/W/H |
96/60/92
|
Introduction
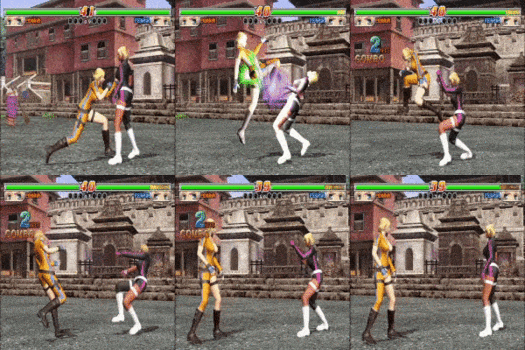
Fenrir is a rushdown character who possesses uniquely strong defense. She can stay on her opponent constantly with barrages of quick attacks, and shut them down just as easily when they return fire with her unique high/mid parry. This combined with her delayed Snowflake projectile lets her get away with extended setplay sequences as the opponent is heavily discouraged from striking back, lest they get Atemi'd for massive damage.
When the opponent does find a hit, Fenrir's weaknesses begin to show, as she has incredibly low health and weight, and can die just as quickly as she can kill. She essentially needs to keep her momentum going at all times, and though it comes at great risk she has an excellent set of tools for the job.
Playstyle
 Fenrir is a defensively-oriented setplay character who creates unfavorable situations for the opponent using her Snowflake projectiles. Fenrir is a defensively-oriented setplay character who creates unfavorable situations for the opponent using her Snowflake projectiles.
|
| Strengths |
Weaknesses
|
- Busted Atemi: Fenrir's P+K is an incredibly strong defensive option which acts as both a high and mid parry.
- Unique Offense: Snowflake allows Fenrir to set up tons of useful offensive pressure and unblockables.
- Great Pokes: Fenrir has an excellent selection of high, mid, and low pokes that can pester the opponent constantly during the match.
|
- Glass Cannon: Fenrir has the second-lowest health in the game, and her incredibly low weight makes her very easy to combo.
- Weak to Sidestep: Snowflakes can be countered primarily just through good use of sidestepping, and Fenrir's options for catching sidesteps are less than stellar.
- Terrible Super: Fenrir has maybe the worst super in the game, and it should really just be avoided entirely.
|
Attacks
Hold 3
|
| Input
|
Damage
|
Startup
|
Active
|
Recovery
|
Guard
|
Break
|
On Hit
|
On Block
|
| Hold 3
|
-
|
-
|
-
|
-
|
-
|
-
|
-
|
-
|
Really weird unique stance. Auto-parries against certain mid kicks. Requires further testing.
|
|
PPPP pppp pppp k ender k ender mid option mid option low option low option
|
| Input
|
Damage
|
Startup
|
Active
|
Recovery
|
Guard
|
Break
|
On Hit
|
On Block
|
| P
|
-
|
-
|
-
|
-
|
-
|
-
|
-
|
-
|
| Input
|
Damage
|
Startup
|
Active
|
Recovery
|
Guard
|
Break
|
On Hit
|
On Block
|
| PP
|
-
|
-
|
-
|
-
|
-
|
-
|
-
|
-
|
| Input
|
Damage
|
Startup
|
Active
|
Recovery
|
Guard
|
Break
|
On Hit
|
On Block
|
| PPP
|
-
|
-
|
-
|
-
|
-
|
-
|
-
|
-
|
Good mash string, surprisingly solid damage.
|
| Input
|
Damage
|
Startup
|
Active
|
Recovery
|
Guard
|
Break
|
On Hit
|
On Block
|
| PPPP
|
-
|
-
|
-
|
-
|
-
|
-
|
-
|
-
|
The game will tell you this is a natural combo. The game is lying.
|
| Input
|
Damage
|
Startup
|
Active
|
Recovery
|
Guard
|
Break
|
On Hit
|
On Block
|
| PPPK
|
-
|
-
|
-
|
-
|
-
|
-
|
-
|
-
|
Green guard break. Despite shared animation, does not carry sidestep K's unique properties.
|
| Input
|
Damage
|
Startup
|
Active
|
Recovery
|
Guard
|
Break
|
On Hit
|
On Block
|
| PP3P
|
-
|
-
|
-
|
-
|
-
|
-
|
-
|
-
|
| Input
|
Damage
|
Startup
|
Active
|
Recovery
|
Guard
|
Break
|
On Hit
|
On Block
|
| PPK
|
-
|
-
|
-
|
-
|
-
|
-
|
-
|
-
|
Mid that doesn't combo. Unremarkable.
|
| Input
|
Damage
|
Startup
|
Active
|
Recovery
|
Guard
|
Break
|
On Hit
|
On Block
|
| PPKK
|
-
|
-
|
-
|
-
|
-
|
-
|
-
|
-
|
|
|
|
PK
|
| Input
|
Damage
|
Startup
|
Active
|
Recovery
|
Guard
|
Break
|
On Hit
|
On Block
|
| PK
|
-
|
-
|
-
|
-
|
-
|
-
|
-
|
-
|
Solid long-range mid option, but slightly worse than both PPP and KK.
|
|
66PK
|
| Input
|
Damage
|
Startup
|
Active
|
Recovery
|
Guard
|
Break
|
On Hit
|
On Block
|
| 66P
|
-
|
-
|
-
|
-
|
-
|
-
|
-
|
-
|
1st hit of 66PK, quick yellow guard break, very good.
|
| Input
|
Damage
|
Startup
|
Active
|
Recovery
|
Guard
|
Break
|
On Hit
|
On Block
|
| 66PK
|
-
|
-
|
-
|
-
|
-
|
-
|
-
|
-
|
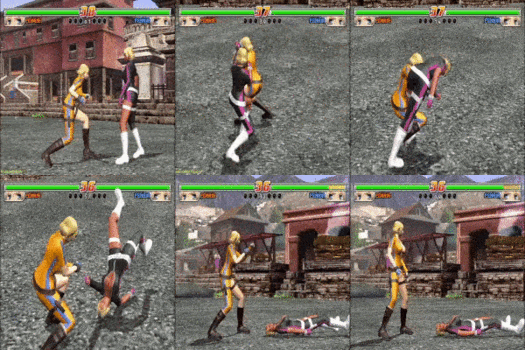
Probably Fenrir's best grounded launcher. Super useful, as it's guaranteed after the 66P guard break and can even be comboed into with Snowflake. Use often.
|
|
214P
|
| Input
|
Damage
|
Startup
|
Active
|
Recovery
|
Guard
|
Break
|
On Hit
|
On Block
|
| 214P
|
-
|
-
|
-
|
-
|
-
|
-
|
-
|
-
|
Nice and quick red guard break. Too much recovery for launch afterwards, best option is sidestep K or 3PPP if you lack the execution.
|
|
3PPPK mid ender mid ender sweep ender sweep ender
|
| Input
|
Damage
|
Startup
|
Active
|
Recovery
|
Guard
|
Break
|
On Hit
|
On Block
|
| 3P
|
-
|
-
|
-
|
-
|
-
|
-
|
-
|
-
|
| Input
|
Damage
|
Startup
|
Active
|
Recovery
|
Guard
|
Break
|
On Hit
|
On Block
|
| 3PP
|
-
|
-
|
-
|
-
|
-
|
-
|
-
|
-
|
| Input
|
Damage
|
Startup
|
Active
|
Recovery
|
Guard
|
Break
|
On Hit
|
On Block
|
| 3PPP
|
-
|
-
|
-
|
-
|
-
|
-
|
-
|
-
|
Excellent string. Quick, hits mid, and deals good damage. All around amazing and extremely spammable
|
| Input
|
Damage
|
Startup
|
Active
|
Recovery
|
Guard
|
Break
|
On Hit
|
On Block
|
| 3PPPK
|
-
|
-
|
-
|
-
|
-
|
-
|
-
|
-
|
Mid ender, whiffs often in juggles but good mix when combined with 2K ender.
|
| Input
|
Damage
|
Startup
|
Active
|
Recovery
|
Guard
|
Break
|
On Hit
|
On Block
|
| 3PPP2K
|
-
|
-
|
-
|
-
|
-
|
-
|
-
|
-
|
Big damage juggle ender, useful as well as mix in neutral.
|
|
1PP
|
| Input
|
Damage
|
Startup
|
Active
|
Recovery
|
Guard
|
Break
|
On Hit
|
On Block
|
| 1P
|
-
|
-
|
-
|
-
|
-
|
-
|
-
|
-
|
| Input
|
Damage
|
Startup
|
Active
|
Recovery
|
Guard
|
Break
|
On Hit
|
On Block
|
| 1PP
|
-
|
-
|
-
|
-
|
-
|
-
|
-
|
-
|
2nd hit is very good for keeping opponents juggled.
|
|
Sidestep P
|
| Input
|
Damage
|
Startup
|
Active
|
Recovery
|
Guard
|
Break
|
On Hit
|
On Block
|
| Sidestep P
|
-
|
-
|
-
|
-
|
-
|
-
|
-
|
-
|
Generic sidestep P. Notable as one of Fenrir's 3 normal hit launchers.
|
|
Running P
|
| Input
|
Damage
|
Startup
|
Active
|
Recovery
|
Guard
|
Break
|
On Hit
|
On Block
|
| Running P
|
-
|
-
|
-
|
-
|
-
|
-
|
-
|
-
|
Low slide. Will sometimes OTG, but pretty inconsistent.
|
|
KK6K mid ender mid ender sweep ender sweep ender
|
| Input
|
Damage
|
Startup
|
Active
|
Recovery
|
Guard
|
Break
|
On Hit
|
On Block
|
| K
|
-
|
-
|
-
|
-
|
-
|
-
|
-
|
-
|
|
|
| Input
|
Damage
|
Startup
|
Active
|
Recovery
|
Guard
|
Break
|
On Hit
|
On Block
|
| KK
|
-
|
-
|
-
|
-
|
-
|
-
|
-
|
-
|
Excellent-er neutral poke, basically always a good idea to press this.
|
| Input
|
Damage
|
Startup
|
Active
|
Recovery
|
Guard
|
Break
|
On Hit
|
On Block
|
| KK6K
|
-
|
-
|
-
|
-
|
-
|
-
|
-
|
-
|
Less than excellent green guard break. Little application.
|
| Input
|
Damage
|
Startup
|
Active
|
Recovery
|
Guard
|
Break
|
On Hit
|
On Block
|
| KK2K
|
-
|
-
|
-
|
-
|
-
|
-
|
-
|
-
|
Decent low option, can catch people if you're doing KK6K a bunch for some reason.
|
|
66KK6K
|
| Input
|
Damage
|
Startup
|
Active
|
Recovery
|
Guard
|
Break
|
On Hit
|
On Block
|
| 66K
|
-
|
-
|
-
|
-
|
-
|
-
|
-
|
-
|
| Input
|
Damage
|
Startup
|
Active
|
Recovery
|
Guard
|
Break
|
On Hit
|
On Block
|
| 66KK
|
-
|
-
|
-
|
-
|
-
|
-
|
-
|
-
|
Green guard break, fairly good as an approach option.
|
| Input
|
Damage
|
Startup
|
Active
|
Recovery
|
Guard
|
Break
|
On Hit
|
On Block
|
| 66KK6K
|
-
|
-
|
-
|
-
|
-
|
-
|
-
|
-
|
Useful for picking up juggles in various scenarios, though easy to Atemi. Best used after groundbounce.
|
|
1KK
|
| Input
|
Damage
|
Startup
|
Active
|
Recovery
|
Guard
|
Break
|
On Hit
|
On Block
|
| 1K
|
-
|
-
|
-
|
-
|
-
|
-
|
-
|
-
|
Stubby low poke. Completely unseeable but low damage.
|
| Input
|
Damage
|
Startup
|
Active
|
Recovery
|
Guard
|
Break
|
On Hit
|
On Block
|
| 1KK
|
-
|
-
|
-
|
-
|
-
|
-
|
-
|
-
|
Decent option for juggles, but mostly outclassed by 1PP and 2KKK. Use when the opponent starts atemi-ing all your stuff.
|
|
3K
|
| Input
|
Damage
|
Startup
|
Active
|
Recovery
|
Guard
|
Break
|
On Hit
|
On Block
|
| 3K
|
-
|
-
|
-
|
-
|
-
|
-
|
-
|
-
|
Guaranteed after Sidestep K, solid mid poke.
|
|
9KK
|
| Input
|
Damage
|
Startup
|
Active
|
Recovery
|
Guard
|
Break
|
On Hit
|
On Block
|
| 9K
|
-
|
-
|
-
|
-
|
-
|
-
|
-
|
-
|
| Input
|
Damage
|
Startup
|
Active
|
Recovery
|
Guard
|
Break
|
On Hit
|
On Block
|
| 9KK
|
-
|
-
|
-
|
-
|
-
|
-
|
-
|
-
|
Weird mixup tool, very gimmicky and interruptible even on hit.
|
| Input
|
Damage
|
Startup
|
Active
|
Recovery
|
Guard
|
Break
|
On Hit
|
On Block
|
| 9KP
|
-
|
-
|
-
|
-
|
-
|
-
|
-
|
-
|
Aerial Snowflake. Same applications as P+K+G, extra useful as it can be used to end juggles and have the opponent wake up into a potential unblockable/launch. Will sometimes whiff OTG against smaller characters.
|
| Input
|
Damage
|
Startup
|
Active
|
Recovery
|
Guard
|
Break
|
On Hit
|
On Block
|
| 9KK~2G
|
-
|
-
|
-
|
-
|
-
|
-
|
-
|
-
|
Nice option for faking the low, can be used to bait for crouch throws, launchers, etc. Still interruptible, so watch out for stray buttons.
|
|
Sidestep K
|
| Input
|
Damage
|
Startup
|
Active
|
Recovery
|
Guard
|
Break
|
On Hit
|
On Block
|
| Sidestep K
|
-
|
-
|
-
|
-
|
-
|
-
|
-
|
-
|
Puts the opponent into a unique stagger state on hit, which allows links afterwards. The opponent is counted as crouching while in this state, so keep that in mind when attempting to combo. 3K and 2K will work naturally, anything else requires a microdash.
|
|
Running K
|
| Input
|
Damage
|
Startup
|
Active
|
Recovery
|
Guard
|
Break
|
On Hit
|
On Block
|
| Running K
|
-
|
-
|
-
|
-
|
-
|
-
|
-
|
-
|
Mid option, decent synergy with running P but otherwise unremarkable.
|
|
P+K
|
| Input
|
Damage
|
Startup
|
Active
|
Recovery
|
Guard
|
Break
|
On Hit
|
On Block
|
| P+K
|
-
|
-
|
-
|
-
|
-
|
-
|
-
|
-
|
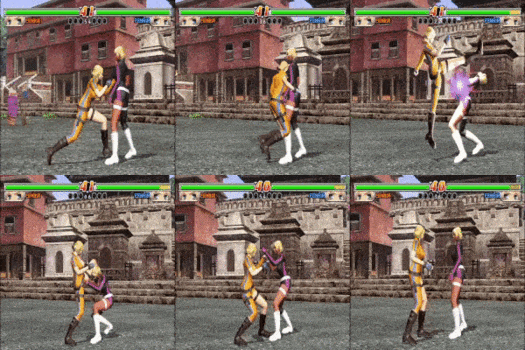
Unique parry, stops every parryable high and mid in the game. Has fewer active frames so requires more precise timing. This is an amazing tool that takes a lot of the guessing game out of her defense. Obviously, abuse whenever you can.
|
|
6K+G
|
| Input
|
Damage
|
Startup
|
Active
|
Recovery
|
Guard
|
Break
|
On Hit
|
On Block
|
| 6K+G
|
-
|
-
|
-
|
-
|
-
|
-
|
-
|
-
|
Natural launcher, slow but high reward. Big damage on counterhit.
|
|
4K+G
|
| Input
|
Damage
|
Startup
|
Active
|
Recovery
|
Guard
|
Break
|
On Hit
|
On Block
|
| 4K+G
|
-
|
-
|
-
|
-
|
-
|
-
|
-
|
-
|
Mid spinning knee, good for catching sidesteps and fishing for counterhits but severely lacking in range.
|
|
3K+G
|
| Input
|
Damage
|
Startup
|
Active
|
Recovery
|
Guard
|
Break
|
On Hit
|
On Block
|
| 3K+G
|
-
|
-
|
-
|
-
|
-
|
-
|
-
|
-
|
Big ol sweep. Somewhat low damage but lots of application as an evasive option, neutral poke, and unblockable when combined with Snowflake.
|
|
Snowflake
P+K+G
|
| Input
|
Damage
|
Startup
|
Active
|
Recovery
|
Guard
|
Break
|
On Hit
|
On Block
|
| P+K+G
|
-
|
-
|
-
|
-
|
-
|
-
|
-
|
-
|
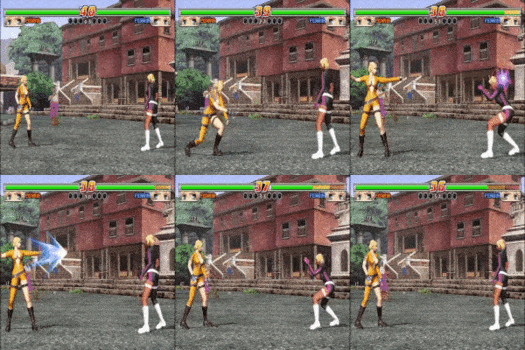
Incredibly vital move, defines Fenrir's offensive game. Fenrir throws two snowflake projectiles into the air which slowly descend on the stage, hitting mid. Useful for a variety of scenarios, can anti-air as well as assist in pressure and creating unblockable setups. Allows 66PK to become a true combo if it is performed immediately afterwards. Worth noting that two snowflakes cannot connect, once one lands the other disappears.
|
|
Crouching Attacks
Crouching KKK
|
| Input
|
Damage
|
Startup
|
Active
|
Recovery
|
Guard
|
Break
|
On Hit
|
On Block
|
| Crouching K
|
-
|
-
|
-
|
-
|
-
|
-
|
-
|
-
|
Great low poke and useful OTG
|
| Input
|
Damage
|
Startup
|
Active
|
Recovery
|
Guard
|
Break
|
On Hit
|
On Block
|
| Crouching KK
|
-
|
-
|
-
|
-
|
-
|
-
|
-
|
-
|
Fenrir staggers when blocked, making the attack highly unsafe on block.
|
| Input
|
Damage
|
Startup
|
Active
|
Recovery
|
Guard
|
Break
|
On Hit
|
On Block
|
| Crouching KKK
|
-
|
-
|
-
|
-
|
-
|
-
|
-
|
-
|
Vital combo extender after 6K+G. Easily Atemi-able when used in neutral.
|
|
Aerial Attacks
Air 2K
|
| Input
|
Damage
|
Startup
|
Active
|
Recovery
|
Guard
|
Break
|
On Hit
|
On Block
|
| Air 2K
|
-
|
-
|
-
|
-
|
-
|
-
|
-
|
-
|
Very long active frames but very low hitstun, will not combo into anything on standing opponents. Can hit OTG.
|
|
Throws
P+G
|
| Input
|
Damage
|
Startup
|
Active
|
Recovery
|
Guard
|
Break
|
On Hit
|
On Block
|
| P+G
|
-
|
-
|
-
|
-
|
-
|
-
|
-
|
-
|
|
3P+G
|
| Input
|
Damage
|
Startup
|
Active
|
Recovery
|
Guard
|
Break
|
On Hit
|
On Block
|
| 3P+G
|
-
|
-
|
-
|
-
|
-
|
-
|
-
|
-
|
Hilarious animation, can combo out of sidestep K with a microdash but be wary of throw breaks.
|
|
6P+G
|
| Input
|
Damage
|
Startup
|
Active
|
Recovery
|
Guard
|
Break
|
On Hit
|
On Block
|
| 6P+G
|
-
|
-
|
-
|
-
|
-
|
-
|
-
|
-
|
Slightly higher damage than normal throw, stick to this one for most scenarios.
|
|
Super Attacks
66P+K+G P+K+G
|
| Input
|
Damage
|
Startup
|
Active
|
Recovery
|
Guard
|
Break
|
On Hit
|
On Block
|
| 66P+K+G
|
-
|
-
|
-
|
-
|
-
|
-
|
-
|
-
|
Awfully slow super, not particularly useful.
|
| Input
|
Damage
|
Startup
|
Active
|
Recovery
|
Guard
|
Break
|
On Hit
|
On Block
|
| 66P+K+G P+K+G
|
-
|
-
|
-
|
-
|
-
|
-
|
-
|
-
|
Significantly faster than the initial shot, but still bad.
|
|


