| Force Impulse Gundam
|
|
|
| Pilot |
Shinn Asuka
|
| Archetype |
All-Rounder/Shoto
|
Introduction
The Force Impulse is essentially the game's shoto/all-rounder of sorts sporting a DP (With an impossible/inconvenient manual input) a tatsu (That leads to unblockable okizeme), and your everyday fullscreen laser :D. Unfortunately this character does not have a guard breaking attack, but his terrifying unblockable cross.....forwards? give him the ability to catch you off guard at a moment's notice anyways.
Palettes
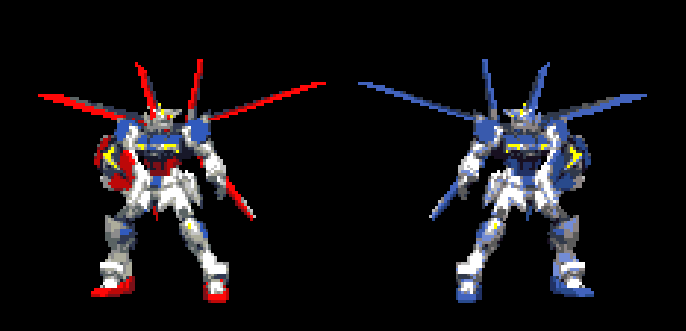
P1 and P2 Colors respectively
Movelist
(Cancels will be listed with their automatic inputs to avoid special and motion attack confusion, however, attack/special names will show both versions.)
Short Attacks
5S
|
| Version
|
Damage
|
Guard
|
Startup
|
Duration
|
Hit Adv
|
Block Adv
|
Cancel
|
| 5S
|
-
|
Mid
|
-
|
-
|
-
|
-
|
5S, 2S, 6S, 6L, SP, Beserk, Seed
|
|
|
|
2S
|
| Version
|
Damage
|
Guard
|
Startup
|
Duration
|
Hit Adv
|
Block Adv
|
Cancel
|
| 2S
|
-
|
Low
|
-
|
-
|
-
|
-
|
Self, SS, 6L, SP, Beserk, Seed
|
A neat fast low kick. Air UB.
|
|
6S
|
| Version
|
Damage
|
Guard
|
Startup
|
Duration
|
Hit Adv
|
Block Adv
|
Cancel
|
| 6S
|
-
|
Mid
|
-
|
-
|
-
|
-
|
SP, Beserk, Seed
|
An advancing shield smack. Has good range and is fairly active;
|
|
6S/2S > 5S
|
| Version
|
Damage
|
Guard
|
Startup
|
Duration
|
Hit Adv
|
Block Adv
|
Cancel
|
| 6/2SS
|
-
|
Mid
|
-
|
-
|
-
|
-
|
6L, SP, Beserk, Seed
|
A nice little kick to the face. Nothing special about it.
|
|
6/2SS > 6S
|
| Version
|
Damage
|
Guard
|
Startup
|
Duration
|
Hit Adv
|
Block Adv
|
Cancel
|
| 6/2SS6S
|
-
|
Mid
|
-
|
-
|
-
|
-
|
6L, SP, Beserk, Seed
|
Another cross slash that causes wallbounce.
|
|
6/2SS > 5S
|
| Version
|
Damage
|
Guard
|
Startup
|
Duration
|
Hit Adv
|
Block Adv
|
Cancel
|
| 6/2SS5S
|
-
|
Mid
|
-
|
-
|
-
|
-
|
6L, SP, Jump, Beserk, Seed
|
An advancing launcher similar to 3S.
|
|
6S/2S > 2S
|
| Version
|
Damage
|
Guard
|
Startup
|
Duration
|
Hit Adv
|
Block Adv
|
Cancel
|
| 6S/2S > 2S
|
-
|
Low
|
-
|
-
|
-
|
-
|
4S, 6L, SP, Beserk, Seed
|
A very very far reaching low similar to 1S. Causes knockdown and is Air UB. Good for beginning 5SP UB loops.
|
|
6/2SS > 2S
|
| Version
|
Damage
|
Guard
|
Startup
|
Duration
|
Hit Adv
|
Block Adv
|
Cancel
|
| 6/2SS2S
|
-
|
Low
|
-
|
-
|
-
|
-
|
6L, SP, Beserk, Seed
|
|
|
|
1S
|
| Version
|
Damage
|
Guard
|
Startup
|
Duration
|
Hit Adv
|
Block Adv
|
Cancel
|
| 1S
|
-
|
Low
|
-
|
-
|
-
|
-
|
6L, SP, Beserk, Seed
|
A very very very far reaching slice that knocks down the opponent and is air ub.
|
|
3S
|
| Version
|
Damage
|
Guard
|
Startup
|
Duration
|
Hit Adv
|
Block Adv
|
Cancel
|
| 3S
|
-
|
Mid
|
-
|
-
|
-
|
-
|
6L, Jump, SP, Beserk, Seed
|
An advancing Launcher. Due to him using his anti-armor knife, it reduces PS a lot more than any of his other normals.
|
|
J5S
|
| Version
|
Damage
|
Guard
|
Startup
|
Duration
|
Hit Adv
|
Block Adv
|
Cancel
|
| J5S
|
-
|
High
|
-
|
-
|
-
|
-
|
SP, J.6L
|
Your good ol' jumping kick. Good for fast thruster mixups.
|
|
J4S
|
| Version
|
Damage
|
Guard
|
Startup
|
Duration
|
Hit Adv
|
Block Adv
|
Cancel
|
| J4S
|
-
|
High
|
-
|
-
|
-
|
-
|
SP, J.6L
|
A wallbouncing high kick.
|
|
J2S
|
| Version
|
Damage
|
Guard
|
Startup
|
Duration
|
Hit Adv
|
Block Adv
|
Cancel
|
| J2S
|
-
|
High
|
-
|
-
|
-
|
-
|
SP, J.6L
|
A downward slash in the air. Great range but slow startup compared to J5S.
|
|
J3S
|
| Version
|
Damage
|
Guard
|
Startup
|
Duration
|
Hit Adv
|
Block Adv
|
Cancel
|
| J3S
|
-
|
High
|
-
|
-
|
-
|
-
|
SP, J.6L
|
A multihitting 'dive kick' of sorts but with his sword revealed.
|
|
Short Guard Cancel
|
| Version
|
Damage
|
Guard
|
Startup
|
Duration
|
Hit Adv
|
Block Adv
|
Cancel
|
| 6S
|
-
|
Mid
|
-
|
-
|
-
|
-
|
SP, 6L
|
|
|
|
Jumping Short Guard Cancel
|
| Version
|
Damage
|
Guard
|
Startup
|
Duration
|
Hit Adv
|
Block Adv
|
Cancel
|
| 6S
|
-
|
Mid
|
-
|
-
|
-
|
-
|
-
|
|
|
|
Long Attacks
5L
|
| Version
|
Damage
|
Guard
|
Startup
|
Duration
|
Hit Adv
|
Block Adv
|
Cancel
|
| 5L
|
-
|
Mid
|
-
|
-
|
-
|
-
|
Beserk
|
Your average PS-killer pellets. Non-guardcancellable.
|
|
6L/236L
|
| Version
|
Damage
|
Guard
|
Startup
|
Duration
|
Hit Adv
|
Block Adv
|
Cancel
|
| 5L
|
-
|
Mid
|
-
|
-
|
-
|
-
|
Beserk
|
Your average crouchable full screen laser. Costs PS bar
|
|
J5L
|
| Version
|
Damage
|
Guard
|
Startup
|
Duration
|
Hit Adv
|
Block Adv
|
Cancel
|
| J5L
|
-
|
Mid
|
-
|
-
|
-
|
-
|
Beserk
|
Your average PS-killer pellets. Non-guardcancellable.
|
|
6L/236L
|
| Version
|
Damage
|
Guard
|
Startup
|
Duration
|
Hit Adv
|
Block Adv
|
Cancel
|
| J6L
|
-
|
Mid
|
-
|
-
|
-
|
-
|
Beserk
|
|
|
|
Long Guard Cancel
|
| Version
|
Damage
|
Guard
|
Startup
|
Duration
|
Hit Adv
|
Block Adv
|
Cancel
|
| 6L
|
-
|
Mid
|
-
|
-
|
-
|
-
|
Beserk
|
|
|
|
Jumping Long Guard Cancel
|
| Version
|
Damage
|
Guard
|
Startup
|
Duration
|
Hit Adv
|
Block Adv
|
Cancel
|
| 6L
|
-
|
Mid
|
-
|
-
|
-
|
-
|
Beserk
|
|
|
|
Special Attacks
6SP>S/236S>S - Beam Saber Crash Advancing Frames Advancing Frames Slash followup Slash followup
|
| Version
|
Damage
|
Guard
|
Startup
|
Duration
|
Hit Adv
|
Block Adv
|
Cancel
|
| 6SP
|
-
|
Mid
|
-
|
-
|
-
|
-
|
Beserk
|
force Impulse rushes toward the opponent with a hitbox and no collision box. Because of this it allows him to go behind the enemy. On the opponent's wakeup, timing this meaty right can allow for an unblockable meaty crossup. From which can be followed up with S to send the opponent flying in the other direction for a chance at another unblockable meaty attack. Use this to your advantage on block as its pretty much a sudo-guard break attack.
|
| Version
|
Damage
|
Guard
|
Startup
|
Duration
|
Hit Adv
|
Block Adv
|
Cancel
|
| S
|
-
|
Mid
|
-
|
-
|
-
|
-
|
Beserk
|
A slash-followup that can be pressed at any point while Force Impulse is advancing. Causes Wallbounce. If done behind the opponent he will turn around and slash. And if performed fast enough, the slash will be unblockable.
|
|
5SP/ 2Sx2 - Saber Spike Double This is performed twice This is performed twice Recovery Frame of each cut. Recovery Frame of each cut.
|
| Version
|
Damage
|
Guard
|
Startup
|
Duration
|
Hit Adv
|
Block Adv
|
Cancel
|
| 5SP
|
-
|
Mid
|
-
|
-
|
-
|
-
|
Beserk
|
FI slashes upward twice while rising. A DP/Anti-air for force impulse. I know what you're thinking...the hell is that manual input on the side there. Well you see, I'm thinking the same thing as well. You cannot do this special raw on manual unless you're buffering it airborne till you hit the floor. On the ground you have to buffer the input by doing a normal first.
|
|
J5SP>S/J236S>S - Beam Saber Crash Advancing Frames Advancing Frames Slash followup Slash followup
|
| Version
|
Damage
|
Guard
|
Startup
|
Duration
|
Hit Adv
|
Block Adv
|
Cancel
|
| 6SP
|
-
|
Mid
|
-
|
-
|
-
|
-
|
Beserk
|
Force Impulse rushes toward the opponent with a hitbox and no collision box. Because of this it allows him to go behind the enemy. This move can also be done infinitely in the air with the right timing as it costs on thruster to perform.
|
| Version
|
Damage
|
Guard
|
Startup
|
Duration
|
Hit Adv
|
Block Adv
|
Cancel
|
| S
|
-
|
Mid
|
-
|
-
|
-
|
-
|
Beserk
|
A slash-followup that can be pressed at any point while Force Impulse is advancing. Causes Wallbounce. If done behind the opponent, unlike its grounded counterpart, Force Impulse will not turn around.
|
|
Force Impulse Burst
|
| Version
|
Damage
|
Guard
|
Startup
|
Duration
|
Hit Adv
|
Block Adv
|
Cancel
|
| Beserk Mode
|
-
|
-
|
-
|
-
|
-
|
-
|
-
|
|
|
|
[2SP]2SP/[2SP]63214S
|
| Version
|
Damage
|
Guard
|
Startup
|
Duration
|
Hit Adv
|
Block Adv
|
Cancel
|
| [2SP]2SP
|
-
|
Mid
|
-
|
-
|
-
|
-
|
-
|
An extremely far reaching slash. Very difficult to hit on airborne opponents, requires a very very tight restand.
|
|
Short Attack Chains
| Chains
|
Notes
|
| 5S>5S
|
|
| 5S/2S > 5S/2S
|
|
| 6S/2S > 5S > 6S/5S/2S
|
Wallbounce/Launch/Knockdown
|
| 6S > 2S
|
Causes Knockdown
|
Combos
| Combo
|
Notes
|
| 5S > 2S >> 5S >> 6S xx 6L/236L
|
Basic Wallbounce Laser Combo. (Easy Cancel)
|
| 5S > 5S > 6S >> 5S >> 6S xx 6L/236L
|
Basic Wallbounce Laser Combo.
|
| 5S > 5S > 6S >> 5S >> 6S xx 5SP/2S>2S
|
Wallbounce Combo (Near Corner).
|
| J.2S > JSP/J236S
|
Air Combo
|
| 3S > J.5S/J.2S > J.236S/JSP >> S
|
Launcher Combo
|
| 6TJ.5S > 5S > 5S > 6S >> 5S >> 5S > J.5S/J.2S > J.236S/JSP >> S
|
Launcher Combo that ends in a knockdown
|
| J.2S > 5S > 2S >> 5S > 2S
|
Easy Knockdown Combo (Easy Cancel)
|
| J.2S > 5S > 5S > 6S >> 5S >> 2S
|
Easy Knockdown Combo
|
| [2SP] 5S > 5S > 2S >> 5S xx [2SP]2SP
|
Easy Super Confirm
|
| J.2S > 5S > 5S > 6S >> 5S xx 2SP > 6TJ.5S > 5S > 5S > 6S >> 5S xx [2SP]2SP
|
Higher Damage Super Confirm
|
| [2SP] J.2S > 5S > 5S > 6S >> 5S >> 5S > J.5S xx J5SP/J.236S >> S > J.5S xx J5SP/.236S >> S > [2SP]2SP/63214S
|
Very Difficult but Safe Super Confirm
|
| J.3S > 5S > 5S > 6S >> 5S xx 6SP/236S >> S xx 2SP > 6TJ.5S > 5S > 5S > 6S >> 5S >> 5S > J.2S xx J5SP/J.236S >> S > J.5S xx J5SP/.236S >> S > > [2SP]2SP/63214S
|
Extremely Difficult but Safe Super Confirm (While not in Burst)
|
| Any Knockdown into {236S/6SP >> S}xN
|
This is a rather difficult infinite - It requires you to meaty the 6SP at a specific time such that you end up making contact with the back of the opponent and it becomes unblockable. The followup knocks them back down, and you are free to repeat this process until they burst.
|
General Strategy
-


