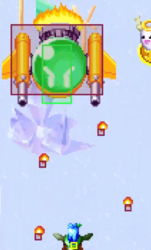
Twinkle Star Sprites/Really Till
| Pretty Till | |
|---|---|
| Attack Rating | ★★★☆☆ |
| Defense Rating | ★★★★☆ |
Story
Really Till is a princess of the neighboring Dragon country. Jealous that Load Ran is stealing the spotlight, she decides to retrieve the Twinkle Star herself. She also wishes to continue the 10,000 year tradition of their countries' war with one another. Once she learns that Ran goes missing, she goes on a journey to look for her in the sequel. Her weapon is Drappy, a dragon child that she rides and fights on.==Gameplay Overview== The fastest character of the game and also has some of the best defense because of it. His high speed can be hard to control, but once you learn how to control his movement, he can be impossible to hit.
| Strengths | Weaknesses |
|---|---|
|
|
Move List
Basic Attacks
Basic shot
A |
|---|
Weakened Basic shot
A |
|---|
Charge Attack
Hold A |
|---|
Bomb Attack
B |
|---|
Special Attacks
EX Attack
|
|---|
Boss
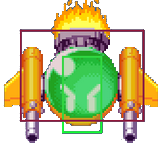
| Magical Cannon | |
|---|---|
| Health | 17 HP |
Dual Laser W->A->E Twinbee stings back Twinbee stings back
|
|---|
Black Bullets W->A->E the legendary divekick the legendary divekick
|
|---|
Bullet Spray
W->A->E |
|---|
Strategy
Till's general performance is quite high due to her fast movement, fast shot, and respectable attacks. These traits make her strong whenever she has decent control of her screen. Her critical weakness is her charge attack, which is arguably the worst in the game due to its short range and low charge speed. This is most problematic when she's pushed into unfavorable areas of the screen, and whenever a boss is used against her. Because of this Till can be seen as a character with very strong advantage states and very weak disadvantage states. The bad charge attack also makes her a technically demanding character with a somewhat higher skill floor than most others.
General Survival
One of the most defining features of Till is the limitation of her charge attack. For most characters, the charge attack can act as a panic button, a means of gaining screen control, a means of attacking bosses, or any combination of those. For Till, none of these are particularly applicable. It has some uses, which will be covered in more detail later, but for now just discard the more normal expectations you might have for charge attacks as a defensive option.
So the most obvious ramification of the short range charge attack is that Till has no real means to damage things that aren't right in front of her. (Note that using normal shots to hit things at long range is generally not viable in this game.) Fortunately, Till is fast, so with efficient and strategic movement, she can typically get close enough to the things she needs to shoot to manage most situations without a charge attack. This does mean that, as the player, you need to have a good understanding of the movement paths of zako and bosses, and of how to manipulate aimed attacks such that you will leave movement paths open for you to be able to physically reach things. If you think it sounds a bit complex, you're correct, but movement speed is the lubricant that makes everything doable.
Since you need to get close to your targets, height (and more generally, good screen control) is important. This does mean sometimes you'll have to make a tough choice between doing something punishable for the sake of maintaining height (i.e. shooting a zako formation that's obstructing you) or retreating downward where you'll have more space to move but may limit your ability to actually shoot anything for a while. There's no easy rule for what to do in these cases, and every situation needs to be assessed carefully. When it's really ambiguous, it's probably best to err on the side of staying high, since you'll at least keep some control that way. Particularly during fever, the need to stay high on the screen will often take priority over more cautious play, as a loss of control can be catastrophic. In general for Till, If you're pushed into an awkward part of the screen, you may become powerless to do anything but brute force dodging. Even with good positioning, you'll have to accept that a difficult dodge will be your only option in many situations.
Handling Bosses
Overall, Till is a bit susceptible to bosses. This is mainly because her charge attack can't reach through them, and of course they simply block access to the top of the screen. This means that an unfortunate combo of boss attack and zako formation can cause you to spontaneously lose control of the game as you simply have no way to hit the zako. That's of course a threat to your survival, for obvious reasons, but can also suddenly ruin your offense in situations where you were at an advantage.
So, how to deal with bosses?
1. Destroy the boss. This tends to be the most desirable option, but also requires the most skill and experience. First, outside of the few characters with good boss killing charge attacks, destroying a boss means getting right in its face and hammering it with normal shots. Till's charge attack is certainly not a boss killer (and is short range regardless), so once again she needs to get extremely close to her target. Second, you need to understand the specific behaviors of the boss you're dealing with. That mostly means knowing how it will move, so you can ensure that you'll be in position at the right time, and knowing how to dodge the attack from close range, since bosses can only be destroyed once they've begun attacking. There's no shortcut to this skill, you just need lots of experience.
As far as most characters go, Till is actually pretty good at killing bosses, owing to her speed and good shot. The charge attack not being much good for it is actually true for most characters, and so it isn't holding Till back too much in this department.
2. Outmaneuver (or ignore) the boss. This is situational, but some boss attacks simply don't get in the way too much, and so killing them tends to be lower priority than other things. (A good example of this is Load Ran's boss.) This would be ideal when you're able to keep chaining zako unimpeded despite the boss's presence. More often, the boss will be "in the way" in that it's ruining your attack potential, but isn't directly threatening you. In this case, it's pretty uncomfortable for Till. You should stay vigilant even when nothing much appears to be happening, and consider leaving unproblematic zako formations alive so as to not spawn a more troublesome one before the boss finishes attacking, escaping, etc.
3. Level 3 reversal. Sometimes, this is what you have to do, but it's a bit of a last resort. Till's charge speed is slow, and her charge attack is unreliable. Generally, when you charge to level 3, you're allowing your screen to get progressively out of control as zako move around wherever they want. You're also making a long window of time where you send no attacks to the other player, letting them maximize their offense. Resultingly, when you finally release the charge, your screen may have devolved into mayhem. In situations like that, it's really nice to have a good panic button charge attack to help recover the situation. Till's charge is a bit of an "anti panic button" in that it prevents normal shooting and won't immediately kill what's in front of you, so you need to be thoughtful about when you actually release the charge attack. If you're attempting to get to level 3, and you can judge the situation well enough to see that things will get out of hand if you keep waiting, don't be too reluctant to just release at level 2 instead. As mentioned before, height and screen control often take priority over everything else for Till, and sometimes you have to make suboptimal moves for the sake of holding your ground.
All in all, as a Till player, you'll likely have to accept that bosses will cause you a ton of trouble until you've gained a lot of experience against them.
Charge Attack Applications
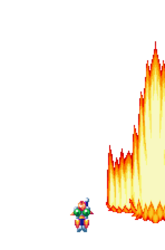
Let's go into the charge attack in more detail. The flames hit an area directly in front of Till. They linger in place for a moment before vanishing, and the attack lasts (keeps producing new flames) for a pretty long time.
The first thing you need to learn is that this attack is not to be thought of as a "shield" (as you might with Kim's or Nanja's, for instance). It deals damage in short intervals, so high speed fireballs will pass through it and hit you in most cases, though you can improve your chances by moving back while firing. Similarly, you cannot safely plow into zako while breathing fire, as the flames won't kill most zako before you collide with them. (You're essentially overtaking the flames as you move up.) An unexpected forced upward move into zako is probably the situation in which this attack is at its worst, so be careful.
Of great significance is the fact that you can't use your normal shot during this attack. This means that, once you've charged up to at least level 1, you've committed to breathing fire before you can shoot again. You should also be aware that there's a bit of a "weak point" in the fire breath's damage output toward the end of its duration, just as the flames stop appearing but before you regain the ability to shoot. Similarly, there's a weak point at the start of the attack, as the lingering flames haven't accumulated yet. This is part of why it makes a terrible panic button.
The charge attack is good at causing slowdown, while also not causing a lot of unwanted collateral damage. That means you can release the attack in dangerous situations to slow down the game and make dodging easier. This is a pretty important technique for Till and utilizing it well can give the charge attack a lot of defensive use in situations where it would otherwise have none.
While the range isn't great, this attack does give you some piercing and area of effect, things a normal shot doesn't provide. The slight lingering of the individual flames also allows you to breathe fire into an area, then move away and still hit something that entered the flames after the fact. This can provide a simulacrum of horizontal reach.
A silver lining to the small AoE is that you won't self deny your own chain reactions too much, or accidentally send reversals, etc. This has particular synergy with the level 2 attack, which will be explained in more detail later.
At the top of the screen, range is no longer a concern and there's essentially no downside to using this attack. In fact, it's great for blanketing the upper area with lingering flames to try to hit the newly spawning zako immediately.
At the bottom of the screen, this attack is very risky to use; however, it does provide two advantages over normal shooting. The first is that with normal shots, there's a risk of missing, which can be disastrous as you'll be unable to shoot again until the missed shots hit something. The fire breath avoids this risk. Second, once the reaper is in play, he'll regularly get in the way and block your shots. The fire breath's piercing will eventually be needed to deal with this.
This is a bit of a subtle point, but I'll make it anyway. If you anticipate wanting a charge attack ready at a certain time after clearing the current zako formation (for instance, using it on the next formation, or using it on a boss), there's some advantage to clearing the current formation with a charge attack. This is because you can start charging again while the attack is ongoing (charge buffering, essentially), letting you delay the destruction of the current formation until the end of the initial charge attack, with a second thus being prepared as soon the next formation comes in. This has some application in level 2 timing attacks, as I'll explain.
Energy Use
For a speed character, Till has quite robust attacks. Her level 2 is one of the best in the game. Used correctly, it can create threatening attacks out of thin air, with no particular need for your opponent to do something punishable first. The basic theory is that when a level 2 is released, you can also create a chain reaction of zako to send some accompanying fireballs, with the dragons and fireballs reaching the other player at the same time. This works best with parabolic fireballs, and you should generally wait until the last few moments of the charge attack to start the chain reaction that sends the fireballs.
Since the level 2 attack relies on parabolic fireballs, you want to pay attention to which type you're going to send, and try to have a level 2 ready as the correct formation enters your screen. This can situationally be a bit difficult, since Till's charge is speed is slow. As mentioned previously, you can use a charge attack and immediately begin charging the next one in order to clear one formation and have level 2 ready for the next.
It's also possible to execute that kind of attack with reversal fireballs by using a level 2 and then hitting a cluster of normals with the fire breath to send reversals on purpose, though this is of course risky. You'd like to be certain you're sending parabolic fireballs, and ideally you should spot that your opponent doesn't have a clear way to punish you. And of course, using a level 2 and then clearing as many reversals as you can to send even more EX attacks is always strong, especially for Till. The dragons tend to be very dangerous when they appear in big groups all at once, and drastically weaker when they appear one at a time.
Using a level 2 when you're about to trigger a boss (by chaining 3 reversals) is extremely strong. This is because dragons that appear at the same time as the boss have amazing synergy with the body slam attack. Here you have a fair chance of making the attack unavoidable.
Aside from that initial timing (sending dragons at the same instant as the boss), it's hard for Till to time level 2 in conjunction with the boss in ways that are particularly effective, but you still have some other considerations for how to attack alongside the boss. The big one you want to think about is using level 3, which with a boss already out creates 5 dragons at once. This is extremely strong, with a non-trivial chance to be unavoidable in and of itself. Ideally you should time it with parabolic fireballs just as you would with normal level 2 attacks, and not concern yourself with whether or not the boss is also attacking at that moment. Another option is to time it such that the dragons will descend at the same time as your boss begins to exit the screen downward. This is better, for instance, than trying to time it with the boss's bullet and fire breath attacks, but tends to be a difficult timing to hit correctly. Lacking a level 3, you can instead use a level 2 with similar timings, or just focus on sending lots of fireballs and building up energy, potentially allowing for a level 3 attack before the boss leaves.
You can also use your energy defensively. When your opponent has fever, both level 2 and the boss are good at interfering with their attacks, but if you're going for a defensive boss you need to be a bit careful. It takes a long time to get to, and you may put yourself in a bad position by holding your fire for so long, as explained previously. The boss can also be returned quickly if you accidentally send any reversals with it. On the other hand, using level 2 twice is easier to get away with, and creates an obstacle for the other player that they have no way to get rid of. When possible, try to time the level 2 just before a new formation enters the enemy screen to deny their access to the top area and prevent them from connecting the new zako with their existing chain. Interrupting the flow of fireballs for even a second can make a tremendous difference in how easy they are to dodge. Basically, while the boss is theoretically ideal (defensively), using level 2 at the right times can be safer and easier.
Finally, if you can't easily find specific timings like this, it's also fine to just use random fireball + level 2 attacks whenever you want, particularly later in the game when the reaper is out.
Late Game
Till has a very strong late game due to her speed and dangerous level 2 attacks. However, this is also where the limited range of the charge attack will pose the greatest issue. It's important to wring all the value you can out of your movement speed and positioning, and manipulate the reaper such that he won't block you from shooting things. As long as you keep your screen reasonably clean, things won't be too hard to manage, but you can quickly run out of options in any situation that becomes even slightly suboptimal.
