|
|
| Line 519: |
Line 519: |
| |Hit Adv= | | |Hit Adv= |
| |Block Adv= | | |Block Adv= |
| |description= Pretty much a higher hitting version of cl.C but this one comes out slower and has even worse horizontal range. Same uses than cl.C but more limited. | | |description= Pretty much cl.C with better vertical range, but this one comes out slower and has even worse horizontal range. Same uses than cl.C but more limited. |
| }} | | }} |
| }} | | }} |
Revision as of 05:49, 24 June 2020

Olof Linderoth
Overview
| Strengths |
Weaknesses
|
- Good range to keep the opponent controlled.
- His punishing game is really good.
- Incredibly Damaging and Unblockable Ippatsu Ougi.
- His juggles can lead to massive damage.
|
- The range of his Normals and Specials are balanced with pretty bad recovery times.
- Struggles in pressure without Stress Meter.
- No reliable pressure or chipping tools.
- Counter hit moves needs to be deeply calculated, especially with Stress Shot.
- Has a tall hurt box and can be hit easier by overheads.
- His best combos have high execution requirements and can drop easely
|
Strategy
Olof is a character who bases his gameplan on Hit n 'Run and 50/50, his best moves are used in his 50/50 setups with his 236B, juggling his j.214D and punishing jumps thanks to his 623A/C. His potential for combos is very good since he can cancel any of his normals in 3B and then finish with 214B or 623A, in addition to using his fake Ippatsu Ougi to cancel recovery times and extend his combos.
All this is balanced by his bad defensive game since thanks to his stature he can be reached by many crossups which puts him in very bad situations. Added to this, his Stress Shot is very difficult to use in combos or as a punish, since although it has invulnerability frames during the dash, it is very slow and can be easily blocked which leaves you exposed to any kind of punishment.
- If you decide to play with Olof you will have to be both patient and aggressive and have a good understanding of your opponent's movements.
What you want to do:
- Bait your opponent's offensive to get a chance of land your combos.
- Use your 50/50 game to force damage.
- Setup your Ippatsu Ougi to get a huge advantage on the match.
- Get Matchup Knowledge and be ready for your opponent's moves.
What you want to avoid:
- Getting cornered.
- Beign predictable, specially with your punishes.
- Face opponents with good Air-to-Air moves during a Jump.
Normal Moves
Standing Normals
Note: Despite the appearances, none of the Olof's standing normals can be crouched.
5A
5A
|
| Total Damage
|
Permanent Damage
|
Cancel
|
Guard
|
Gauge
|
Startup
|
Active
|
Recovery
|
Hit Adv
|
Block Adv
|
| -
|
-
|
-
|
Mid
|
-
|
-
|
-
|
-
|
-
|
-
|
Fast and has nice range. Olof's main standing poke wich can be comboed into 214B or 236A easely.
|
|
5B
5B
|
| Total Damage
|
Permanent Damage
|
Cancel
|
Guard
|
Gauge
|
Startup
|
Active
|
Recovery
|
Hit Adv
|
Block Adv
|
| -
|
-
|
-
|
Mid
|
-
|
-
|
-
|
-
|
-
|
-
|
Another good poke, it hits slightly higher and comes out a tiny bit slower than 5A but it causes double the damage. Can work as a late Anti-Air but Olof has better options.
|
|
5C
5C
|
| Total Damage
|
Permanent Damage
|
Cancel
|
Guard
|
Gauge
|
Startup
|
Active
|
Recovery
|
Hit Adv
|
Block Adv
|
| -
|
-
|
-
|
Mid
|
-
|
-
|
-
|
-
|
-
|
-
|
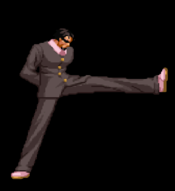
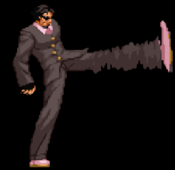
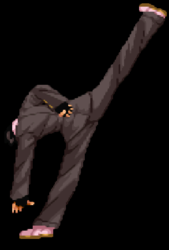
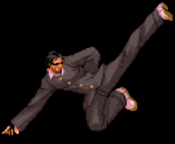
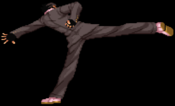
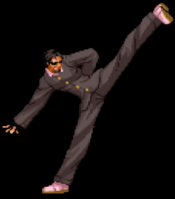
This kick is pretty odd, comes out relatively fast, has a good range and hits upwards, but the recovery makes it pretty unsafe for throw it often as it can be jumped out and you will get punished for it. The best use for this one is to stop foward dashes or as a late Anti-Air.
|
|
5D
5D
|
| Total Damage
|
Permanent Damage
|
Cancel
|
Guard
|
Gauge
|
Startup
|
Active
|
Recovery
|
Hit Adv
|
Block Adv
|
| -
|
-
|
-
|
Mid
|
-
|
-
|
-
|
-
|
-
|
-
|
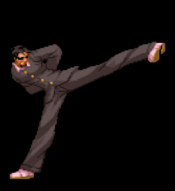
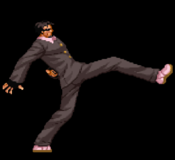
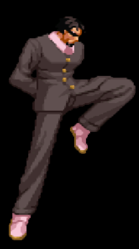
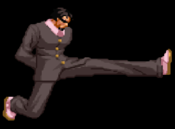
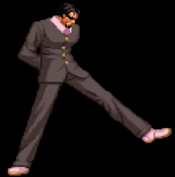
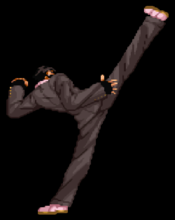
Another odd kick, shares the same problems as 5C but it can't be used as a late Anti-Air since it hits straight foward. Comes out kind of slow too, so you probably won't be using this one too much.
|
|
6A
6A
|
| Total Damage
|
Permanent Damage
|
Cancel
|
Guard
|
Gauge
|
Startup
|
Active
|
Recovery
|
Hit Adv
|
Block Adv
|
| -
|
-
|
-
|
High
|
-
|
-
|
-
|
-
|
-
|
-
|
Overhead Axe Kick with a good ammount of stun that allows you to combo into 623B from close range or 214C from far range. It comes out kind of slow but is safe on block. Part of the Ippatsu Ougi Setup.
|
|
5CD
5CD
|
| Total Damage
|
Permanent Damage
|
Cancel
|
Guard
|
Gauge
|
Startup
|
Active
|
Recovery
|
Hit Adv
|
Block Adv
|
| -
|
-
|
-
|
Mid
|
-
|
-
|
-
|
-
|
-
|
-
|
Comes out slow and the range is shorter than his other standing normals, but causes good damage and is wall slam as any 5CD, but is not that good so you won't be using this one outside punishes to prepare your 50/50.
|
|
Crouching Normals
2A
2A
|
| Total Damage
|
Permanent Damage
|
Cancel
|
Guard
|
Gauge
|
Startup
|
Active
|
Recovery
|
Hit Adv
|
Block Adv
|
| -
|
-
|
-
|
Low
|
-
|
-
|
-
|
-
|
-
|
-
|
Pretty much a crouching version of 5A, but comes out a little bit slower with a tiny bit shorter range and does little bit less damage. Despite that this move can't be comboed into specials like 5A can.
|
|
2B
2B
|
| Total Damage
|
Permanent Damage
|
Cancel
|
Guard
|
Gauge
|
Startup
|
Active
|
Recovery
|
Hit Adv
|
Block Adv
|
| -
|
-
|
-
|
Low
|
-
|
-
|
-
|
-
|
-
|
-
|
Olof's main crouching normal, Fast and nice range but unlike 2A it can be comboed into specials like 214B or 623C. Usefull during combos but is outclassed as a footsie tool by 5A and 5B.
|
|
2C
2C
|
| Total Damage
|
Permanent Damage
|
Cancel
|
Guard
|
Gauge
|
Startup
|
Active
|
Recovery
|
Hit Adv
|
Block Adv
|
| -
|
-
|
-
|
Mid
|
-
|
-
|
-
|
-
|
-
|
-
|
Sliding kick, this moves Olof about 1 character length. Pretty usefull during combos and 50/50s. Despite the appareances, this is not an Anti-Air because it hits too low.
|
|
2D
2D
|
| Total Damage
|
Permanent Damage
|
Cancel
|
Guard
|
Gauge
|
Startup
|
Active
|
Recovery
|
Hit Adv
|
Block Adv
|
| -
|
-
|
-
|
Low
|
-
|
-
|
-
|
-
|
-
|
-
|
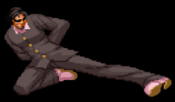
Long range sweep, comes out kinda slow and can't be comboed into but is a neat footsie move if you need the knockdown.
|
|
2CD
2CD
|
| Total Damage
|
Permanent Damage
|
Cancel
|
Guard
|
Gauge
|
Startup
|
Active
|
Recovery
|
Hit Adv
|
Block Adv
|
| -
|
-
|
-
|
Low
|
-
|
-
|
-
|
-
|
-
|
-
|
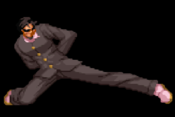
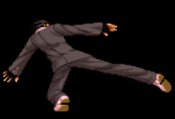
Slow and has almost no horizontal range, but it hits surpisingly high and sets some of the Olof's advanced combos. Also is the only way to combo into Stress Shot and Ippatsu Ougi.
|
|
Jumping Normals
j.A
j.A
|
| Total Damage
|
Permanent Damage
|
Cancel
|
Guard
|
Gauge
|
Startup
|
Active
|
Recovery
|
Hit Adv
|
Block Adv
|
| -
|
-
|
-
|
High
|
-
|
-
|
-
|
-
|
-
|
-
|
This normal has a short range in comparsion to the other Olof's jumping normals, but is active for pretty much the entire jump and allows really easy Air-to-Ground combos but is kinda outclassed by j.B.
|
|
j.B
j.B
|
| Total Damage
|
Permanent Damage
|
Cancel
|
Guard
|
Gauge
|
Startup
|
Active
|
Recovery
|
Hit Adv
|
Block Adv
|
| -
|
-
|
-
|
High
|
-
|
-
|
-
|
-
|
-
|
-
|
From where I should start? This is a great jumping normal, comes out almost instantly, has a great active period, is the Olof's main crossup and is a good all-round air to air normal. Is also safe on block so spam away.
|
|
j.C
j.C
|
| Total Damage
|
Permanent Damage
|
Cancel
|
Guard
|
Gauge
|
Startup
|
Active
|
Recovery
|
Hit Adv
|
Block Adv
|
| -
|
-
|
-
|
High
|
-
|
-
|
-
|
-
|
-
|
-
|
Comes out fast and does good damage, but it hits upwards so is only usefull during certain air to air situations or for juggles. Good normal but its limited on his uses.
|
|
8C
8C
|
| Total Damage
|
Permanent Damage
|
Cancel
|
Guard
|
Gauge
|
Startup
|
Active
|
Recovery
|
Hit Adv
|
Block Adv
|
| -
|
-
|
-
|
High
|
-
|
-
|
-
|
-
|
-
|
-
|
This one has the same uses as j.C, but even more limited since it hits almost straight upwards.
|
|
j.D
j.D First kick First kick Second kick Second kick
|
| Total Damage
|
Permanent Damage
|
Cancel
|
Guard
|
Gauge
|
Startup
|
Active
|
Recovery
|
Hit Adv
|
Block Adv
|
| -
|
-
|
-
|
High
|
-
|
-
|
-
|
-
|
-
|
-
|
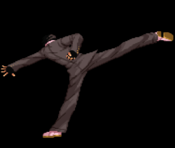
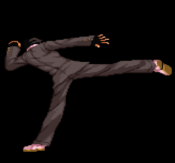
Olof's oddest normal by far. It comes out with delay so it requires a good timing to be used on air to ground combos or air to air. if you hit the D button again after the j.D connects he will do a 2nd kick with almost the same properties but coming out faster enought to combo from the first hit. This is good on paper but on practice is kinda unorthodox to be used consistently, specially against short characters like Oume.
|
|
8D
8D
|
| Total Damage
|
Permanent Damage
|
Cancel
|
Guard
|
Gauge
|
Startup
|
Active
|
Recovery
|
Hit Adv
|
Block Adv
|
| -
|
-
|
-
|
High
|
-
|
-
|
-
|
-
|
-
|
-
|
Pretty much a straight version of j.C.
|
|
Dashing Normals
66P
66P
|
| Total Damage
|
Permanent Damage
|
Cancel
|
Guard
|
Gauge
|
Startup
|
Active
|
Recovery
|
Hit Adv
|
Block Adv
|
| -
|
-
|
-
|
Mid
|
-
|
-
|
-
|
-
|
-
|
-
|
This kick comes out slow wich makes it not very usefull, as any dashing punch it can combo into the dashing normals and if connects you can cancel it into 4146A for a combo, but that rarely happens so you won't be using this one too much.
|
|
66K
66K
|
| Total Damage
|
Permanent Damage
|
Cancel
|
Guard
|
Gauge
|
Startup
|
Active
|
Recovery
|
Hit Adv
|
Block Adv
|
| -
|
-
|
-
|
Mid
|
-
|
-
|
-
|
-
|
-
|
-
|
Comes out kind of fast wich makes it a good punish option if you can't get anything else. It can be countered easely on reaction so be carefull about that.
|
|
Close Normals
cl.5A
cl.A
|
| Total Damage
|
Permanent Damage
|
Cancel
|
Guard
|
Gauge
|
Startup
|
Active
|
Recovery
|
Hit Adv
|
Block Adv
|
| -
|
-
|
-
|
Low
|
-
|
-
|
-
|
-
|
-
|
-
|
Comes out quick, reaches surprisingly far for a close normal and hits low, this last detail is great because you can get a really easy High/Low after a blocked jumping attack. Despite that, this move is outclased by cl.B as a combo tool.
|
|
cl.5B
cl.B
|
| Total Damage
|
Permanent Damage
|
Cancel
|
Guard
|
Gauge
|
Startup
|
Active
|
Recovery
|
Hit Adv
|
Block Adv
|
| -
|
-
|
-
|
Mid
|
-
|
-
|
-
|
-
|
-
|
-
|
Olof's 2nd main combo tool. Comes out really fast, can be chained into itself up to 4 times and does nice damage. You want to use this each time you are close to the opponent.
|
|
cl.5C
cl.C
|
| Total Damage
|
Permanent Damage
|
Cancel
|
Guard
|
Gauge
|
Startup
|
Active
|
Recovery
|
Hit Adv
|
Block Adv
|
| -
|
-
|
-
|
Mid
|
-
|
-
|
-
|
-
|
-
|
-
|
This normal is interesting. Comes out really fast, hits very high and does nice damage but its horizontal range is lame. Can be used as a late or preemptive anti-air if the opponent is close to you. On hit it can be comboed into 623B/D or cl.D for a knowckdown.
- If you know when to apply it then this normal can give you nice results.
|
|
cl.5D
cl.D
|
| Total Damage
|
Permanent Damage
|
Cancel
|
Guard
|
Gauge
|
Startup
|
Active
|
Recovery
|
Hit Adv
|
Block Adv
|
| -
|
-
|
-
|
Mid
|
-
|
-
|
-
|
-
|
-
|
-
|
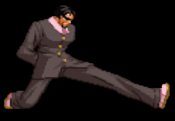
Pretty much cl.C with better vertical range, but this one comes out slower and has even worse horizontal range. Same uses than cl.C but more limited.
|
|
Special Moves
| Special
|
Total Damage
|
Permanant Damage
|
Notes
|
| Counter Trick
|
| 5
|
35T
|
17P
|
Automatic counter. Triggers after being idle for 4 seconds.
|
| Battle (Битва)
|
| 236.A/C
|
15T
|
7P
|
Heavy version is faster.
|
| 236.B
|
15T
|
7P
|
Projectile moves towards the bottom corner of the screen.
|
| 236.D
|
15T
|
7P
|
Projectile moves towards the top corner of the screen.
|
| Sanctions (санкций)
|
| 623.B
|
20T
|
10P
|
Second hit is an overhead.
|
| 623.D
|
22T
|
11P
|
Third hit is an overhead.
|
| Dashing 623.K
|
30T
|
15P
|
5th hit is an overhead.
|
| Sudden Attack (внезапное нападение)
|
| 214.B
|
20T
|
20P
|
WallSlam finish.
|
| 214.D
|
22T
|
22P
|
WallSlam finish.
|
| Dashing 214.K
|
30T
|
30P
|
WallSlam finish.
|
| By The Squares (По Квадратам)
|
| J.214.B
|
20T
|
10P
|
|
| J.214.D
|
22T
|
10P
|
Launches higher than the light version.
|
Super Moves
| Super
|
Total Damage
|
Permanant Damage
|
Notes
|
| Stress Shot - Blockade (Блокада)
|
| 2363214.D
|
50T
|
25P
|
|
| Ippatsu Ougi - In An Extreme Case (Крайний Случай)
|
| 4146.C
|
90T
|
45P
|
Unblockable. Deals 40 damage to Olof & cannot kill Olof.
|
| 4146.A
|
0T
|
0P
|
Feign Super. It only costs 1 bar.
|
Combos
| Combo
|
Total Damage
|
Permanant Damage
|
Notes
|
| BnB Combos
|
| cl.5a > cl.5a > cl.5a xx 214.B
|
30T
|
15P
|
|
| cl.5A > cl.5A > cl.5A > 3.B xx 214.D
|
35T
|
35P
|
Cancel on the first hit of 3.B.
|
| cl.5b > cl.5b > cl.5b > 5.B > 3.B xx 214.D
|
33T
|
33P
|
Cancel on the first hit of 3.B.
|
| 6.A xx 214.D
|
32T
|
32P
|
|
| 9.B >> cl.5B > 5.B xx 214.B
|
30T
|
15P
|
|
| 9.B >> cl.5B xx 623.D
|
31T
|
15P
|
|
| 9.B >> cl.5C > 3.B xx 214.D
|
38T
|
38P
|
Cancel on first hit of 3.B.
|
| 2.CD xx 2363214.D
|
62T
|
31P
|
Requires 1 Stress Meter.
|
| 2.CD xx 4146.C
|
|
|
Requires 2 Stress Meter.
|
| Intermediate Combos
|
| cl.5A > cl.5A >> 2.B xx 214.B
|
32T
|
16P
|
cl.5A >> 2.B requires a CPS1 Chain.
|
| cl.5A > cl.5A >> 2.C xx 214.B
|
34T
|
17P
|
5.A >> 2.C requires a CPS1 Chain.
|
| cl.5A > cl.5A >> 2.C > 3.B xx 214.D
|
41T
|
41P
|
5.A >> 2.C requires a CPS1 Chain. Cancel on 1st hit of 3.B.
|
| cl.5A >> 2.C > 6.A xx 214.D
|
43T
|
41P
|
5.A >> 2.C requires a CPS1 Chain.
|
| Cross-up 9.B >> 5.A > 5.A >> 2.C xx 623.D
|
39T
|
19P
|
5.A >> 2.C requires a CPS1 Chain.
|
| Cross-up 9.B >> cl.5B > cl.5B > 5.B > 3.B xx 214.D
|
39T
|
39P
|
Cancel on 1st hit of 3.B.
|
| 6.A >> 2.B xx 214.B
|
37T
|
18P
|
6.A >> 2.B is a low frame link.
|
| 6.A >> 2.B > 3.B xx 214.D
|
39T
|
39P
|
6.A >> 2.B is a low frame link.
|
| (Corner Only) 9.D > D xx J.214.D >> 623.D
|
47T
|
23P
|
|
| 9.D > D >> 2.CD xx 2363214.D
|
72T
|
36P
|
Requires 1 Stress Meter.
|
| Advanced Combos
|
| (juggle) 9.C > j.214.D >> 9.C > j.214.D >> 5.C > 3.B xx 623.D
|
T
|
P
|
J.214.D must launch high enough. Must corner carry.
|
| 9.D > D xx J.214.D >> 214.D
|
T
|
P
|
2nd hit on 214.D whiffs.
|
| 9.D > D >> cl.5A >> 2.B > 3.B xx 214.D
|
T
|
P
|
cl.5A >> 2.B requires a CPS1 Chain. Cancel 3.B on the 1st hit.
|
| (Corner only) 9.D > D > j.214.D > cl.5C > 3.B xx 623.D
|
T
|
P
|
Cancel 3.B on the 1st hit.
|
| (Corner Only) 9.D >> 2.CD xx 4146.A >> Dashing 623.K
|
T
|
P
|
Must instantly dash to connect 623.K Requires 1 Stress Meter.
|
| 6[6].A xx 4146.A >> 2.C > 3.B xx 4146.A >> 2.B > 3.B xx 236.C
|
T
|
P
|
Cancel all 3.B's on the first hit. Requires 2 Stress Meter.
|
| 9.b >> cl.5B > cl.5B > 5.B xx 4146.A >> 2.C > 3.B xx 4146.A >> 2.C > 3.B xx 214.D
|
T
|
P
|
Cancel all 3.B's on the first hit. Requires 2 Stress meter.
|
Colors

