User:ChairGTables/Riki: Difference between revisions
Jump to navigation
Jump to search
ChairGTables (talk | contribs) No edit summary |
ChairGTables (talk | contribs) No edit summary |
||
| (17 intermediate revisions by the same user not shown) | |||
| Line 10: | Line 10: | ||
{{ProConTable | {{ProConTable | ||
|pros= | |pros= | ||
* | *His Skylark Shoot can confuse opponent on which side to catch the ball from. | ||
*Quick DP | *His special moves can hit other team members. | ||
*Quick DP. | |||
*Has a very nice pompadour. | |||
|cons= | |cons= | ||
* | *His special moves will leave him on the opponent's side, making his moves risky when your opponents catch the ball. | ||
}} | }} | ||
== Move List == | == Move List == | ||
=== | ===Normals (Holding Ball)=== | ||
{{MoveData | {{MoveData | ||
|image= | |image=SDB_Riki_NormalThrow.png | ||
|name=Normal Throw | |name=Normal Throw | ||
|input=5A | |input=5A | ||
|data= | |data= | ||
{{AttackData-SDB | {{AttackData-SDB | ||
| | |damage=15 | ||
|damage=20 | |chip=5 | ||
|hits=1 | |||
|knockdown=No | |||
|startup=16 | |||
|active=- | |||
|recovery=27 | |||
|stun=20% | |||
|description= | |||
: Throw with no additional inputs. | |||
}} | |||
}} | |||
{{MoveData | |||
|image=SDB_Riki_RunningThrow.png | |||
|name=Running Throw | |||
|input=66A | |||
|data= | |||
{{AttackData-SDB | |||
|damage=18 | |||
|chip=5 | |||
|hits=1 | |||
|knockdown=Yes | |||
|startup=9 | |||
|active=- | |||
|recovery=7 | |||
|stun=25% | |||
|description= | |||
: Throw during the running state. | |||
}} | |||
}} | |||
{{MoveData | |||
|image=SDB_Riki_Pass.png | |||
|name=Pass | |||
|input=5B | |||
|data= | |||
{{AttackData-SDB | |||
|damage=- | |||
|chip=- | |||
|hits=- | |||
|knockdown=- | |||
|startup=12~ | |||
|active=- | |||
|recovery=10 (on pass), 18 (on catch) | |||
|stun=- | |||
|description= | |||
: | |||
*Passes the ball to another team member. | |||
~ If Riki is not facing the team member, he has to turn to the team member for a few additional frames before he begins his startup frames. | |||
}} | |||
}} | |||
{{MoveData | |||
|image=SDB_Riki_Feint.png | |||
|name=Feint | |||
|input=5D | |||
|data= | |||
{{AttackData-SDB | |||
|damage=- | |||
|chip=- | |||
|hits=- | |||
|knockdown=- | |||
|startup=- | |||
|active=- | |||
|recovery=21 | |||
|stun=- | |||
|description= | |||
: Fake a throw. | |||
}} | |||
}} | |||
{{MoveData | |||
|image=SDB_Riki_AirThrow.png | |||
|name=Air Throw | |||
|input=j.5A | |||
|data= | |||
{{AttackData-SDB | |||
|damage=18 | |||
|chip=5 | |||
|hits=1 | |||
|knockdown=Yes | |||
|startup=17 | |||
|active=- | |||
|recovery=14 | |||
|stun=20% | |||
|description= | |||
: | |||
*Throw with no additional inputs while jumping. | |||
*No additional actions cannot be performed until Riki touches the ground. | |||
}} | |||
}} | |||
{{MoveData | |||
|image=SDB_Riki_RunningAirThrow.png | |||
|name=Running Air Throw | |||
|input=j.66A | |||
|data= | |||
{{AttackData-SDB | |||
|damage=23 | |||
|chip=10 | |||
|hits=1 | |||
|knockdown=Yes | |||
|startup=17 | |||
|active=- | |||
|recovery=14 | |||
|stun=20% | |||
|description= | |||
: | |||
*Throw while jumping in the running state. | |||
*No additional actions cannot be performed until Riki touches the ground. | |||
}} | |||
}} | |||
{{MoveData | |||
|image=SDB_Riki_AirPass.png | |||
|name=Air Pass | |||
|input=j.5B | |||
|data= | |||
{{AttackData-SDB | |||
|damage=- | |||
|chip=- | |||
|hits=- | |||
|knockdown=- | |||
|startup=16~ | |||
|active=- | |||
|recovery=9 (on pass), 17 (on catch)~ | |||
|stun=- | |||
|description= | |||
: | |||
*Passes the ball to another team member. | |||
*The team member catching the ball will jump unless they are close to Riki. | |||
~ If Riki is not facing the team member, he has to turn to the team member for a few additional frames before he begins his startup frames. | |||
}} | |||
}} | |||
{{MoveData | |||
|image=SDB_Riki_AirFeint.png | |||
|name=Air Feint | |||
|input=5D | |||
|data= | |||
{{AttackData-SDB | |||
|damage=- | |||
|chip=- | |||
|hits=- | |||
|knockdown=- | |||
|startup=- | |||
|active=- | |||
|recovery=19 | |||
|stun=- | |||
|description= | |||
: | |||
*Fake a throw in the air. | |||
*Resets gravity when performed. | |||
*Can only be used once in the air | |||
}} | |||
}} | |||
===Normals (Hands Free)=== | |||
{{MoveData | |||
|image=SDB_Riki_Catch.png | |||
|name=Catch | |||
|input=5A | |||
|data= | |||
{{AttackData-SDB | |||
|damage=- | |||
|chip=- | |||
|hits=- | |||
|knockdown=- | |||
|startup=1 | |||
|active=36~ | |||
|recovery=1 | |||
|stun=- | |||
|description= | |||
: | |||
*Catch an incoming ball. | |||
~If ball is caught between frames 6 - 25, all chip damage is negated except when catching super moves. | |||
}} | |||
}} | |||
{{MoveData | |||
|image=SDB_Riki_AirCatch.png | |||
|name=Air Catch | |||
|input=j.5A | |||
|data= | |||
{{AttackData-SDB | |||
|damage=- | |||
|chip=- | |||
|hits=- | |||
|knockdown=- | |||
|startup=1 | |||
|active=18~ | |||
|recovery=1 | |||
|stun=- | |||
|description= | |||
: | |||
*Catch an incoming ball in the air. | |||
*This is shorter than when catching a ball on the ground. | |||
~If ball is caught between frames 4 - 14, all chip damage is negated except when catching super moves. | |||
}} | |||
}} | |||
{{MoveData | |||
|image=SDB_Riki_Dodge.png | |||
|name=Dodge | |||
|input=5B | |||
|data= | |||
{{AttackData-SDB | |||
|damage=- | |||
|chip=- | |||
|hits=- | |||
|knockdown=- | |||
|startup=1 | |||
|active=33 | |||
|recovery=1 | |||
|stun=- | |||
|description= | |||
: | |||
*Riki kneels on the ground to dodge an incoming attack. | |||
*Use sparingly and only when you know you don't have enough time to turn around to catch the ball. | |||
*Keep note that teammates behind you can still get hit. | |||
}} | |||
}} | |||
===Command Normals (Hands Free)=== | |||
{{MoveData | |||
|image=SDB_Riki_Charge.png | |||
|name=Charge | |||
|input=5AB | |||
|data= | |||
{{AttackData-SDB | |||
|damage=- | |||
|chip=- | |||
|hits=- | |||
|knockdown=- | |||
|startup=14 | |||
|active=- | |||
|recovery=1 | |||
|stun=- | |||
|description= | |||
: | |||
*Charges your super meter. | |||
*Can be cancelled as soon as you let go of the buttons, even during startup. | |||
}} | |||
}} | |||
===Specials (Holding Ball)=== | |||
{{MoveData | |||
|image=SDB_Riki_MachShoot.png | |||
|name=Mach Shoot | |||
|input=236A | |||
|data= | |||
{{AttackData-SDB | |||
|damage=66 (22 per hit) | |||
|chip=8 | |||
|hits=3 | |||
|knockdown=On last hit | |||
|startup=9 | |||
|active=- | |||
|recovery=17 | |||
|stun=- | |||
|description= | |||
: | |||
*Riki spins towards the enemy while surrounding himself with the ball's flames. | |||
*Deals a large amount of damage if all hits connect. | |||
}} | |||
}} | |||
{{MoveData | |||
|image=SDB_Riki_SkylarkShoot.png | |||
|name=Skylark Shoot | |||
|input=623A | |||
|data= | |||
{{AttackData-SDB | |||
|damage=52 (13 per hit) | |||
|chip=8 | |||
|hits=4 | |||
|knockdown=No | |||
|startup=27 | |||
|active=- | |||
|recovery=47 | |||
|stun=- | |||
|description= | |||
: | |||
*Riki jumps in the air then dives diagonally towards the opponent. | |||
*The initial jump can move forward, allowing it to be a good crossup tool. | |||
*All hits may not connect if performed at a steeper angle. | |||
*Can be performed in the air | |||
}} | |||
}} | |||
{{MoveData | |||
|image=SDB_Riki_SpecialPass.png | |||
|name=Special Pass | |||
|input=623B | |||
|data= | |||
{{AttackData-SDB | |||
|damage=21 | |||
|chip=10 | |||
|hits=1 | |||
|knockdown=Yes | |||
|startup=32 (on pass), 21(on catch)~ | |||
|active=- | |||
|recovery=39 | |||
|stun=25% | |||
|description= | |||
: | |||
*Riki performs a powerful throw after receiving the ball from a teammate. | |||
*Deals a large amount of damage if all hits connect. | |||
~ Startup varies depending on distance between team members. | |||
}} | |||
}} | |||
===Specials (Hands Free)=== | |||
{{MoveData | |||
|image=SDB_Riki_HanazonoCounter.png | |||
|name=Hanazono Counter | |||
|input=623A | |||
|data= | |||
{{AttackData-SDB | |||
|damage=Varies~ | |||
|chip=6 | |chip=6 | ||
|hits=1 | |hits=1 | ||
|knockdown=Yes | |||
|startup=6 | |startup=6 | ||
|active= | |active=14 | ||
|recovery= | |recovery=25 | ||
|knockdown= | |stun=25% | ||
|description= | |||
: | |||
*Riki quickly does a spinning uppercut to reflect the ball back at the opponent. | |||
*Can be performed in the air, but will leave you vulnerable for longer until you reach the ground. | |||
*Invincible until you're on your recovery frames. | |||
*Loses against super moves. | |||
~ Damage amount dealt is based on the type of move your opponent performed against you. | |||
}} | |||
}} | |||
===Supers (Holding Ball)=== | |||
{{MoveData | |||
|image=SDB_Riki_BurningUpper.png | |||
|name=Burning Upper | |||
|input=641236A | |||
|data= | |||
{{AttackData-SDB | |||
|damage=77 | |||
|chip=21 | |||
|hits=1 | |||
|knockdown=Yes | |||
|startup=70~ | |||
|active=- | |||
|recovery=47 | |||
|stun=- | |||
|description= | |description= | ||
: | : | ||
*Riki passes the ball to his teammates. As his teammates spin to bounce the ball towards each other to build speed, Riki runs to the ball and performs a powerful spinning uppercut to set the ball on flames toward the opponent. | |||
~ Startup will take longer depending on how far away each team member is from their intended position to start performing the move. | |||
}} | }} | ||
}} | }} | ||
== Gameplan == | == Gameplan == | ||
:Jumping past the middle line and using his | :Jumping past the middle line and using his Skylark Shoot will have him sometimes attack from behind, leaving your opponents open. | ||
{{ | {{Navbox-SDB}} | ||
[[Category:Super Dodge Ball]] | [[Category:Super Dodge Ball]] | ||
Latest revision as of 00:53, 6 February 2023

| “ |
That was fun! A little more toughness and you'd be the perfect match. |
” |
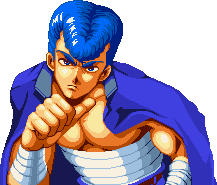
Overview
Riki is the main rival of Kunio, but also treats him as his best friend. His tools offer him many mixup opportunities.
| Strengths | Weaknesses |
|---|---|
|
|
Move List
Normals (Holding Ball)
Normal Throw 5A  |
|---|
Running Throw 66A  |
|---|
Pass 5B  |
|---|
Feint 5D  |
|---|
Air Throw j.5A  |
|---|
Running Air Throw j.66A  |
|---|
Air Pass j.5B  |
|---|
Air Feint 5D  |
|---|
Normals (Hands Free)
Catch 5A  |
|---|
Air Catch j.5A  |
|---|
Dodge 5B  |
|---|
Command Normals (Hands Free)
Charge 5AB  |
|---|
Specials (Holding Ball)
Mach Shoot 236A  |
|---|
Skylark Shoot 623A  |
|---|
Special Pass 623B  |
|---|
Specials (Hands Free)
Hanazono Counter 623A  |
|---|
Supers (Holding Ball)
Burning Upper 641236A  |
|---|
Gameplan
- Jumping past the middle line and using his Skylark Shoot will have him sometimes attack from behind, leaving your opponents open.