Theatre of Light/Gunner: Difference between revisions
m (→Gameplan) |
|||
| Line 246: | Line 246: | ||
TL;DR: spam ATK and S1 at long range, add in knife moves and grenade at mid and use almost exclusively knife moves at close. | TL;DR: spam ATK and S1 at long range, add in knife moves and grenade at mid and use almost exclusively knife moves at close. | ||
== Recommended Cards == | |||
General rule of thumb when building decks with Gunner is to have a status and sustain card, below are some notable examples of this. | General rule of thumb when building decks with Gunner is to have a status and sustain card, below are some notable examples of this. | ||
Revision as of 15:28, 20 March 2024
Overview
| Gunner | |
| Archetype: | Zoner |
| Health Defense Multiplier: |
|
| Stagger Defense Multiplier: |
|
| Walk Speed: | 16 |
| Max Light: | 3 |
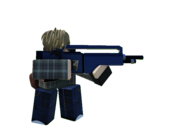
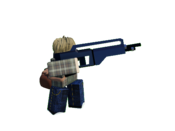
Theatre of Light's resident long range zoner, Gunner is a fragile class that plays keepaway with his array of grenades, sniper shots, and a unique parry to keep enemies off him. However despite his zoner status, he can be played as a semi-rushdown using his high light gain and incredibly versatile Swift Strike in order to breeze past traditional wake-up options.
| Strengths | Weaknesses |
|---|---|
|
|
Move List
Normal moves
Double Tap ATK 2 Ammo per use. 2 Ammo per use.
|
|---|
Headshot S1 Boom, Headshot. Boom, Headshot. Has bonus P1 if you hit it raw. Has bonus P1 if you hit it raw.
|
|---|
Pineapple Surprise S2 Area Denial 101 Area Denial 101
|
|---|
Knife Slash ATK S1 Minus on Hit... Minus on Hit... ...Unless it counters. ...Unless it counters.
|
|---|
Reload SP If this animation passes, they missed the perfect If this animation passes, they missed the perfect
|
|---|
Psyches
Swift Strike ATK > S2 (HOLD) Has high evade, and a huge hitbox. Has high evade, and a huge hitbox.
|
|---|
Over The Limit S1 > S2 (HOLD) Giant Hitscan Gun Giant Hitscan Gun
|
|---|
Gameplan
Gunner’s gameplan can be mainly divided into three main parts: Long range, Mid range and Close range
Long range
As stated in the overview, Gunner is a zoner that heavily excels at long range kiting, when he’s at least half a stage’s worth of distance away from his opponent. At this range, Gunner is capable of safely poking the enemy with absolute zero punishment while dishing out good damage himself.
There are two main ways to approach zoning with Gunner at this range:
- ATK chain: abusing your ATKs at this range is completely valid as it is fast, multi-hitting and easily sustainable. As you fire out two projectiles, ATK chaining demands less aim from the player. However, ATK bullets are slow and hard to hitconfirm from given their low hitstun, making hits from this tactic less impactful, but is effective at stopping overly aggressive players.
- S1 Sniping: this tactic involves observing your opponent and attempting to snipe them with S1 when the conditions line up (Dash CD, endlag, etc…). As S1 fires a fast, damaging and high hitstun projectile, it allows Gunner to easily convert from any hit, dealing great damage and retaining distance as long as the player has decent aim. Nevertheless, it is more risky as S1 consumes one light, making misses more impactful to you instead. This method is useful against defensive players aiming to slowly work their way towards you.
When zoning at long range, exert caution to not spam your moves. This is not only to stop yourself from burning resources but also to catch the opponents’ attempts to bypass your zoning like blocks or sidedashes.
Reloading is a free action at this range. You can reload at anytime, mostly to recover light and not necessarily resorting to it when you run low on bullets. Alas, although long range is gunner’s favored distance, the majority of the match will have you in the next section.
Mid Range
This is the range where opponents like samurai or vigilante can threaten you with their neutral skip moves. Now, zoning has more risks to it and precautions must be made.
- Mid range neutral sees heavy use of ATKs more than S1 as it is inherently less committal. Practicing hit confirms with S1 is vital here to make use of any stray ATK hit to push the opponent back in an advantageous position and range for yourself. If need be, you can spam S1 to buffer it after firing ATK and stop when you think the ATKs won’t hit. This is, however, far from optimal.
- Grenade is also essential in mid range, generally used in neutral or to end combos for setup. It is useful for creating distance, limiting the opponent’s movement options and mental stacking them as well as extending stray hits if the stars align. You can also use this to try and gain back distance immediately when the opponent starts to intrude from long range to mid range.
- Aside from attempting to zone, you can also opt to bait out the opponent’s neutral skip options by committing to a knife parry. Aggressive opponents will use their tool as soon as they see that they are in range, so respond by parrying first to gain the opportunity to dish out huge damage and maintain distance. Regardless, the opponent can also bait this out by delaying their move, spelling the end for you if you already committed to knife parry.
- It is also an option to use the knife reversal preemptively in order to gain back distance easily and sneak in some damage. Although this is Gunner’s best option in mid range, it is very costly at 2 light as well as being prone to the opponent’s defensive options like block or evade. Use it sparingly.
- Reloading in neutral is more risky at this range and not advised, although it is still possible if you threaten them with an immediate parry after. Generally, you can reload after throwing out a grenade, landing a stray hit, or ending a combo/canceling out knife super.
Close range
You’re most likely dead.
In all seriousness, playing close range is extremely hard as Gunner. Zoning becomes invalid, and you’re focused on resetting back to mid range ASAP.
- Knife reversal is your strongest option. It is fully invulnerable and can be reload canceled to reset back to neutral. However, TOL classes have multiple ways to safely pressure someone like moves with added block or evade. Therefore, it is not infallible, and god bless if you got called out and parried by something like To claim their bones.
- Knife parry works as an alternative. It has a melee hitbox, which can prove useful in some situations although it’s minus on hit. What you’re mainly looking for is to parry the opponent’s pressure string and do a combo that reset to neutral. You can also aim the melee hit away to avoid hitting the opponent’s block for the aforementioned purpose. The threat of the parry may make the opponent hesitate, forcing them to attempt to bait it out first before punishing. This makes them prone to the next option
- Mash M1. If the opponent is trying to bait your knife options, you can usually M1 some classes in the face and get away with it. This doesn’t work most of the time, however, and should only be used very sparingly to mix up your options.
- Grenade can also be used to create superficial distance. If the opponent commits to an attack and whiffs, you gain back distance. If they were expecting it or they cancel out of it, it is very easy for them to chase you and you are back to selecting one of the above options.
- ONLY reload after one of the above options succeeded.
Anti Air
Don’t try it. It’s better to do this in combo more than in neutral practically. But sometimes it’s ranger and you are forced to do or die.
TL;DR: spam ATK and S1 at long range, add in knife moves and grenade at mid and use almost exclusively knife moves at close.
Recommended Cards
General rule of thumb when building decks with Gunner is to have a status and sustain card, below are some notable examples of this.
Scars
EL1: Scars
EL2: Alertness
EL3: N/A
Gluttony
EL1: Metallic Ringing/Cocoon
EL2: Gluttony
EL3: N/A

