Twinkle Star Sprites/Load Ran/Dark Ran: Difference between revisions
Jump to navigation
Jump to search
No edit summary |
|||
| (16 intermediate revisions by 3 users not shown) | |||
| Line 5: | Line 5: | ||
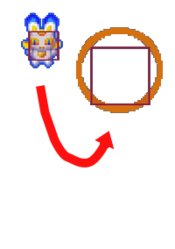
| align="center" colspan="2" |[[File:TSS_LoadRan.png|center|frameless|350px]] | | align="center" colspan="2" |[[File:TSS_LoadRan.png|center|frameless|350px]] | ||
|- | |- | ||
| ''' | | '''Attack Rating''' || ★★★☆☆ | ||
|- | |- | ||
| ''' | | '''Defense Rating''' || ★★☆☆☆ | ||
|} | |} | ||
| Line 14: | Line 14: | ||
==Gameplay Overview== | ==Gameplay Overview== | ||
TBD | |||
{{ProConTable | {{ProConTable | ||
|pros= | |pros= | ||
*''' | *'''Easy to Use''': Ran is a character that's easy to use, and can be a strong character even at high level. | ||
*'''EX/Bosses are good''': Ran's EX and Boss are both pretty decent, so she has multiple ways she can use meter well | |||
*''' | *'''Solid for a "Ryu" character''': She's the main character, but she's not exactly average. | ||
*''' | |||
|cons= | |cons= | ||
*'''Bomb | *'''Worst Bomb''': Ran has an extra animation when using her bomb, so she has less invul time to reposition after a bomb | ||
*'''charge is a little slow''': idk she doesn't have alot of glaring cons. I had to put something up here | |||
*''' | }} | ||
==Move List== | |||
== | ===Basic Attacks=== | ||
{{MoveData | {{MoveData | ||
|image= | |image=TSS_LoadRan_Shot.png | ||
|caption= | |caption= | ||
| | |name= Basic shot | ||
| | |input= A | ||
|data= | |data= | ||
{{AttackData- | {{AttackData-TSS | ||
| | |speed=6 ppf | ||
| | |damage=1 | ||
|startup= | |startup= | ||
|active= | |active= | ||
|description= | |||
Load Ran's basic shot. 2 Lines shoot from in front of her. about as wide as her character sprite | |||
}} | }} | ||
}} | }} | ||
{{MoveData | {{MoveData | ||
|image= | |image=TSS_LoadRan_Shot_Weak.png | ||
|caption= | |caption= | ||
| | |name= Weakened Basic shot | ||
| | |input= A | ||
|data= | |data= | ||
{{AttackData- | {{AttackData-TSS | ||
| | |speed=4ppf | ||
| | |damage=1 | ||
|startup= | |startup= | ||
|active= | |active= | ||
|description= | |||
Load Ran's basic shot, but 1 line instead of the 2 | |||
}} | }} | ||
}} | }} | ||
{{MoveData | {{MoveData | ||
|image= | |image=TSS_LoadRan_Charge.png | ||
|caption= | |caption= | ||
| | |name= Charge Attack | ||
| | |input= Hold A | ||
|data= | |data= | ||
{{AttackData- | {{AttackData-TSS | ||
| | |speed=? | ||
| | |damage=2/8/10 | ||
| chargetime=65 frames | |||
|description= | |||
A giant blue light comet that shoots in one direction. A strong, fairly wide charge attack that is good for killing bosses and reflecting fireballs. Its only weaknesses are that it takes a little long to charge, and that you have to connect on its center to do a significant amount of damage. | |||
| | |||
| | |||
}} | }} | ||
}} | }} | ||
{{MoveData | {{MoveData | ||
|image= | |image=TSS_LoadRan_Bomb.png | ||
| | |name= Bomb Attack | ||
|input= | |input= B | ||
|data= | |data= | ||
{{AttackData- | {{AttackData-TSS | ||
|damage= | |damage=12 | ||
|startup=1 | |||
|startup= | |active=10 | ||
|active= | |description= | ||
| | Load Rans and throws in a star that damages everything on screen. | ||
}} | }} | ||
}} | }} | ||
==Special Attacks== | |||
{{MoveData | {{MoveData | ||
|image= | |image=TSS_LoadRan_EX.png | ||
|caption= | |caption= | ||
| | |name= EX Attack | ||
| | |input= | ||
|data= | |data= | ||
{{AttackData- | {{AttackData-DF | ||
|damage= | |damage=3 | ||
|startup=20 | |||
|startup= | |active=-- | ||
|active | |description= | ||
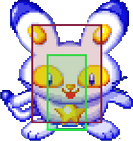
A rabicat comes and fires at the opponent in an arc path. Explodes when it stops. This can be almost impossible to dodge at high speeds/combos. | |||
| | |||
}} | }} | ||
}} | }} | ||
===Boss=== | |||
{| class="wikitable" margin-left: 10px;" | |||
|- | |||
! align="center" colspan="2" | Super Rabicat | |||
|- | |||
| align="center" colspan="2" |[[File:TSS_LoadRan_Boss.png|center|frameless|300px]] | |||
|- | |||
| '''Health''' || 22 HP | |||
|} | |||
{{MoveData | {{MoveData | ||
|image= | |image=TSS_Schmitt_DL.png | ||
| | |caption=Twinbee stings back | ||
| | |name= Body Ram | ||
|input= | |input= A->w->E | ||
|data= | |data= | ||
{{AttackData- | {{AttackData-TSS | ||
| | |speed | ||
| | |damage= 3 hearts | ||
|startup= | |startup= 0 | ||
|active= | |active= -- | ||
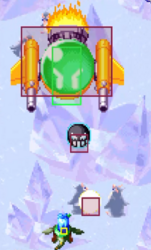
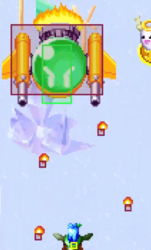
|description=The boss attacks by dropping it's butt directly from the top of the screen. Can die isntantly if you're able lower of its HP before it receovers from the attack. | |||
|description= | |||
}} | }} | ||
}} | }} | ||
{{MoveData | {{MoveData | ||
|image= | |image=TSS_Schmitt_BB.png | ||
|caption= | |caption= | ||
| | |name= Star Spread | ||
| | |input= W->A->W->E | ||
|data= | |data= | ||
{{AttackData- | {{AttackData-TSS | ||
|damage=3 | |damage=3 | ||
|startup=8 | |||
|startup= | |active=16 | ||
|active= | |description= | ||
| | The Rabicat moves in nearly a full circle, and while it is halfway through the circle, it lifts its butt and fires a five-way star spread with a stray star immediately following. The spread's center is always focused on your current position. | ||
}} | }} | ||
}} | }} | ||
{{MoveData | {{MoveData | ||
|image= | |image=TSS_Schmitt_Spray.png | ||
| | |name= Carrot Barrage | ||
|input= | |input= W->A->E | ||
|data= | |data= | ||
{{AttackData- | {{AttackData-TSS | ||
|damage= | |damage=3 | ||
|startup=20 | |||
|startup= | |active=180 | ||
|active= | |description= | ||
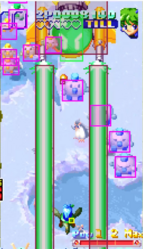
Rabicat moves to one wall, then shoots carrots down vertically while strafing to the opposite side. You can slip through the carrots if you're careful, but it's a high risk, low reward move. (do it) | |||
|description= | |||
}} | }} | ||
}} | }} | ||
{{MoveData | {{MoveData | ||
|image= | |image=TSS_Schmitt_Spray.png | ||
| | |name= Dual Bunny Bombs | ||
|input= W->A->E | |||
|input= | |||
|data= | |data= | ||
{{AttackData- | {{AttackData-TSS | ||
|damage= | |damage=3 | ||
|startup=20 | |||
|startup= | |active=180 | ||
|active= | |description= | ||
The boss circles around the stage, then drops two bunnies toward your position. | |||
| | |||
}} | }} | ||
}} | }} | ||
==Strategy== | ==Strategy== | ||
How Should someone play as | How Should someone play as Schmitt? [NEEDS EDITS] | ||
{{Navbox-TSS}} | {{Navbox-TSS}} | ||
Latest revision as of 15:38, 30 May 2024
| Load Ran | |
|---|---|
| Attack Rating | ★★★☆☆ |
| Defense Rating | ★★☆☆☆ |
Story
Load Ran is an girl that uses her broom to fly and fight. She has a counterpart named Dark Ran and she plays the same as her and is only a palette change.
Gameplay Overview
TBD
| Strengths | Weaknesses |
|---|---|
|
|
Move List
Basic Attacks
Basic shot
A |
|---|
Weakened Basic shot
A |
|---|
Charge Attack
Hold A |
|---|
Bomb Attack
B |
|---|
Special Attacks
EX Attack
|
|---|
Boss
| Super Rabicat | |
|---|---|
| Health | 22 HP |
Body Ram A->w->E Twinbee stings back Twinbee stings back
|
|---|
Star Spread
W->A->W->E |
|---|
Carrot Barrage
W->A->E |
|---|
Dual Bunny Bombs
W->A->E |
|---|
Strategy
How Should someone play as Schmitt? [NEEDS EDITS]
