Introduction
Character is...
Character Spotlight
Under Construction
Overview
Afi Attributes
| Walk Speed |
Dash Start Speed |
Dash Acceleration |
Dash Speed
|
| 0.09
|
0.04
|
2.25
|
0.195
|
| Jump Speed |
Short Hop Speed |
Double Jump Speed |
Double Jump Count
|
| 0.3
|
0.195
|
0.31
|
1
|
| Weight |
Gravity |
Fall Speed |
Fast Fall Speed
|
| 97
|
0.9
|
0.22
|
0.28
|
| Ground To Air Speed |
Air Speed |
Air Accel |
Air Friction
|
| 0.5
|
0.1
|
0.36
|
0.12
|
| Rush Jump Speed |
Neutral Dash Jump Speed |
Short Dash Jump Speed |
Short Standing Dash Jump Speed
|
| 0.216
|
0.5
|
0.8
|
0.6
|
| Float
|
Character Mechanic
|
| no
|
Mechanic
|
Galu Attributes
| Walk Speed |
Dash Start Speed |
Dash Acceleration |
Dash Speed
|
| 0.065
|
0.04
|
2.25
|
0.14
|
| Jump Speed |
Short Hop Speed |
Double Jump Speed |
Double Jump Count
|
| 0.26
|
0.15
|
0.235
|
1
|
| Weight |
Gravity |
Fall Speed |
Fast Fall Speed
|
| 108
|
0.54
|
0.19
|
0.2375
|
| Ground To Air Speed |
Air Speed |
Air Accel |
Air Friction
|
| 0.3
|
0.14
|
0.75
|
0.12
|
| Rush Jump Speed |
Neutral Dash Jump Speed |
Short Dash Jump Speed |
Short Standing Dash Jump Speed
|
| 0.216
|
0.5
|
0.8
|
0.6
|
| Float
|
Character Mechanic
|
| no
|
Mechanic
|
Game Plan
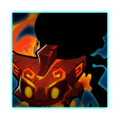
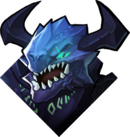
Afi & Galu is a Puppet/Stance Fighter with a Steam Mechanic.
At the start of the match the player will be able to spend up to 3 "Steam" Clouds to switch back and forth which of the two totems is active. An inactive Afi or Galu is simply called "Totem".
Spark will be used for switching before utilizing steam. Without either resource switching between characters is unavailable.
There's a tech called "Charged Active Switch" (CAS) where the active totem starts charging a Tilt attack, but switches into the other mid charge. This means the newly active totem is free to move and try to hit the opponent into the charging one. This generates 2 vs. 1 situations not unlike tag team games.
To gain Steam, the player must first hit the opponent to apply a status effect. When the enemy is then hit with the opposite totem, Steam is gained and the move used deals extra damage.
The mechanic is much simpler to follow as long as you are hitting the opponent when switching between both.
Being a duo character does come with a high difficulty level, where weaknesses like slow ground speed and stubby normals.
The opponent can interact with the inactive totem, using strong attacks to lift them off the ground.
From there, it becomes much easier to launch them offstage, causing an 8 second cool down and 10 health damage before they respawn.
For Afi
- Jab is the fastest button to use, has good range and can transition into Up Special without Spark. It has follow ups at all HP Bands.
- Side Tilt is strong at the ledge when using charged active switch set ups. Set up Afi, then have Galu hit them into it. It's start up is too commital for neutral.
- Down tilt is a quick long range poke useful for whiff punishing with an excellent angle for follow ups. It carries momentum, allowing for waveland and rush mixups.
- Up Tilt has very high hitstun, but is a little too slow for Anti-Airs. Rush and follow DI for follow ups even on the weak hit.
- Neutral Air used when falling is unsafe. It's angle also isn't the best for totem switching, but on standing opponents it can create a tech chase on it's own.
- Forward Air is his best kill move. It's stronger than Side Tilt, has less endlag than Galu's and can hit under or above the ledge. Combo into it from Up Special.
- Back Air is a projectile hitbox, so it loses in trades. With charge, it goes from Combo tool to Kill move. Can charge early during a boomerang jump, which essentially makes for a Super Jump forward while facing away.
- Up Air is a projectile hitbox, so it loses in trades. Main button to kill off the top because it mixups DI. Using Down Special during UAir has Afi hit themselves upwards for Height (Swooping).
- Down Air is a quick multi-hit with little endlag that can drag foes up or down. It can be negative on hit if they remain grounded, but it can cross up shields to remain ambiguous. Using DAir then jumping gives a bit more height.
- Grab range is small, but Afi gets a lot from it, specially from Down Throw.
- Forward Throw has consistent solo follow ups at every band using Super Jumps at the ledge, but these tend to be very specific to do when other throws exists.
- Back Throw has use at blue band where it sends at a low angle for tilt follow ups, but not low enough to allow for Tech chasing.
- Up Throw Combine it with DSpecial and use Galu DAir for regrab loops. Otherwise it permits follow ups at early bands for quick damage.
- Down Throw is Afi's best throw. It's slow enough for a DSpecial switch. Either totem then uses the time for a reaction tech chase.
- Neutral Special
- Side Special
- Up Special
- Down Special
For Galu
- Jab is the fastest button to use, but it follows up into STilt or BAir after spark cancelling and reading DI.
- Side Tilt is likely his worst move. On the slower side, it remains active for plenty of frames. Only useful as a poking tool off of waveland or Rush.
- Down tilt is a slow 2-hit attack that's 0 on shield. It has a weak spike that becomes much more threatening when fully charged.
- Up Tilt is an excellent disjointed combo starter no matter the HP band. Used in CAS, it can be used to deny air space and can kill in orange band.
- Neutral Air has a better angle than Afi's, allowing for easier back and forth combos. Use it to combo into Afi's CAS STilt or use it in Neutral to cover space.
- Forward Air isnt' as good as Afi's, staling pretty hard but otherwise having similar uses.
- Back Air is an excellent multi hit tool that has low knockback with follow ups into itself and SSpecial, but also into grounded attacks. Galu's fastest Aerial.
- Up Air has low endlag and landing lag. Works well enough for combos and doesn't kill unless Charged or near the blastzone. Use CAS to launch opponents up with it's disjoint into an Afi already set up on higher platforms.
- Down Air is a weak low hitstun move used to vortex opponents. Using it on standing ones will bounce them up with high hitstun. It's also great for juggling Totem upwards.
- Grab
- Forward Throw
- Back Throw
- Up Throw
- Down Throw
- Neutral Special
- Side Special
- Up Special
- Down Special
- For Neutral they want to hit combos that bounce the opponent back and forth between Afi & Galu. Charged Active Switch can also turn one of the totems into an Assist of sorts, which can both help pressure shield or combo break.
- In advantage they should be using "steam" for switch set ups. Be it simple 2v1 combos to bounce the opponent around, or Charged Active Set ups for ledge traps, tech chases and covering landings. Using the threat of FAir to hit ledge hang, They can set up to cover most ledge options as well. While risky, it's also possible to launch the inactive totem offstage as a projectile that can then become an active fighter and edgeguard.
- In disadvantage both have good buttons to mash out of combos. Afi has a better time mixing up recoveries with the faster SSpecial, more horizontal USpecial and charged BAir. Recovering with Totem offstage might be the best recovery in the game thanks to infinite USpecial when hitting totem while NSpecial is used to shoot projectiles back on stage. Can also gain Switch back by hitting the totem.
Afi & Galu are for you if you enjoy:
- Hard-to-Use but rewarding characters.
- Super versatile pressure tools with "Assist-like" coverage.
- Using character specific mechanics for Mind blowing set ups for frame traps, combo breakers and extensions.
For a more in depth overview of the character, guides and a matchup spread, go to Afi & Galu: Competitive Overview
Moveset
Grounded Strikes
|
|
Jab 1 Afi 5A. 5A.
|
| Type
|
Hits
|
Version
|
| 'Jab 1'
|
1
|
0.9.4
|
| Start Up
|
Active
|
End Lag
|
Total
|
Land lag
|
Whiff Lag
|
Frame Adv
|
iFrames
|
Grants Spark
|
| 5
|
3
|
15
|
22
|
-
|
-
|
-4/-8
|
-
|
Yes
|
| Damage
|
Angle
|
Knockback
|
Knockback Growth
|
Shield Stun
|
Hitlag
|
Paralyzer
|
Chargeable
|
| 3
|
50
|
30
|
0
|
6
|
1
|
-
|
No
|
|
|
|
Toggle Hitboxes Toggle Hitboxes
|
Jab 2 Afi 5A. 5A.
|
| Type
|
Hits
|
Version
|
| 'Jab 2'
|
1
|
0.9.4
|
| Start Up
|
Active
|
End Lag
|
Total
|
Land lag
|
Whiff Lag
|
Frame Adv
|
iFrames
|
Grants Spark
|
| 4
|
4
|
11
|
18
|
-
|
-
|
-3/-3
|
-
|
Yes
|
| Damage
|
Angle
|
Knockback
|
Knockback Growth
|
Shield Stun
|
Hitlag
|
Paralyzer
|
Chargeable
|
| 3
|
70
|
30
|
0
|
7
|
6/6
|
-
|
No
|
|
|
|
Toggle Hitboxes Toggle Hitboxes
|
Jab 3 5A. 5A.
|
| Type
|
Hits
|
Version
|
| 'Jab 3 Afi'
|
1
|
0.9.4
|
| Start Up
|
Active
|
End Lag
|
Total
|
Land lag
|
Whiff Lag
|
Frame Adv
|
iFrames
|
Grants Spark
|
| 5
|
5
|
20
|
28
|
-
|
-
|
-8/-18
|
-
|
Yes
|
| Damage
|
Angle
|
Knockback
|
Knockback Growth
|
Shield Stun
|
Hitlag
|
Paralyzer
|
Chargeable
|
| 3
|
45
|
40
|
0.65
|
2
|
14/14
|
-
|
No
|
|
|
|
Toggle Hitboxes Toggle Hitboxes
|
Jab 1 5A. 5A.
|
| Type
|
Hits
|
Version
|
| 'Jab 1 Galu'
|
1
|
0.9.4
|
| Start Up
|
Active
|
End Lag
|
Total
|
Land lag
|
Whiff Lag
|
Frame Adv
|
iFrames
|
Grants Spark
|
| 5
|
3
|
15
|
22
|
-
|
-
|
-4/-8
|
-
|
Yes
|
| Damage
|
Angle
|
Knockback
|
Knockback Growth
|
Shield Stun
|
Hitlag
|
Paralyzer
|
Chargeable
|
| 3
|
50
|
30
|
0
|
6
|
1
|
-
|
No
|
|
|
|
Toggle Hitboxes Toggle Hitboxes
|
Jab 2 Galu 5A. 5A.
|
| Type
|
Hits
|
Version
|
| 'Jab 2'
|
1
|
0.9.4
|
| Start Up
|
Active
|
End Lag
|
Total
|
Land lag
|
Whiff Lag
|
Frame Adv
|
iFrames
|
Grants Spark
|
| 4
|
4
|
11
|
18
|
-
|
-
|
-3/-3
|
-
|
Yes
|
| Damage
|
Angle
|
Knockback
|
Knockback Growth
|
Shield Stun
|
Hitlag
|
Paralyzer
|
Chargeable
|
| 3
|
70
|
30
|
0
|
7
|
6/6
|
-
|
No
|
|
|
|
Toggle Hitboxes Toggle Hitboxes
|
Jab 3 5A. 5A.
|
| Type
|
Hits
|
Version
|
| 'Jab 3 Galu'
|
1
|
0.9.4
|
| Start Up
|
Active
|
End Lag
|
Total
|
Land lag
|
Whiff Lag
|
Frame Adv
|
iFrames
|
Grants Spark
|
| 5
|
5
|
20
|
28
|
-
|
-
|
-8/-18
|
-
|
Yes
|
| Damage
|
Angle
|
Knockback
|
Knockback Growth
|
Shield Stun
|
Hitlag
|
Paralyzer
|
Chargeable
|
| 3
|
45
|
40
|
0.65
|
2
|
14/14
|
-
|
No
|
|
|
|
Toggle Hitboxes Toggle Hitboxes
|
FStrike Afi 5A. 6A.
|
| Type
|
Hits
|
Version
|
| 'Forward Strike'
|
1
|
0.9.4
|
| Start Up
|
Active
|
End Lag
|
Total
|
Land lag
|
Whiff Lag
|
Frame Adv
|
iFrames
|
Grants Spark
|
| 10
|
5
|
24
|
38
|
-
|
-
|
4/-2
|
-
|
Yes
|
| Damage
|
Angle
|
Knockback
|
Knockback Growth
|
Shield Stun
|
Hitlag
|
Paralyzer
|
Chargeable
|
| 11
|
35
|
55
|
0.60
|
14
|
10/10
|
-
|
Yes
|
|
|
|
Toggle Hitboxes Toggle Hitboxes
|
FStrike Galu 5A. 5A.
|
| Type
|
Hits
|
Version
|
| 'Forward Strike'
|
1
|
0.9.4
|
| Start Up
|
Active
|
End Lag
|
Total
|
Land lag
|
Whiff Lag
|
Frame Adv
|
iFrames
|
Grants Spark
|
| 7
|
8
|
17
|
31
|
-
|
-
|
-2/-9
|
-
|
Yes
|
| Damage
|
Angle
|
Knockback
|
Knockback Growth
|
Shield Stun
|
Hitlag
|
Paralyzer
|
Chargeable
|
| 8
|
50
|
60
|
0.50
|
8
|
9/9
|
-
|
Yes
|
|
|
|
Toggle Hitboxes Toggle Hitboxes
|
Up Strike 5A. 8A.
|
| Type
|
Hits
|
Version
|
| 'Up Strike Sweet Spot'
|
1
|
0.9.4
|
| Start Up
|
Active
|
End Lag
|
Total
|
Land lag
|
Whiff Lag
|
Frame Adv
|
iFrames
|
Grants Spark
|
| 12
|
1
|
25
|
48
|
-
|
-
|
2/-16
|
-
|
Yes
|
| Damage
|
Angle
|
Knockback
|
Knockback Growth
|
Shield Stun
|
Hitlag
|
Paralyzer
|
Chargeable
|
| 10
|
70
|
60
|
0.60
|
12
|
10/10
|
-
|
Yes
|
|
|
| Type
|
Hits
|
Version
|
| 'Up Strike Sour Spot 1'
|
1
|
0.9.4
|
| Start Up
|
Active
|
End Lag
|
Total
|
Land lag
|
Whiff Lag
|
Frame Adv
|
iFrames
|
Grants Spark
|
| 12
|
2
|
25
|
48
|
-
|
-
|
-1/-17
|
-
|
Yes
|
| Damage
|
Angle
|
Knockback
|
Knockback Growth
|
Shield Stun
|
Hitlag
|
Paralyzer
|
Chargeable
|
| 8
|
80
|
50
|
0.45
|
12
|
9/9
|
-
|
Yes
|
|
|
| Type
|
Hits
|
Version
|
| 'Up Strike Sour Spot 2'
|
1
|
0.9.4
|
| Start Up
|
Active
|
End Lag
|
Total
|
Land lag
|
Whiff Lag
|
Frame Adv
|
iFrames
|
Grants Spark
|
| 12
|
9
|
25
|
48
|
-
|
-
|
-1/-17
|
-
|
Yes
|
| Damage
|
Angle
|
Knockback
|
Knockback Growth
|
Shield Stun
|
Hitlag
|
Paralyzer
|
Chargeable
|
| 8
|
80
|
50
|
0.45
|
12
|
9/9
|
-
|
Yes
|
|
|
|
Toggle Hitboxes Toggle Hitboxes
|
Up Strike Galu 5A. 5A.
|
| Type
|
Hits
|
Version
|
| 'Up Strike'
|
1
|
0.9.4
|
| Start Up
|
Active
|
End Lag
|
Total
|
Land lag
|
Whiff Lag
|
Frame Adv
|
iFrames
|
Grants Spark
|
| 9
|
10
|
20
|
38
|
-
|
-
|
4/-4
|
-
|
Yes
|
| Damage
|
Angle
|
Knockback
|
Knockback Growth
|
Shield Stun
|
Hitlag
|
Paralyzer
|
Chargeable
|
| 10
|
90
|
60
|
0.60
|
14
|
9/9
|
-
|
Yes
|
|
|
|
Toggle Hitboxes Toggle Hitboxes
|
Down Strike Afi 5A. 2A.
|
| Type
|
Hits
|
Version
|
| 'Down Strike'
|
1
|
0.9.4
|
| Start Up
|
Active
|
End Lag
|
Total
|
Land lag
|
Whiff Lag
|
Frame Adv
|
iFrames
|
Grants Spark
|
| 10
|
5
|
23
|
38
|
-
|
-
|
-2/-18
|
-
|
Yes
|
| Damage
|
Angle
|
Knockback
|
Knockback Growth
|
Shield Stun
|
Hitlag
|
Paralyzer
|
Chargeable
|
| 8
|
70
|
60
|
0.50
|
8
|
9/9
|
-
|
Yes
|
|
|
|
Toggle Hitboxes Toggle Hitboxes
|
Down Strike Galu 5A. 5A.
|
| Type
|
Hits
|
Version
|
| 'Down Strike'
|
1
|
0.9.4
|
| Start Up
|
Active
|
End Lag
|
Total
|
Land lag
|
Whiff Lag
|
Frame Adv
|
iFrames
|
Grants Spark
|
| 14
|
8
|
21
|
42
|
-
|
-
|
-2/-18
|
-
|
Yes
|
| Damage
|
Angle
|
Knockback
|
Knockback Growth
|
Shield Stun
|
Hitlag
|
Paralyzer
|
Chargeable
|
| 10
|
90
|
60
|
0.60
|
9
|
10/10
|
-
|
Yes
|
|
|
|
Toggle Hitboxes Toggle Hitboxes
|
|
Aerials
|
|
Neutral Air Afi 5A. (Air) 5A.
|
| Type
|
Hits
|
Version
|
| 'Neutral Air'
|
1
|
0.9.4
|
| Start Up
|
Active
|
End Lag
|
Total
|
Land lag
|
Whiff Lag
|
Frame Adv
|
iFrames
|
Grants Spark
|
| 6
|
24
|
9
|
38
|
8
|
8
|
3/-18
|
-
|
Yes
|
| Damage
|
Angle
|
Knockback
|
Knockback Growth
|
Shield Stun
|
Hitlag
|
Paralyzer
|
Chargeable
|
| 9
|
15
|
40
|
0.50
|
10
|
10/10
|
-
|
Yes
|
|
|
|
Toggle Hitboxes Toggle Hitboxes
|
Neutral Air Galu 5A. 5A.
|
| Type
|
Hits
|
Version
|
| 'Neutral Air'
|
1
|
0.9.4
|
| Start Up
|
Active
|
End Lag
|
Total
|
Land lag
|
Whiff Lag
|
Frame Adv
|
iFrames
|
Grants Spark
|
| 6
|
24
|
9
|
38
|
7
|
12
|
3/-18
|
-
|
Yes
|
| Damage
|
Angle
|
Knockback
|
Knockback Growth
|
Shield Stun
|
Hitlag
|
Paralyzer
|
Chargeable
|
| 9
|
15
|
55
|
0.50
|
10
|
18/10
|
-
|
Yes
|
|
|
|
Toggle Hitboxes Toggle Hitboxes
|
Forward Air Afi 5A. 5A.
|
| Type
|
Hits
|
Version
|
| 'Forward Air'
|
1
|
0.9.4
|
| Start Up
|
Active
|
End Lag
|
Total
|
Land lag
|
Whiff Lag
|
Frame Adv
|
iFrames
|
Grants Spark
|
| 11
|
3
|
24
|
37
|
7
|
7
|
5/-10
|
-
|
Yes
|
| Damage
|
Angle
|
Knockback
|
Knockback Growth
|
Shield Stun
|
Hitlag
|
Paralyzer
|
Chargeable
|
| 14
|
40
|
30
|
0.70
|
12
|
13/13
|
-
|
Yes
|
|
|
|
Toggle Hitboxes Toggle Hitboxes
|
Forward Air Galu 5A. 5A.
|
| Type
|
Hits
|
Version
|
| 'Forward Air'
|
1
|
0.9.4
|
| Start Up
|
Active
|
End Lag
|
Total
|
Land lag
|
Whiff Lag
|
Frame Adv
|
iFrames
|
Grants Spark
|
| 11
|
3
|
30
|
43
|
7
|
11
|
4/-12
|
-
|
Yes
|
| Damage
|
Angle
|
Knockback
|
Knockback Growth
|
Shield Stun
|
Hitlag
|
Paralyzer
|
Chargeable
|
| 8
|
63
|
65
|
0.45
|
11
|
9/9
|
-
|
Yes
|
|
|
|
Toggle Hitboxes Toggle Hitboxes
|
Back Air Afi 5A. 5A.
|
| Type
|
Hits
|
Version
|
| 'Single Hit'
|
1
|
0.9.4
|
| Start Up
|
Active
|
End Lag
|
Total
|
Land lag
|
Whiff Lag
|
Frame Adv
|
iFrames
|
Grants Spark
|
| 12
|
6
|
20
|
37
|
7
|
13
|
16/-14
|
-
|
Yes
|
| Damage
|
Angle
|
Knockback
|
Knockback Growth
|
Shield Stun
|
Hitlag
|
Paralyzer
|
Chargeable
|
| 2
|
30
|
40
|
0.60
|
8
|
9/9
|
-
|
Yes
|
|
|
|
Toggle Hitboxes Toggle Hitboxes
|
{{MoveData
|imageSize= 140x200px
|image=RushRev_Galu_BackAir.gif
|caption=5A.
|imageSize2= 140x200px
|hitbox=RushRev_Galu_BackAir_Hitbox.gif
|hitboxCaption=5A.
|name=Back Air Galu
|data=
|- style="font-size:90%; line-height:1em"
! style="width:10%" | Type
! style="width:12%" | Hits
! Version
|-
| 'Back Air'
| 5
| 0.9.4
|- style="font-size:90%; line-height:1em"
! Start Up
! Active
! End Lag
! Total
! Land lag
! Whiff Lag
! Frame Adv
! iFrames
! Grants Spark
|-
| 5
| 2/4
| 27
| 45
| 7
| 13
| 30/-58
| -
| Yes
|- style="font-size:90%; line-height:1em"
! Damage
! Angle
! Knockback
! Knockback Growth
! Shield Stun
! Hitlag
! Paralyzer
! Chargeable
|-
| 2/hit
| Auto Linking
| 25
| Low
| 1
| 5/5
| -
| Yes
|-
| colspan="13" style="text-align: left; vertical-align:top;" |
|-
|-
|- style="font-size:90%; line-height:1em"
! style="width:10%" | Type
! style="width:12%" | Hits
! Version
|-
| 'Back Air Final Hit'
| 5
| 0.9.4
|- style="font-size:90%; line-height:1em"
! Start Up
! Active
! End Lag
! Total
! Land lag
! Whiff Lag
! Frame Adv
! iFrames
! Grants Spark
|-
| 5
| 2
| 27
| 45
| 7
| 13
| 30/-58
| -
| Yes
|- style="font-size:90%; line-height:1em"
! Damage
! Angle
! Knockback
! Knockback Growth
! Shield Stun
! Hitlag
! Paralyzer
! Chargeable
|-
| 4
| 70
| 60
| 0.75
| 8
| 6/6
| -
| Yes
|-
| colspan="13" style="text-align: left; vertical-align:top;" |
|-
|-
Up Air Afi 5A. 5A.
|
| Type
|
Hits
|
Version
|
| 'Up Air'
|
1
|
0.9.4
|
| Start Up
|
Active
|
End Lag
|
Total
|
Land lag
|
Whiff Lag
|
Frame Adv
|
iFrames
|
Grants Spark
|
| 9
|
-
|
6
|
9
|
7
|
8
|
2/-13
|
-
|
Yes
|
| Damage
|
Angle
|
Knockback
|
Knockback Growth
|
Shield Stun
|
Hitlag
|
Paralyzer
|
Chargeable
|
| 2
|
85
|
60
|
0.55
|
11
|
9/9
|
-
|
Yes
|
|
|
|
Toggle Hitboxes Toggle Hitboxes
|
Up Air Galu 5A. 5A.
|
| Type
|
Hits
|
Version
|
| 'Up Air'
|
1
|
0.9.4
|
| Start Up
|
Active
|
End Lag
|
Total
|
Land lag
|
Whiff Lag
|
Frame Adv
|
iFrames
|
Grants Spark
|
| 10
|
5
|
23
|
37
|
9
|
10
|
4/-10
|
-
|
Yes
|
| Damage
|
Angle
|
Knockback
|
Knockback Growth
|
Shield Stun
|
Hitlag
|
Paralyzer
|
Chargeable
|
| 10
|
85
|
50
|
0.7
|
13
|
10/10
|
-
|
Yes
|
|
|
|
Toggle Hitboxes Toggle Hitboxes
|
Down Air Afi 5A. 5A.
|
| Type
|
Hits
|
Version
|
| 'Down Air 1-5'
|
1
|
0.9.4
|
| Start Up
|
Active
|
End Lag
|
Total
|
Land lag
|
Whiff Lag
|
Frame Adv
|
iFrames
|
Grants Spark
|
| 7
|
2/5
|
10
|
33
|
7
|
8
|
-6/-26
|
-
|
Yes
|
| Damage
|
Angle
|
Knockback
|
Knockback Growth
|
Shield Stun
|
Hitlag
|
Paralyzer
|
Chargeable
|
| 1
|
280
|
0
|
0
|
1
|
4/4
|
-
|
Yes
|
|
|
| Type
|
Hits
|
Version
|
| 'Down Air Final Hit'
|
1
|
0.9.4
|
| Start Up
|
Active
|
End Lag
|
Total
|
Land lag
|
Whiff Lag
|
Frame Adv
|
iFrames
|
Grants Spark
|
| 7
|
2
|
10
|
33
|
7
|
8
|
-6/-11
|
-
|
Yes
|
| Damage
|
Angle
|
Knockback
|
Knockback Growth
|
Shield Stun
|
Hitlag
|
Paralyzer
|
Chargeable
|
| 4
|
55
|
55
|
0.5
|
1
|
6/6
|
-
|
Yes
|
|
|
|
Toggle Hitboxes Toggle Hitboxes
|
Down Air Galu 5A. 5A.
|
| Type
|
Hits
|
Version
|
| 'Down Air Sweet Spot'
|
1
|
0.9.4
|
| Start Up
|
Active
|
End Lag
|
Total
|
Land lag
|
Whiff Lag
|
Frame Adv
|
iFrames
|
Grants Spark
|
| 7
|
3
|
19
|
41
|
7
|
8
|
6/-18
|
-
|
Yes
|
| Damage
|
Angle
|
Knockback
|
Knockback Growth
|
Shield Stun
|
Hitlag
|
Paralyzer
|
Chargeable
|
| 9
|
280
|
60
|
0.41
|
13
|
17/17
|
-
|
Yes
|
|
|
| Type
|
Hits
|
Version
|
| 'Down Air Sour Spot'
|
1
|
0.9.4
|
| Start Up
|
Active
|
End Lag
|
Total
|
Land lag
|
Whiff Lag
|
Frame Adv
|
iFrames
|
Grants Spark
|
| 7
|
13
|
19
|
41
|
7
|
8
|
-1/-12
|
-
|
Yes
|
| Damage
|
Angle
|
Knockback
|
Knockback Growth
|
Shield Stun
|
Hitlag
|
Paralyzer
|
Chargeable
|
| 5
|
40
|
35
|
0.40
|
6
|
7/7
|
-
|
Yes
|
|
|
|
Toggle Hitboxes Toggle Hitboxes
|
|
Specials
|
|
Neutral Special Afi 5A. 5A.
|
| Type
|
Hits
|
Version
|
| 'Neutral Special Roll'
|
1
|
0.9.4
|
| Start Up
|
Active
|
End Lag
|
Total
|
Land lag
|
Whiff Lag
|
Frame Adv
|
iFrames
|
Grants Spark
|
| 9
|
-
|
41
|
53
|
-
|
-
|
-
|
-
|
Yes
|
| Damage
|
Angle
|
Knockback
|
Knockback Growth
|
Shield Stun
|
Hitlag
|
Paralyzer
|
Chargeable
|
| 7
|
45
|
82
|
0.2
|
11
|
8/8
|
-
|
Yes
|
|
|
| Type
|
Hits
|
Version
|
| 'Neutral Special Flame Explosion'
|
1
|
0.9.4
|
| Start Up
|
Active
|
End Lag
|
Total
|
Land lag
|
Whiff Lag
|
Frame Adv
|
iFrames
|
Grants Spark
|
| 9
|
3
|
50
|
62
|
-
|
-
|
-
|
-
|
Yes
|
| Damage
|
Angle
|
Knockback
|
Knockback Growth
|
Shield Stun
|
Hitlag
|
Paralyzer
|
Chargeable
|
| 10
|
45
|
70
|
0.55
|
11
|
16/0
|
-
|
Yes
|
Neutral Special Flame Explosion
|
|
Toggle Hitboxes Toggle Hitboxes
|
Down Special Galu 5A. 5A.
|
| Type
|
Hits
|
Version
|
| 'Neutral Special Roll'
|
1
|
0.9.4
|
| Start Up
|
Active
|
End Lag
|
Total
|
Land lag
|
Whiff Lag
|
Frame Adv
|
iFrames
|
Grants Spark
|
| 9
|
-
|
41
|
53
|
-
|
-
|
-
|
-
|
Yes
|
| Damage
|
Angle
|
Knockback
|
Knockback Growth
|
Shield Stun
|
Hitlag
|
Paralyzer
|
Chargeable
|
| 7
|
45
|
82
|
0.2
|
11
|
8/8
|
-
|
Yes
|
|
|
| Type
|
Hits
|
Version
|
| 'Neutral Special Water Explosion'
|
1
|
0.9.4
|
| Start Up
|
Active
|
End Lag
|
Total
|
Land lag
|
Whiff Lag
|
Frame Adv
|
iFrames
|
Grants Spark
|
| 9
|
3
|
50
|
62
|
-
|
-
|
-
|
-
|
Yes
|
| Damage
|
Angle
|
Knockback
|
Knockback Growth
|
Shield Stun
|
Hitlag
|
Paralyzer
|
Chargeable
|
| 10
|
45
|
70
|
0.55
|
11
|
16/0
|
-
|
Yes
|
Neutral Special Water Explosion
|
|
Toggle Hitboxes Toggle Hitboxes
|
Side Special Afi 5A. 5A.
|
| Type
|
Hits
|
Version
|
| 'Side Special'
|
1
|
0.9.4
|
| Start Up
|
Active
|
End Lag
|
Total
|
Land lag
|
Whiff Lag
|
Frame Adv
|
iFrames
|
Grants Spark
|
| 10
|
32
|
5
|
47
|
4
|
4
|
9/-23
|
-
|
Yes
|
| Damage
|
Angle
|
Knockback
|
Knockback Growth
|
Shield Stun
|
Hitlag
|
Paralyzer
|
Chargeable
|
| 8
|
70
|
60
|
0.5
|
13
|
12/12
|
-
|
Yes
|
|
|
|
Toggle Hitboxes Toggle Hitboxes
|
Down Special Galu 5A. 5A.
|
| Type
|
Hits
|
Version
|
| 'Single Hit'
|
1
|
0.9.4
|
| Start Up
|
Active
|
End Lag
|
Total
|
Land lag
|
Whiff Lag
|
Frame Adv
|
iFrames
|
Grants Spark
|
| 3
|
32
|
5
|
47
|
4
|
4
|
9/-23
|
-
|
Yes
|
| Damage
|
Angle
|
Knockback
|
Knockback Growth
|
Shield Stun
|
Hitlag
|
Paralyzer
|
Chargeable
|
| 8
|
65
|
80
|
0.3
|
13
|
9/9
|
-
|
Yes
|
|
|
|
Toggle Hitboxes Toggle Hitboxes
|
Up Special Afi 5A. 5A.
|
| Type
|
Hits
|
Version
|
| 'Up Special 1'
|
1
|
0.9.4
|
| Start Up
|
Active
|
End Lag
|
Total
|
Land lag
|
Whiff Lag
|
Frame Adv
|
iFrames
|
Grants Spark
|
| 12
|
3
|
20
|
64
|
-
|
-
|
-12/-41
|
-
|
Yes
|
| Damage
|
Angle
|
Knockback
|
Knockback Growth
|
Shield Stun
|
Hitlag
|
Paralyzer
|
Chargeable
|
| 8
|
90
|
70
|
0.3
|
10
|
9/9
|
-
|
Yes
|
|
|
| Type
|
Hits
|
Version
|
| 'Up Special 2'
|
1
|
0.9.4
|
| Start Up
|
Active
|
End Lag
|
Total
|
Land lag
|
Whiff Lag
|
Frame Adv
|
iFrames
|
Grants Spark
|
| 12
|
3
|
20
|
64
|
-
|
-
|
6/-41
|
-
|
Yes
|
| Damage
|
Angle
|
Knockback
|
Knockback Growth
|
Shield Stun
|
Hitlag
|
Paralyzer
|
Chargeable
|
| 15
|
15
|
40
|
0.4
|
4
|
14/14
|
-
|
Yes
|
|
|
|
Toggle Hitboxes Toggle Hitboxes
|
Up Special Galu 5A. 5A.
|
| Type
|
Hits
|
Version
|
| 'Up Special 1'
|
1
|
0.9.4
|
| Start Up
|
Active
|
End Lag
|
Total
|
Land lag
|
Whiff Lag
|
Frame Adv
|
iFrames
|
Grants Spark
|
| 12
|
3
|
20
|
64
|
-
|
-
|
-12/-41
|
-
|
Yes
|
| Damage
|
Angle
|
Knockback
|
Knockback Growth
|
Shield Stun
|
Hitlag
|
Paralyzer
|
Chargeable
|
| 10
|
90
|
75
|
0.25
|
10
|
9/9
|
-
|
Yes
|
|
|
| Type
|
Hits
|
Version
|
| 'Up Special 2'
|
1
|
0.9.4
|
| Start Up
|
Active
|
End Lag
|
Total
|
Land lag
|
Whiff Lag
|
Frame Adv
|
iFrames
|
Grants Spark
|
| 12
|
3
|
20
|
64
|
-
|
-
|
18/-41
|
-
|
Yes
|
| Damage
|
Angle
|
Knockback
|
Knockback Growth
|
Shield Stun
|
Hitlag
|
Paralyzer
|
Chargeable
|
| 15
|
130
|
70
|
0.35
|
4
|
10/10
|
-
|
Yes
|
|
|
|
Toggle Hitboxes Toggle Hitboxes
|
Down Special Afi 5A. 5A.
|
| Type
|
Hits
|
Version
|
| 'Down Special'
|
0
|
0.9.4
|
| Start Up
|
Active
|
End Lag
|
Total
|
Land lag
|
Whiff Lag
|
Frame Adv
|
iFrames
|
Grants Spark
|
| -
|
-
|
12
|
12
|
-
|
-
|
-
|
-
|
-
|
| Damage
|
Angle
|
Knockback
|
Knockback Growth
|
Shield Stun
|
Hitlag
|
Paralyzer
|
Chargeable
|
| -
|
-
|
-
|
-
|
-
|
-
|
-
|
-
|
|
|
|
Toggle Hitboxes Toggle Hitboxes
|
Down Special Galu 5A. 5A.
|
| Type
|
Hits
|
Version
|
| 'Down Special'
|
0
|
0.9.4
|
| Start Up
|
Active
|
End Lag
|
Total
|
Land lag
|
Whiff Lag
|
Frame Adv
|
iFrames
|
Grants Spark
|
| -
|
-
|
12
|
12
|
-
|
-
|
-
|
-
|
-
|
| Damage
|
Angle
|
Knockback
|
Knockback Growth
|
Shield Stun
|
Hitlag
|
Paralyzer
|
Chargeable
|
| -
|
-
|
-
|
-
|
-
|
-
|
-
|
-
|
|
|
|
Toggle Hitboxes Toggle Hitboxes
|
|
Throws/Misc
|
|
Forward Throw Afi 5A. 5A.
|
| Type
|
Hits
|
Version
|
| 'Forward Throw'
|
1
|
0.9.4
|
| Start Up
|
Active
|
End Lag
|
Total
|
Land lag
|
Whiff Lag
|
Frame Adv
|
iFrames
|
Grants Spark
|
| 15
|
9
|
22
|
46
|
-
|
-
|
-
|
9
|
Yes
|
| Damage
|
Angle
|
Knockback
|
Knockback Growth
|
Shield Stun
|
Hitlag
|
Paralyzer
|
Chargeable
|
| 8
|
45
|
65
|
0.55
|
-
|
8/9
|
-
|
No
|
|
|
|
Toggle Hitboxes Toggle Hitboxes
|
Forward Throw Galu 5A. 5A.
|
| Type
|
Hits
|
Version
|
| 'Forward Throw'
|
1
|
0.9.4
|
| Start Up
|
Active
|
End Lag
|
Total
|
Land lag
|
Whiff Lag
|
Frame Adv
|
iFrames
|
Grants Spark
|
| 15
|
9
|
22
|
46
|
-
|
-
|
-
|
9
|
Yes
|
| Damage
|
Angle
|
Knockback
|
Knockback Growth
|
Shield Stun
|
Hitlag
|
Paralyzer
|
Chargeable
|
| 8
|
60
|
65
|
0.65
|
-
|
9/9
|
-
|
No
|
|
|
|
Toggle Hitboxes Toggle Hitboxes
|
Back Throw Afi 5A. 5A.
|
| Type
|
Hits
|
Version
|
| 'Back Throw'
|
1
|
-
|
| Start Up
|
Active
|
End Lag
|
Total
|
Land lag
|
Whiff Lag
|
Frame Adv
|
iFrames
|
Grants Spark
|
| 19
|
9
|
22
|
50
|
-
|
-
|
-
|
9
|
Yes
|
| Damage
|
Angle
|
Knockback
|
Knockback Growth
|
Shield Stun
|
Hitlag
|
Paralyzer
|
Chargeable
|
| 8
|
135
|
65
|
0.50
|
-
|
8/9
|
-
|
No
|
|
|
|
Toggle Hitboxes Toggle Hitboxes
|
Back Throw Galu 5A. 5A.
|
| Type
|
Hits
|
Version
|
| 'Back Throw'
|
1
|
0.9.4
|
| Start Up
|
Active
|
End Lag
|
Total
|
Land lag
|
Whiff Lag
|
Frame Adv
|
iFrames
|
Grants Spark
|
| 19
|
13
|
22
|
554
|
-
|
-
|
-
|
9
|
Yes
|
| Damage
|
Angle
|
Knockback
|
Knockback Growth
|
Shield Stun
|
Hitlag
|
Paralyzer
|
Chargeable
|
| 8
|
120
|
65
|
0.40
|
-
|
13/13
|
-
|
No
|
|
|
|
Toggle Hitboxes Toggle Hitboxes
|
Up Throw Afi 5A. 5A.
|
| Type
|
Hits
|
Version
|
| 'Up Throw'
|
1
|
0.9.4
|
| Start Up
|
Active
|
End Lag
|
Total
|
Land lag
|
Whiff Lag
|
Frame Adv
|
iFrames
|
Grants Spark
|
| 18
|
9
|
22
|
51
|
-
|
-
|
-
|
9
|
Yes
|
| Damage
|
Angle
|
Knockback
|
Knockback Growth
|
Shield Stun
|
Hitlag
|
Paralyzer
|
Chargeable
|
| 8
|
90
|
65
|
0.70
|
-
|
8/9
|
-
|
No
|
|
|
|
Toggle Hitboxes Toggle Hitboxes
|
Up Throw Galu 5A. 5A.
|
| Type
|
Hits
|
Version
|
| 'Up Throw'
|
1
|
0.9.4
|
| Start Up
|
Active
|
End Lag
|
Total
|
Land lag
|
Whiff Lag
|
Frame Adv
|
iFrames
|
Grants Spark
|
| 18
|
9
|
22
|
51
|
-
|
-
|
-
|
9
|
Yes
|
| Damage
|
Angle
|
Knockback
|
Knockback Growth
|
Shield Stun
|
Hitlag
|
Paralyzer
|
Chargeable
|
| 8
|
90
|
65
|
0.70
|
-
|
9/9
|
-
|
No
|
|
|
|
Toggle Hitboxes Toggle Hitboxes
|
Down Throw Afi 5A. 5A.
|
| Type
|
Hits
|
Version
|
| 'Down Throw'
|
1
|
0.9.4
|
| Start Up
|
Active
|
End Lag
|
Total
|
Land lag
|
Whiff Lag
|
Frame Adv
|
iFrames
|
Grants Spark
|
| 30
|
8
|
26
|
64
|
-
|
-
|
-
|
9
|
Yes
|
| Damage
|
Angle
|
Knockback
|
Knockback Growth
|
Shield Stun
|
Hitlag
|
Paralyzer
|
Chargeable
|
| 6
|
65
|
75
|
0.50
|
-
|
7/8
|
-
|
No
|
|
|
|
Toggle Hitboxes Toggle Hitboxes
|
Down Throw Galu 5A. 5A.
|
| Type
|
Hits
|
Version
|
| 'Down Throw'
|
1
|
0.9.4
|
| Start Up
|
Active
|
End Lag
|
Total
|
Land lag
|
Whiff Lag
|
Frame Adv
|
iFrames
|
Grants Spark
|
| 30
|
8
|
26
|
64
|
-
|
-
|
-
|
9
|
Yes
|
| Damage
|
Angle
|
Knockback
|
Knockback Growth
|
Shield Stun
|
Hitlag
|
Paralyzer
|
Chargeable
|
| 6
|
20
|
70
|
0.30
|
-
|
8/8
|
-
|
No
|
|
|
|
Toggle Hitboxes Toggle Hitboxes
|
Get Up Attack Afi 5A. 5A.
|
| Type
|
Hits
|
Version
|
| 'Get Up Attack'
|
1
|
0.9.4
|
| Start Up
|
Active
|
End Lag
|
Total
|
Land lag
|
Whiff Lag
|
Frame Adv
|
iFrames
|
Grants Spark
|
| 15
|
11
|
26
|
52
|
-
|
-
|
0/-16
|
33
|
Yes
|
| Damage
|
Angle
|
Knockback
|
Knockback Growth
|
Shield Stun
|
Hitlag
|
Paralyzer
|
Chargeable
|
| 6
|
45
|
80
|
0.45
|
10
|
15/15
|
-
|
No
|
|
|
|
Toggle Hitboxes Toggle Hitboxes
|
Get Up Attack Galu 5A. 5A.
|
| Type
|
Hits
|
Version
|
| 'Get Up Attack'
|
1
|
0.9.4
|
| Start Up
|
Active
|
End Lag
|
Total
|
Land lag
|
Whiff Lag
|
Frame Adv
|
iFrames
|
Grants Spark
|
| 15
|
11
|
26
|
52
|
-
|
-
|
0/-16
|
33
|
Yes
|
| Damage
|
Angle
|
Knockback
|
Knockback Growth
|
Shield Stun
|
Hitlag
|
Paralyzer
|
Chargeable
|
| 6
|
45
|
80
|
0.45
|
10
|
15/15
|
-
|
No
|
|
|
|
Toggle Hitboxes Toggle Hitboxes
|
Ledge Attack Afi 5A. 5A.
|
| Type
|
Hits
|
Version
|
| 'Ledge Attack'
|
1
|
0.9.4
|
| Start Up
|
Active
|
End Lag
|
Total
|
Land lag
|
Whiff Lag
|
Frame Adv
|
iFrames
|
Grants Spark
|
| 15
|
7
|
23
|
45
|
-
|
-
|
-13
|
17
|
Yes
|
| Damage
|
Angle
|
Knockback
|
Knockback Growth
|
Shield Stun
|
Hitlag
|
Paralyzer
|
Chargeable
|
| 6
|
15
|
90
|
0.1
|
10
|
8/8
|
-
|
No
|
|
|
|
Toggle Hitboxes Toggle Hitboxes
|
Ledge Attack Galu 5A. 5A.
|
| Type
|
Hits
|
Version
|
| 'Ledge Attack'
|
1
|
0.9.4
|
| Start Up
|
Active
|
End Lag
|
Total
|
Land lag
|
Whiff Lag
|
Frame Adv
|
iFrames
|
Grants Spark
|
| 15
|
7
|
23
|
45
|
-
|
-
|
-13
|
17
|
Yes
|
| Damage
|
Angle
|
Knockback
|
Knockback Growth
|
Shield Stun
|
Hitlag
|
Paralyzer
|
Chargeable
|
| 6
|
15
|
90
|
0.1
|
10
|
8/8
|
-
|
No
|
|
|
|
Toggle Hitboxes Toggle Hitboxes
|
|
Alternate Costumes
Gallery
Trivia
- funny fact about character
