Unpacking the game
Download the UNIST Unpacker, and place it inside the steamapps\common\UNDER NIGHT In-Birth Exe Late[st]\d folder. Then, press CTRL+A to select all the files within the d folder and unselect unistunpacker.exe Now with all the files selected, you can drag them Click and Hold LMB onto unistunpacker.exe. Once you've done that, a command prompt will open and the unpacker will unpack all the game files in UNICLR. This may take some time, so leave the command prompt in the background. Once it's finished the command prompt will close on it's own, and a new folder output will appear containing all the unpacked files.
Setting up a Language Folder

|
What's a Language Folder For?
Each in-game language loads it's own set of files from it's own folder, including non-localization files.
By using this property, we can have multiple mods on and change between them using the in-game language option.
|
First, go into the output folder and pick one of the languages. Copy that language folder into the game's root folder, which is where UNIst.exe is. This will be the basis for your mods. Once copied, go back into the output folder and select all NON-Language folders using SHIFT+LMB, and with the root folder in a seperate window, drag all the folders to the new language folder you've made. Alternatively you can also press CTRL+C to copy, then CTRL+V inside the new language folder. If you want to keep the localization files intact, when prompted DO NOT replace files, or re-copy the language files once more.
Changing or Disabling Mods
Once you've copied the game files over, you've successfully setup a language folder! This will be used as your modding environment. If you want to load in a different set of mods, or disable mods, you can do any of the following:
- Move the specific language folder out of the game root folder, such as into a separate "mod backup" folder.
- Rename the language folder so that the game doesn't recognize a language name. You can rename it back to restore the mods.
- Change the language using the in-game options menu. Depending on the mod, this may require a restart of the game for changes to fully take effect.
All of these actions make the game load in different mod files, or fallback files (which is just normal UNICLR). This is important if you want to continue playing netplay with those that do not have mods, for example.
How do I know that this is working?
We can setup a simple check mod to verify that we've setup everything correctly. Enter your language folder and navigate to System\str_jp\DLC.csv. Opening this file with Notepad or any other text editor should show the text Checking downloadable contents...,, which is the first text that appears when booting up the game. Simply replace this text with anything you want, making sure to keep the comma at the end. Once you've done that, simply open the game to check whether the text updated.
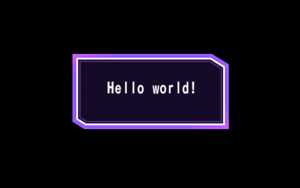
Hello world! We've made our first UNICLR mod!
Unpacking the game
Compile the UNIB Data Tool to use as an unpacker, and run the .exe using a command shell, providing both an input folder and output folder.
Alternatively you can download this compiled version, and extract both the .exe and the .bat files inside the steamapps\common\UNDER NIGHT IN-BIRTH II Sys Celes folder. Open up the batch file with a text editor like Notepad RMB > Edit, and you should see something like this.
@echo off
color a
uni2datatool "C:\SteamLibrary\steamapps\common\UNDER NIGHT IN-BIRTH II Sys Celes\d" "C:\SteamLibrary\steamapps\common\UNDER NIGHT IN-BIRTH II Sys Celes\d\Unpacked"
pause
Notice the two filepaths - the first one tells the unpacker where the d folder is, and the second tells the unpacker where to extract all the files. Simply update those addresses to match your game's and save. Then run the .bat file and wait for it to finish unpacking, which is when it waits for a key input. After, you'll see all the game files inside your output folder. The unpacking process may take a significant amount of time depending on the speed of your hard drive or SSD, so make sure to be patient otherwise you'll be missing many files.
Setting up a Modding Environment

|
Wait... Things are different!? This is hurting my brain...
Unlike in UNICLR, this game only loads files that are listed in internal directories. Read more to find out how modding works for this game!
|
First, go into the output folder and select all non-language folders. Then, press CTRL+C to copy and head back to the game root folder (where the UNI2.exe is), and CTRL+P to paste. What this does is match the unpacked files to the game's internal directory, allowing you to overwrite existing assets with your files, or add new ones. Once you're done, you can go into the output folder and select a language. Copy the contents of that language folder and paste them in the game root folder as well. When prompted, replace files. What this does is add back localization files, allowing you to keep, for example, English text.
How do I know that this is working?
We can setup a simple check mod to verify that we've setup everything correctly. Enter your language folder and navigate to System\str_jp\DLC.csv. Opening this file with Notepad or any other text editor should show the first line of text <GR_MS_CheckingForDLC>,, which calls the "Checking for add-on." text that appears when booting up the game. Simply replace this text (including the brackets) with a string, making sure to keep the comma at the end, example "Hello World, UNI2!",. Now that the mod has been made, next is actually making the game read the mod.
De-indexing D Files
If you haven't got it, download HxD. Open up file d/rcwWiiqjmxpmojs (and make sure to keep a backup somewhere safe), which corresponds to the System directory. What this (and a few other small files) contains is a file index which the game reads from. By changing the text of these filepaths, it's possible to de-index these files and force the game to search the directory for backup assets - the mods. Now simply search using CTRL+F for the file that we just changed, DLC.csv. Then change the name of the file, for example to DLC.csa. Now the d file is de-indexed and booting up the game should show our modified text.
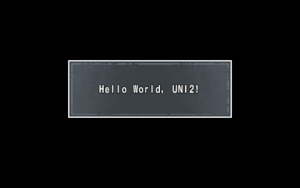
Hello world! We've made our first UNI2 mod!

|
This process has to be done for all modded files, but...
If you have the full game dump, you can instead de-index the entire folder of a d file by changing the filepath or folder name at the top.
|
Changing or Removing Mods
Unlike UNICLR, there are less ways to change or remove mods. The only viable method is to do the following:
- Keep a backup of the "vanilla" d folder, or go into Steam and verify files to remove mods
- Remove all modded files from the game and replace them with new mods to change them.
Unpacking the game
First, download the MBTL BIN Tool. Extract the zip and locate to the folder that contains MBTL.Unpacker.bat, MBTL.Unpacker.exe and the 0.10.2.0 folder. Copy and paste these items into the MBTL directory, which will be this in most cases C:\Program Files (x86)\Steam\steamapps\common\MELTY BLOOD TYPE LUMINA. Once you have done that, download the updated Cache files needed, and replace the ones that you placed in the MBTL directory earlier. Now, in order to unpack the game, right-click on MBTL.Unpacker.bat, Right Click -> Edit. Add the folder path of the MBTL Directory and the folder path of the unpacked files separated with "" respectively. (Example shown below)
Example → MBTL.Unpacker "C:\Program Files (x86)\Steam\steamapps\common\MELTY BLOOD TYPE LUMINA" "C:\Program Files (x86)\Steam\steamapps\common\MELTY BLOOD TYPE LUMINA\Unpacked_new"
If everything is done correctly up to this point, double click on the MBTL.Unpacker.bat file and watch your game start unpacking (This will take a few minutes to complete)

|
If you check files in Notepad and it comes up with random Chinese characters...
It means the cache is outdated. The current cache works for Update 1.45.
|
Making your first mod
Now it is time to get the DLL files needed in order for mods to load, as well as some extra files needed for Palette Color modding if needed. First, download FateUpdate.exe (courtesy of the MBTL Palette Gallery Discord server) and place this anywhere. Run the .EXE and a prompt should show asking where you want to extract the files. Use the tab to navigate to your MBTL directory mentioned above and click Extract.
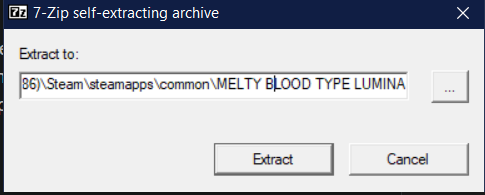
This is what the prompt should look like. Click the "..." button to select a directory.
To check if this worked successfully, we can make a test mod which changes the Singleplayer description at the bottom of the Main Menu. First, create a folder named str_jp in MBTL Directory → System. Then, get this file from your directory of Unpacked Files → ___English\System\str_jp\MainMenuCSText, and check that opening the file is in English characters. Copy and paste it in that new folder created earlier, then Right Click → Edit on the file. Change the text listed in "" to anything you want. After that save the file and run the game. Hover over to the Singleplayer section and check if the text is changed.

We've made our first MBTL mod!
Removing or Changing Mods
placeholder


