Alice Gear Aegis CS/Mechanics
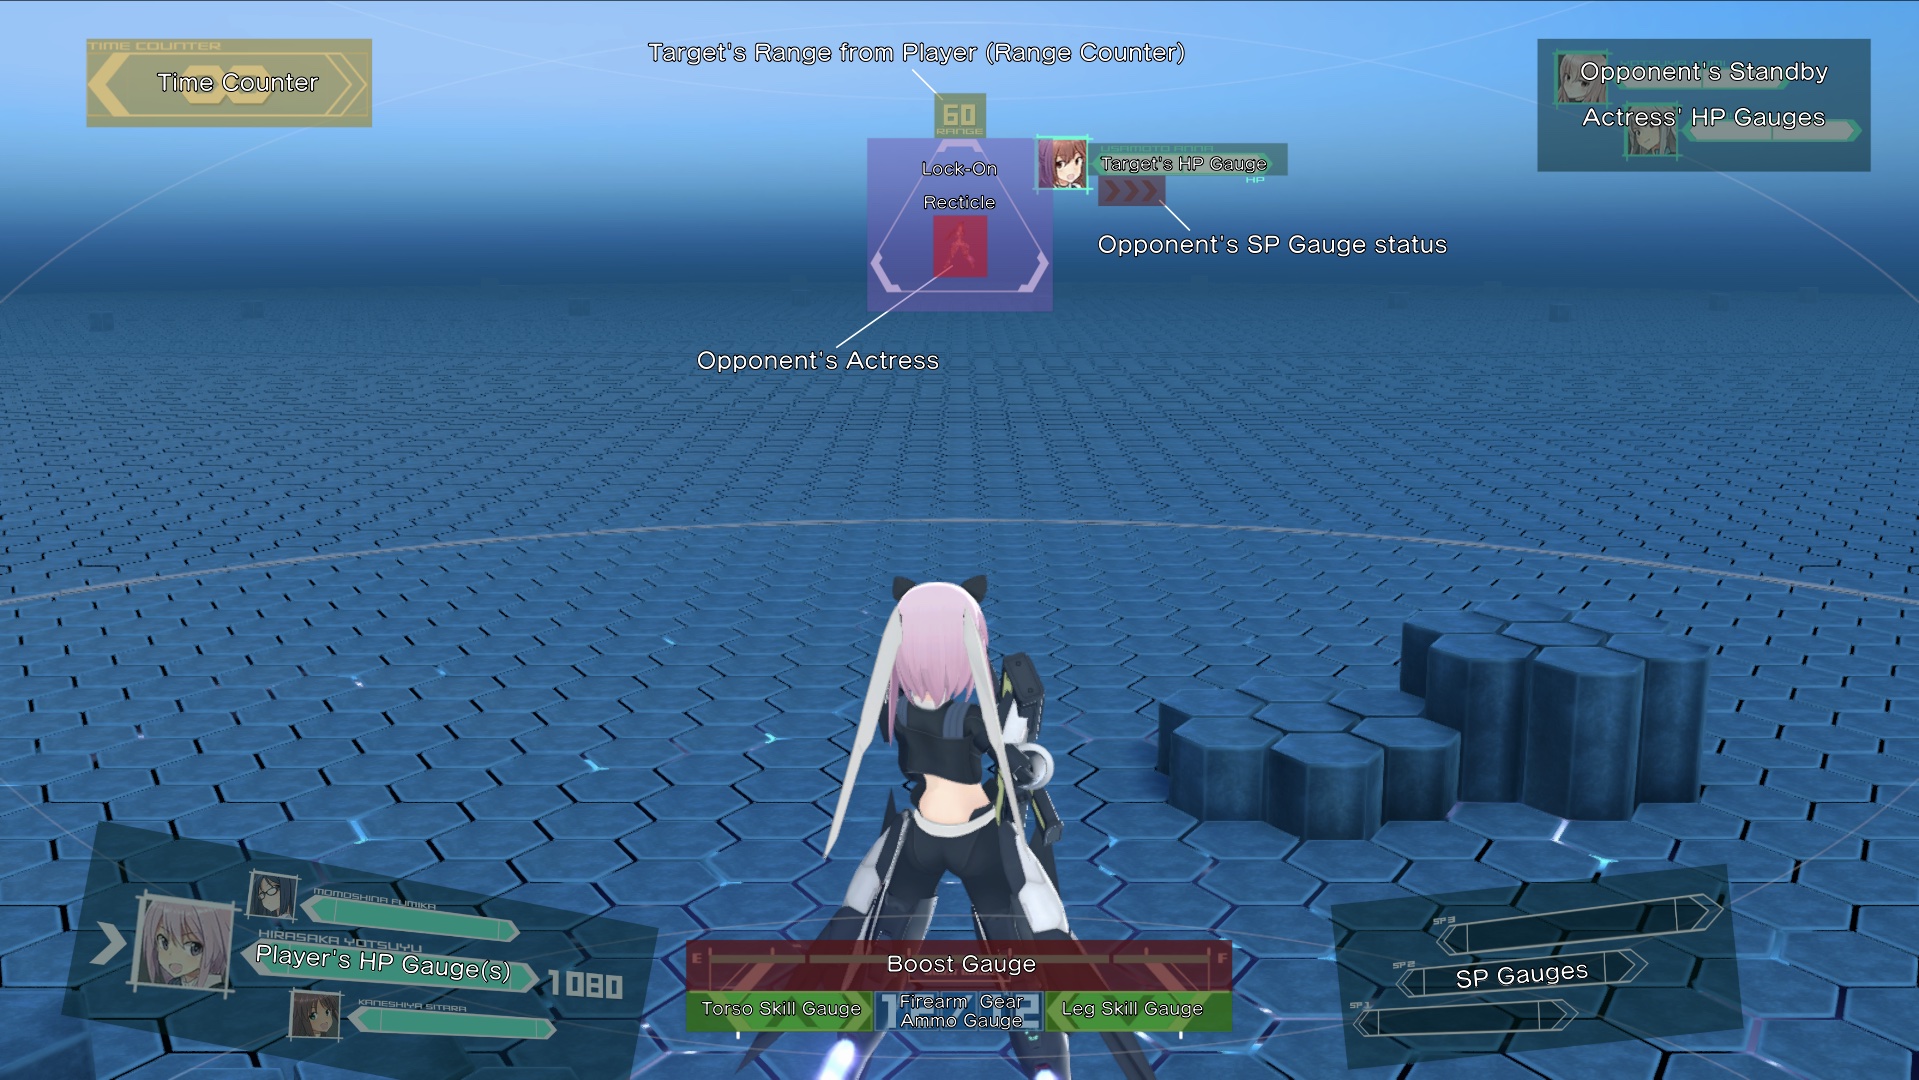
This page goes over the stuff that appears on the game's HUD and some basic information on what the HUD's resources do. This is a screenshot taken from a Team Match, but the other game modes don't look that much different from each other:
There's also videos in this page. If you can't watch them, try viewing this webpage in chrome the Brave web browsers.
The Lock-On Recticle
The Lock-On Recticle organizes all of the important information you need to know about your target:
- The target's distance from your Actress
- The HP status of your target
- How many SP Gauges your opponent has access to
The game's camera will always focus on the location of the Lock-On Recticle. If the target somehow manages to move outside of your viewing range, the camera will automatically try and reorient itself to the the Lock-On Recticle's current location, which can be disorienting when both you and your opponent are trying to slash and stab each other with melee weapons.
The Lock-On Recticle cannot be manipulated unless you're playing a Battle Royale match, as that's the only time you have to have to deal with more than one target in the arena.
Range Counter
Shows you how far your Actress is from your target, making it a useful tool to figure out how far your Actress' attacks can reach. The Range Counter also takes into account vertical height as well.
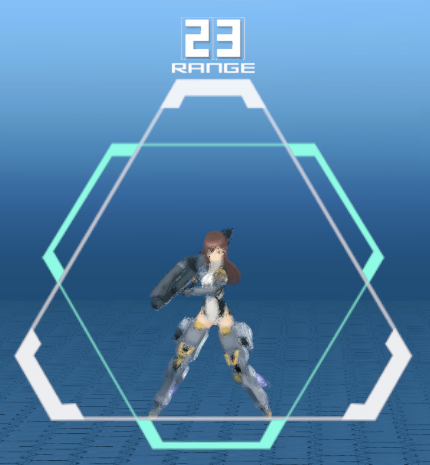
Teal Lock-On
Other terms : Double Lock
If you see a teal recticle overlap with the Lock-On Recticle, your target is within auto Boost range of your Actress' Normal Clash Attack:
Howver, this recticle does not guarantee that your Actress' other Clash Attack options will connect at this distance.
Hit and Damage Counters
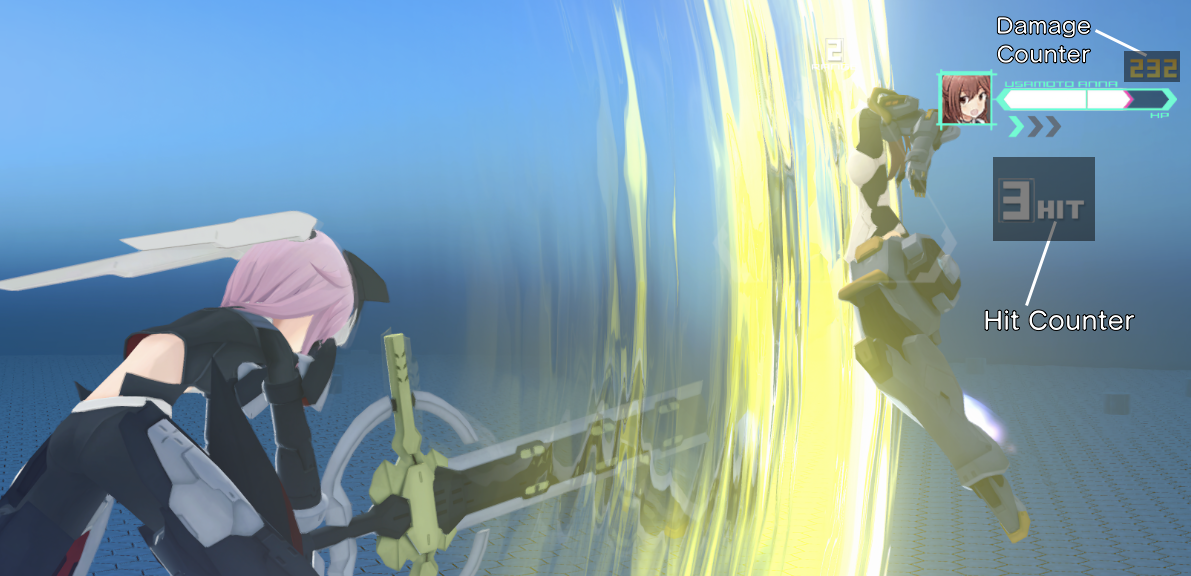
When your Actress lands successful blows on your opponent, these status indicators will appear temporarily near the Lock-On Recticle:
- The Damage Counter appears right above the Target's HP Gauge. The number is colored based on what element was used to inflict the damage, but this is purely cosmetic.
- The Hit Counter appears at the bottom right of the Target's SP Gauge Status only if 2 or more hits are part of a combo.
Both status indicators will stop count and either reset or disappear if the game detects a gap between hits.
At higher levels of play, you'll be keeping an eye on these status indicators primarily to determine how to maximize the amount of damage you can deal to your opponent before they're forced into a knockdown state.
Also keep in mind that the attacker is the only one privy to this information. If your Actress is on the receiving end of this assault, you have no idea how much damage she's taking and whether or not these attacks are escapable.
Dim Lock-On Recticle
Other terms : Knockdown
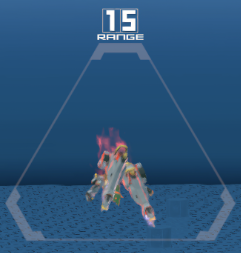
If the Lock-On Recticle is slightly dimmed out, that means your target has taken enough hits to be put into a knockdown state. This is a really important visual cue because sometimes it's hard to tell if a successful hit only blew back your target and can be followed up with other attacks or if they were knocked down from it, and you just wasted precious resources trying to hit them while they're invulnerable.
HP
Both you and your opponent have Hit Points (HP) determined by a numerical value. You will only get a visual estimate of your opponent's HP status. On your side, the situation's only slightly better; the game will only reveal the numerical HP value of the Actress you're currently in control of.
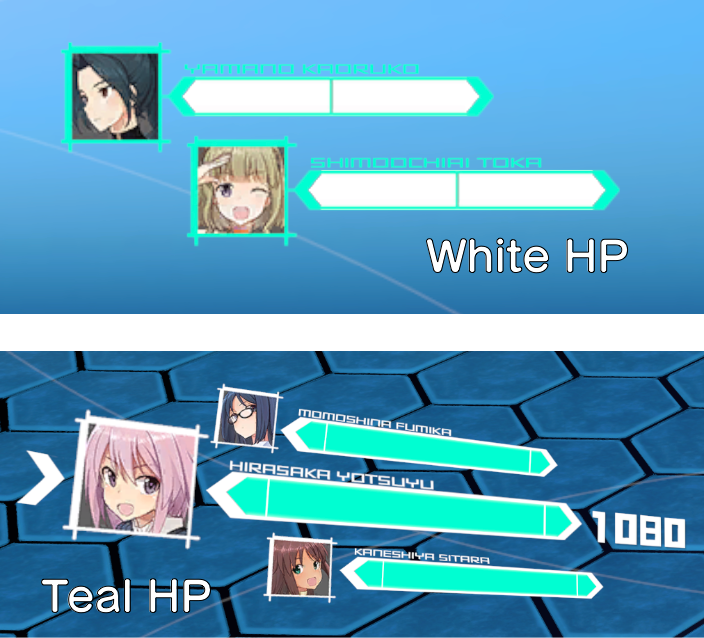
There's two types of HP: Teal/White and Red.
Teal/White HP
Teal (your HP) or white (your opponent's HP) is what is what this number on your point Actress' HP Gauge represents. If they take a damage amount higher than this value, they're eliminated from the match (temporarily in Battle Royale). If the damage received is lower than your Actress' current HP value, the HP Gauge drops by the damage amount instead.
Red HP
Red HP appears only after an Actress takes a certain amount of damage. It performs two roles:
- It represents how much HP your Actress can recover when they tag out in a Team Match or when they use certain abilities designed to replenish only Red HP.
- Your Actress' Shield will use it as a "2nd HP Gauge" once it depletes all of her Teal HP:
If your Actress has no more Red HP left for the Shield to use, she'll be eliminated from the match (temporarily in Battle Royale) on the following hit.
Red HP is hard to gain and easy to lose
Your Actress' currently stored Red HP disappears instantaneously under the following conditions:
- Your Actress tags back in a Team Match:
Your opponent can force this to happen by eliminating your point Actress.
- Your Actress' Shield breaks from taking too many hits. Your Actress will also be eliminated from the match (temporarily in Battle Royale) if the Shield was already using her Red HP as a last resort:
Boost Gauge
The Boost Gauge determines whether or not your Actress can perform Boost movement or Dodge Steps. It consists of five bars (frames).
- Boost movement will gradually deplete the Gauge
- Dodging will deplete one bar from the Gauge
- Rolling during a Dodge depletes about 80% of one bar from the Gauge
- Performing Neutral and Left or Right Cross Gear attacks will drain various amounts of a single bar from the Gauge
Refilling the Boost Gauge
To completely refill the Boost Gauge, do not perform any of the above actions for about one second (this is actually longer than you think). If you do, it resets the timer.
However, this countdown timer pauses:
- During the startup flash of a Torso or Leg Skill and ends about a split second after the animation for the skill finishes
- When an Up or Down Clash Gear attack is used and ends around a split second after the animation is finished
- When the Shield is activated and ends around a split second after the Shield is turned off
The only offensive move your Actress can do without affecting the Boost Gauge’s recharge timer is using her Firearm Gear. That, and getting hit by your opponent.
If you're still having trouble getting the timing down for this, a good visual reference is to observe your Actress' unique animation where she engages the brakes on her boosters when you suddenly let go of the left analog stick during Boost movement (before you attempt to start this whole sequence, make sure you first see your Actress standing down their firearm). The Boost Gauge is timed to refill the moment her braking animation is complete.
Overheat Warning
If the last bar on the Boost Gauge glows pink, that's a warning sign indicating your Actress is close to overheating their Boost system, and performing a Dodge will send it over the edge.
Your Actress can still Boost move safely in this state as she'll automatically revert to normal movement once the Boost Gauge is completely empty. However, she can still Overheat during this critical moment if she executes a Clash Gear attack that drains the Boost Gauge once it's completely empty.
Performing an Reversal Step regardless of how full the Boost Gauge is instantly overheats it, so if you know it's impossible to avoid the next incoming attack without overheating anyway, you might as well use this ability instead of Dodging.
Boost Gauge Overheat
The moment the Boost Gauge overheats, a series of three 1-second pulsing animations around the Boost Gauge frames will play. Assuming you didn’t do anything else to pause the refill timer, this is about how long it’ll take for the Boost Gauge to refill:
However, while the refill timer is counting down:
- Boost movement and Dodge Step is disabled, making your Actress an easy target, which is usually all it takes to lose 30%+ of their HP in one Overheat cycle
- Reveral Step is also diasbled as that requires a working Boost Gauge, which creates a vicious cycle of the Shield being your only defensive option at this point but it using it pauses the refill timer
- All other actions that would pause the refill timer still pause the refill timer
- It is still possible to do Clash Gear attacks, and the ones that would’ve drained the Boost Gauge instead pause the refill timer
Firearm (Japanese: Shot) Gear Ammo Gauge
Your Actress' Firearm Gear ammo status are those two sets of white numbers right below the Boost Gauge. The left number indicates the current ammunition left in the weapon while the right number is the maximum it can store.
If the numbers are outlined in pink, that means there's not enough ammo to fire a Normal Shot and you have to wait for the weapon to begin its reload cycle.
Ammo Consumption
Each weapon will deplete a specific amount of ammo per Normal or Charged Shot once the first projectile is fired. As a general rule, Charged Shots consume more ammo than Normal Shots, and the more charges stored before firing the weapon, the more ammunition will be consumed. Any unfired projectiles are still consumed if the attack animation is interrupted for any reason (ie- you Actress took a hit that caused knockback).
Reload Cycle
The Firearm Gear's Reload cycle consists of two phases and begins automatically after she fires the weapon:
- The weapon's cooldown phase. The duration of the cooldown is determined by the Shot Gear the Actress is using.
- The ammo reloading phase. Just like with the cooldown phase, the ammo reload speed depends on the weapon used.
There's a few parameters that affect the Reload Cycle:
- If your Actress fires their Shot Gear again at any point during the Reload Cycle, the whole process resets to the beginning.
- If your Actress uses any Torso or Leg Skills, it will add a few milliseconds to the cooldown timer, but it won't reset the Reload Cycle.
- If your Actress begins starts charging her Shot, the reload cycle pauses.
- If your Actress attempts to charge their weapon without meeting its minimum ammo requirements to fire it, the Reload Cycle will continue as normal despite the Firearm Gear button being held down, and pause again once it reloads enough ammo to fire a single Charged Shot.
Torso (Japanese: Tops) Skill Gauge
This gauge is less complicated to understand than any of the other gauges mentioned so far. As a general rule, the Torso Skill Gauge will behave like this:
- If the color of the gauge is teal, your Actress can activate it by pressing the assigned button.
- The Torso Skill can be charged by holding down its assigned button. Most charged Torso skills require a full Gauge to activate.
- The Gauge will always begin recharging after it's used. Recharging can pause based on certain skills used, and is on a Gear by Gear basis.
- If the color of the gauge is white, it cannot be activated. Typically this happens when there's not enough of the gauge filled up to use it. Less commonly it happens when your Actress is in the process of using it, or more rarely, situations based on a series of actions your Actress performed that the developers realized could result in shenanigans if the player was allowed to use it at that point in time.
Leg (Japanese: Bottoms) Skill Gauge
The Leg Skill Gauge is very similar to the Torso Skill Gauge, except it can't be charged; you can hold the button down if you want, but it's not going to start up a charging animation and it'll still activate if you release the button. The rules are as follows:
- If the color of the gauge is teal, you can use it.
- If it's white, you can't.
- Most of the time activating it eats most, if not all of the gauge.
What makes the Leg Gear stand out from the Torso Gear is that its ability isn't always offensive.
