Fighting Vipers 2/System
| Fighting Vipers Layman's Guide. Covers the basics. | |
|---|---|
Nutcracker Rules
Health Values
To start off, everyone has the same amount of health in the game. The default is 210 points of health for both the arcade and dreamcast versions. Max health is 360 in the arcade version. 400 max health in the dreamcast version. Lowest is 160 for both versions.
Basic Mechanics
Movement
Movement is done with the D-Pad or Control Stick:
- Press
 or
or  to move left or right. Holding back has a notably faster speed than other games. Fighting Vipers 1 included.
 - You can double tap forward (

 ) or back for a quick dash.
 - Double Tap Forward (

 ) while far from your opponent to run. You can simply hold forward to run from far away.
 - You can hold left and right while holding
 at pretty much the same speed as a normal fighting game walk.
 - You can hold down to crouch. You can hold down
 \
\  for a crawl.
 - Double tap
 or
or  while crouching for a crouch dash.
Characters can jump not too unlike older 3D fighters in the 90s, but not as floaty:
- There’s short jumps by tapping
 ,
,  (For Bahn and Sanman) and
  . They have attacks attached to them.
 - There are long jumps by holding
 ,
,  and
and  . These have the more useful attacks imo.
 - Most characters have a backflip by tapping
 . It’s invincible for 15 frames. Bahn and Sanman can’t perform them.
Some movement related techniques are tied to Walls.
- Press
 while jumping near a Wall to bounce off of it.
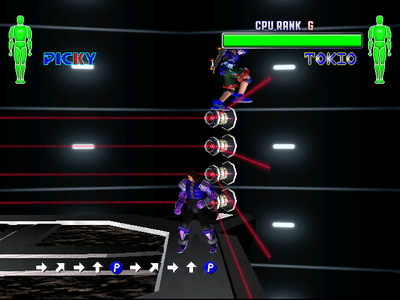
 - Wall Climbing: Jump towards a wall then press
 +
+ to climb a wall. If you fail to perform a move, you automatically jump off back in the stage. (Raxel, Jane, Honey, Emi, Picky and Mahler to perform these.)
 - Over The Wall moves have a character automatically jump on top of the nearest wall then attacks. The input is:

 +
+ +
+ :. Only Raxel, Honey, Picky and Emi can perform these.
Basic Combat
Fighting Vipers 2 has two main attack buttons and one guard button. Many moves and mechanics are tied to combined inputs:
 : Covers all punch based attacks. All basic jabs are high. Frame data varies. Notated as P.
 : Covers all kick based attacks. All basic kicks are high. They can be feinted by pressing G before making contact with the opponent. Notated as K.
 : The block button. Hold to guard up. You can guard while crouching. No chip damage is received. A strong enough attack can break it for a bit. Notated as G.
- Throw: Throwing based attacks. Performed by pressing Punch and Guard at the same time (
 +
+ ). The default throw is a wall slam (except for Jane) by pressing
  +
+ alone. Other throws have slightly more complex commands. Sanman has the most chain throws. The grab animation for most throws are 10 frames startup.
- Low Throws: Throws meant to catch opponents in crouching height. Performed by inputting


 +
+ .
.  +
+  : This combined input is relegated to stronger punch attacks, shoulder tackles, guitar swings, etc.
 +
+  : Pretty much relegated to stronger kick attacks, Roundhouse kicks, sweeps, etc.
 +
+ +
+ : Special Actions. Can be attacks, character specific movement or main mechanics.
 : Elbow. A universal mid-punch just like Virtua Fighter. Picky and Grace are exceptions since they have no move with this input.
 : Middle Kick. A universal mid-kick like in Virtua Fighter. Better to use it at a certain range.
 or
or 
 : Generic Guard & Attacks. Guards on startup. Everyone has at least one of them from these inputs.
Recovery
Fighting Vipers 2 has a few ways to recover after an opponent knocks you down/launches you in the air.
 : Press when lying on the ground. You roll backwards. Good for avoiding pursuits. Lasts for 40 frames.
 or
or  : Press when lying on the ground. You roll to the background/foreground respectively. Lasts for 60 frames.
 : Press when lying on the ground (on your back). You do a headspring on the spot. It lasts for about 50 frames. Invincible for the first 41 frames. You’ll be able to Guard after the invincibility period.
 : Press when lying on the ground. Get up faster without the headspring. 30 frames total (on your back). Invincible for the first 21 frames.
Lasts for 40 frames when lying on your stomach. Invincible for the first 31 frames. You can recover in the air
 +
+ +
+ : Simple air recovery. You can still get juggled in the air.
 +
+ +
+ : Makes your airtime last longer. Could be used to mistime opponent’s combos.
 +
+ +
+ : Makes you flip back away from your opponent. Be careful against a wall.
Armor
Everyone has armor for the start of the match. Armor can get broken from the top half to the bottom half. It stays broken for the rest of the match. While armor is broken, you deal x1.25 damage than you would gain normally. When all your armor is broken, you get some weight loss. Everyone has different armor values measured by the damage of the attack hitting the armor. *Damage values are unknown as of now.
Weight
Weight is mostly tied to armor. Some combos can be affect by weight. But there are still combos that fit all sizes. Sanman is the heaviest character and Emi is the lightest. (Weight is displayed on character bios.)
Armor Flash
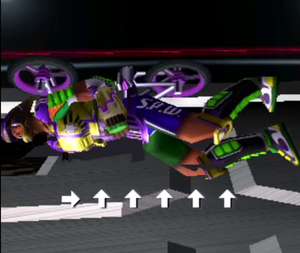
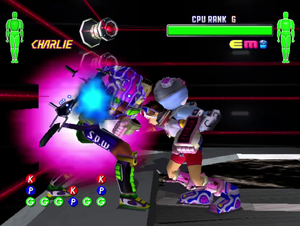
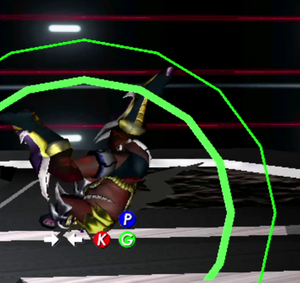
This is a technique where you break all your armor quickly. Just like normal, the armor is broken for the rest of the match. The input is ![]()
![]()
![]()
![]()
![]() +
+![]() +
+![]() .
Armor Flash can be done in the air.
.
Armor Flash can be done in the air.
It can hit your opponent for 5 points of damage.
Armor Breakers
Armor Breaker / Guard & Attack
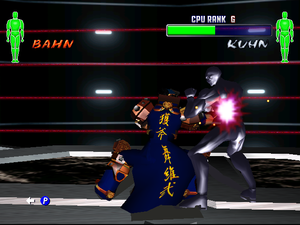
There are special heavy attacks used to break armor at its breaking point. Every character has these. When an Armor Breaker is being used, the character flickers a white light. Most of them can be blocked and even be interrupted for Counter Hit damage. Another type of Armor Breaker is the Guard & Attack (G&A). These armor breakers guard the character during its delayed startup animation. These can be blocked as well. They can also be interrupted by a move that Guard Crushes. These are indicated by extra flashes surrounding the character.
| FV2 Guide covering Core Changes and Unique Mechanics | |
|---|---|
Tech Mechanics
These new defensive mechanics come in the form of Tech Guards, Tech Counters and Tech Recovery/Rolls.
Tech Guards
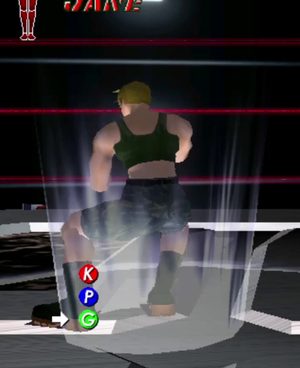
Tech Guards are functionally parries. Time it at the right time, it cancel out attacks and interrupt strings altogether. The input is ![]() +
+![]() +
+![]() : For High and Mid attacks. The startup is where Tech Guarding is considered successful. The startup window is 12 frames with armor. 7 frames without armor.
There are Low Tech guards as well for low attacks. Input is
: For High and Mid attacks. The startup is where Tech Guarding is considered successful. The startup window is 12 frames with armor. 7 frames without armor.
There are Low Tech guards as well for low attacks. Input is ![]()
![]() +
+![]() +
+![]() :. The startup window is 7 frames with and without armor.
Mistiming a tech counter equates to counter hit damage.
You cannot Tech Guard in the air.
:. The startup window is 7 frames with and without armor.
Mistiming a tech counter equates to counter hit damage.
You cannot Tech Guard in the air.
Tech Counters
After Tech Guarding, you’ll be able to counter attack immediately after to knock your opponent away or launch them. Simply press ![]() ’’’or’’’
’’’or’’’ ![]() after a successful Tech Guard. Most of the counters are Armor Breakers.
There are Low Tech Counters by pressing
after a successful Tech Guard. Most of the counters are Armor Breakers.
There are Low Tech Counters by pressing ![]()
![]() or
or ![]()
![]() .
.
Tech Step
These are side steps after a successful Tech Guard.
![]() +
+![]() +
+![]() to side step right.
to side step right. ![]()
![]() +
+![]() +
+![]() to side step left.
to side step left.
Tech Recovery
If you played 3D fighters like Tekken, Virtua Fighter, Soul Calibur, etc you’ve encountered this type of recovery. As you’re falling down from an attack, you press an input (![]() +
+![]() +
+![]() : in this case) just right before you land, you get right back up preventing further damage.
You can Tech Roll to the background/foreground by pressing
: in this case) just right before you land, you get right back up preventing further damage.
You can Tech Roll to the background/foreground by pressing ![]()
![]() +
+![]() +
+![]() /
/![]()
![]() +
+![]() +
+![]() respectively.
You can Tech Roll back by pressing
respectively.
You can Tech Roll back by pressing ![]()
![]() +
+![]() +
+![]() . Use for avoiding pursuits.
. Use for avoiding pursuits.
Throw Escapes
The method for teching throws is a bit unique. If both characters input the same throw input (player 2 inputs flipped) as one is about to grab another, a sort of struggle between both characters is enacted. It takes 13 frames to react if the opponent is about to grab you. During this struggle, one player has to input the first throw command faster than the other.
You can press ![]() +
+![]() to cancel out the struggle. You can still attack with a strike in this struggle state as well.
to cancel out the struggle. You can still attack with a strike in this struggle state as well.
Multi-Throw Escape
As you’re about to get grabbed (commonly after a using a move that’s negative on block) you can input multiple throw escape commands. Realistically, you can input 3 of the most common throws your opponent likes to do.
- Example: Sanman enters


 +
+ (flipped on player 2 side), so Honey enters many throw inputs where one of them is
 +
+ , which is what Sanman's throw ends with. The result is a success throw escape.
Super K.O.
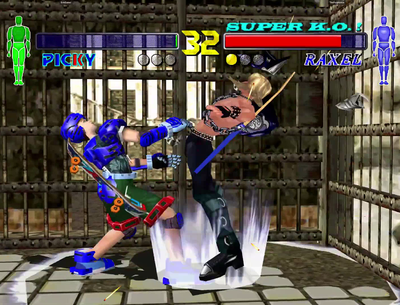
These are finishing moves when successful, ends in a cinematic visual. When you finish a round with it, 2 Round win points are given.
To perform these moves, you need all your armor broken (Armor Flash makes it easier) and press ![]()
![]() +
+![]() +
+![]() . The startup is 31 frames. Super KO being ready is indicated by the blue armor icon next to your health bar.
However, you get only one chance. Super KO moves can be blocked and interrupted like any other move. The damage from these moves is also not very high at all so the opponent has to have low enough health to perform a successful Super K.O.
The Armor Flash animation also counts as a Super K.O. The damage it dishes out is even lower.
. The startup is 31 frames. Super KO being ready is indicated by the blue armor icon next to your health bar.
However, you get only one chance. Super KO moves can be blocked and interrupted like any other move. The damage from these moves is also not very high at all so the opponent has to have low enough health to perform a successful Super K.O.
The Armor Flash animation also counts as a Super K.O. The damage it dishes out is even lower.
Taunts
Every character has a taunt. Very small points of damage is done at specific points of each character’s animation. These can be done whenever you want. Taunts lock you in place until they finish.
Their inputs are ![]() +Start for the arcade version.
+Start for the arcade version. ![]() +R/L for the Dreamcast version.
+R/L for the Dreamcast version.
Stun Subtraction System
A weird and obscure Block Stun system that activates with repeated use of a move. If a move gets repeated after 16 uses, the block stun decreases up to a multiple of 2. best to provide an example from an old Shoryuken.com article (now SuperCombo) explaining this pretty well:
SSS subtracts frames from the opponent’s blockstun equal to the number of times the attacker uses the same move within the 16 move window, but it only takes effect the third time you use the same move, and can only remove six frames at maximum.
So let’s take Bahn’s Iron Elbow (6P) as an example, as seen above in the left diagram. It’s -3 on block normally, and remains -3 the second time you use it within the 16 move window. As soon as you use it three times, however, SSS kicks in and subtracts three frames from the opponent’s blockstun, making the move -6. Use it four times, and it becomes -7, five times and it’s -8, six times and it’s -9. SSS can’t subtract more than six frames, though, so even if you used the move 16 times in a row it would never become worse than -9 on block.
Link to the Article: https://supercombo.gg/2021/10/15/death-crunch-smashing-through-the-cage-of-fighting-vipers-2-with-heidi-zero-chan-kemps-and-heruru-by-jason-moses/
