RoFighters/Gaunt

From Mizuumi Wiki
Jump to navigation Jump to search

Story

Introduction

Archetype: Grappler/Meter Management


Strengths Weaknesses
  • MASSIVE Damage: By far the highest dmg output in the game. Gaunt has multiple viable 2 taps and tods, that only get stronger as he levels up.
  • Command Grab City: 214L/M/H is an easy way to open up an opponent. At Azure Charge level 2 it can even be used for combos. The heavy version does massive damage and has armor.
  • Max Azure Charge: At max Azure Charges, Gaunt becomes the best character in the game, being able to kill and confirm from any hit, getting a fast airdash, combo starting projectile (although with somewhat stubby range), armored combo starters and the best super in the game.
  • Traumatizing Offense/Pressure: With frametraps, cg 214X, overhead 623L, low 2M and +4 on block 5M, Gaunt can easily take rounds off of his terrifying pressure when he gets in.
  • Great Ground to Air Game: Gaunt has some of best anti-airs in the game, 2L, 2S and 236H, all lead to high damage and are consistent. You can't jump against Gaunt.
  • Low Mobility: Gaunt has a very slow walkspeed and can't air dash. Because of this, it can be hard to approach and evade projectiles.
  • Big Body, Big Problems: A larger body means you will have more difficulty than others in avoiding stray hits and projectiles. Additionally, air combos are much less susceptible to dropping on Gaunt.
  • Struggles During Early Game: Gaunt needs Azure Charge to access many of his better combos. at level 2 being where he gets strong. At lvl1 his bnb's do underwhelming damage and his hitconfirms are limited.
  • Heavily Meter Reliant: Gaunt has very useful EX moves, but he also needs that meter to level up, making you constantly have to manage your meter. This creates a tough situation for gaunt, making him have to choose between risking his meter for confirms or using them to snowball rounds. With this, if you can't efficiently build meter up as fast as possible, then rounds become a lot harder to win.
  • Limited Range: Most of Gaunt's normals have weak range, meaning he has to use dash attacks often, this also weaken his long range confirms.

Move List

Gaunt possess a charge mechanic via 2S and the taunt button. The bonus of damage from these are listed below:

  • x0.8 (No charge nor taunt)
  • x0.9 (1 charge)
  • x1 (2 charge OR no charge and taunt)
  • x1.1 (3 charge OR 1 charge and taunt)
  • x1.2 (2 charge and taunt)
  • x1.3 (3 charge and taunt)

Please note that damages for the following moves are listed in this exact order.

Normal Attacks

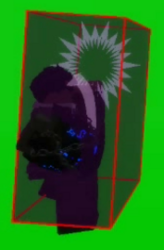
5L
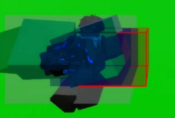
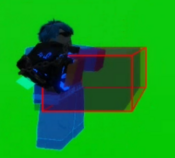
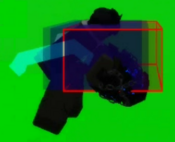
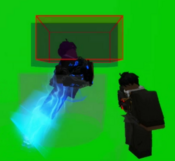
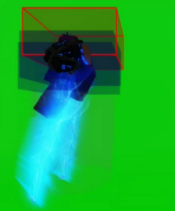
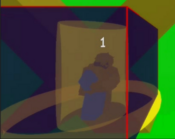
Gaunt 5L hitbox.png
Gaunt 5L.png
Damage Guard Startup Active Recovery Hit Adv. Block Adv.
4 / 5 / 5 / 6 / 7 / 7 Mid 6 6 11 +9 -2
  • Party starter. Self chains for frametraps and easy hitconfirms
  • Limited range means it might not combo into 5L or 5M


5M
Gaunt 5H a1.png
Gaunt 5M b.png
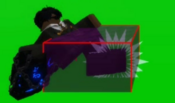
Damage Guard Startup Active Recovery Hit Adv. Block Adv.
7 / 8 / 8 / 9 / 10 / 11 Mid 10 6 9 +18 +3
  • Main hitconfirm tool, + on block so you can continue pressure


5H
Gaunt 5H a.png
Gaunt 5H b.png
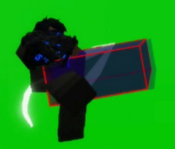
Damage Guard Startup Active Recovery Hit Adv. Block Adv.
7 / 7 / 7 / 9 / 9 / 10 Mid 20 6 23 -4 -30
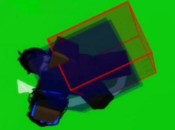
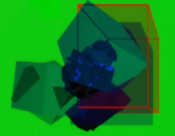
  • Has an inner hitbox and an outer hitbox. If the opponent touches the inner hitbox this move pulls them in, otherwise it pushes them away instead.
  • Combo tool but very unsafe on block, cancel into 214L or 236M to keep yourself safe


2L
Gaunt 2L a.png
Gaunt 2L b.png
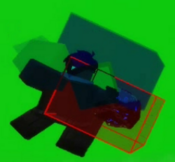
Damage Guard Startup Active Recovery Hit Adv. Block Adv.
8 / 9 / 9 / 9 / 11 / 12 Mid 12 5 26 +78 -16
  • Launcher and usuable anti air
  • Gaunt's main punish tool, high damage combo starter with a lot of hitstun, YOLO move aswell

2L 2S 2L 5M 2H 214H

  • Unsafe on block by itself, gattle into 5L


2M
Gaunt 2M.png
Damage Guard Startup Active Recovery Hit Adv. Block Adv.
7 / 8 / 8 / 9 / 10 / 11 Low 11 6 12 +14 -1
  • Gaunt's only low.
  • Strong in neutral and in combos, hit's OTG


2H
Gaunt 2H.png
2H-H
Gaunt 2HH.png
Version Damage Guard Startup Active Recovery Hit Adv. Block Adv.
2H 10 / 11 / 12 / 13 / 15 / 16 Mid 17 6 11 +12 +5
  • Gains a projectile at Azure Charge level 3
  • As a starter it leads to massive damage
  • Is very + on block, use this to hitconfirm
  • Can be followed up with another H, dealing additonal damage and allowing for aircomboing
2HH 4 / 4 / 5 / 5 / 6 / 6 Low - - - +62 -11
  • A followup attack that launches on hit, allowing for aircomboing or chaining into 623X


j.L
Gaunt jL.png
Damage Guard Startup Active Recovery Hit Adv. Block Adv.
6 / 7 / 7 / 8 / 9 / 10 Mid 9 12 1 +15 +8
  • Jump in and air poke
  • Hits mid


j.M
Gaunt jM.png
Damage Guard Startup Active Recovery Hit Adv. Block Adv.
7 / 8 / 8 / 9 / 10 / 11 High 7 12 12 +15 -3
  • Jump in and air poke
  • Hits high


j.H
Gaunt jH.png
Damage Guard Startup Active Recovery Hit Adv. Block Adv.
9 / 10 / 12 / 13 / 14 / 15 High 9 6 16 +22 +8
  • Resets chain on hit
  • Has weirdly good scaling (120%)

Special Attacks

Body Toss
5S
Damage Guard Startup Active Recovery Hit Adv. Block Adv.
16 / 18 / 20 / 22 / 24 / 27 Throw 12 5 16 +71 +3
  • Low reward midscreen, launches away and let's you taunt/level up safely
  • Very scary near corner, becomes a combo tool
  • In the corner let's you setup taunt and still have time to hit them on wakeup.


Body Toss (Air)
j.S
Damage Guard Startup Active Recovery Hit Adv. Block Adv.
20 / 23 / 25 / 28 / 31 / 34 Throw 12 6 31~ +21 +3
  • Air combo ender and ocasional air to air


Ground Smash
2S
Damage Guard Startup Active Recovery Hit Adv. Block Adv.
13 / 15 (Sw: 4) / 16 (Sw: 4) / 18 (Sw: 5) / 20 (Sw: 6) / 22 (Sw: 7) Mid 33 6 34 +30 -24
  • Shockwave size increases with charge level
  • At Azure Charge level 1, gains armor


Meteor Smash
j.2S
Gaunt j2S a.png
Gaunt j2S b.png
Damage Guard Startup Active Recovery Hit Adv. Block Adv.
8 (4x2),16 / 5,4,18 / 5,4,20 / 6,5,22 / High 18 Until Landing Until Landing+35 +5 -13
  • Main air combo ender, gives a good knockdown
  • Occasional high risk medium reward divekick in neutral


Dash Punch
236L or M or H
Gaunt 236L.png
Gaunt 236M.png
Gaunt 236H.png
Version Damage Guard Startup Active Recovery Hit Adv. Block Adv.
L 8 / 9 / 10 / 11 / 12 / 13 High 20 3 17~ +37 -24
  • Block this overhead
  • All versions of this move destroy projectiles
M 10 / 11 / 12 / 14 / 15 / 17 Mid 20 8 14 +35 -24
  • Main combo filler, great starter
  • On level 2 gains armor and becomes a YOLO neutral tool
H 18 / 20 / 22 / 24 / 27 / 29 Mid 27 8 26~ +53 -27
  • Armored, links into 5L always and into dash 2M on counterhit
  • In Level 3 it causes a slide kd and becomes a crazy good starter
  • Generally not worth the meter


Pile Driver
214L or M or H
Gaunt 214M.png
Gaunt 214L.png
Version Damage Guard Startup Active Recovery Hit Adv. Block Adv.
L 19 / 21 / 23 / 26 / 29 / 31 Throw 6 5 29 +28 +2
  • FAST
  • Side switches on hit, your go to grab before level 2
M 13 / 15 / 16 / 18 / 20 / 22 Throw 14 5 29 +17 / +53 +3

Does NOT side switch, at lvl 2 this grab launches the opponent and allows for an air combo.

H 30 / 34 / 37 / 41 / 44 / 48 Throw 20 5 23 +14 +3
  • Armored, high damage, make them fear you
  • Can be teched on reaction, weakening it as a reversal.


Bullet Sault
623L or M or H
Gaunt 623L.png
Gaunt 623M.png
Version Damage Guard Startup Active Recovery Hit Adv. Block Adv.
L 5,20 / 6,23 / 6,25 / 7,28 / 8, 31 / 9, 34 Throw 15 15 36 +10 +3
  • An air grab that travels at a sharp vertical angle. Literally budget 236H
M 5,20 / 6,23 / 6,25 / 7,28 / 8, 31 / 9, 34 Throw 15 15 24 +10 +2
  • Travels at a more horizontal angle than 236L and 236H. More usefull as a way to reposition.
  • Gains armor on level 2
H 5,31 / 6,35 / 6,38 / 7,42 / 8, 46 / 9, 51 Throw 9 15 28~ +16 +3
  • Best anti air in the game, don't jump at gaunt
  • Can be OS teched without much risk, but weakens your jump-in
  • Red Burst 236H deals absurd damage
  • Gains armor at level 1, making it a great get out jail card

Level 1 Ultimate Attacks

Azure Charge
236S
Gaunt 236S a.png
Gaunt 236S b.png
Gaunt 236S c.png
Damage Guard Startup Active Recovery Hit Adv. Block Adv.
5 Mid 31 3 34 -7 +3
  • What makes gaunt. You'll have to manage your meter a lot to use this effectively
  • Staggers on hit, allowing you to level up mid combo
  • Has a somewhat small hitbox, and timed with the long charge up and endlag, this is not a great reversal, however is good as a combo extender.
  • Every time Gaunt levels up he gets +0.1x damage multiplier, +0.5 walkspeed and 2S shockwave grows

Level 1: 2S gains 1 hit or armor and 236H gets 1 hit of armor.
Level 2: 623M gets 1 hit of armor, 214M becomes a combo starter, 236M gets armor. Where the fun starts.
Level 3: Unlocks an airdash, 236S becomes a new move, 2H gets a projectile, 623H gets 5 hits of armor and slides on hit.


Charge 3
236S when Azure Charge is at level 3
Damage Guard Startup Active Recovery Hit Adv. Block Adv.
31/37 Mid 5 (47) 2 30 +59 -8
  • Screen flash starts on frame 5
  • A lazer punch that reaches full screen. Very fast
  • Amazing for long-range punishes and confirms
  • Do not get counter-hit by this, you will die

Level 3 Ultimate Attacks

All Out
63214S
Damage Guard Startup Active Recovery Hit Adv. Block Adv.
- Mid 1 (32) 2 58 +72 -15
  • Screen flash starts on frame 1
  • Reversal, input the followup after the hit


Followup to All Out
After All Out, 5L>5M>5H>5M>5H>2L>Burst
Damage Guard Startup Active Recovery Hit Adv. Block Adv.
- - - - - - -
  • Deadly Rave
  • Needs burst to do the full thing, otherwise ends at the 2L, which you can combo off of
  • Highest damage move in the game, making it a great round closer
  • Resets you back to level 0 and leaves both of you midscreen
  • Not a very practical move and leaves you at a major disadvantage if you dont kill with it. The True Gaunt Way is to land this raw in neutral as a counter hit option.

Strategy

Fish for gold burst on round start then win the game.

Combos

  • 5L 5L 5M is your main hitconfirm, go into 5H on hit.

aircombo = j.L j.M j.H j.L j.M j.2S/j.5S Level 0/Universal

  • 5H 623M dash 2L 236L - Easy
  • 5H 623M dash 2L aircombo - Bnb
  • 623L/623M 2M 5H 623M dash 2L j.M land 5L 5M 5H 214L/214M - Overhead combo
  • 5H 623M dash 2M 2H 2S dash 2L aircombo - Optimal bnb

Level 2

  • 5H 214M dash 2S dash 2M 5H 623M dash 2L j.L j.M j.H j.L j.M j.2S - Bnb
  • 214M dash 214M dash 2S dash 2M 5H 623M dash 2L aircombo - Command grab Bnb

Level 3

  • 236H/236L 236S dash 214M 2S dash 2M 5H 623M dash 2L aircombo - Metered anti-air confirm.

TOD

  • 6321S 5L 5M 5H 5M 5H 2L 5L 5L 2M 5M 2H 623M 66 2L 6H j.M j.H [dl]j.M 2M 5M 2H 2S 214M j.L j.M j.2S Red Burst j.2S

Colors

1: Base
2: Fire themed
3: Broly

General
FAQ
Controls
HUD
System
Characters
Oath
Gaunt
Geovana
Mai
Eppo