Mobile Suit Gundam: Ex Revue/Gundam: Difference between revisions
Jump to navigation
Jump to search

No edit summary |
|||
| (17 intermediate revisions by 4 users not shown) | |||
| Line 9: | Line 9: | ||
|border=no|tablewidth=102 | |border=no|tablewidth=102 | ||
|flex_header=Gundam: Amuro Ray | |||
|flex_data=[[File:GXER_Pilot_Amuro_Ray.png]] | |flex_data=[[File:GXER_Pilot_Amuro_Ray.png]] | ||
[[File:Gundam Portrait.png]] | [[File:Gundam Portrait.png]] | ||
<table style="width: 100%; border-collapse: collapse;"> | <table style="width: 100%; border-collapse: collapse;"> | ||
<tr><td style="text-align: right;">'''Jumps''':</td><td style="width:48%; text-align: left;"> One </td></tr> | <tr style="background: #f9f9f9;"><td style="text-align: right;">'''Jumps''':</td><td style="width:48%; text-align: left;"> One </td></tr> | ||
<tr><td style="text-align: right;">'''Air Throw''':</td><td style="width:48%; text-align: left;"> No</td></tr> | <tr><td style="text-align: right;">'''Air Throw''':</td><td style="width:48%; text-align: left;"> No</td></tr> | ||
<tr><td style="text-align: right;">'''Pummel Grab''':</td><td style="width:48%; text-align: left;"> No </td></tr> | <tr style="background: #f9f9f9;"><td style="text-align: right;">'''Pummel Grab''':</td><td style="width:48%; text-align: left;"> No </td></tr> | ||
<tr><td style="text-align: right;">'''Defense''':</td><td style="width:48%; text-align: left;"> 0 </td></tr> | <tr><td style="text-align: right;">'''Defense''':</td><td style="width:48%; text-align: left;"> 0 </td></tr> | ||
</table> | </table> | ||
}} | }} | ||
==Normals== | ==Normals== | ||
{{MoveData | {{MoveData | ||
|input=5A | |input=5A | ||
|image=GEXR_Gundam_5A. | |image=GEXR_Gundam_5A.png | ||
|caption= | |caption= | ||
|data= | |data= | ||
| Line 42: | Line 42: | ||
{{MoveData | {{MoveData | ||
|input=cl.B | |input=cl.B | ||
|image= | |image=GEXR_Gundam_c.B.png | ||
|caption= | |caption= | ||
|data= | |data= | ||
| Line 60: | Line 60: | ||
{{MoveData | {{MoveData | ||
|input=f.B | |input=f.B | ||
|image= | |image=GEXR_Gundam_f.B.png | ||
|caption= | |caption= | ||
|data= | |data= | ||
| Line 78: | Line 78: | ||
{{MoveData | {{MoveData | ||
|input=cl.C | |input=cl.C | ||
|image= | |image=GEXR_Gundam_c.C.png | ||
|caption= | |caption= | ||
|data= | |data= | ||
| Line 96: | Line 96: | ||
{{MoveData | {{MoveData | ||
|input=f.C | |input=f.C | ||
|image= | |image=GEXR_Gundam_f.C-1.png | ||
|image2= | |caption= | ||
|image2=GEXR_Gundam_f.C-2.png | |||
|caption= | |caption= | ||
|data= | |data= | ||
| Line 115: | Line 116: | ||
{{MoveData | {{MoveData | ||
|input=2A | |input=2A | ||
|image=GEXR_Gundam_2A. | |image=GEXR_Gundam_2A.png | ||
|caption= | |caption= | ||
|data= | |data= | ||
| Line 133: | Line 134: | ||
{{MoveData | {{MoveData | ||
|input=2B | |input=2B | ||
|image=GEXR_Gundam_2B. | |image=GEXR_Gundam_2B.png | ||
|caption= | |caption= | ||
|data= | |data= | ||
| Line 151: | Line 152: | ||
{{MoveData | {{MoveData | ||
|input=2C | |input=2C | ||
|image=GEXR_Gundam_2C-1. | |image=GEXR_Gundam_2C-1.png | ||
|caption= | |caption= | ||
|image2=GEXR_Gundam_2C-2.png | |||
|caption2= | |||
|image3=GEXR_Gundam_2C-3.png | |||
|caption3=Very slightly shrunken hitbox | |||
|data= | |data= | ||
{{AttackData-GEXR | {{AttackData-GEXR | ||
| Line 171: | Line 174: | ||
{{MoveData | {{MoveData | ||
|input=j.A | |input=j.A | ||
|image=GEXR_Gundam_j.A. | |image=GEXR_Gundam_j.A.png | ||
|caption= | |caption= | ||
|data= | |data= | ||
| Line 189: | Line 192: | ||
{{MoveData | {{MoveData | ||
|input=j.B | |input=j.B | ||
|image=GEXR_Gundam_j.B. | |image=GEXR_Gundam_j.B.png | ||
|caption= | |caption= | ||
|data= | |data= | ||
| Line 208: | Line 211: | ||
|input=j.2B | |input=j.2B | ||
|image=GEXR_Gundam_j.2B-Spin.gif | |image=GEXR_Gundam_j.2B-Spin.gif | ||
|image2=GEXR_Gundam_j.2B-1. | |image2=GEXR_Gundam_j.2B-1.png | ||
|image3=GEXR_Gundam_j. | |image3=GEXR_Gundam_j.2C-2.png | ||
|caption=Speen | |caption=Speen | ||
|data= | |data= | ||
| Line 220: | Line 223: | ||
|special cancel= | |special cancel= | ||
|guard=High | |guard=High | ||
|description=One of Gundam's most notable approach tools. </br>-Gundam has no | |description=One of Gundam's most notable approach tools. </br>-Gundam has no hurtbox while it spins. </br>-Good for challenging air attacks, but is still vulnerable to anti-airs after the spin. </br>-Ends in an attack similar to j.C but slightly bigger. | ||
}} | }} | ||
}} | }} | ||
| Line 227: | Line 230: | ||
{{MoveData | {{MoveData | ||
|input=j.C | |input=j.C | ||
|image=GEXR_Gundam_j.C-1. | |image=GEXR_Gundam_j.C-1.png | ||
|image2=GEXR_Gundam_j.C-2. | |image2=GEXR_Gundam_j.C-2.png | ||
|caption= | |caption= | ||
|data= | |data= | ||
| Line 247: | Line 250: | ||
|name=Beam Rifle | |name=Beam Rifle | ||
|input=236x | |input=236x | ||
|image=GEXR_Gundam_236x. | |image=GEXR_Gundam_236x.png | ||
|caption= | |caption= | ||
|data= | |data= | ||
| Line 289: | Line 292: | ||
|name=Beam Saber | |name=Beam Saber | ||
|input=623x | |input=623x | ||
|image= | |image=GEXR_Gundam_623x-Startup.png | ||
|caption=First Hitbox | |caption=First Hitbox | ||
|image2= | |image2=GEXR_Gundam_623x-A.png | ||
|caption2=A Version | |caption2=A Version | ||
|image3= | |image3=GEXR_Gundam_623x-B.png | ||
|caption3=B Version | |caption3=B Version | ||
|image4= | |image4=GEXR_Gundam_623x-C.png | ||
|caption4=C Version | |caption4=C Version | ||
|data= | |data= | ||
| Line 307: | Line 310: | ||
|special cancel=No | |special cancel=No | ||
|guard=Mid | |guard=Mid | ||
|description=Single hit DP. </br>-Doesn't go far infront or above of gundam. </br>-Does more damage then the B version. | |description=Single hit DP. </br>-Doesn't go far infront or above of gundam. </br>-Does more damage then the B version.<br>-Completely invincible | ||
}} | }} | ||
{{AttackData-GEXR | {{AttackData-GEXR | ||
| Line 336: | Line 339: | ||
{{MoveData | {{MoveData | ||
|name=Double Beam Saber | |name=Double Beam Saber | ||
|image=GEXR_Gundam_Tatsu-Startup.PNG | |||
|input=214x | |input=214x | ||
|caption=Competely invincible on this sprite | |||
|caption= | |image2=GEXR_Gundam_Tatsu-1.PNG | ||
|image2=GEXR_Gundam_Tatsu- | |||
|caption2= | |caption2= | ||
|image3=GEXR_Gundam_Tatsu-2.PNG | |||
|caption3=This is a low | |||
|data= | |data= | ||
{{AttackData-GEXR | {{AttackData-GEXR | ||
| Line 373: | Line 378: | ||
|special cancel=No | |special cancel=No | ||
|guard=Mid, Low | |guard=Mid, Low | ||
|description=Same as the A version but travels almost fullscreen before attacking. </br>-If timed right, the invulnerability frames can dodge fireballs | |description=Same as the A version but travels almost fullscreen before attacking. </br>-If timed right, the invulnerability frames can dodge fireballs, oki attempts, or pokes. <br>-Due to how fast Gundam slides across the stage, this move completely whiffs on crouching opponents at any distance other than fullscreen. | ||
}} | }} | ||
}} | }} | ||
| Line 421: | Line 426: | ||
}} | }} | ||
==Combos== | ==Combos/Setups== | ||
{| class="wikitable sortable" border="1" style="margin: 1em auto 1em auto;text-align: center; width:100%; font-weight:bold; padding 10px " | {| class="wikitable sortable" border="1" style="margin: 1em auto 1em auto;text-align: center; width:100%; font-weight:bold; padding 10px " | ||
|- | |- | ||
! Combo !! Position !! Damage !! Works on: !! Notes | ! Type !! Combo !! Position !! Damage !! Works on: !! Notes | ||
|- | |- | ||
|style="padding:10px" | 5A*4 > 623C || Any || ? || All || reduce how many | |style="padding:10px" | Combo || 5A*4 > 623C || Any || ? || All || reduce how many 5A you do depending on range the first hits | ||
|- | |- | ||
|style="padding:10px" | Jump-In > 5A*5 > 623C || Corner | |style="padding:10px" | Combo || Jump-In > 5A*5 > 623C || Corner Only || ? || All || The jump-in helps to position you for a extra hit of 5A, but if your midscreen you don't get any more. | ||
|- | |- | ||
|style="padding:10px" | 2A*3 > 623C || Any || ? || All || The 623C can be tricky to get out do to the input reader. Make sure to reduce how many 2A you do depending on the range you hit the first. | |style="padding:10px" | Combo || 2A*3 > 623C || Any || ? || All || The 623C can be tricky to get out do to the input reader. Make sure to reduce how many 2A you do depending on the range you hit the first. | ||
|- | |- | ||
|style="padding:10px" | 2A > 5A*3 > 623C || Any || ? || All || More involved then the one above but the ender is easier to hit. As always reduce how many hits you do depending on range. | |style="padding:10px" | Combo || 2A > 5A*3 > 623C || Any || ? || All || More involved then the one above but the ender is easier to hit. As always reduce how many hits you do depending on range. | ||
|- | |- | ||
|style="padding:10px" | c.C/2C > 214C || Any || ? || All || | |style="padding:10px" | Combo || c.C/2C > 214C || Any || ? || All || | ||
|- | |- | ||
|style="padding:10px" | c.B > 214B || Any || ? || All || | |style="padding:10px" | Combo || c.B > 214B || Any || ? || All || | ||
|- | |- | ||
|style="padding:10px" | j.C > c.C > 214C || Any || | |style="padding:10px" | Combo || j.C > c.C > 214C || Any || 76 || All || Holding forward makes connecting the c.C and 214C easier | ||
|- | |- | ||
|} | |} | ||
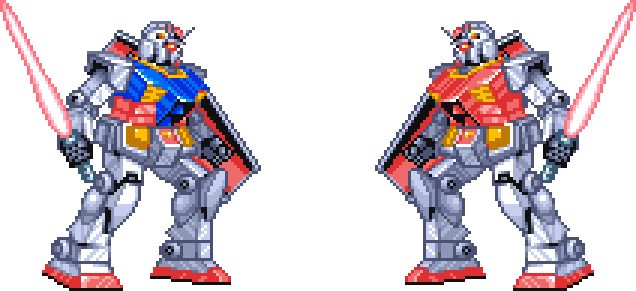
==Colors== | |||
[[image:GEXR_Gundam_Colors.png|frame|center|Gundam's Colors]] | |||
{{Navbox| title= Mobile Suit Gundam Ex Revue |link=Mobile Suit Gundam: Ex Revue | {{Navbox| title= Mobile Suit Gundam Ex Revue |link=Mobile Suit Gundam: Ex Revue | ||
| rows= | | rows= | ||
Revision as of 07:04, 29 December 2021
Overview
The RX-78-2 Gundam, or just Gundam, is the titular mobile suit and an icon in every sense of the word. Secretly built on Side 7 and Piloted by the Newtype Amuro Ray, the Gundam would turn the tide of the One Year War in the original Mobile Suit Gundam series. In EX Revue, Gundam is a Shoto, an all-rounder with solid options for every situation. Gundam's biggest enemy during a fight can often wind up not being the other player, but rather the player's inputs. With an annoying amount of overlap between special move inputs, it's very easy to accidentally perform the wrong special in a pinch.
Playstyle
| Pros | Cons |
|
|
Gundam: Amuro Ray

| Jumps: | One |
| Air Throw: | No |
| Pummel Grab: | No |
| Defense: | 0 |
Normals
5A  |
|---|
cl.B  |
|---|
f.B  |
|---|
cl.C  |
|---|
f.C   |
|---|
2A  |
|---|
2B  |
|---|
2C    Very slightly shrunken hitbox Very slightly shrunken hitbox
|
|---|
Jumping Normals
j.A  |
|---|
j.B  |
|---|
j.2B  Speen Speen   |
|---|
j.C   |
|---|
Specials
Beam Rifle 236x  |
|---|
Beam Saber 623x  First Hitbox First Hitbox  A Version A Version  B Version B Version  C Version C Version
|
|---|
Double Beam Saber 214x  Competely invincible on this sprite Competely invincible on this sprite   This is a low This is a low
|
|---|
Gundam Hammer 41236x  Startup Hitbox Startup Hitbox  1st, 2nd, and 3rd Ball Hitboxes 1st, 2nd, and 3rd Ball Hitboxes
|
|---|
Combos/Setups
| Type | Combo | Position | Damage | Works on: | Notes |
|---|---|---|---|---|---|
| Combo | 5A*4 > 623C | Any | ? | All | reduce how many 5A you do depending on range the first hits |
| Combo | Jump-In > 5A*5 > 623C | Corner Only | ? | All | The jump-in helps to position you for a extra hit of 5A, but if your midscreen you don't get any more. |
| Combo | 2A*3 > 623C | Any | ? | All | The 623C can be tricky to get out do to the input reader. Make sure to reduce how many 2A you do depending on the range you hit the first. |
| Combo | 2A > 5A*3 > 623C | Any | ? | All | More involved then the one above but the ender is easier to hit. As always reduce how many hits you do depending on range. |
| Combo | c.C/2C > 214C | Any | ? | All | |
| Combo | c.B > 214B | Any | ? | All | |
| Combo | j.C > c.C > 214C | Any | 76 | All | Holding forward makes connecting the c.C and 214C easier |
Colors

Gundam's Colors


