Mobile Suit Gundam: Ex Revue/Z'gok: Difference between revisions
Jump to navigation
Jump to search

Mediocrity (talk | contribs) (Created page with "{| class="wikitable" style="float:right; margin-left: 10px;" |- ! align="center" colspan="2" | Z'gok |- | align="center" colspan="2" |File:Z'gok Portrait.png|frameless|cente...") |
Mediocrity (talk | contribs) mNo edit summary |
||
| (33 intermediate revisions by 4 users not shown) | |||
| Line 1: | Line 1: | ||
======<span style="visibility:hidden;font-size:0">Overview</span>====== | |||
| | {{FP Overview | ||
|overview= Z'gok is a mass produced amphibious mobile suit used by the Principality of Zeon, used for bypassing the Earth Federation's defenses via an underwater passageway during the attack at Jaburo. Sadly, Z'gok and it's pilot "Soldier 2" don't quite live up to how they performed in the anime. With low combo potential thanks to jabs that don't combo into themselves and rather awkward tools, Z'gok struggles to get in and open up opponents who understand his rather linear gameplan. | |||
|- | |pros= | ||
| | *'''Great Corner Pressure''': Z’gok has devastating corner pressure thanks to Overhead pressure and okizeme loops. | ||
|cons= | |||
*'''Not a Combo Character''': Z’gok lacks the ability to chain normals, it’s rare to see Z’gok do a combo that consists of more than a jump-in, one normal and a special. | |||
*'''Can’t Handle Zoning''': Z’gok’s awkward movement speed, awful fireball and linear approach tools make it hard to get in on zoners to say the least. | |||
*'''Very Linear Character''': Z’gok has one plan and not much beyond that. If Z’gok can’t corner his opponent fast the game will be an uphill battle at best. | |||
|border=no|tablewidth=102 | |||
|flex_header=Z'gok: Akahana | |||
|flex_data=[[File:GXER_Pilot_Akahana.png]] | |||
[[File:Z'gok Portrait.png]] | |||
<table style="width: 100%; border-collapse: collapse;"> | |||
<tr><td style="text-align: right;">'''Jumps''':</td><td style="width:48%; text-align: left;"> One </td></tr> | |||
<tr><td style="text-align: right;">'''Air Throw''':</td><td style="width:48%; text-align: left;"> No</td></tr> | |||
<tr><td style="text-align: right;">'''Pummel Grab''':</td><td style="width:48%; text-align: left;">Yes (6/4B) </td></tr> | |||
<tr><td style="text-align: right;">'''Defense''':</td><td style="width:48%; text-align: left;"> +1 </td></tr> | |||
</table> | |||
}} | |||
==Normals== | ==Normals== | ||
{{MoveData | {{MoveData | ||
|input=5A | |input=5A | ||
|image= | |image=Z'gok_5a.PNG | ||
|caption= | |caption= | ||
|data= | |data= | ||
{{AttackData- | {{AttackData-GEXR | ||
|damage= | |damage=9 | ||
|startup= | |startup= | ||
|active= | |active= | ||
| Line 29: | Line 38: | ||
|special cancel=Yes | |special cancel=Yes | ||
|guard=mid | |guard=mid | ||
|description=A | |description=A solid jab, nothing special here | ||
}} | }} | ||
}} | }} | ||
{{MoveData | {{MoveData | ||
|input= | |input=cl.B | ||
|image= | |image=Z'gok_cl5b.PNG | ||
|caption= | |caption= | ||
|data= | |data= | ||
{{AttackData- | {{AttackData-GEXR | ||
|damage= | |damage=17 | ||
|startup= | |startup= | ||
|active= | |active= | ||
|recovery= | |recovery= | ||
|frameAdv= | |frameAdv= | ||
| special cancel = Yes | |special cancel=Yes | ||
|guard=mid | |guard=mid | ||
|description= | |description=Like f.b, but much slower and worse as an anti-air thanks to the smaller hitbox. | ||
}} | }} | ||
}} | }} | ||
{{MoveData | {{MoveData | ||
|input= | |input=f.B | ||
|image= | |image=Z'gok_5b.PNG | ||
|caption= | |caption= | ||
|data= | |data= | ||
{{AttackData- | {{AttackData-GEXR | ||
|damage= | |damage=17 | ||
|startup= | |startup= | ||
|active= | |active= | ||
|recovery= | |recovery= | ||
|frameAdv= | |frameAdv= | ||
|special cancel= | | special cancel = Yes | ||
|guard= | |guard=mid | ||
|description=A | |description=A fairly decent anti-air, but a tad too stubby to be strong. | ||
}} | }} | ||
}} | }} | ||
{{MoveData | {{MoveData | ||
|input= | |input=cl.C | ||
|image= | |image=Z'gok_cl5c.PNG | ||
|caption= | |caption= | ||
|data= | |data= | ||
{{AttackData- | {{AttackData-GEXR | ||
|damage= | |damage=24 | ||
|startup= | |startup= | ||
|active= | |active= | ||
| Line 76: | Line 94: | ||
|frameAdv= | |frameAdv= | ||
|special cancel=Yes | |special cancel=Yes | ||
|guard= | |guard=mid | ||
|description= | |description=At a glance this looks like an amazing anti-air hurt by it's status as a proximity normal, but hitboxes reveal it's secretly an awful anti-air hurt by it's status as a proximity normal. | ||
}} | }} | ||
}} | }} | ||
{{MoveData | {{MoveData | ||
|input= | |input=f.C | ||
|image= | |image=Z'gok_5c.PNG | ||
|caption= | |caption= | ||
|data= | |data= | ||
{{AttackData- | {{AttackData-GEXR | ||
|damage= | |damage=27 | ||
|startup= | |startup= | ||
|active= | |active= | ||
|recovery= | |recovery= | ||
|frameAdv= | |frameAdv= | ||
|special cancel= | |special cancel=No | ||
|guard= | |guard=low | ||
|description= | |description=A solid standing sweep. One of Z'gok's better buttons for sure. | ||
}} | }} | ||
}} | }} | ||
{{MoveData | {{MoveData | ||
|input= | |input=2A | ||
|image= | |image=Z'gok_2a.PNG | ||
|caption= | |caption= | ||
|data= | |data= | ||
{{AttackData- | {{AttackData-GEXR | ||
|damage= | |damage=9 | ||
|startup= | |startup= | ||
|active= | |active= | ||
| Line 108: | Line 132: | ||
|frameAdv= | |frameAdv= | ||
|special cancel=Yes | |special cancel=Yes | ||
|guard= | |guard=low | ||
|description=A | |description=A short, fairly slow, low hitting jab. Just like 5A there's nothing special going on here. | ||
}} | }} | ||
}} | }} | ||
{{MoveData | {{MoveData | ||
|input= | |input=2B | ||
|image= | |image=Z'gok_2b.PNG | ||
|caption= | |caption= | ||
|data= | |data= | ||
{{AttackData- | {{AttackData-GEXR | ||
|damage= | |damage=17 | ||
|startup= | |startup= | ||
|active= | |active= | ||
| Line 127: | Line 152: | ||
|special cancel=Yes | |special cancel=Yes | ||
|guard=mid | |guard=mid | ||
|description= | |description=At first glance this may seem like a great poke that can low profile stuff, but in reality it isn't. It doesn't low profile much and hitting mid isn't very nice. It's still an ok poke all things considered. | ||
}} | }} | ||
}} | }} | ||
{{MoveData | {{MoveData | ||
|input= | |input=2C | ||
| | |image=Z'gok_2c_1.PNG | ||
|image2=Z'gok_2c_2.PNG | |||
|caption= | |caption= | ||
|data= | |data= | ||
{{AttackData- | {{AttackData-GEXR | ||
|damage= | |damage=24 | ||
|startup= | |startup= | ||
|active= | |active= | ||
| Line 143: | Line 172: | ||
|special cancel=Yes | |special cancel=Yes | ||
|guard=mid | |guard=mid | ||
|description= | |description=A good anti-air, but really slow. | ||
}} | }} | ||
}} | }} | ||
==Jumping Normals== | ==Jumping Normals== | ||
{{MoveData | {{MoveData | ||
|input=j.A | |input=j.A | ||
|image= | |image=Z'gok_ja.PNG | ||
|caption= | |caption= | ||
|data= | |data= | ||
{{AttackData- | {{AttackData-GEXR | ||
|damage= | |damage=12 | ||
|startup= | |startup= | ||
|active= | |active= | ||
| Line 161: | Line 191: | ||
|special cancel=No | |special cancel=No | ||
|guard=high | |guard=high | ||
|description=Great all-purpose jump-in. Good air-to-air, good air-to-ground, but other buttons are better for both purposes | |description=Great all-purpose jump-in. Good air-to-air, good air-to-ground, but other buttons are better for both purposes. If you don't know what your opponent is doing you can't go wrong with j.A. | ||
}} | }} | ||
}} | }} | ||
{{MoveData | {{MoveData | ||
|input=j.B | |input=j.B | ||
|image= | |image=Z'gok_jb.PNG | ||
|caption= | |caption= | ||
|data= | |data= | ||
{{AttackData- | {{AttackData-GEXR | ||
|damage= | |damage=19 | ||
|startup= | |startup= | ||
|active= | |active= | ||
| Line 180: | Line 213: | ||
}} | }} | ||
}} | }} | ||
{{MoveData | {{MoveData | ||
|input=j. | |input=j.2B | ||
|image= | |image=Z'gok_j2b.PNG | ||
|caption= | |caption= | ||
|data= | |data= | ||
{{AttackData- | {{AttackData-GEXR | ||
|damage= | |damage=17 | ||
|startup= | |startup= | ||
|active= | |active= | ||
| Line 193: | Line 229: | ||
|special cancel=No | |special cancel=No | ||
|guard=high | |guard=high | ||
|description= | |description=A downwards jab. Good for hitting people directly under you or for crossing up. If this move connects close enough to the ground it even becomes unblockable. | ||
}} | }} | ||
}} | }} | ||
{{MoveData | {{MoveData | ||
|input=j. | |input=j.C | ||
|image= | |image=Z'gok_jc.PNG | ||
|caption= | |caption= | ||
|data= | |data= | ||
{{AttackData- | {{AttackData-GEXR | ||
|damage= | |damage=27 | ||
|startup= | |startup= | ||
|active= | |active= | ||
| Line 209: | Line 248: | ||
|special cancel=No | |special cancel=No | ||
|guard=high | |guard=high | ||
|description= | |description=Great jump-in button, really bad air-to-air. This move can crossup too! | ||
}} | }} | ||
}} | }} | ||
| Line 215: | Line 254: | ||
==Specials== | ==Specials== | ||
{{MoveData | {{MoveData | ||
|name=Headbutt | |||
|input=[4]6x | |input=[4]6x | ||
|image= | |image=Z'gok_dosukoi.PNG | ||
|caption= | |caption= | ||
|data= | |data= | ||
{{AttackData- | {{AttackData-GEXR | ||
|damage= | |version=A version | ||
|damage=12+14 | |||
|startup= | |||
|active= | |||
|recovery= | |||
|frameAdv= | |||
|special cancel=No | |||
|guard=Mid | |||
|description= | |||
}} | |||
{{AttackData-GEXR | |||
|version=B version | |||
|damage=16+14 | |||
|startup= | |startup= | ||
|active= | |active= | ||
| Line 226: | Line 278: | ||
|frameAdv= | |frameAdv= | ||
|special cancel=No | |special cancel=No | ||
|guard= | |guard=Mid | ||
|description=Doing it's best E. Honda impression, Z'gok lunges head first towards the opponent, knocking down if it connects. The lower the strength of the button, the less distance Z'gok covers. | |description= | ||
}} | |||
{{AttackData-GEXR | |||
|version=C version | |||
|damage=19+17 | |||
|startup= | |||
|active= | |||
|recovery= | |||
|frameAdv= | |||
|special cancel=No | |||
|guard=Mid | |||
|description= Doing it's best E. Honda impression, Z'gok lunges head first towards the opponent, knocking down if it connects. The lower the strength of the button, the less distance Z'gok covers. | |||
}} | }} | ||
}} | }} | ||
{{MoveData | {{MoveData | ||
|name=Overhead! | |name=Overhead! | ||
|input=[2]8x | |input=[2]8x | ||
|image= | |image=Z'gok_overhead_A.PNG | ||
|caption= | |image2=Z'gok_overhead_BC.PNG | ||
|image3=Z'gok_overhead_hit_2.PNG | |||
|caption=A version first hit | |||
|caption2=B/C Version first hit | |||
|caption3=Second hit | |||
|data= | |data= | ||
{{AttackData- | {{AttackData-GEXR | ||
|damage= | |version=B version | ||
|damage=19+17 | |||
|startup= | |||
|active= | |||
|recovery= | |||
|frameAdv= | |||
|special cancel=No | |||
|guard=Mid | |||
|description= | |||
}} | |||
{{AttackData-GEXR | |||
|version=C version | |||
|damage=22+17 | |||
|startup= | |startup= | ||
|active= | |active= | ||
| Line 243: | Line 325: | ||
|frameAdv= | |frameAdv= | ||
|special cancel=No | |special cancel=No | ||
|guard= | |guard=Mid | ||
|description=One of Z'gok's | |description= Deception is commonplace in warfare, and Z'gok demonstrates that beautifully by screaming "Overhead!" during an attack that hits mid. One of Z'gok's better attacks and Z'gok's reversal, however only the A version is fully invincible. Just like [4]6x, Z'gok moves forward more depending on the strength of the button used. Calling this attack the bread and butter of Z'gok's corner pressure would be an understatement, this is one of the few redeemable qualities of Z'gok. It's safe on block, difficult to challenge and leaves Z'gok in range to go for another one. Cornering the opponent and abusing this special is integral to any Z'gok player's success, but the second the plan falls apart it's time to go next. | ||
}} | }} | ||
}} | }} | ||
{{MoveData | {{MoveData | ||
|input=214x | |input=214x | ||
|image= | |name=Head Missile | ||
|image=Z'gok_214x.PNG | |||
|caption= | |caption= | ||
|data= | |data= | ||
{{AttackData- | {{AttackData-GEXR | ||
|damage= | |damage=14(projectile)+12(headbutt) | ||
|startup= | |startup= | ||
|active= | |active= | ||
| Line 260: | Line 346: | ||
|special cancel=No | |special cancel=No | ||
|guard=mid | |guard=mid | ||
|description=Z'gok leaps backwards before lunging forward with a miniature version of [4]6x and fires some missiles out of it's head. The missiles will go fullscreen at different speeds depending on the strength of the button used for the attack, while Z'gok travels different distances based on the strength of the button. If Z'gok's main body connects, the opponent will be knocked down. This attack is pretty bad during fireball wars and is too slow | |description=Z'gok leaps backwards before lunging forward with a miniature version of [4]6x and fires some missiles out of it's head. The missiles will go fullscreen at different speeds depending on the strength of the button used for the attack, while Z'gok travels different distances based on the strength of the button. If Z'gok's main body connects, the opponent will be knocked down. This attack is pretty bad during fireball wars and is too slow combo into. | ||
}} | }} | ||
}} | }} | ||
{{MoveData | {{MoveData | ||
|input=Mash X | |input=Mash X | ||
|image= | |name=Screw Claw | ||
|image=Z'gok_hands.gif | |||
|caption= | |caption= | ||
|data= | |data= | ||
{{AttackData- | {{AttackData-GEXR | ||
|damage= | |damage=4 per hit | ||
|startup= | |startup= | ||
|active= | |active= | ||
| Line 279: | Line 369: | ||
}} | }} | ||
}} | }} | ||
==Combos== | ==Combos/Setups== | ||
{| class="wikitable sortable" border="1" style="margin: 1em auto 1em auto;text-align: center; width:100%; font-weight:bold; padding 10px " | |||
: | |- | ||
! Type !! Combo !! Position !! Damage !! Works on: !! Notes !! Video Example | |||
|- | |||
|style="padding:10px" | Combo || j.C > f.C || Any || ? || All || A quick 2-hit jump in combo. About as simple as it gets. || [https://youtu.be/gKjMYYURAic Link] | |||
|- | |||
|style="padding:10px" | Combo ||j.C > 2A > [4]6x || Any || ? || All || Another simple confirm into a knockdown, but with a special this time. || [https://youtu.be/jvRpNMdPgrc Link] | |||
|- | |||
|} | |||
==Colors== | ==Colors== | ||
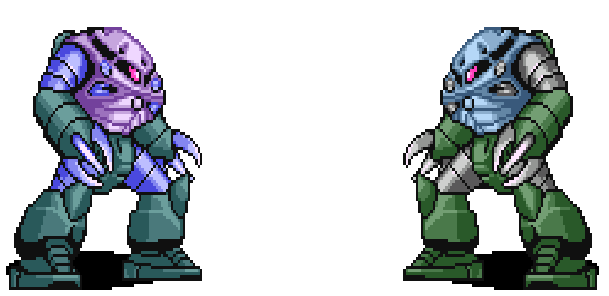
[[image:Z'gok colors.PNG|frame| | [[image:Z'gok colors.PNG|frame|center|Z'gok colors]] | ||
{{Navbox| title= Mobile Suit Gundam Ex Revue |link=Mobile Suit Gundam: Ex Revue | |||
| rows= | |||
{{Navbox/Row| text=General | textwidth=110 | maxlines=2 | |||
| data= | |||
{{Navbox/Icon| image=icon hud.png | text=Hud}} | |||
{{Navbox/Icon| image=icon controls.png | text=Controls}} | |||
{{Navbox/Row| text=Characters | textwidth=90 | maxlines=4}} | |||
{{Navbox/Icon| image=Acguy_character_select.PNG | text=Acguy}} | |||
{{Navbox/Icon| image=Char's_Gelgoog_character_select.PNG | text=Char's Gelgoog}} | |||
{{Navbox/Icon| image=Char's_Zaku_character_select.PNG| text=Char's Zaku}} | |||
{{Navbox/Icon| image=Char's_Z'Gok_character_select.PNG| text=Char's Z'gok}} | |||
{{Navbox/Icon| image=Dolmel_character_select.PNG| text=Dolmel}} | |||
{{Navbox/Icon| image=Dom_character_select.PNG| text=Dom}} | |||
{{Navbox/Icon| image=Gelgoog_character_select.PNG| text=Gelgoog}} | |||
{{Navbox/Icon| image=Gouf_character_select.PNG| text=Gouf}} | |||
{{Navbox/Icon| image=Guncannon_character_select.PNG| text=Guncannon}} | |||
{{Navbox/Icon| image=Gundam_character_select.PNG| text=Gundam}} | |||
{{Navbox/Icon| image=Gyan_character_select.PNG| text=Gyan}} | |||
{{Navbox/Icon| image=Zaku_character_select.PNG| text=Zaku}} | |||
{{Navbox/Icon| image=Z'Gok_character_select.PNG| text=Z'gok}} | |||
{{Navbox/Icon| image=Zeong_character_select.PNG| text=Zeong}} | |||
}} | |||
}} | |||
[[Category:Mobile Suit Gundam EX Revue]] | |||
Latest revision as of 06:16, 24 November 2022
Overview
Z'gok is a mass produced amphibious mobile suit used by the Principality of Zeon, used for bypassing the Earth Federation's defenses via an underwater passageway during the attack at Jaburo. Sadly, Z'gok and it's pilot "Soldier 2" don't quite live up to how they performed in the anime. With low combo potential thanks to jabs that don't combo into themselves and rather awkward tools, Z'gok struggles to get in and open up opponents who understand his rather linear gameplan.
Playstyle
| Pros | Cons |
|
|
Z'gok: Akahana

| Jumps: | One |
| Air Throw: | No |
| Pummel Grab: | Yes (6/4B) |
| Defense: | +1 |
Normals
5A  |
|---|
cl.B  |
|---|
f.B  |
|---|
cl.C  |
|---|
f.C  |
|---|
2A  |
|---|
2B  |
|---|
2C   |
|---|
Jumping Normals
j.A  |
|---|
j.B  |
|---|
j.2B  |
|---|
j.C  |
|---|
Specials
Headbutt [4]6x  |
|---|
Overhead! [2]8x  A version first hit A version first hit  B/C Version first hit B/C Version first hit  Second hit Second hit
|
|---|
Head Missile 214x  |
|---|
Screw Claw Mash X  |
|---|
Combos/Setups
| Type | Combo | Position | Damage | Works on: | Notes | Video Example |
|---|---|---|---|---|---|---|
| Combo | j.C > f.C | Any | ? | All | A quick 2-hit jump in combo. About as simple as it gets. | Link |
| Combo | j.C > 2A > [4]6x | Any | ? | All | Another simple confirm into a knockdown, but with a special this time. | Link |
Colors

Z'gok colors


