Alice Gear Aegis CS/Yotsuyu: Difference between revisions
(Changed the crunch data on the clash gear info. Added one more video to the T-Skill section.) |
m (added Senko no Ronde DUO-esque Actress overview video under evaluation) |
||
| Line 1: | Line 1: | ||
==Introduction== | ==Introduction== | ||
| Line 23: | Line 23: | ||
| style="width: 25%;"| | | style="width: 25%;"| | ||
[[File:AGACS_Yotsuyu_Profile.png|<center><font size="4><b></br>比良坂 夜露</br></b></font> <font size="2">(Hirasaka Yotsuyu)</ | [[File:AGACS_Yotsuyu_Profile.png|<center><font size="4><b></br>比良坂 夜露</br></b></font> <font size="2">(Hirasaka Yotsuyu) </br>Combat Role: Mid to Close-Range Assault </br>Difficulty: Easy </font>|thumb|right|300px]] | ||
| Line 33: | Line 33: | ||
==Evaluation== | ==Evaluation== | ||
[[File:AGACS_Yotsuyu_Demo.mp4|frameless]] | |||
Keep in mind that this evaluation is based on using her exclusive kit. You can compensate for any of her weaknesses or enhance her strengths by swapping out the appropriate Gear or Skill Modules. | |||
{| | {| | ||
| Line 57: | Line 61: | ||
==Exclusive Kit== | ==Exclusive Kit== | ||
There will be a video demonstrating how each attack works so you can check if you're doing the move correctly. If you're unable to view these, try opening this page in Google Chrome or the Brave browser. | |||
===Firearm Gear: Izumo #D=== | ===Firearm Gear: Izumo #D=== | ||
| Line 64: | Line 70: | ||
The Normal shots aren't anything to write home about, but its Charged Shot more than makes up for that. Just keep in mind that the weapon's reload is a little bit on the slow side. | The Normal shots aren't anything to write home about, but its Charged Shot more than makes up for that. Just keep in mind that the weapon's reload is a little bit on the slow side. | ||
'''Ammo | '''Ammo capacity:''' 12</br> | ||
'''Ammo required to charge weapon:''' 4 </br> | |||
'''Reload delay after firing:''' 1.6 seconds</br> | '''Reload delay after firing:''' 1.6 seconds</br> | ||
'''Full reload from 0 ammo:''' 2 seconds</br> | '''Full reload from 0 ammo:''' 2 seconds</br> | ||
| Line 81: | Line 88: | ||
Normal Shots are recommended in situations when you can spot an opportunity to [https://glossary.infil.net/?t=Punish punish] your opponent's sloppy movement or whiffed attacks. They're also a good way to continue your combo as well. | Normal Shots are recommended in situations when you can spot an opportunity to [https://glossary.infil.net/?t=Punish punish] your opponent's sloppy movement or whiffed attacks. They're also a good way to continue your combo as well. | ||
The properties of the weapon remain the same when | The properties of the weapon remain the same when using a Step Shot, except it'll force Yotsuyu to remain stationary just long enough for the opponent to punish her if the attack misses or she's too close to them even after a successful direct hit. | ||
====Charged Shot==== | ====Charged Shot==== | ||
| Line 93: | Line 100: | ||
'''Base damage per hit:''' 240</br> | '''Base damage per hit:''' 240</br> | ||
The Charged Shot fires a big <s>lemon</s> energy ball toward the opponent. Its inherent accuracy, faster velocity, and large hitbox means that you're incentivized to use this more often than her normal shots. A direct hit from this projectile won't cause knockdown | The Charged Shot fires a big <s>lemon</s> energy ball toward the opponent. Its inherent accuracy, faster velocity, and large hitbox means that you're incentivized to use this more often than her normal shots. At closer ranges, it can be used like a shotgun due to its large coverage and fast speed. | ||
A direct hit from this projectile won't cause knockdown and you can usually follow up the combo with a Normal Shot from a maximum range of 30 if you can react fast enough. | |||
The base damage from this attack means that 5 direct hits will KO an opponent with base stats, so practicing when to use this move is highly recommended. | |||
====SP Assist==== | ====SP Assist==== | ||
| Line 102: | Line 113: | ||
'''Base damage per hit:''' 60</br> | '''Base damage per hit:''' 60</br> | ||
Standard SP assist attack of two sets of three projectiles that shoot out in a fan spread. | Standard SP assist attack of two sets of three projectiles that shoot out in a horizontal fan spread. | ||
Unlike everything else in Yotsuyu's kit, this is the only attack that applies normal damage and normal red HP generation. | Unlike everything else in Yotsuyu's kit, this is the only attack that applies normal damage and normal red HP generation. | ||
| Line 113: | Line 124: | ||
'''Actual weapon range:''' 4</br> | '''Actual weapon range:''' 4</br> | ||
A two-handed sword. Attack speed is above average for its class | A two-handed sword that like others in its class has a large hitbox because of the wide swings Yotsuyu does when using it. | ||
Attack speed is above average for its class so it's good for initiating or continuing combos. However, it's still advised to proceed with caution when using it against Actresses who specialize at this type of combat. | |||
====Normal Attack==== | ====Normal Attack==== | ||
| Line 167: | Line 180: | ||
'''Base damage per hit:''' 100</br> | '''Base damage per hit:''' 100</br> | ||
Gives minor knockback resistance during her attack animation. It's also deceptively fast despite having a "slow" startup | Like with the forward Clash Attack, this does not deplete the Boost Gauge. However, Yotsuyu must commit to the attack once started and cannot do anything else until after her [https://glossary.infil.net/?t=Active attack animation] finishes. | ||
Gives minor knockback resistance during her attack animation. It's also deceptively fast despite having a "slow" [https://glossary.infil.net/?t=Startup startup.] | |||
Can be used as part of a combo if you can execute it fast enough. | Can be used as part of a combo if you can execute it fast enough. | ||
| Line 179: | Line 194: | ||
'''Base damage per hit:''' 40, 64</br> | '''Base damage per hit:''' 40, 64</br> | ||
Standard tag in two-handed sword attack animation. | Standard tag in two-handed sword attack animation. Hitbox has wide coverage so it's hard for the opponent to avoid if they're in range of it. | ||
====SP Clash==== | ====SP Clash==== | ||
| Line 190: | Line 205: | ||
'''Base damage per hit:''' 40, 40, 64, 120</br> | '''Base damage per hit:''' 40, 40, 64, 120</br> | ||
Standard SP Clash attack animation. Damage is lower than normal to compensate for | Standard SP Clash attack animation. Damage is lower than normal to compensate for less Red HP generation. | ||
===Torso Gear: Susanoo #D/T=== | ===Torso Gear: Susanoo #D/T=== | ||
| Line 198: | Line 213: | ||
This equipment has two roles: a long range homing laser attack, or a close-range [https://glossary.infil.net/?t=Zoning zoning]/[https://glossary.infil.net/?t=Pressure pressure] one. | This equipment has two roles: a long range homing laser attack, or a close-range [https://glossary.infil.net/?t=Zoning zoning]/[https://glossary.infil.net/?t=Pressure pressure] one. | ||
'''Normal use | '''Normal use cooldown time:''' 3 seconds</br> | ||
'''Full Gauge | '''Full Gauge cooldown time:''' 10 seconds</br> | ||
====Normal Activation==== | ====Normal Activation==== | ||
| Line 206: | Line 221: | ||
'''Range:''' 75 (homing lasers) and 13 (pigeon)</br> | '''Range:''' 75 (homing lasers) and 13 (pigeon)</br> | ||
'''Base damage per hit:''' 20 | '''Lasers fired per pigeon:''' 3 | ||
'''Base damage per hit:''' 20 (lasers only) or 100 (pigeon only)</br> | |||
Deploys a pigeon in front of Yotsuyu, which slowly moves towards the opponent for about 1 second before firing off a set of 3 homing lasers and disappearing. The homing lasers are clustered in a way that | Deploys a pigeon in front of Yotsuyu, which slowly moves towards the opponent for about 1 second before firing off a set of 3 homing lasers and disappearing. The homing lasers are clustered in a way that if one hits the opponent, all of them will, so the opponent will always take 3 hits on impact unless one of them causes knockdown before the last projectile connects. You can use the homing lasers to force the opponent to move in a way to make it easier for Yotsuyu's F-Gear to hit them. | ||
If the pigeon is deployed within 13 range of the opponent, they can run into it before the lasers fire, meaning that this part of the skill can be used in a combo as you can cancel into it from most of Yotusu's clash attacks. | If the pigeon is deployed within 13 range of the opponent, they can run into it before the lasers fire, meaning that this part of the skill can be used in a combo as you can cancel into it from most of Yotusu's clash attacks. | ||
| Line 226: | Line 242: | ||
'''Projectiles fired per burst:''' 4</br> | '''Projectiles fired per burst:''' 4</br> | ||
'''Base damage per hit:''' 10, 10, 10, 9</br> | '''Base damage per hit:''' 10, 10, 10, 9</br> | ||
'''Skill effect penalty:''' T-Skill cooldown paused for X seconds after activation | |||
Deploys a satellite pigeon to the left and right sides of Yotsuyu, and will alternate firing four lasers about a split second after the other finishes shooting. Each pigeon will automatically disappear after firing 4 sets of lasers. The lasers are not homing, but their tracking power is just about as strong as Yotsuyu's F-Gear, meaning that once she gets her opponent into range, they'll have a high chance of getting hit from her projectiles, or be forced to move in a way that they'll be hit by a well timed charged shot. | Deploys a satellite pigeon to the left and right sides of Yotsuyu, and will alternate firing four lasers about a split second after the other finishes shooting. Each pigeon will automatically disappear after firing 4 sets of lasers. The lasers are not homing, but their tracking power is just about as strong as Yotsuyu's F-Gear, meaning that once she gets her opponent into range, they'll have a high chance of getting hit from her projectiles, or be forced to move in a way that they'll be hit by a well timed charged shot. | ||
| Line 237: | Line 254: | ||
[[File:AGACS_Yotsuyu_Bottoms.png|frameless]] | [[File:AGACS_Yotsuyu_Bottoms.png|frameless]] | ||
One of the few very | One of the few very defensive L-Skill abilities in the game, and it's a pretty good one. | ||
'''Full Gauge recharge time:''' 9.5 seconds</br> | '''Full Gauge recharge time:''' 9.5 seconds</br> | ||
| Line 243: | Line 260: | ||
[[File:AGACS_Yotsuyu_Bottoms_Activate_Normal.mp4|frameless]] | [[File:AGACS_Yotsuyu_Bottoms_Activate_Normal.mp4|frameless]] | ||
'''Skill effect | '''Skill effect enhancement:''' Knockback resistance and 50% damage reduction on all hits taken </br> | ||
'''Skill effect duration:''' 8.5 seconds, or when 100 damage is absorbed, or when hit by an SP Clash or SP Skill</br> | '''Skill effect duration:''' 8.5 seconds, or when 100 damage is absorbed, or when hit by an SP Clash or SP Skill</br> | ||
'''Projectiles fired after skill effect ends:''' 3</br> | '''Projectiles fired after skill effect ends:''' 3</br> | ||
'''Projectile range:''' 80</br> | '''Projectile range:''' 80</br> | ||
'''Base damage per hit:''' 50</br> | '''Base damage per hit:''' 50</br> | ||
'''Skill effect penalty:''' L-Skill cooldown paused for X seconds after activation</br> | |||
By default, it'll deploy three pigeons around Yotsuyu that act as a unique defensive shield for her. If the opponent is unable to destroy the pigeons before they naturally run their course, they'll automatically fire three fast-moving projectiles clustered together like one single projectile and take 3 hits simultaneously. In this situation, the player is free to execute some risky moves against the opponent since the timing of the pigeons firing on top of the other buffs the skill effect provide would cover Yotsuyu's 'mistakes.' | By default, it'll deploy three pigeons around Yotsuyu that act as a unique defensive shield for her. If the opponent is unable to destroy the pigeons before they naturally run their course, they'll automatically fire three fast-moving projectiles clustered together like one single projectile and take 3 hits simultaneously. In this situation, the player is free to execute some risky moves against the opponent since the timing of the pigeons firing on top of the other buffs the skill effect provide would cover Yotsuyu's 'mistakes.' | ||
| Line 254: | Line 273: | ||
===SP Skill=== | ===SP Skill: Yomotsu Ookami=== | ||
[[File:AGACS_Yotsuyu_SP.mp4|frameless]] | [[File:AGACS_Yotsuyu_SP.mp4|frameless]] | ||
| Line 262: | Line 281: | ||
'''Number of swings:''' 4</br> | '''Number of swings:''' 4</br> | ||
'''Base damage per hit:''' 80, 80, 80, 250 </br> | '''Base damage per hit:''' 80, 80, 80, 250 </br> | ||
''' | '''Skill effect enhancement:''' Knockback resistance and damage reduction for 10 seconds after activation | ||
Although the range says it's 45, it's easily avoidable by the opponent if Yotsuyu's further than 14 units away and has Boost Gauge available to Step away from it if you activate the SP Skill by itself. | Although the range says it's 45, it's easily avoidable by the opponent if Yotsuyu's further than 14 units away and has Boost Gauge available to Step away from it if you activate the SP Skill by itself. | ||
Latest revision as of 07:02, 14 June 2024
Introduction
|
Yotsuyu kind of feels like what Altlene from Busou Shinki: Battle Masters would play like if she had an actual projectile game since her "exclusive" equipment were all melee weapons. Anyway, Yotsuyu's exclusive kit is tuned to be the "Temjin" of this game. While the official Japanese website says that she's meant to be a close-range melee fighter, that's sort of true; she's actually more of a well-rounded Actress that's slightly better at mid-ranged firefights who can do close-range combat in short bursts. Her shots don't look as flashy but have pretty high accuracy. Like the Temjin, her combat performance scales very well with player skill. The effectiveness of her charged T-Skill lives or dies on how well the player's good at preventing Yotsuyu from taking knockback damage dealt by the opponent. And you really want to make sure her charged T-Skill is working for as long as possible. On top of all this, Yotsuyu's exclusive kit has one final trait unique only to her: they'll deal less damage compared to similar weapons in the same class, but also means the opponent won't get a lot of Red HP in return. Miscellaneous Info/Links1. Good Smile Company's Figma brand is responsible for making any figurines of Yotsuyu, so consider yourself lucky if you're a fan of hers since you don't have to worry about putting her together out of the box. Link to her exclusive kit figure here
|
|
Evaluation
Keep in mind that this evaluation is based on using her exclusive kit. You can compensate for any of her weaknesses or enhance her strengths by swapping out the appropriate Gear or Skill Modules.
| Strengths | Weaknesses |
|---|---|
|
|
Exclusive Kit
There will be a video demonstrating how each attack works so you can check if you're doing the move correctly. If you're unable to view these, try opening this page in Google Chrome or the Brave browser.
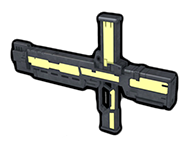
Firearm Gear: Izumo #D
The Normal shots aren't anything to write home about, but its Charged Shot more than makes up for that. Just keep in mind that the weapon's reload is a little bit on the slow side.
Ammo capacity: 12
Ammo required to charge weapon: 4
Reload delay after firing: 1.6 seconds
Full reload from 0 ammo: 2 seconds
Normal Shot
Range: 80
Ammo consumed: 3
Rounds fired per shot: 3
Base damage per hit: 43
The velocity of the bullets feel slow for a rifle that looks like it came out of Warhammer 40,000, but they're pretty accurate compared to similar Firearm Gear. The opponent will go into knockback from 2 hits, and knockdown in 5.
Normal Shots are recommended in situations when you can spot an opportunity to punish your opponent's sloppy movement or whiffed attacks. They're also a good way to continue your combo as well.
The properties of the weapon remain the same when using a Step Shot, except it'll force Yotsuyu to remain stationary just long enough for the opponent to punish her if the attack misses or she's too close to them even after a successful direct hit.
Charged Shot
Charge time: 1 second
Range: 100
Ammo consumed: 4
Rounds fired per shot: 1
Base damage per hit: 240
The Charged Shot fires a big lemon energy ball toward the opponent. Its inherent accuracy, faster velocity, and large hitbox means that you're incentivized to use this more often than her normal shots. At closer ranges, it can be used like a shotgun due to its large coverage and fast speed.
A direct hit from this projectile won't cause knockdown and you can usually follow up the combo with a Normal Shot from a maximum range of 30 if you can react fast enough.
The base damage from this attack means that 5 direct hits will KO an opponent with base stats, so practicing when to use this move is highly recommended.
SP Assist
Standby until fire: 1.23 seconds
Base damage per hit: 60
Standard SP assist attack of two sets of three projectiles that shoot out in a horizontal fan spread.
Unlike everything else in Yotsuyu's kit, this is the only attack that applies normal damage and normal red HP generation.
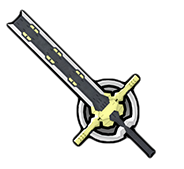
Clash Gear: Habakiri #D
Double Lock activation range: 23
Actual weapon range: 4
A two-handed sword that like others in its class has a large hitbox because of the wide swings Yotsuyu does when using it.
Attack speed is above average for its class so it's good for initiating or continuing combos. However, it's still advised to proceed with caution when using it against Actresses who specialize at this type of combat.
Normal Attack
Suggested max range: When Double Lock appears
First swing animation: 10 frames
Number of swings: 3
Distance traveled per swing: 12-23, 2, 6
Base damage per hit: 48, 56, 120
The only real disadvantage to this attack is its autoboost range. Otherwise it's a pretty good attack by itself or a nice follow up to a successful hit with a charged shot.
If the first swing literally misses a few units away from the opponent, you can try continuing to swing the weapon in hopes the next one in the attack will connect before the opponent can react.
Forward Attack
Suggested max range: 21
First swing animation: 34 frames
Number of swings: 2
Distance traveled per swing: 17, 2,
Base damage per hit: 40, 120
This attack will not deplete the Boost Gauge even though you can see her moving forward.
Keep in mind that Yotsuyu will only swing her weapon after she travels the maximum autoboost distance since this move is meant to chase down retreating opponents. She must also commit to completing the full attack before she's able to do anything else.
The Japanese wiki says that it's also good to end combos with as well.
Side Attack
Suggested max range:28
Attack animation: 7 frames
Number of swings: 2
Distance traveled per swing: 6-24, 2
Base damage per hit: 48, 112
Standard clash attack where Yotsuyu autoboosts at a curved horizontal angle towards the opponent.
Back Attack
Suggested max range: 15
First swing animation: 32 frames
Number of swings: 1
Distance traveled per swing: 11
Base damage per hit: 100
Like with the forward Clash Attack, this does not deplete the Boost Gauge. However, Yotsuyu must commit to the attack once started and cannot do anything else until after her attack animation finishes.
Gives minor knockback resistance during her attack animation. It's also deceptively fast despite having a "slow" startup.
Can be used as part of a combo if you can execute it fast enough.
Shift Attack
Suggested max range: 10
Number of swings: 2
Base damage per hit: 40, 64
Standard tag in two-handed sword attack animation. Hitbox has wide coverage so it's hard for the opponent to avoid if they're in range of it.
SP Clash
Suggested max range: 21
Attack animation: 38 frames
Number of swings: 4
Base damage per hit: 40, 40, 64, 120
Standard SP Clash attack animation. Damage is lower than normal to compensate for less Red HP generation.
Torso Gear: Susanoo #D/T
This equipment has two roles: a long range homing laser attack, or a close-range zoning/pressure one.
Normal use cooldown time: 3 seconds
Full Gauge cooldown time: 10 seconds
Normal Activation
Range: 75 (homing lasers) and 13 (pigeon)
Lasers fired per pigeon: 3
Base damage per hit: 20 (lasers only) or 100 (pigeon only)
Deploys a pigeon in front of Yotsuyu, which slowly moves towards the opponent for about 1 second before firing off a set of 3 homing lasers and disappearing. The homing lasers are clustered in a way that if one hits the opponent, all of them will, so the opponent will always take 3 hits on impact unless one of them causes knockdown before the last projectile connects. You can use the homing lasers to force the opponent to move in a way to make it easier for Yotsuyu's F-Gear to hit them.
If the pigeon is deployed within 13 range of the opponent, they can run into it before the lasers fire, meaning that this part of the skill can be used in a combo as you can cancel into it from most of Yotusu's clash attacks.
Sometimes the impact caused by the pigeon will make the opponent fly up, especially during a combo:
Scientists are still figuring out why this phenomenon occasionally happens.
Charged Activation
Charge time: 0.75 seconds
Range: 45
Projectiles fired per burst: 4
Base damage per hit: 10, 10, 10, 9
Skill effect penalty: T-Skill cooldown paused for X seconds after activation
Deploys a satellite pigeon to the left and right sides of Yotsuyu, and will alternate firing four lasers about a split second after the other finishes shooting. Each pigeon will automatically disappear after firing 4 sets of lasers. The lasers are not homing, but their tracking power is just about as strong as Yotsuyu's F-Gear, meaning that once she gets her opponent into range, they'll have a high chance of getting hit from her projectiles, or be forced to move in a way that they'll be hit by a well timed charged shot.
Because this move is pretty strong, the developers balanced it out by having both satellite pigeons instantly disappear if Yotsuyu takes knockback damage or gets knocked down, so you can't just carelessly pop this off and expect an easy win.
One unique trait of this charged skill is midway through the ability, your T-Skill Gauge will begin recharging automatically, meaning that if you're able to successfully let the satellite pigeons run their course, you'll have to wait only 1.8 seconds to be able to use Yotsuyu's charged T-Skill again. Or you can use her normal T-Skill ability to shoot homing lasers while her satellite pigeons continue the pressure.
Leg Gear: Susanoo #D/B
One of the few very defensive L-Skill abilities in the game, and it's a pretty good one.
Full Gauge recharge time: 9.5 seconds
Skill effect enhancement: Knockback resistance and 50% damage reduction on all hits taken
Skill effect duration: 8.5 seconds, or when 100 damage is absorbed, or when hit by an SP Clash or SP Skill
Projectiles fired after skill effect ends: 3
Projectile range: 80
Base damage per hit: 50
Skill effect penalty: L-Skill cooldown paused for X seconds after activation
By default, it'll deploy three pigeons around Yotsuyu that act as a unique defensive shield for her. If the opponent is unable to destroy the pigeons before they naturally run their course, they'll automatically fire three fast-moving projectiles clustered together like one single projectile and take 3 hits simultaneously. In this situation, the player is free to execute some risky moves against the opponent since the timing of the pigeons firing on top of the other buffs the skill effect provide would cover Yotsuyu's 'mistakes.'
If the opponent is able to end the pigeon shield prematurely by dealing enough damage, they still have to worry about the automatic counterattack fired from the pigeons that have a good chance of stopping their momentum the closer they are to Yotsuyu unless they were using an SP Clash or SP Skill to hit her.
SP Skill: Yomotsu Ookami
Attack range: 45 (melee)
First hit Shield break: Yes
Number of swings: 4
Base damage per hit: 80, 80, 80, 250
Skill effect enhancement: Knockback resistance and damage reduction for 10 seconds after activation
Although the range says it's 45, it's easily avoidable by the opponent if Yotsuyu's further than 14 units away and has Boost Gauge available to Step away from it if you activate the SP Skill by itself.
Where the SP Skill truly shines is when you use it as part of a combo. The Japanese wiki says that you can deal 700 damage (or 70% of the opponent's total health with default stats) if you're able to start it off with a charged shot. Not only that, this move generates the least amount of Red HP for the opponent to use, so that more than makes up for the reduced damage this ability deals out.
