Story
Introduction
Playstyle: Puppet
Health: 900
| Strengths |
Weaknesses
|
- Expunge's existence: Expunge's existence helps Buddy and Pal's mixup game, giving them an (what seems to be at the time) unblockable. Lock them down with a Pal move (ideally 236X) and use Expunge to get an (what seems to be at the time) true unblockable
- Useful specials: Specials overall are good at many things (expect for 623C), 236X for pressure, 214X for neutral, and 624C for surprise attacks.
|
- Where are my buttons: You have only two normal buttons as Buddy, leaving you with less tools.
- Where is my defensive tool: You have only 46C as an defensive option, which can be chased down and punished. Pal stole your DP.
- Stubby: Your biggest normals are outdone by other normals.
- Slow: Pal's buttons are slow, making him vulnerable to taking damage.
- Easily crippled: If Pal gets downed, you're VERY crippled in terms of moveset.
|
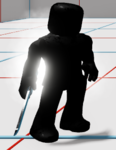
Buddy is a unique character who can command a shadow creature named Pal. By making effective use of Pal, you can create some crazy setups that allow you to effectively attack in two places at once.
Pal
This is Pal. Say hello to Pal. HELLO PAL
Pal is going to help you beat people up. He can move around freely and has his very own moveset separate from Buddy.
- Pal can be summoned to your current location by pressing 5C. Press 5C again to desummon him.
- Move Pal by holding 1 or 3. Pal can move at any time while he's in neutral.
- Pal cannot move vertically. If he is summoned in the air he will stay there until he is summoned again.
- When Buddy is in neutral, he can issue attacks to Pal. When given an attack, Pal will perform it from his current location.
- While Pal is attacking, Buddy is free to do whatever.
- All Pal attacks consume the Pal Bar. (explained below)
- If a Pal attack is inputted while Pal isn't out, this will summon him and he'll perform the attack immediately.
- You can use taunts to cancel Pal's action. This has no real use other than putting him vertically upwards. This may be useful later.
Pal Bar
You may have already noticed this little thing above your meter.

This is the Pal Bar. It basically functions as Pal's health. If it hits zero Pal will become temporarily unavailable. Buddy doesn't have a whole lot he can do on his own, so try to make sure that doesn't happen.
- The bar recovers over time when Pal is not out.
- When Pal attacks, he will consume some of the bar. (exact amount depends on attack)
- Pal can get hit just like Buddy. If Pal is hit he will lose some of the bar.
- If the bar reaches zero or below, Pal will desummon automatically. He cannot be summoned again until the bar is completely full.
- Pal's attacks cannot cause the bar to go below zero. If he does not have enough for an attack, he will consume whatever he has left.
- Enemy attacks, however, CAN cause the bar to go below zero, which means Pal will take longer to recover.
Move List
Normal Moves
5A
|
| Damage
|
Startup
|
Active
|
Recovery
|
Block Advantage
|
Guard
|
Attribute
|
| 10
|
-
|
-
|
-
|
-
|
Mid
|
Strike
|
|
5B
|
| Damage
|
Startup
|
Active
|
Recovery
|
Block Advantage
|
Guard
|
Attribute
|
| 15
|
-
|
-
|
-
|
-
|
Mid
|
Strike
|
|
2A
|
| Damage
|
Startup
|
Active
|
Recovery
|
Block Advantage
|
Guard
|
Attribute
|
| 10
|
-
|
-
|
-
|
-
|
Low
|
Strike
|
|
2B
|
| Damage
|
Startup
|
Active
|
Recovery
|
Block Advantage
|
Guard
|
Attribute
|
| 15
|
-
|
-
|
-
|
-
|
Low
|
Strike
|
|
j.A
|
| Damage
|
Startup
|
Active
|
Recovery
|
Block Advantage
|
Guard
|
Attribute
|
| 10
|
-
|
-
|
-
|
-
|
High
|
Strike
|
|
j.B
|
| Damage
|
Startup
|
Active
|
Recovery
|
Block Advantage
|
Guard
|
Attribute
|
| 15
|
-
|
-
|
-
|
-
|
High
|
Strike
|
|
Pal's Normal Moves
Summon!
5C
|
| Damage
|
Startup
|
Active
|
Recovery
|
Block Advantage
|
Guard
|
Attribute
|
| 0
|
-
|
N/A
|
N/A
|
N/A
|
N/A
|
N/A
|
If Pal isn't out, this summons him at your position. If pal is out, this desummons him. Cannot be used in the air, if you try Pal will do j.C instead.
|
|
4C
|
| Damage
|
Startup
|
Active
|
Recovery
|
Block Advantage
|
Guard
|
Attribute
|
| 45
|
-
|
-
|
-
|
-
|
Mid
|
Projectile
|
Slow but long and damaging slash. Actually not that hard to combo into. With careful timing this can bounce the opponent back and forth between Pal and Buddy, at least until you run out of pal bar.
|
|
2C
|
| Damage
|
Startup
|
Active
|
Recovery
|
Block Advantage
|
Guard
|
Attribute
|
| 45
|
-
|
-
|
-
|
-
|
Low
|
Projectile
|
A sweep that moves Pal forward. Mostly just used for mixups.
|
|
j.C
|
| Damage
|
Startup
|
Active
|
Recovery
|
Block Advantage
|
Guard
|
Attribute
|
| 45
|
-
|
-
|
-
|
-
|
Mid
|
Projectile
|
Vertical slash. Reaches very high. Good anti air like most 2Cs are. Also a launcher.
|
|
6C
|
| Damage
|
Startup
|
Active
|
Recovery
|
Block Advantage
|
Guard
|
Attribute
|
| 30x2 (60)
|
-
|
-
|
-
|
-
|
Mid
|
Projectile
|
Pal slashes forward twice. Both move him forward. The two attacks do not combo together on their own, Buddy will need to keep the opponent busy between hits.
|
|
Universal Mechanics
Throw
4A
|
| Damage
|
Startup
|
Active
|
Recovery
|
Block Advantage
|
Guard
|
Attribute
|
| 20, 30 (50)
|
-
|
-
|
-
|
-
|
Unblockable
|
Throw
|
|
Overhead
6B
|
| Damage
|
Startup
|
Active
|
Recovery
|
Block Advantage
|
Guard
|
Attribute
|
| 35
|
-
|
-
|
-
|
-
|
High
|
Strike
|
|
Special Moves
Evasion
46C
|
| Damage
|
Startup
|
Active
|
Recovery
|
Block Advantage
|
Guard
|
Attribute
|
| 0
|
-
|
N/A
|
N/A
|
N/A
|
N/A
|
N/A
|
|
Expunge
41236C
|
| Damage
|
Startup
|
Active
|
Recovery
|
Block Advantage
|
Guard
|
Attribute
|
| 50x2 (100)
|
-
|
-
|
-
|
-
|
Unblockable
|
Throw
|
|
Pal's Special Moves
Rushing Shadows
236A or B or C (Air OK)
|
| Version
|
Damage
|
Startup
|
Active
|
Recovery
|
Block Advantage
|
Guard
|
Attribute
|
| A
|
5x10 (50)
|
-
|
-
|
-
|
-
|
Mid
|
Projectile
|
| B
|
5x15 (75)
|
-
|
-
|
-
|
-
|
Mid
|
Projectile
|
| EX
|
5x20 (100)
|
-
|
-
|
-
|
-
|
Mid
|
Projectile
|
|
Black Wheel
214A or B or C (Air OK)
|
| Version
|
Damage
|
Startup
|
Active
|
Recovery
|
Block Advantage
|
Guard
|
Attribute
|
| A
|
50
|
-
|
-
|
-
|
-
|
Mid
|
Projectile
|
| B
|
50
|
-
|
-
|
-
|
-
|
Mid
|
Projectile
|
| EX
|
30x3 (90)
|
-
|
-
|
-
|
-
|
Mid
|
Projectile
|
|
Rise from Darkness
623C (Air OK)
|
| Damage
|
Startup
|
Active
|
Recovery
|
Block Advantage
|
Guard
|
Attribute
|
| 80
|
-
|
-
|
-
|
-
|
Mid
|
Projectile
|
|
Fall from Grace
63214C (Air OK)
|
| Damage
|
Startup
|
Active
|
Recovery
|
Block Advantage
|
Guard
|
Attribute
|
| 95
|
-
|
-
|
-
|
-
|
High
|
Projectile
|
|
Willpowers
Beatdown
421A then press buttons (except D) to create a sequence
|
| Version
|
Damage
|
Startup
|
Active
|
Recovery
|
Block Advantage
|
Guard
|
Attribute
|
| Start
|
0
|
-
|
N/A
|
-
|
N/A
|
N/A
|
N/A
|
Only costs 1.5 meter instead of the usual 2
|
| A
|
-
|
-
|
-
|
-
|
-
|
-
|
-
|
| B
|
-
|
-
|
-
|
-
|
-
|
-
|
-
|
| C
|
-
|
-
|
-
|
-
|
-
|
-
|
-
|
|
Contraband
236236B (Air OK)
|
| Version
|
Damage
|
Startup
|
Active
|
Recovery
|
Block Advantage
|
Guard
|
Attribute
|
| Buddy
|
100x2, 67 (267)
|
-
|
-
|
-
|
-
|
Mid
|
Projectile
|
| Pal
|
60x3, 41, 67 (288)
|
-
|
-
|
-
|
-
|
Mid
|
Projectile
|
|
Driving Force
Schizofrenzy
236236C (Air OK)
|
| Damage
|
Startup
|
Active
|
Recovery
|
Block Advantage
|
Guard
|
Attribute
|
| 0
|
-
|
N/A
|
N/A
|
N/A
|
N/A
|
N/A
|
|
Resolve
Evernight
236236D
|
| Damage
|
Startup
|
Active
|
Recovery
|
Block Advantage
|
Guard
|
Attribute
|
| INSTANT K.O.
|
-
|
-
|
-
|
-
|
Mid
|
Throw
|
- THIS WILL NOT HIT IF USED RIGHT NEXT TO THE OPPONENT
|
|
Combos
Colors


