Mega Knockdown/Mahogany Marv
|
Mahogany Marv | ||||||
|
Introduction
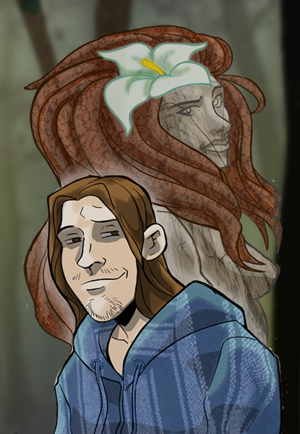
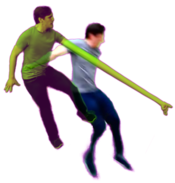
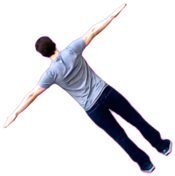
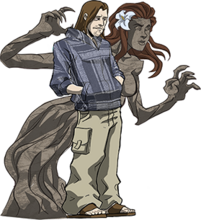
Mahogany Marv is a dedicated zoner who uses Jayne's long limbs to keep the opponent at bay.
Gameplan
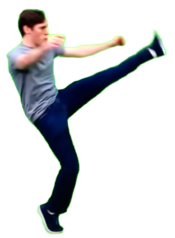
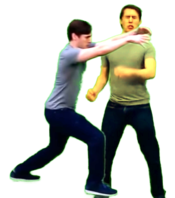
Marv generally likes to chill at a distance and let Jayne do the work. She'll stick out Blazing Ent, or Vapor Strike if expecting an air approach. Gravity spike can give you some breathing room, or a well timed 6A can also create some space in a pinch, either on hit or on trade.
| "Does anyone know how to get rid of a vengeful forest spirit? Asking for a friend." | |
| Lore: | It was just another hike for Marv, until he found himself haunted by Jayne, the spirit of Greenville Forest. Jayne has one inscrutable demand: take her to the final round of the Mega Knockdown tournament. She's also not crazy about the wood paneling in his house. |
Pros and Cons
| Strengths | Weaknesses |
|---|---|
|
|
Normal Moves
A
[4A/6A] |
|---|
B
[4B/5B] |
|---|
C
[4C/5C/6C] |
|---|
j.B
[8B] |
|---|
Universal Mechanics
Throw
[Any+T] |
|---|
Block
[Any+G] |
|---|
Special Moves
Vapor Strike
[5A] |
|---|
Blazing Ent
[6B] |
|---|
Gravity Spike
[8A] |
|---|
Tornado Blitz
[8C] |
|---|
Unique Traits
Haunted Limbs
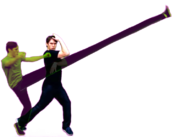
Marv's pacifist nature requires Jayne to step in and fight. As a forest spirit, she has longer than average limbs that apply to Marv's special moves. The downside to the range is that the limbs are exposed after attacking and can be hit, allowing attacks to hit at a range but not allowing combos to trigger.
Strategy
Marv likes to be in the middle of the stage at round start distance. Some space is good but resist the urge to back all the way to the corner where Marv can't retreat. Against melee ranged opponents, he will outrange all of their attacks with Blazing Ent (6B). Against zoning opponents, 6B will typically be faster. Generally this will leave your opponent with 3 options: Walk and block, jump, or retreat out of 6B range.
Blazing Ent (6B) is a pretty default option. If your opponent is trying to walk and block or trade blows they are going to have a bad time. This pretty quickly pushes opponent towards the jumping option. Marv has a few different approaches to dealing with jumps, each with their own set of trade-offs. If you believe in your reads, you can alternate between Vapor Strike (5A) and 6B. This is a high-risk/high reward approach to Marv but it is very strong when applied; allowing Marv huge comeback from most positions. Alternatively, you can lean on his 4B and 5B to control the air. These have worse rewards but because they cover both options it is a must to represent. The main drawback here is Marv will be at a major disadvantage and he will need to make a hard read or attempt a retreat, which carries it's own risks.
Now, if you have convinced opponents not to jump, you can't Blazing Ent (6B) forever. 6B is never unsafe, but it gets progressively less advantage as the opponent gets closer. Using 6T or 5C, with throw being higher risk but granting much better stage position as a result. Alternatively, you can employ a hit and run strategy with 6A. 6A will get you stage position, is your fastest non-throw move, protects against jumps and leaves you at an advantage. When Marv is plus it makes Gravity Spike (8A) a very strong harassment tool. Mixing in 5T/8A after a blocked 6A. Marv's post throw game is pretty basic but can't be ignored. Adding in a dash of offensive strategy will make Marv's stage position harder to contest and he also win while playing quite aggressively!
If you find your opponent retreating or staying at long range, they probably want to hit the exposed hurtbox on your limbs. Ideally you want to keep them from moving to max range on 6B, so try to move in and let them walk themselves into the corner where 6B functionally becomes a full-screen attack.
Matchups
| Paul (Even) |
|---|
| Blazing Ent (6B) is faster than his Firepaul (6C), this dynamic really defines the matchup and can force Paul to move in. Paulcano (5A) is a uniquely good option for beating your Gravity Spike (8A).
Keep in mind that if you trade 6B with his projectile, you both take the same damage but Marv will get knocked down (this is bad). Also, pushing Paul too far away will tilt zoning control into his favor. |
| Billy (Even) |
|---|
| Billy has to work hard to get in and his slower grounded moves give you extra options that you normally wouldn't have. However, one knockdown can lose the round. |
| Lewis (Slight Advantage) |
|---|
| Blazing Ent (6B) soundly defeats Lewis' backwards moving specials in most situations, as well as Slippery Slope (6C), Fist of Euphoria (4A) is slightly faster at neutral but also only hits range 1. This gives Marv a lot of chances to force Lewis to play more straightforward, removing most his innate advantages. Lewis' passive chip damage from normals gives him even lower health than you. Also, Gravity Spike (8A) is really good in this matchup because you can hard counter Lewis' 4A with it.
Beware of getting knocked down, Lewis has a harder time than normal getting in but one knockdown can lose the round. |
(Even) |
|---|
| A 2v2 battle?
Pay extra attention to frame advantage! If you block Blazing Ent (6B) at a far range, you will be at disadvantage. |
| Noel (Even) |
|---|
| Noel never has a guaranteed vine setup if she is in Blazing Ent (6B) range. You can force her to abandon her typical game plan of pokes and anti-airs because 6B can hit her Fightning Flurry (6B) before it can reach you. If she does get a Vine set up with her Unusual Botanical (6C) the matchup swings in her favor. You must be very careful because she can hit you at ranges that your long limbs would normally be uncontestable at. |
| Nick (Slight Disadvantage) |
|---|
| The chip on his normals makes jump attacks even more threatening and the corner is even worse here for you than normal.
However, you greatly outrange him and he doesn't have any tricky moves to get around Blazing Ent (6B) or Gravity Spike (8A). |
Colors
